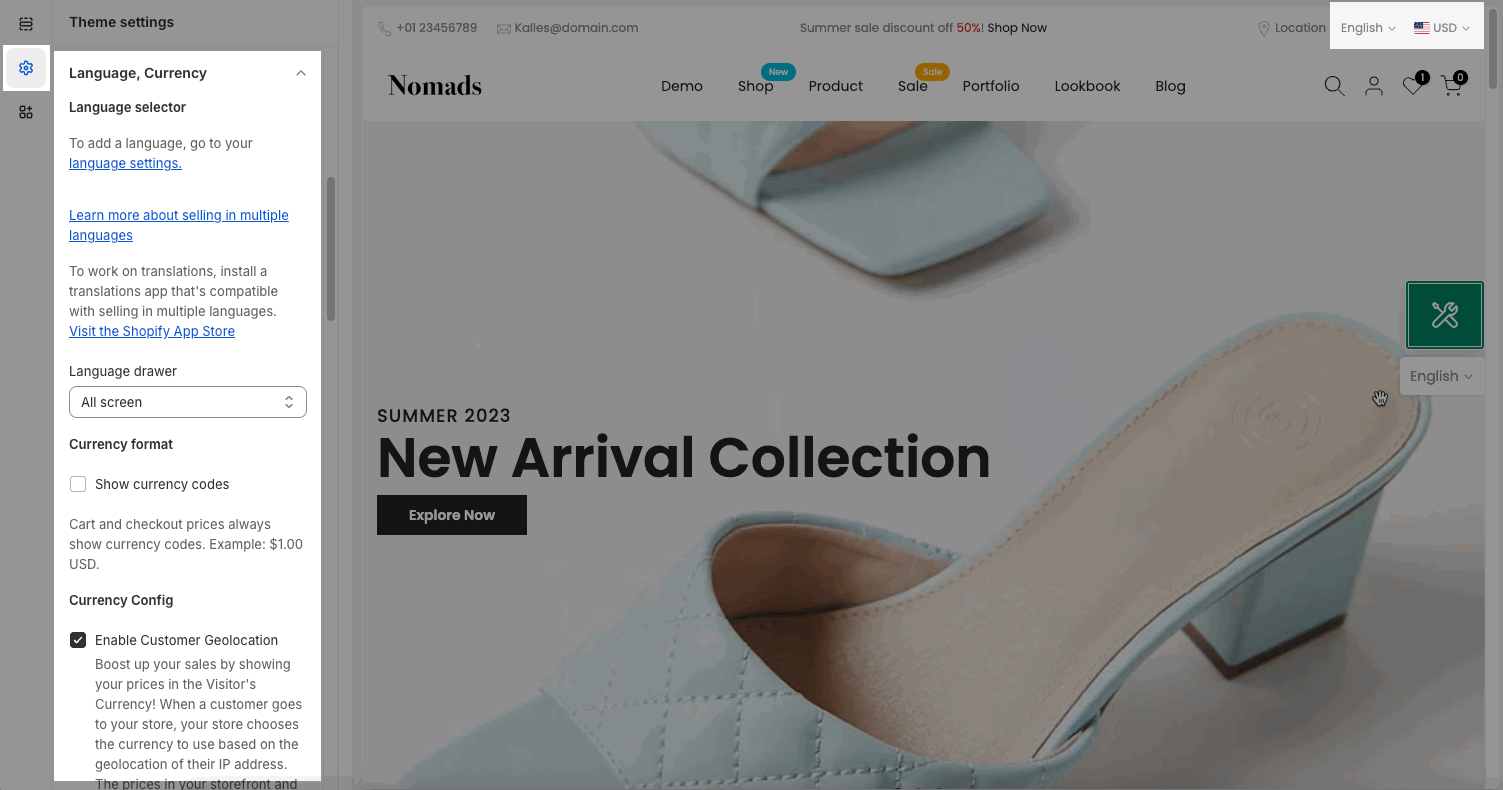
From Theme Settings -> LANGUAGE, CURRENCY
Note: The languages, currency option shows on Header Top bar, so if you don’t enable the Show top bar in Top bar -> Top bar settings the language and currency will not show.
1. Language selector
To configure languages and translate the theme, you follow this guide.
You can enable Language drawer:
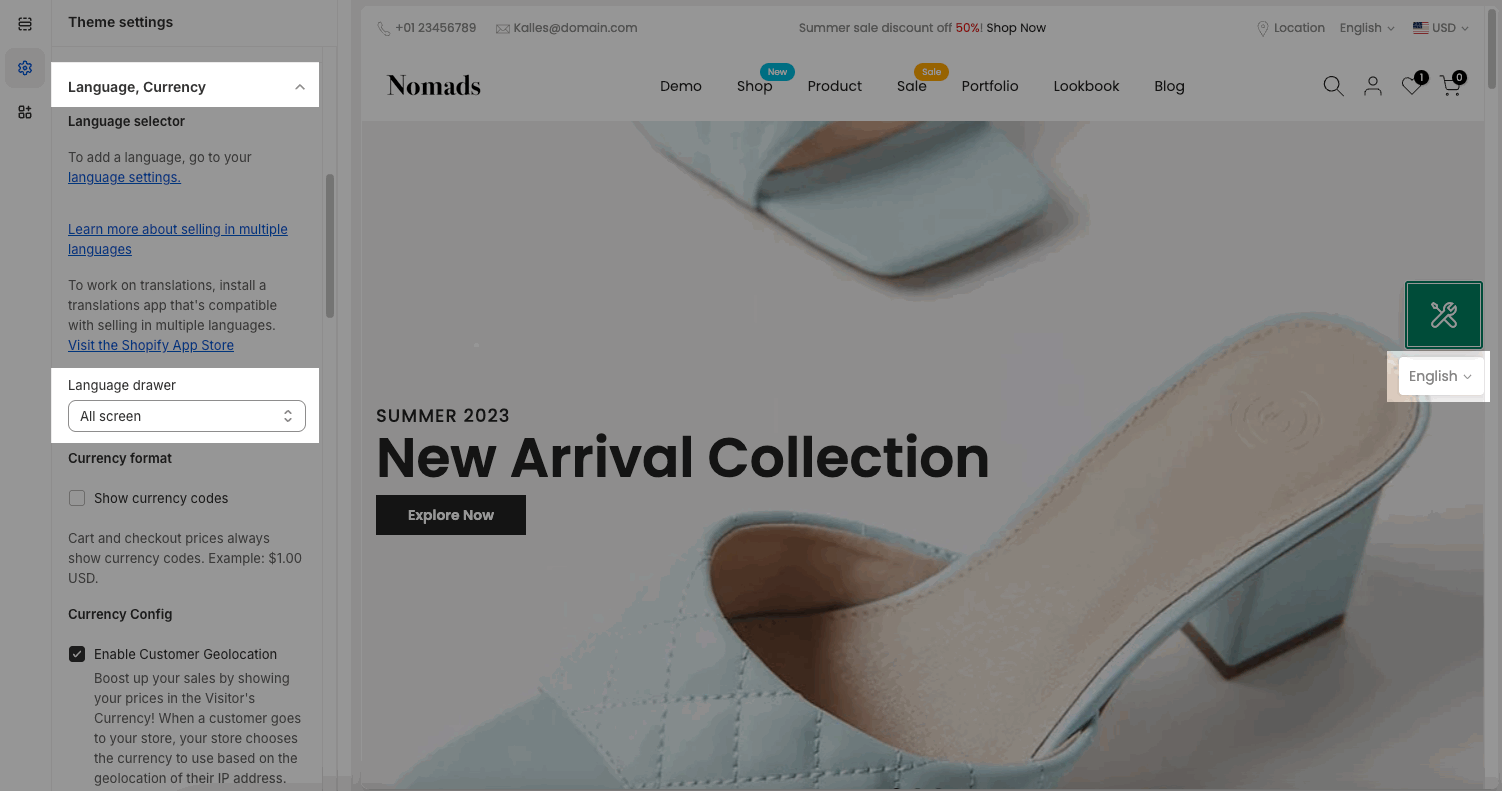
2. Currency format
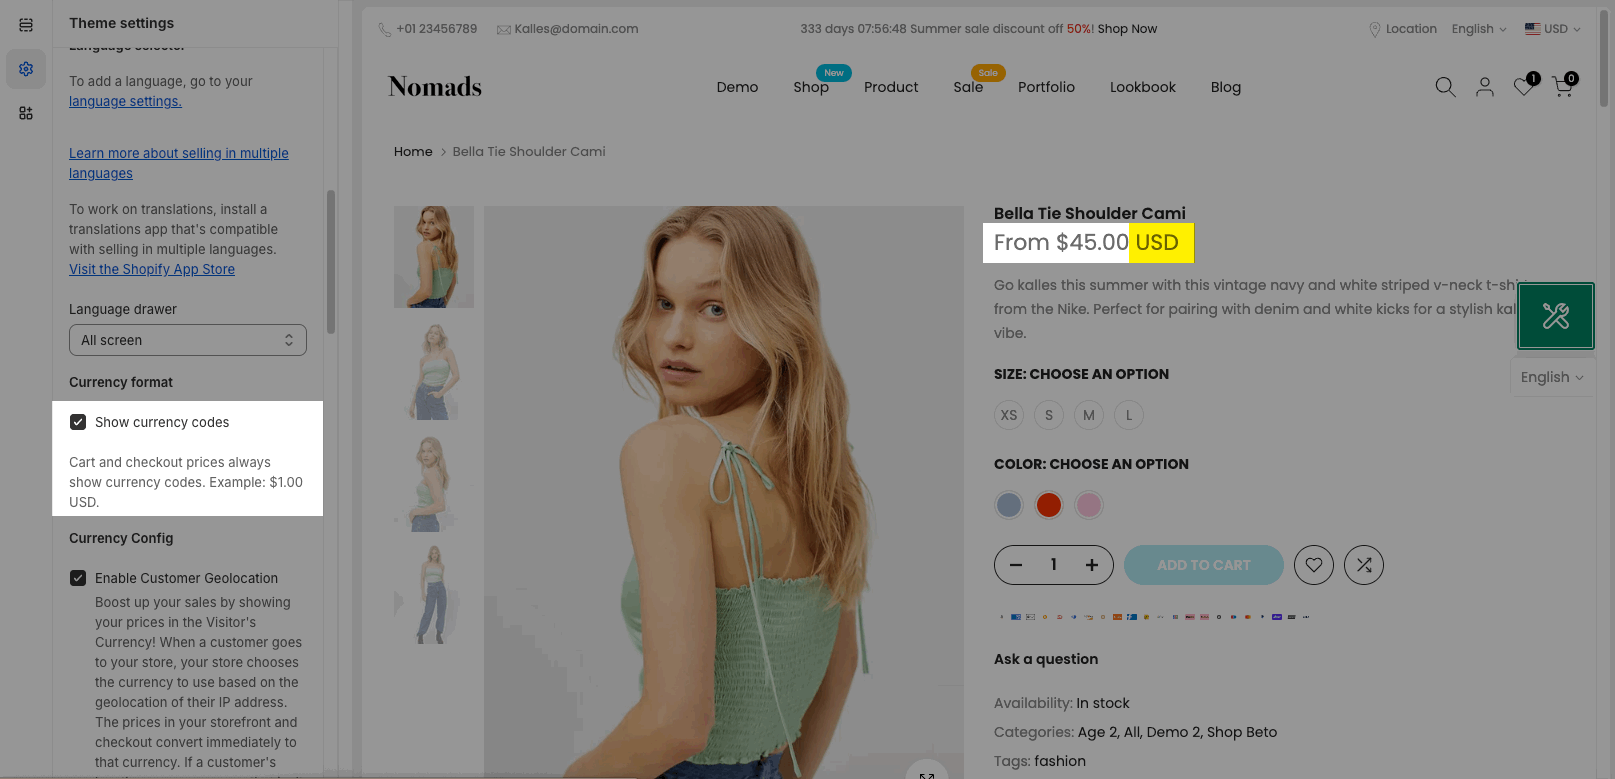
This option allows currency code in price.
Note: Cart and Checkout page always shows currency codes. Not depending on this option.
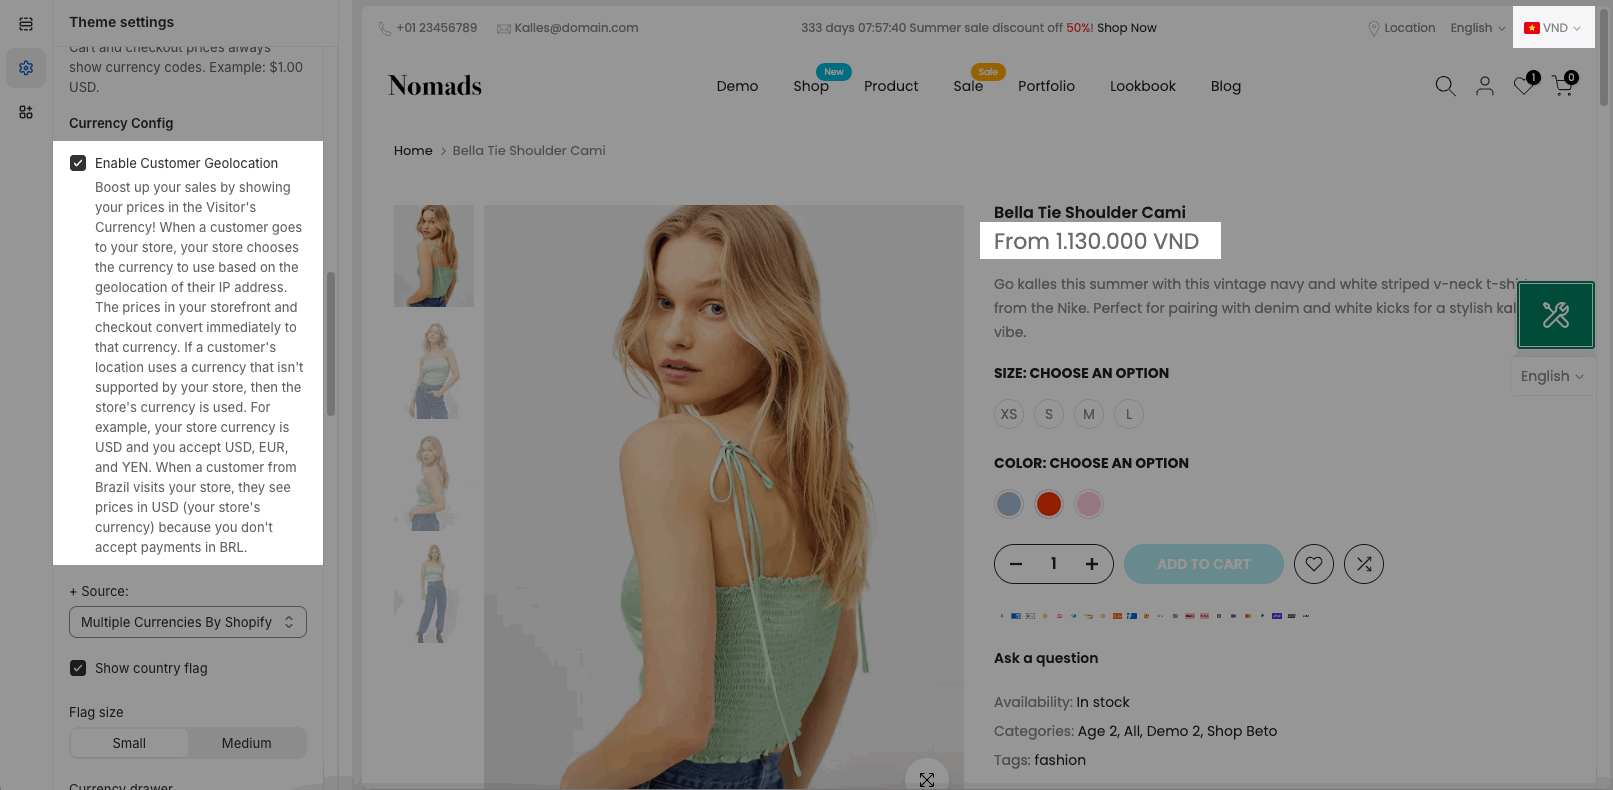
3. Enable Customer Geolocation
Boost up your sales by showing your prices in the Visitor’s Currency! When a customer goes to your store, your store chooses the currency to use based on the geolocation of their IP address. The prices in your storefront and checkout convert immediately to that currency. If a customer’s location uses a currency that isn’t supported by your store, then the store’s currency is used.
For example, your store currency supports USD, EUR and VND. If your customer is from VietNam, it’ll automatically convert to VND.
Important note: If you enable this option in the theme, please disable similar option from Theme Settings => Markets => Preferences => Country/region redirection
4. Currency Source
This option has Two selections:
4.1. Multiple Currencies by Shopify
Advantages: When you check out the product, you will be able to use the initial currency of your choice.
Disadvantages: When you select other currency the page will be auto reloaded.
To sell in multiple currencies, you need to use Shopify Payments in your online store and activate Shopify Markets.
Step 1: Configure Payment
Please follow this guide https://help.shopify.com/en/manual/payments
Step 2: Manage Markets
You check this guide to know more about Shopify Market.
To set up currency for a market: https://help.shopify.com/en/manual/markets/pricing/set-up-local-currencies
Please follow this video to add multiple currencies by Shopify:
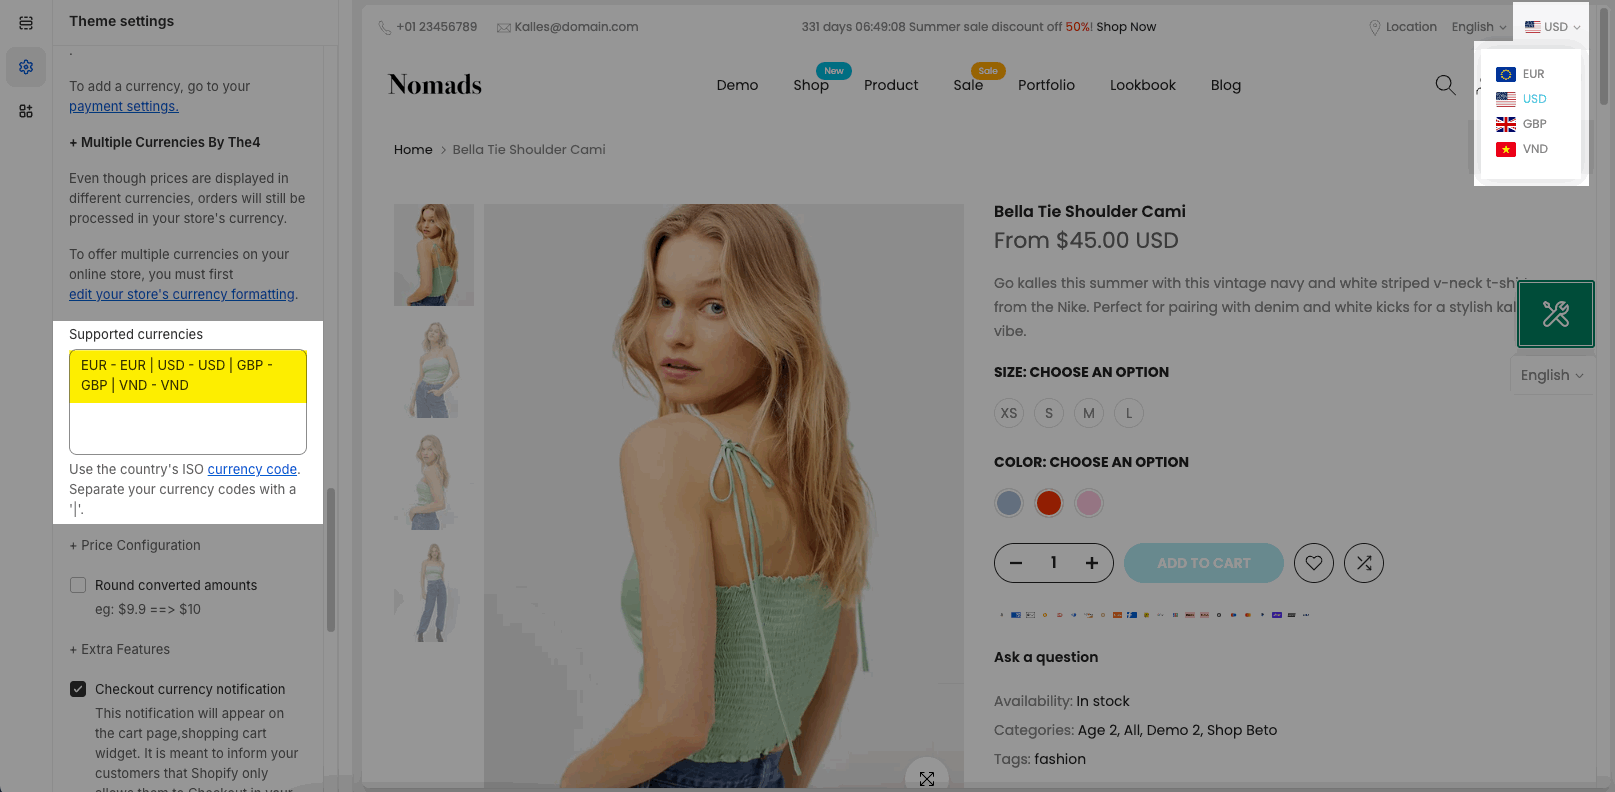
4.2. Multiple Currencies by The4
For this source, when the clients use currency conversion, it is only applied to the pages in the theme. However, on the Checkout page, the currency will revert to the default currency that is set in Settings > Store details > Store Currency.
Go to Settings > General > Scroll down to Currency Formatting. You need to add currency format with this syntax below. Otherwise, the currencies will not work.
HTML with currency:
<span class=money>${{amount}} USD</span>
HTML without currency:
<span class=money>${{amount}}</span>Example: If you select US Dollar(USD) on Store currency. You need to fill in the currency format as video below:
Supported currencies:
When selecting source Multiple Currencies By The4, you can set the currency convert by entering the currency code in the supported currencies box. You can use the country’s ISO currency code. Separate your currency codes with a “|”.
5. Other settings
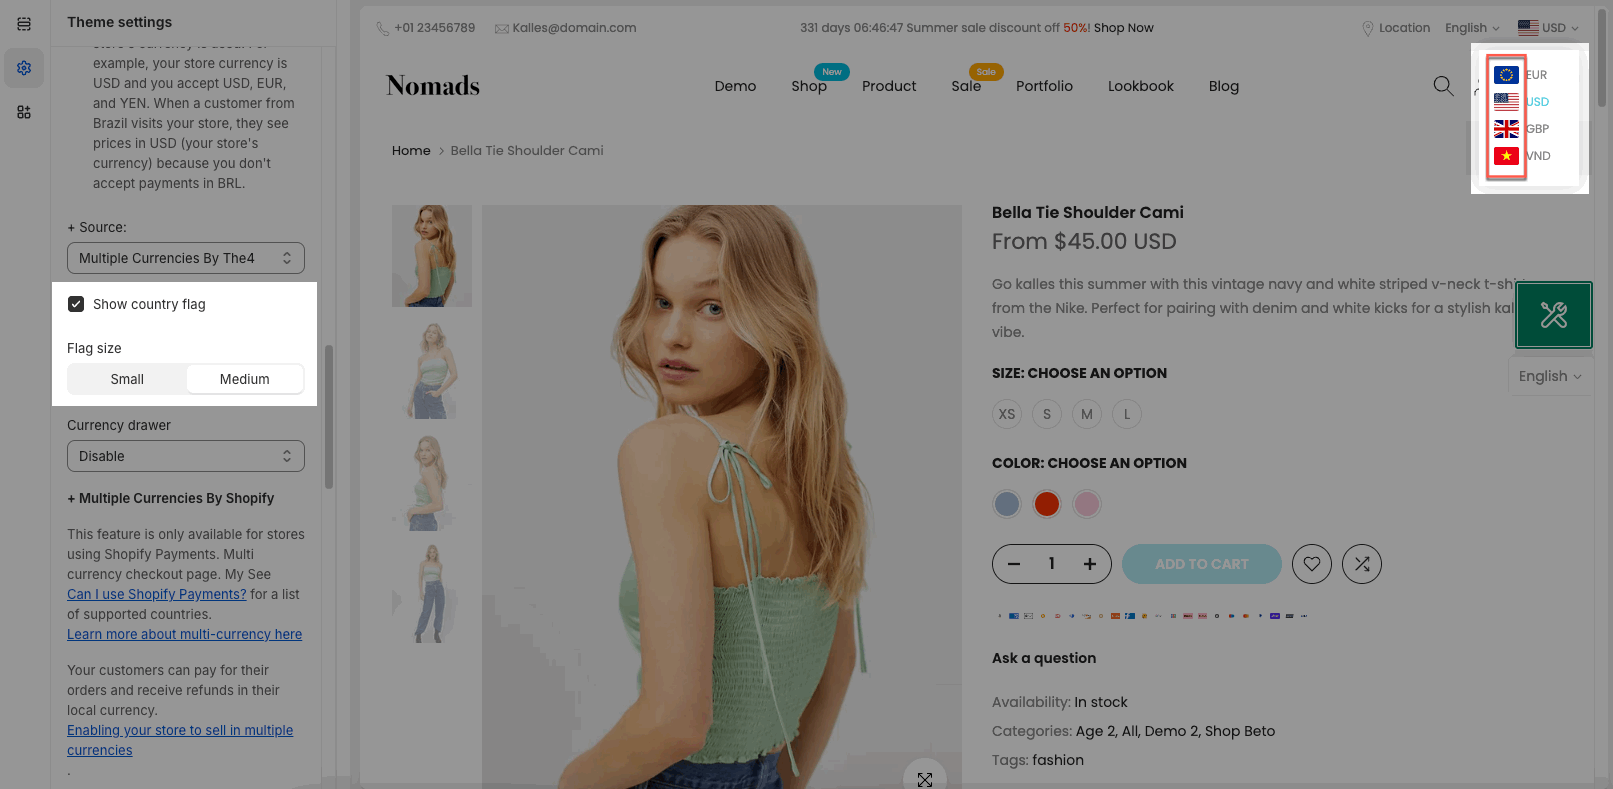
Show country flag: When you enable this option, it’ll show the country flag of the currency.
Flag size: There are 2 types: Small, Medium
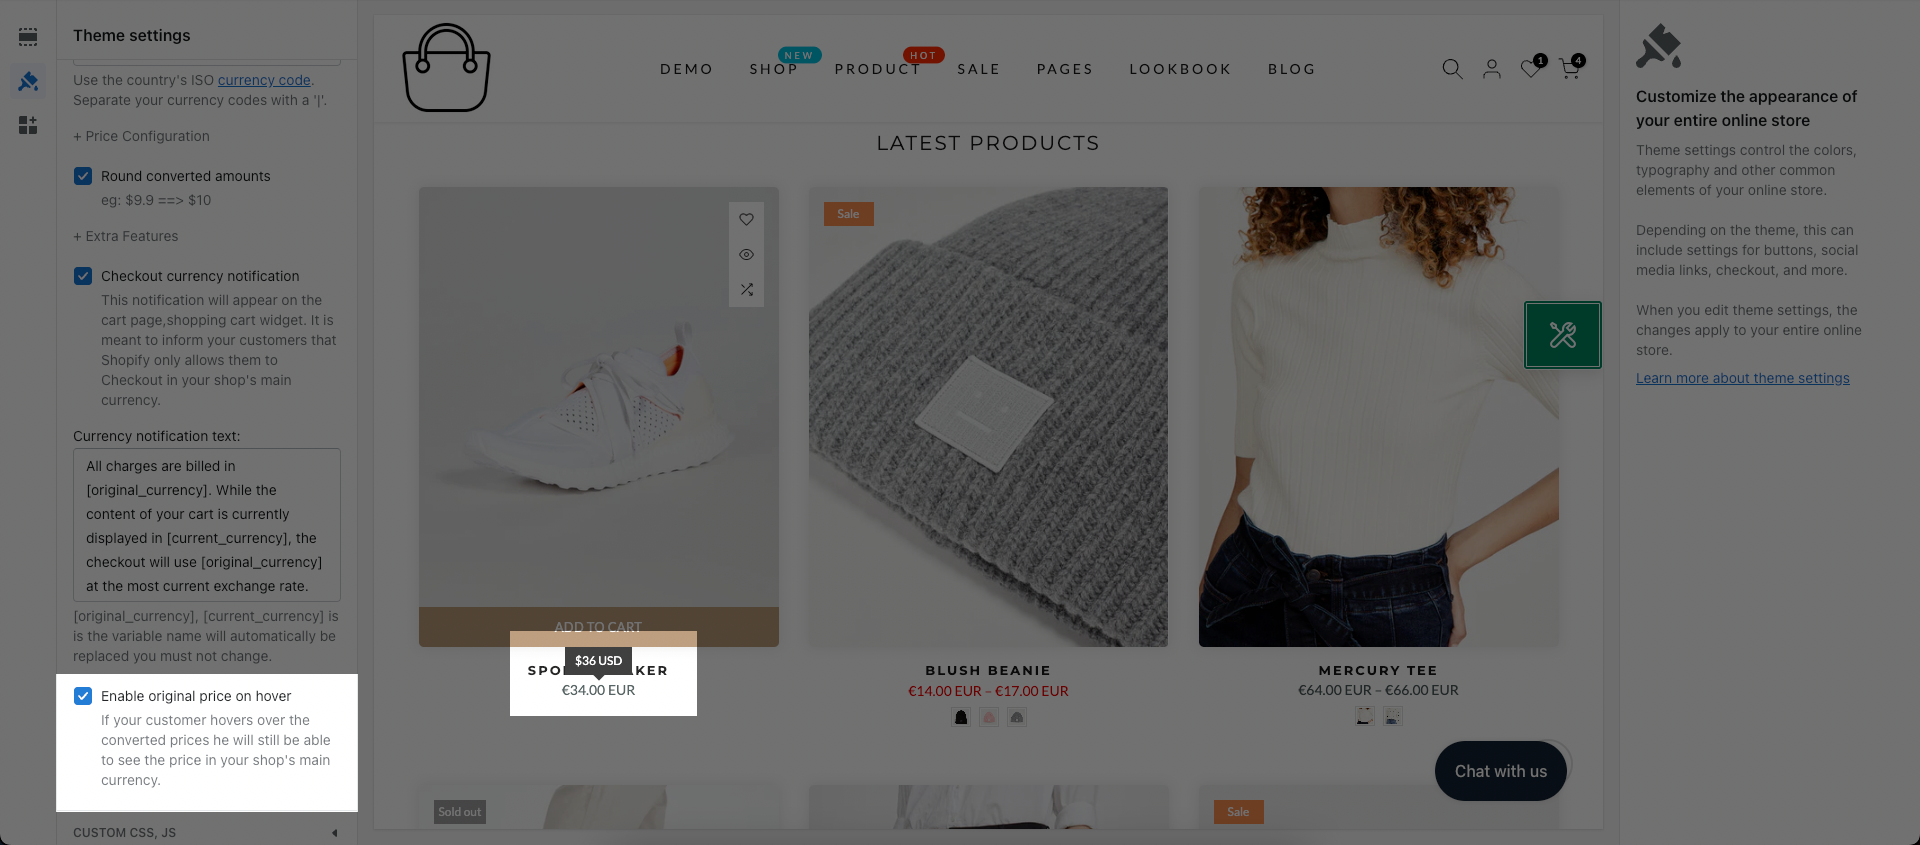
Price Configuration:
Round converted amounts: When you enable this option, it will round the price of the product. This only works when you convert the currency.
6. Extra Features
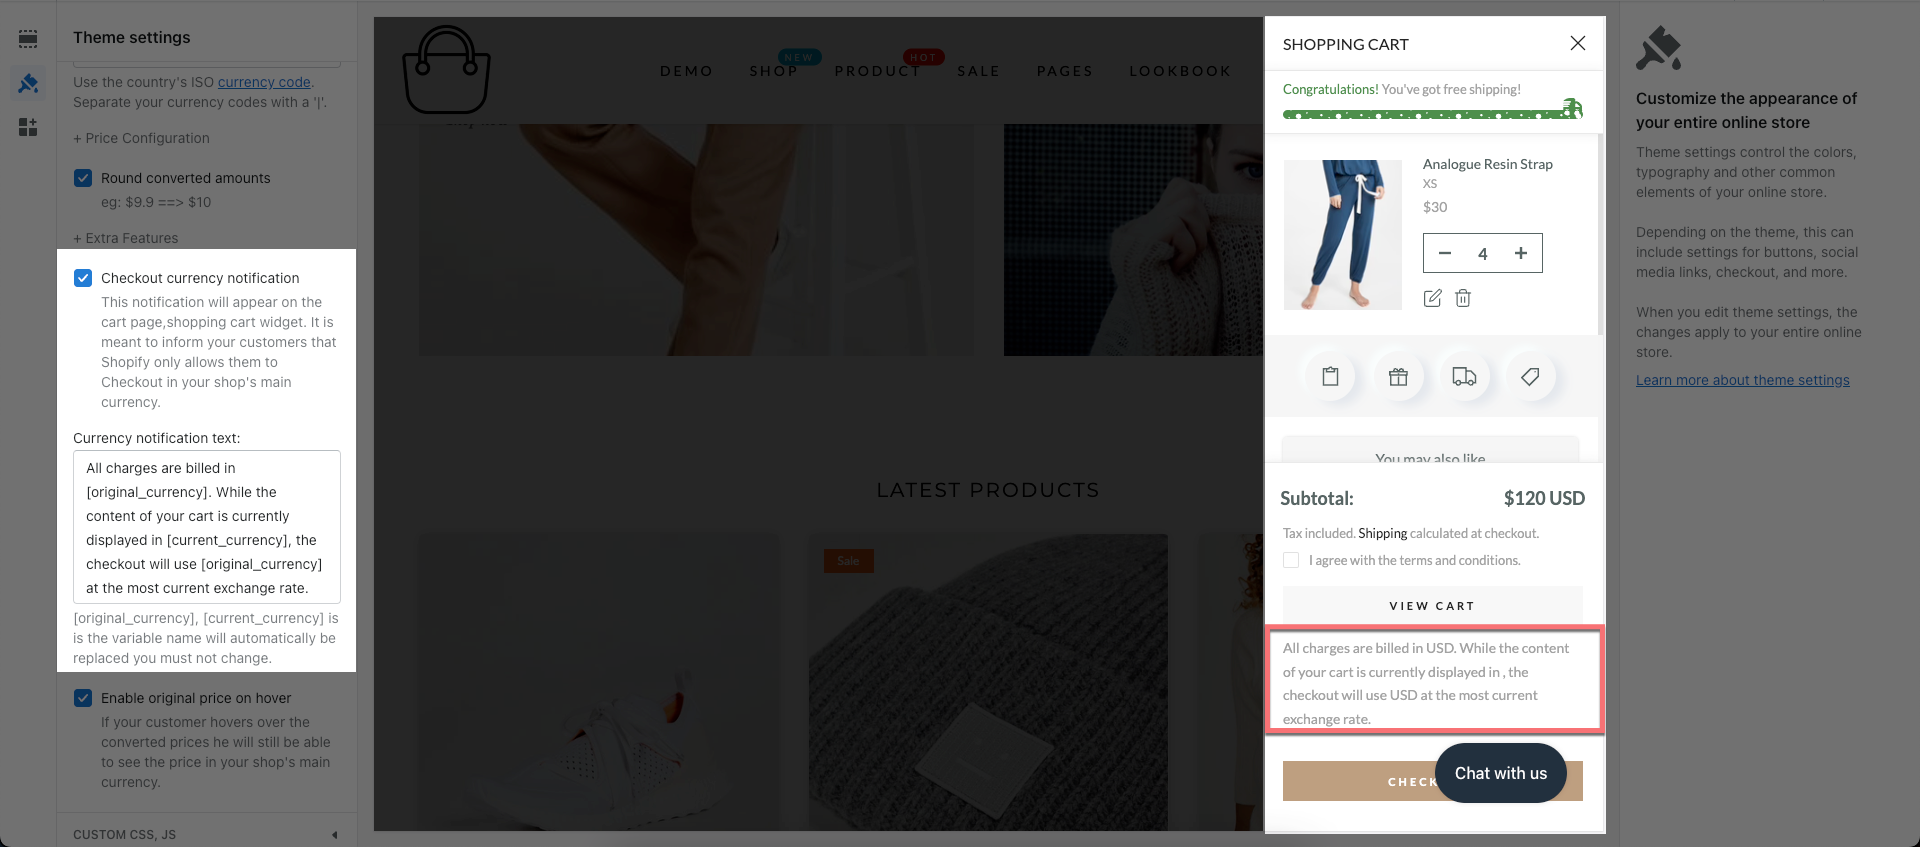
Checkout Currency Notification?
This notification only show when customer convert currency. It will appear on the cart page, shopping cart widget. It is meant to inform your customers that Shopify only allows them to Checkout in your shop’s default currency.
Currency Notification Text:
You can write the notification text here to let customers understand more about the currency in your store. You can see this video below to understand more about it.
Enable original price on hover:
If your customer hovers over the converted prices he will still be able to compare see the price in your shop’s main currency.