As you have done before, you can configure metafield for each product by admin tool setting.
However, when Shopify changes the link when logging in admin like https://admin.shopify.com/, it doesn’t work anymore because Shopify blocks it, so those tools are old versions like editing metafields, creating product tags will no longer usable. Please follow these steps to config it.
This guide is for Short description metafield, but it is the same as other metafields: Countdown, External / Affiliate, Delivery Start Date, Delivery End Date.
Doing this guide will not lose the metafield data you already created before, it will transfer the metafield from admin tools to each product metafield.
Step 1: Add metafield from Shopify Settings
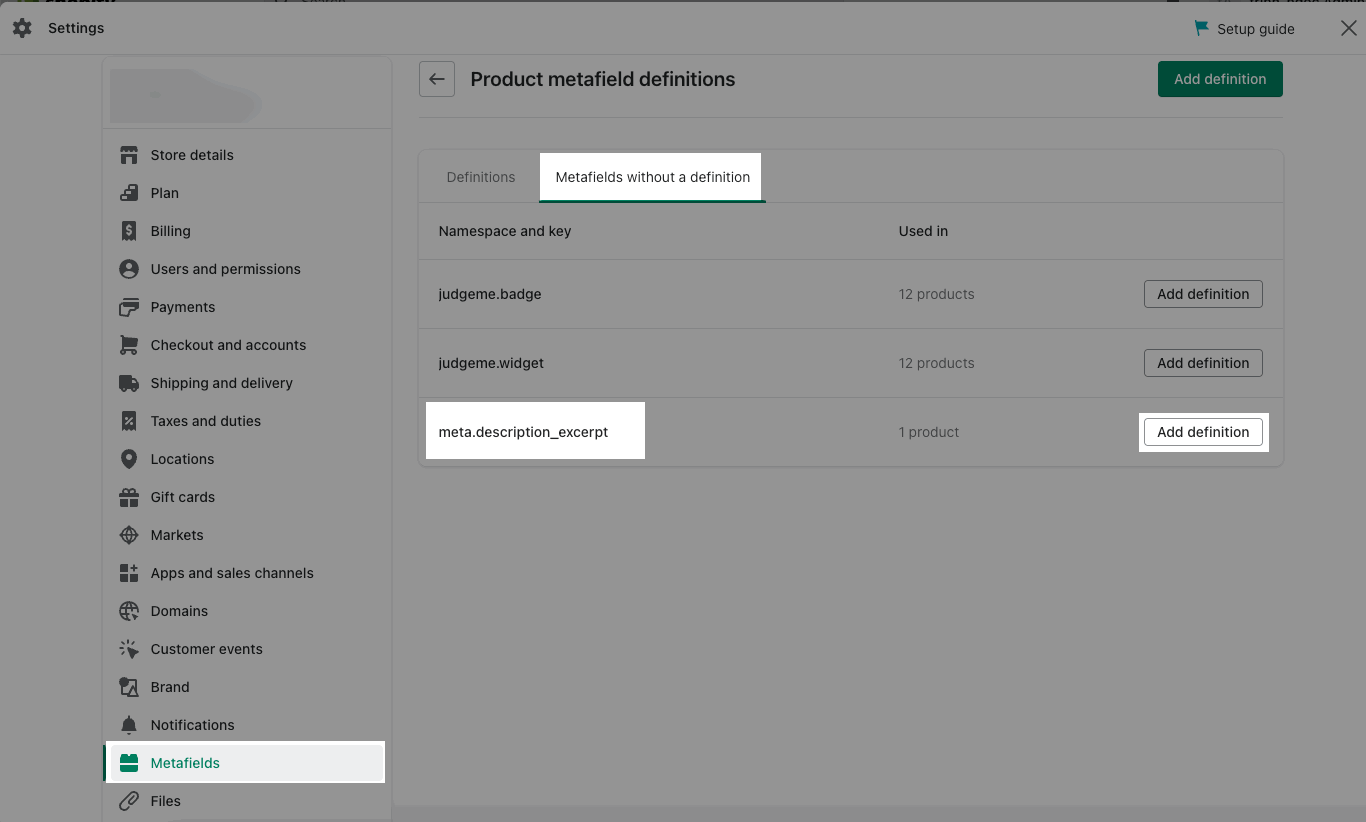
From Shopify Settings > Metafields > Products > Metafields without a definition > find the metafield you need, for example: description_excerpt > Add definition
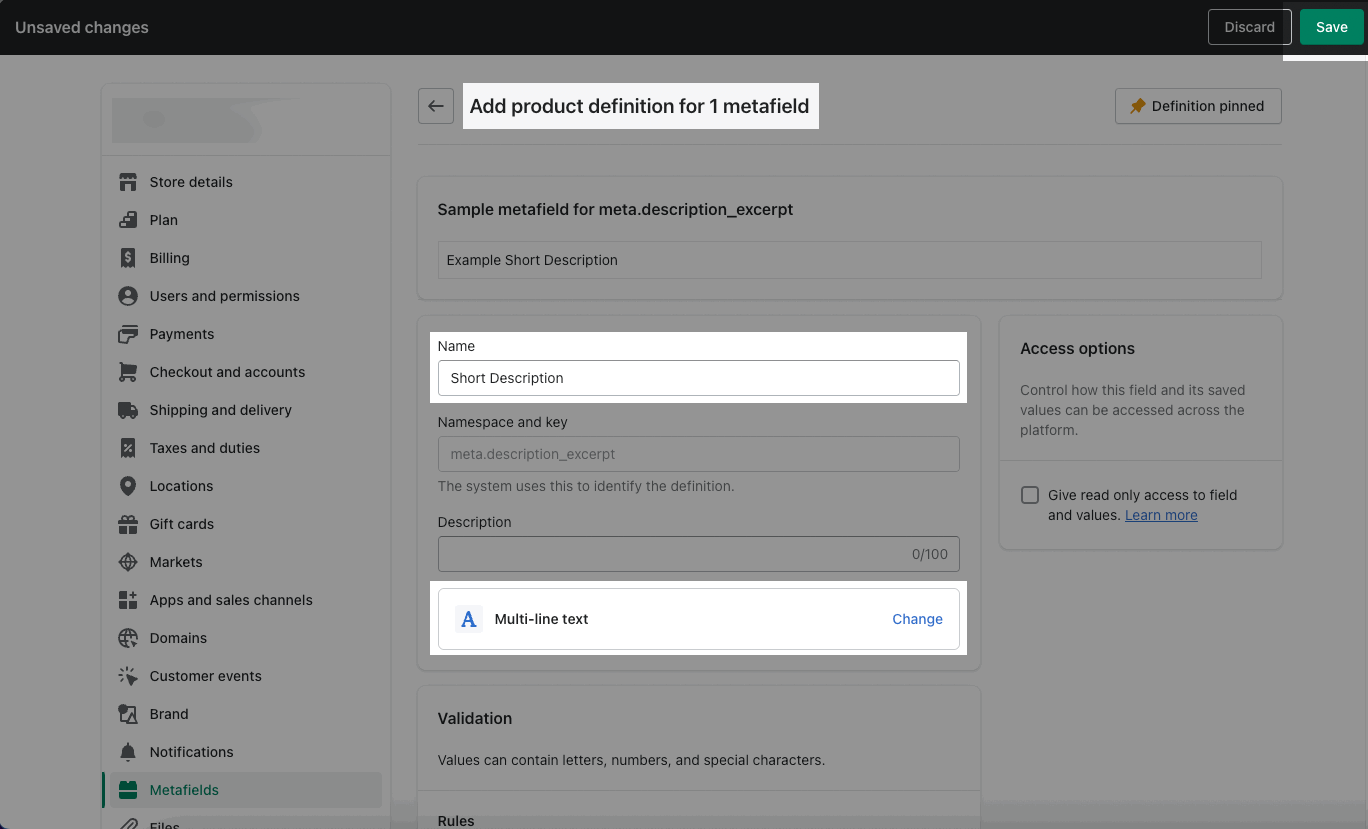
2. Fill in the name and type for the metafield > Save
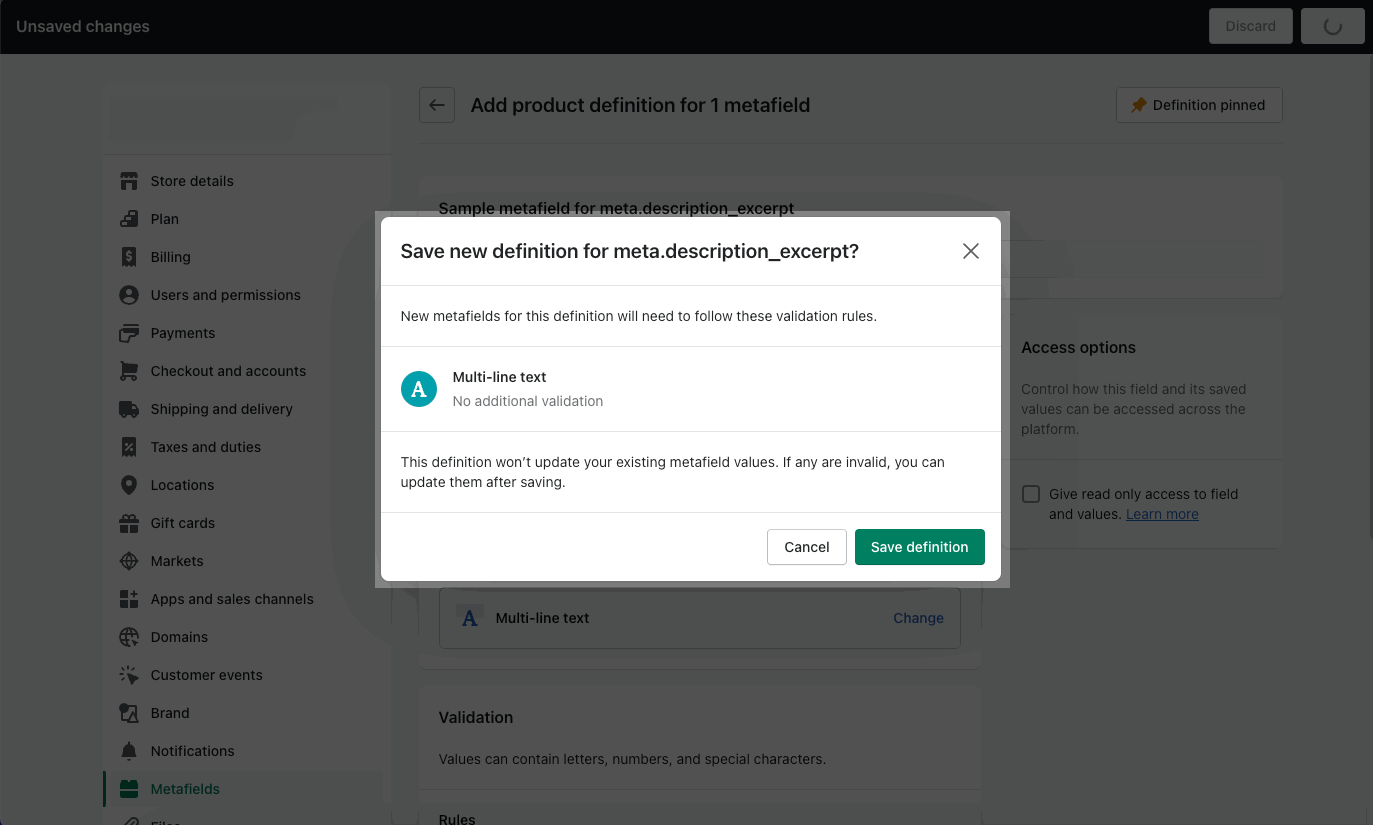
3. A message box will show to confirm the progress > click Save definition
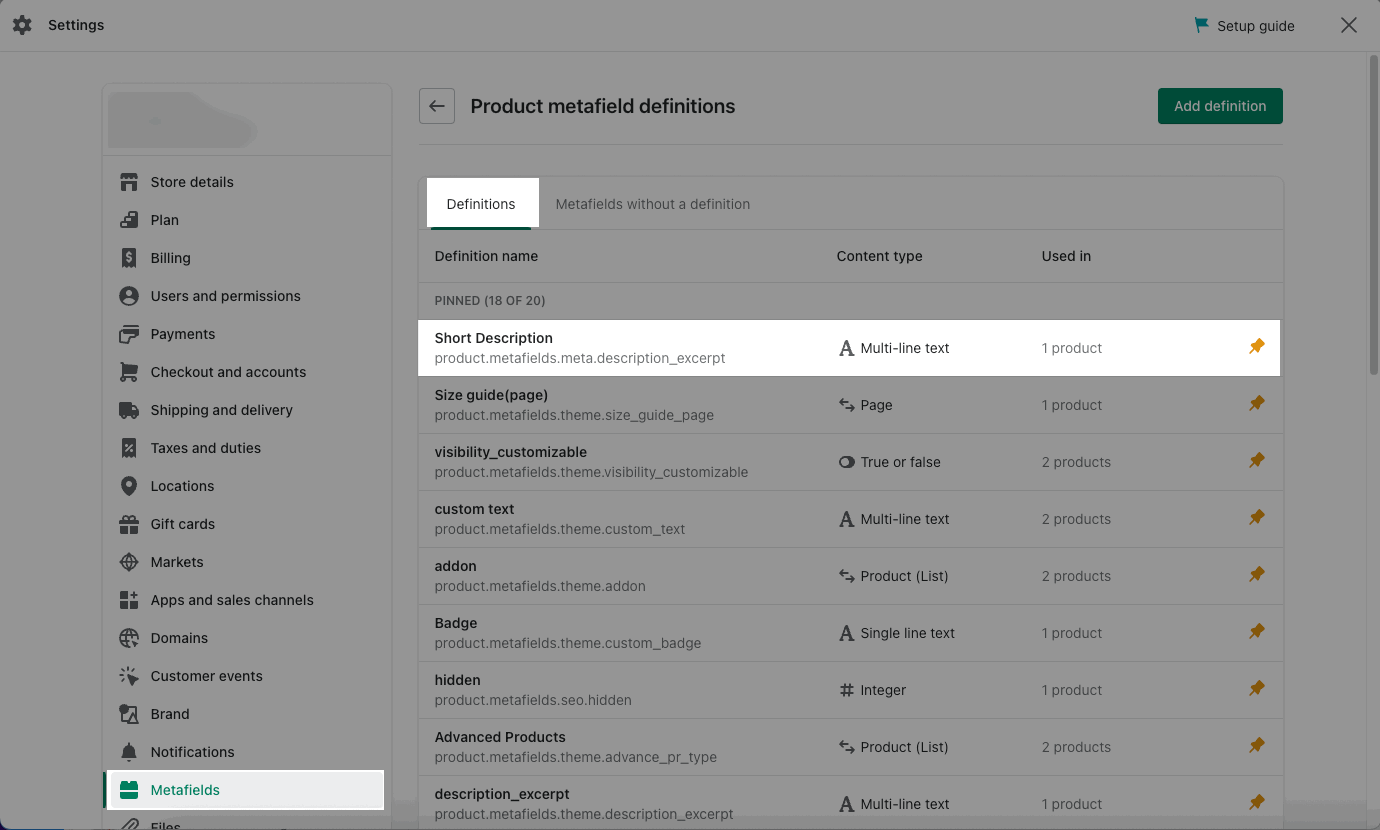
4. After you add it successfully, you will see the metafield in Definition tab:
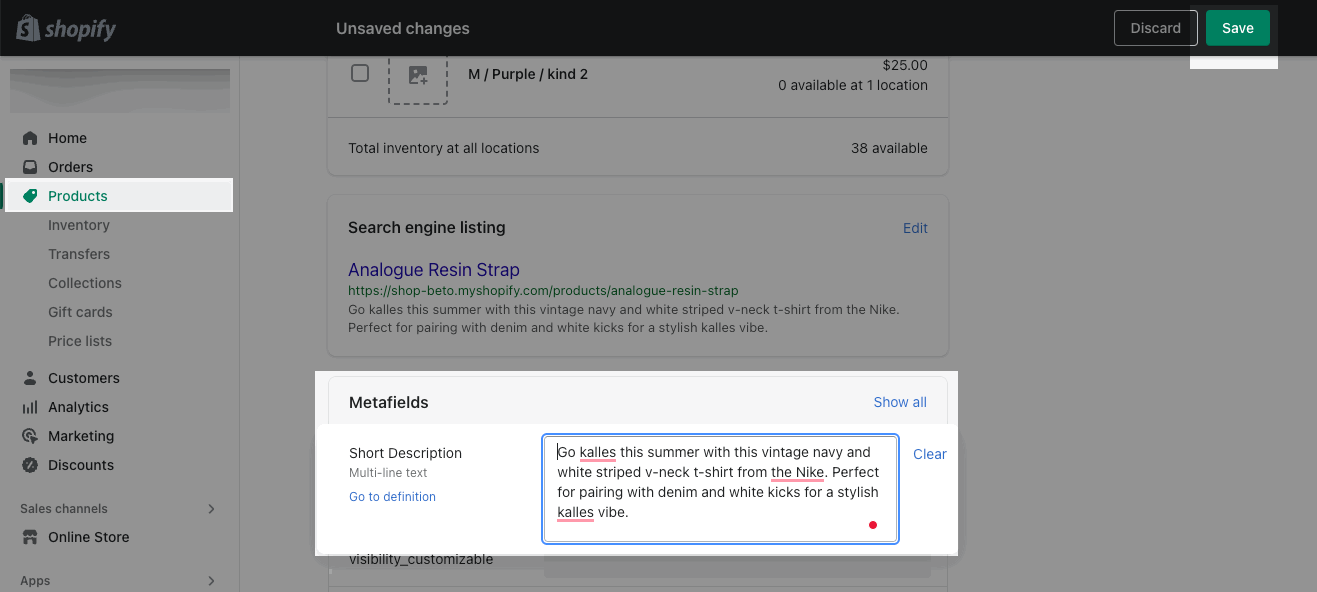
Step 2: Add the content for each product in Products > Metafields.
After filling in the content, click to Save then the metafield will be applied.
Namespace, key and type for metafields:
Image size chart:
meta.img_size_chart => Single line text
Example value, the name of sizeguide image: Men_size.jpg
Page size chart:
meta.page_size_chart => Single line text
Example value, the name of sizeguide page: sizeguide


