


Block properties are used to collect customization information for an item added to the cart. This information can be collected from the buyer on the product page.
Note: this feature is available from Kalles 4.1.0, Gecko 6.0, Unsen & Ocolus.
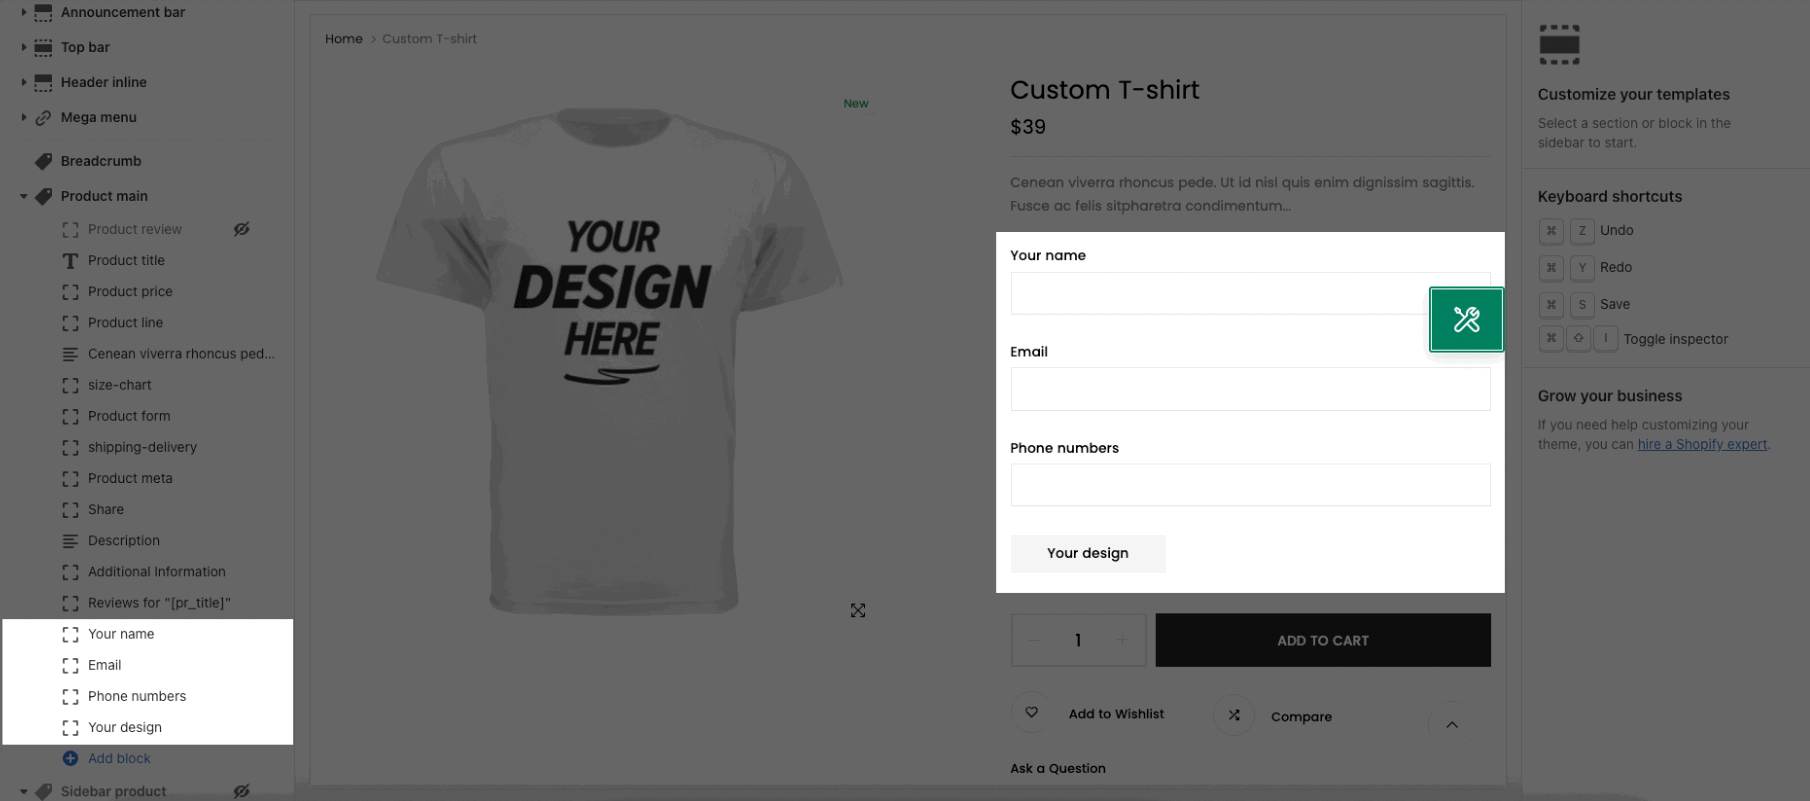
Steps:
Product page > Product main
Add block Customizable Product
Click Save
How to configure the Customizable Product block?
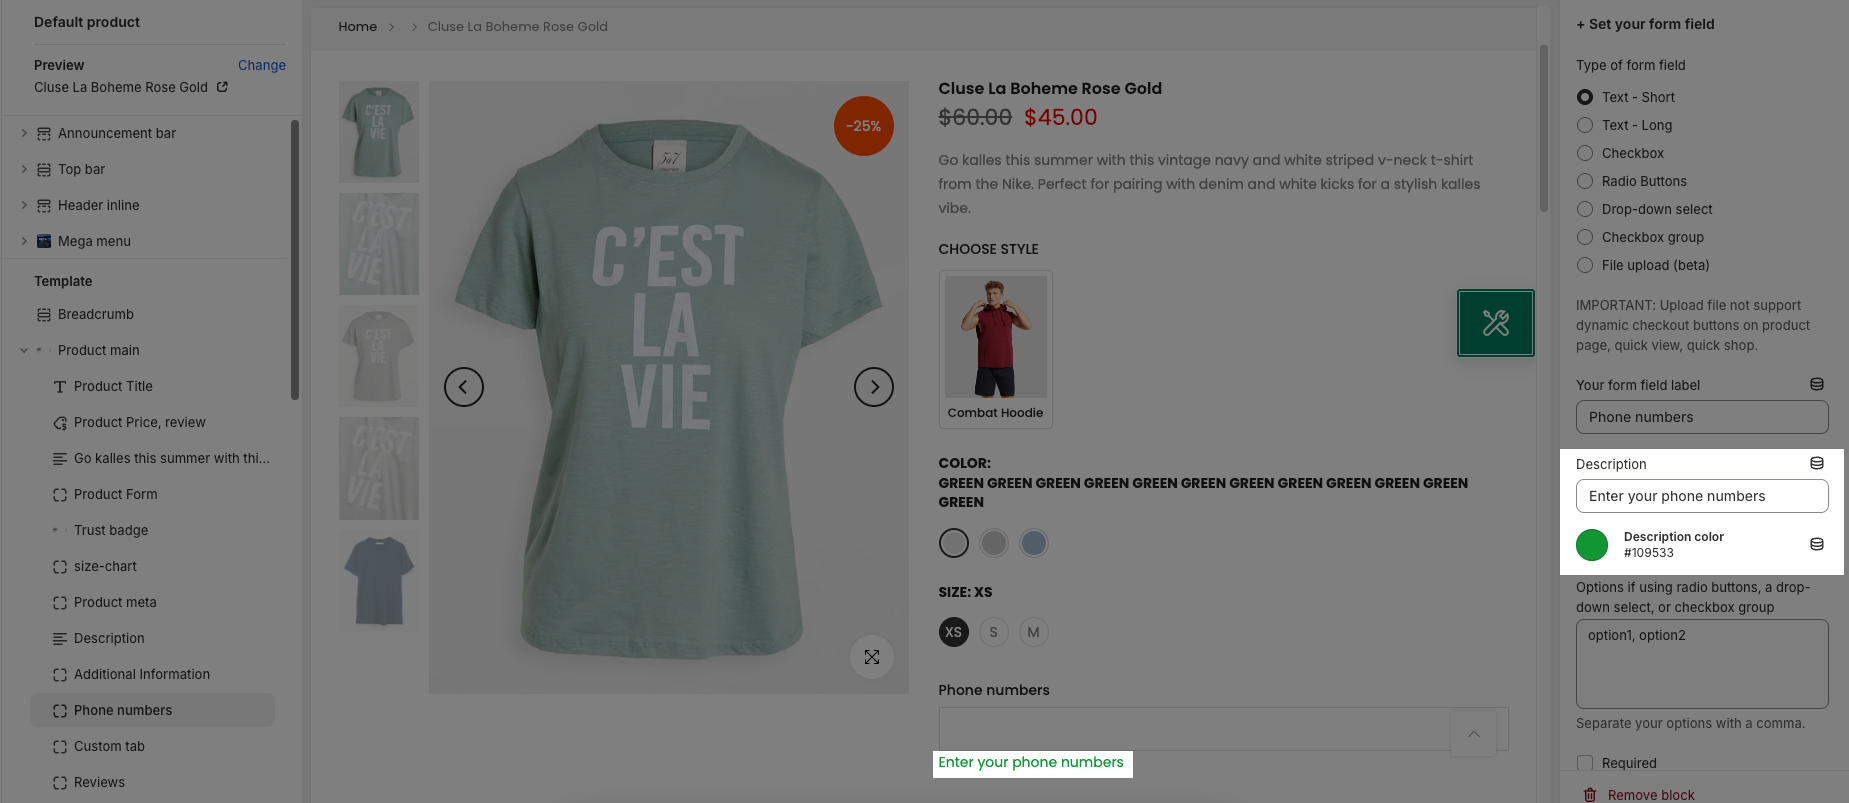
1. SET YOUR FORM FIELD
1.1. Type of form field
First, you need to define the fields that you need to include on the product page to help customers fill in the information. We provided these fields below might adapt to your requirement:
Text - Short
Text - Long
Checkbox
Radio Buttons
Drop-down select
Checkbox group
File upload (beta)
Notice: Upload file not support dynamic checkout buttons on product page, quick view, quick shop.
1.2. Your form field label
You are allowed to set the name for Custom field here.
You can add description and choose color for it
1.3. Options values
This field helps you add your Options values for radio buttons, a drop-down select and checkbox group.
Notice: Separate your options with a comma.
1.4. Required option
If you use “Required” with a checkbox, then the checkbox will need to be checked for the customer to add the item to the cart.
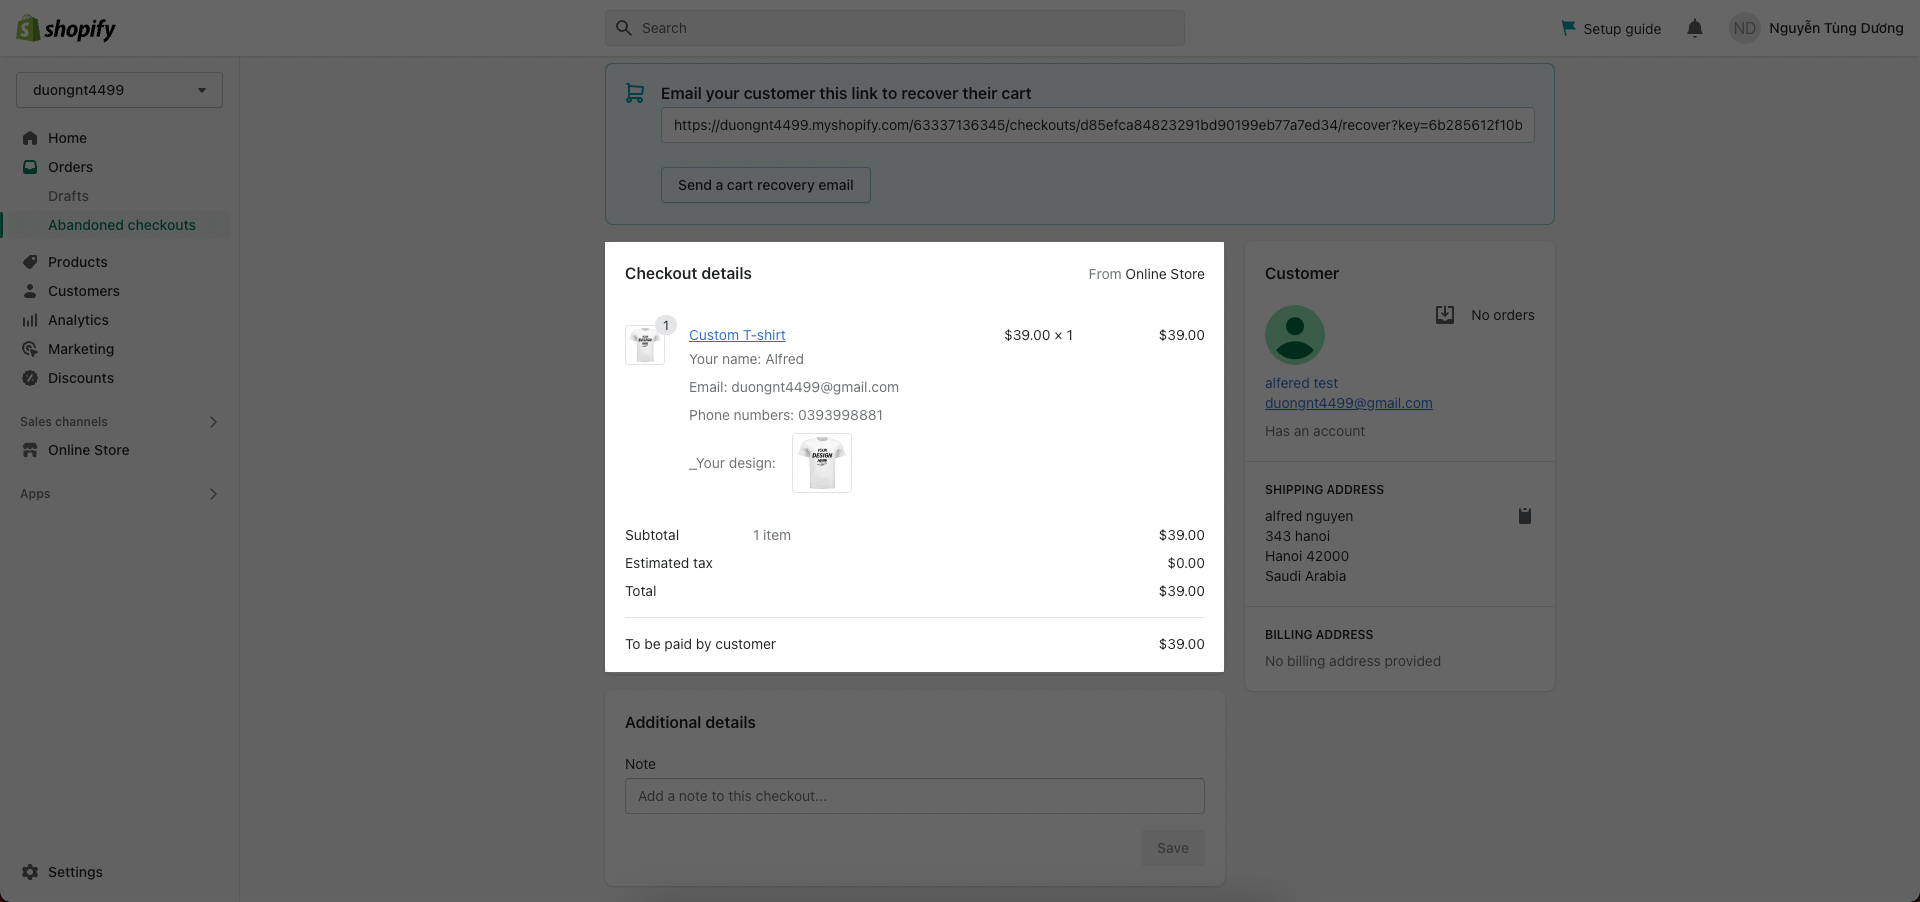
1.5. Show at checkout, cart option
Uncheck this if you don't want the captured information to be shown in the order summary on the cart, checkout page.
You still can see that information on Shopify Orders.
2. SET YOUR VISIBILITY
With this settings, you will be able to control the VISIBILITY of form fields with every single product.
Lets check the visibility options with their following settings:
All - Adapt with all Active products.
Collection based - Collection list settings.
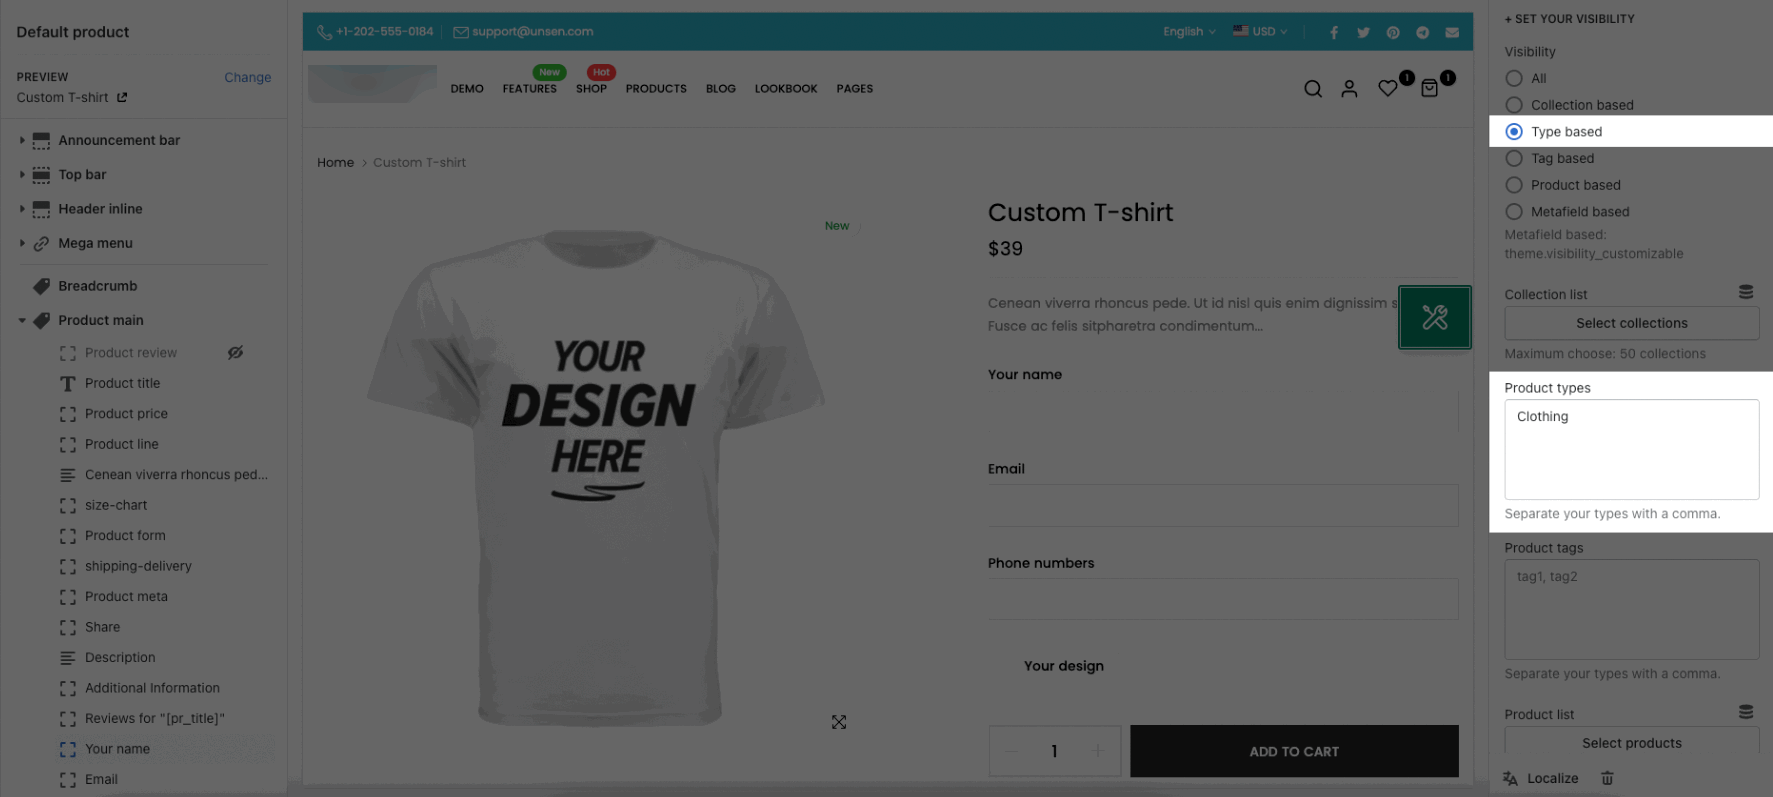
Type based - Product types.
You can go to Shopify Dashboard -> Products to get the Product Type.
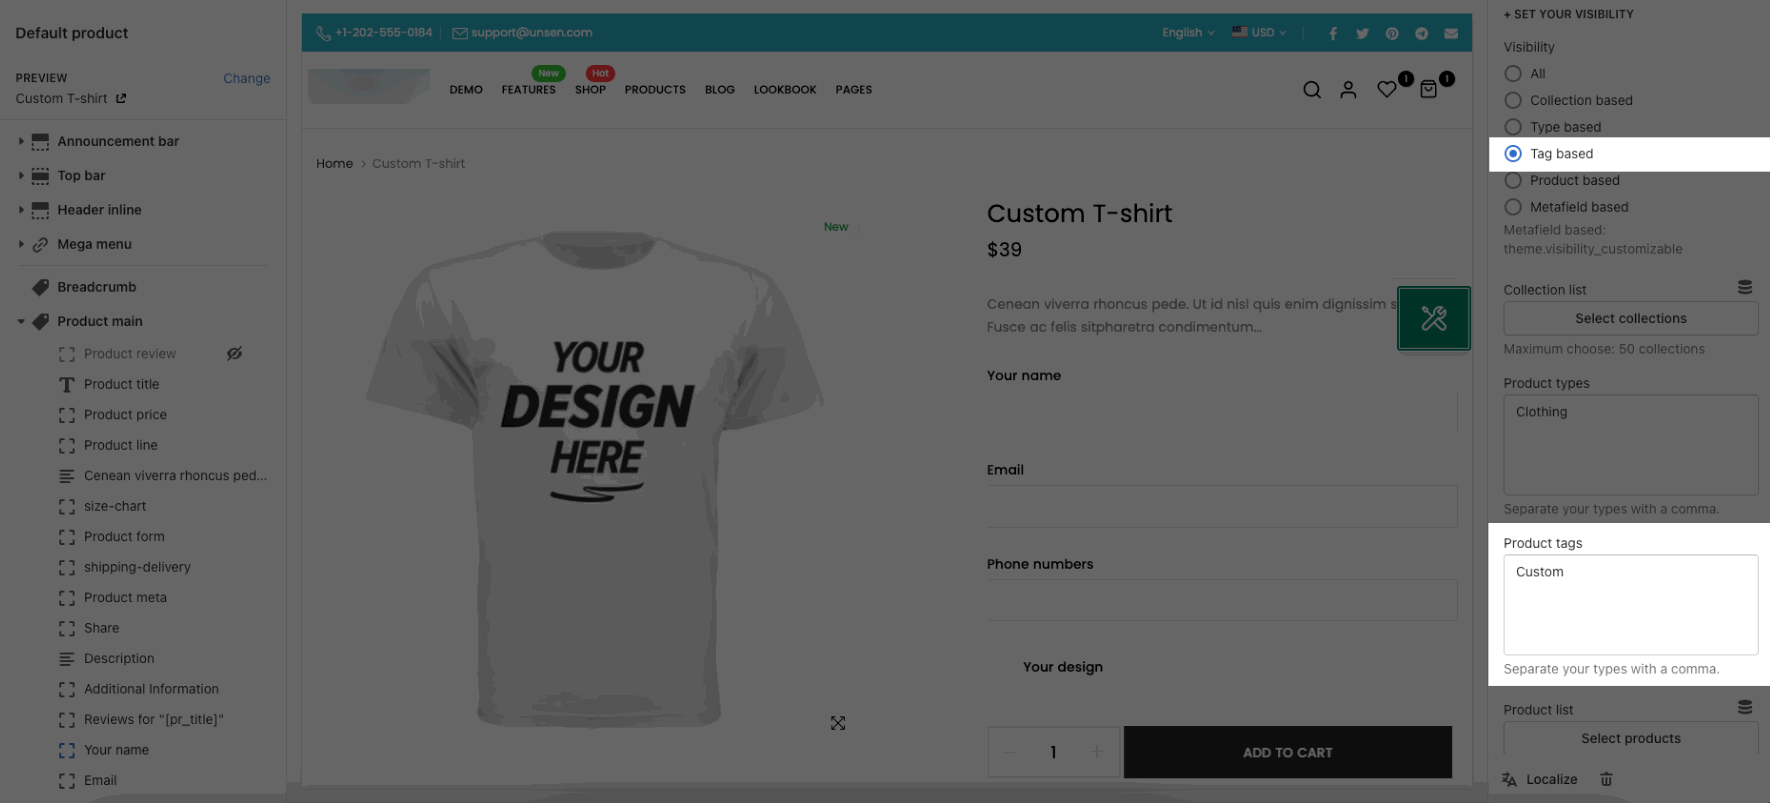
Tag based - Product tags.
You can go to Shopify Dashboard -> Products to get the Tags.
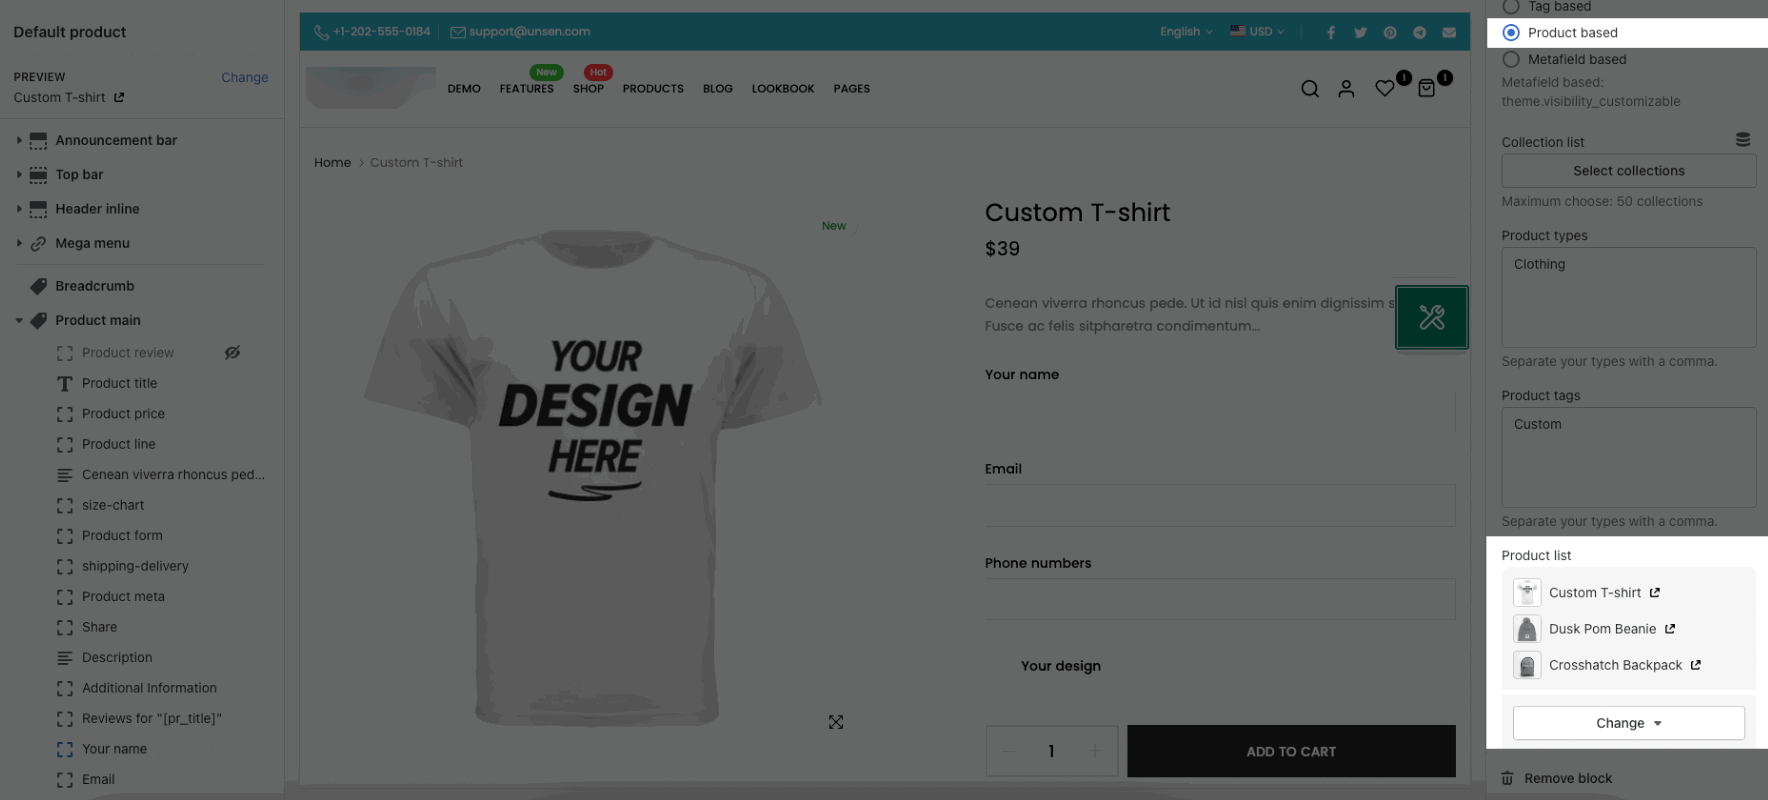
Product based - Product list.
You can select up to 50 Products.
Metafield based - Adapt all products that have this Metafield turn True.
Please follow these steps:
Step 1: Create Metafield by going to Shopify Settings -> Custom data -> Products ->Add definition.

Step 2: Input Namespace and key with this code "theme.visibility_customizable" and Select content type with "True or false".
Step 3: Go to Products that you want to set the Metafield -> select True


