


Product Upsell features allow you to set up a strategy to get customers to shop. It has outstanding features such as Countdown timer, Inventory Quantity, Trust badge, Live view, Delivery time, Total Sold Flash.
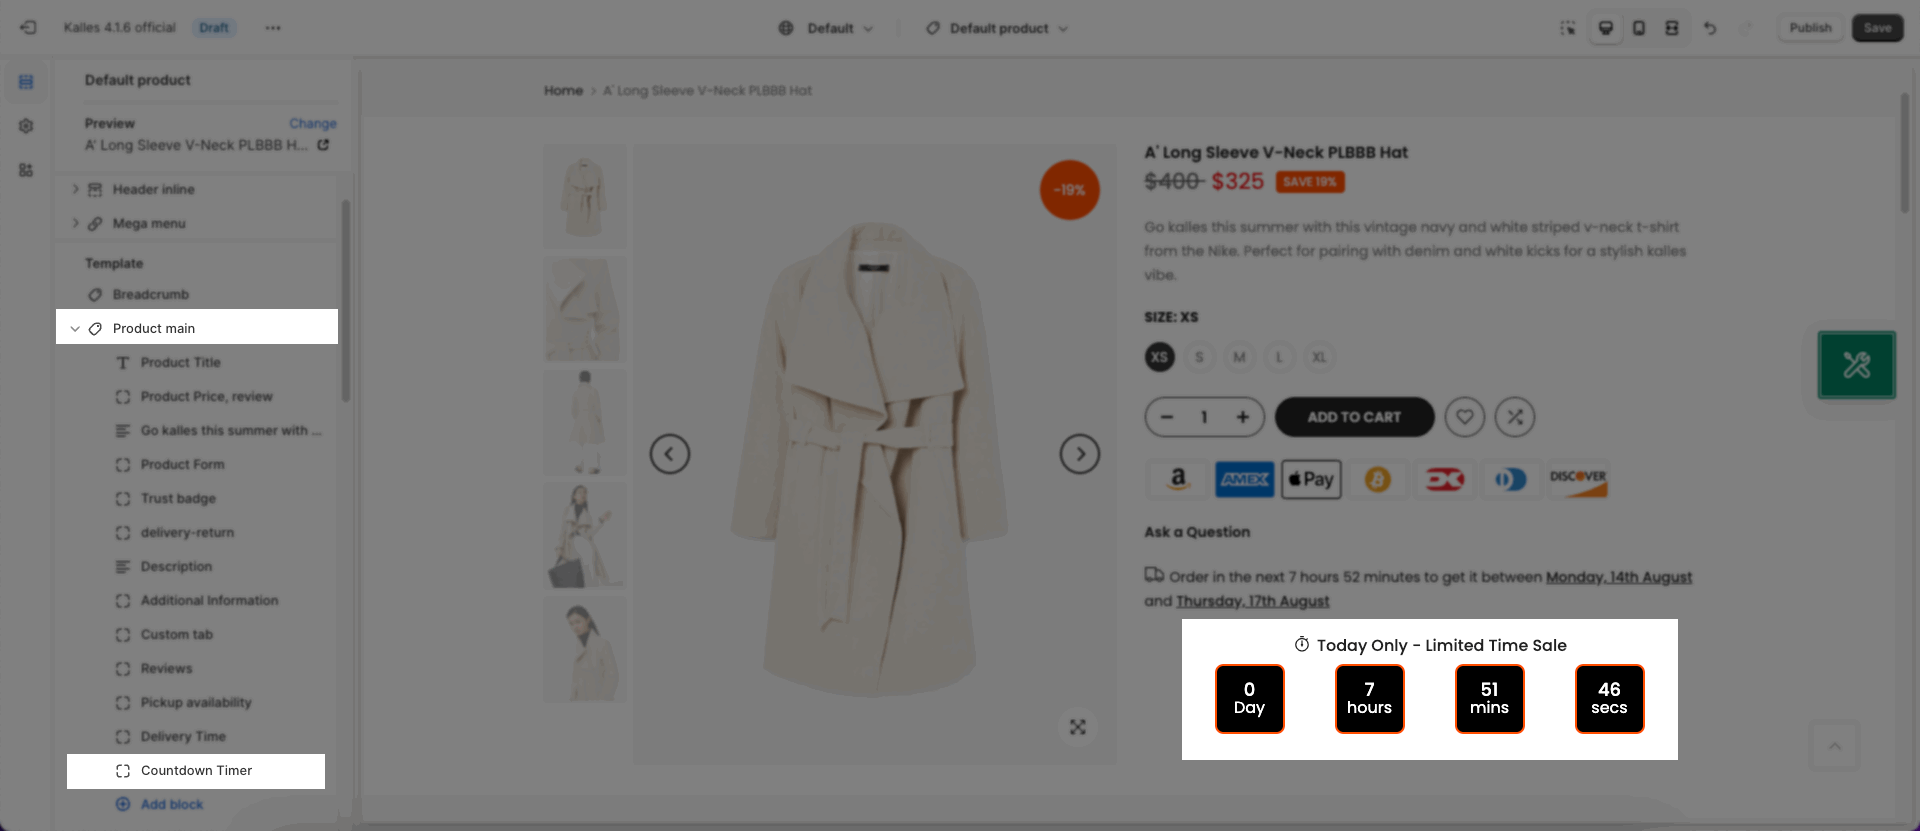
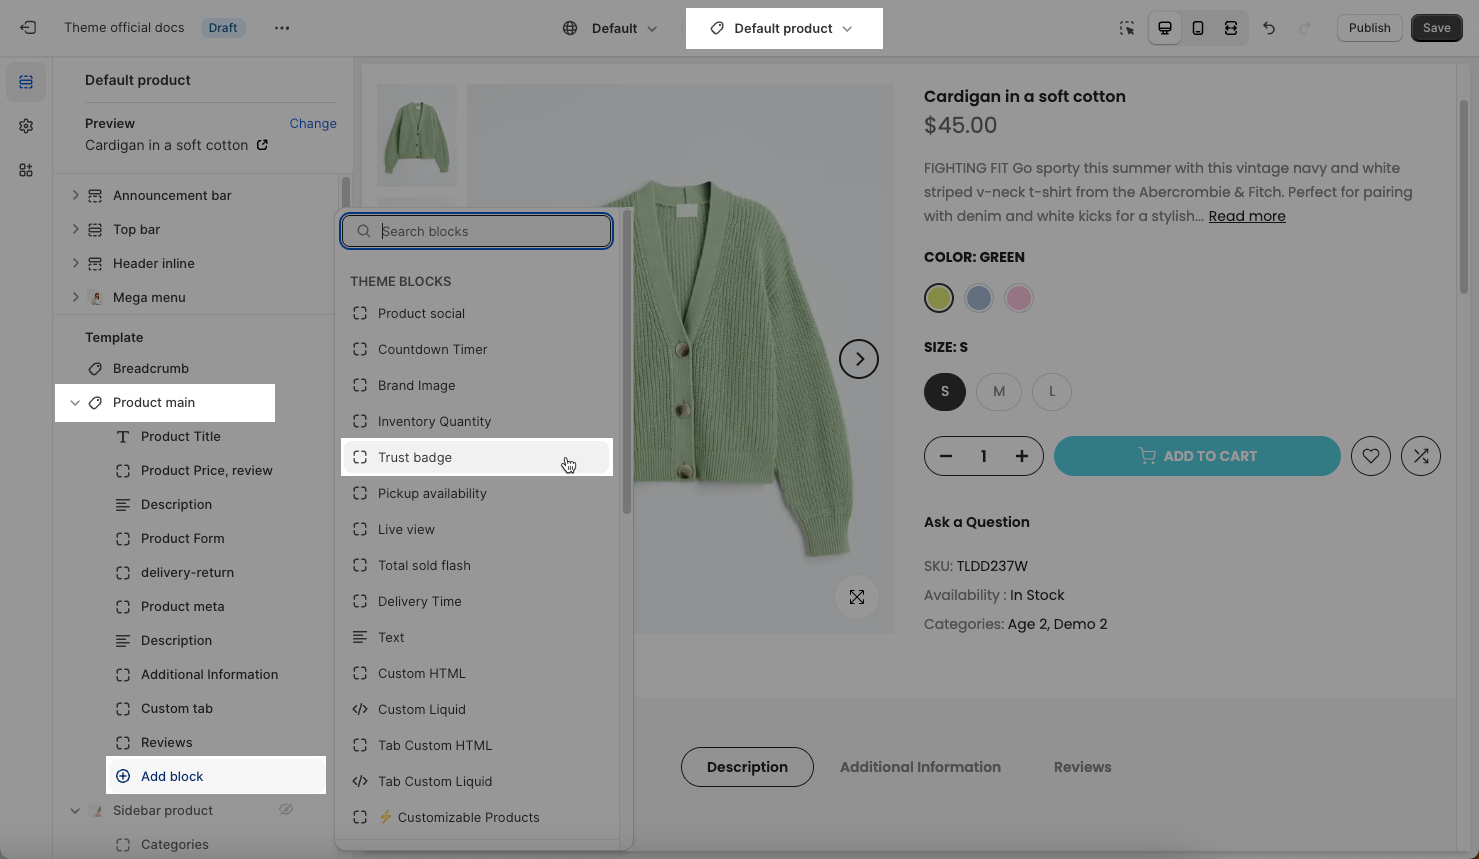
Step: Go to Theme Customize > Product page (Default product) > Product Main > Add block > choose block you want to add.
You can drag to sort the position of these blocks.
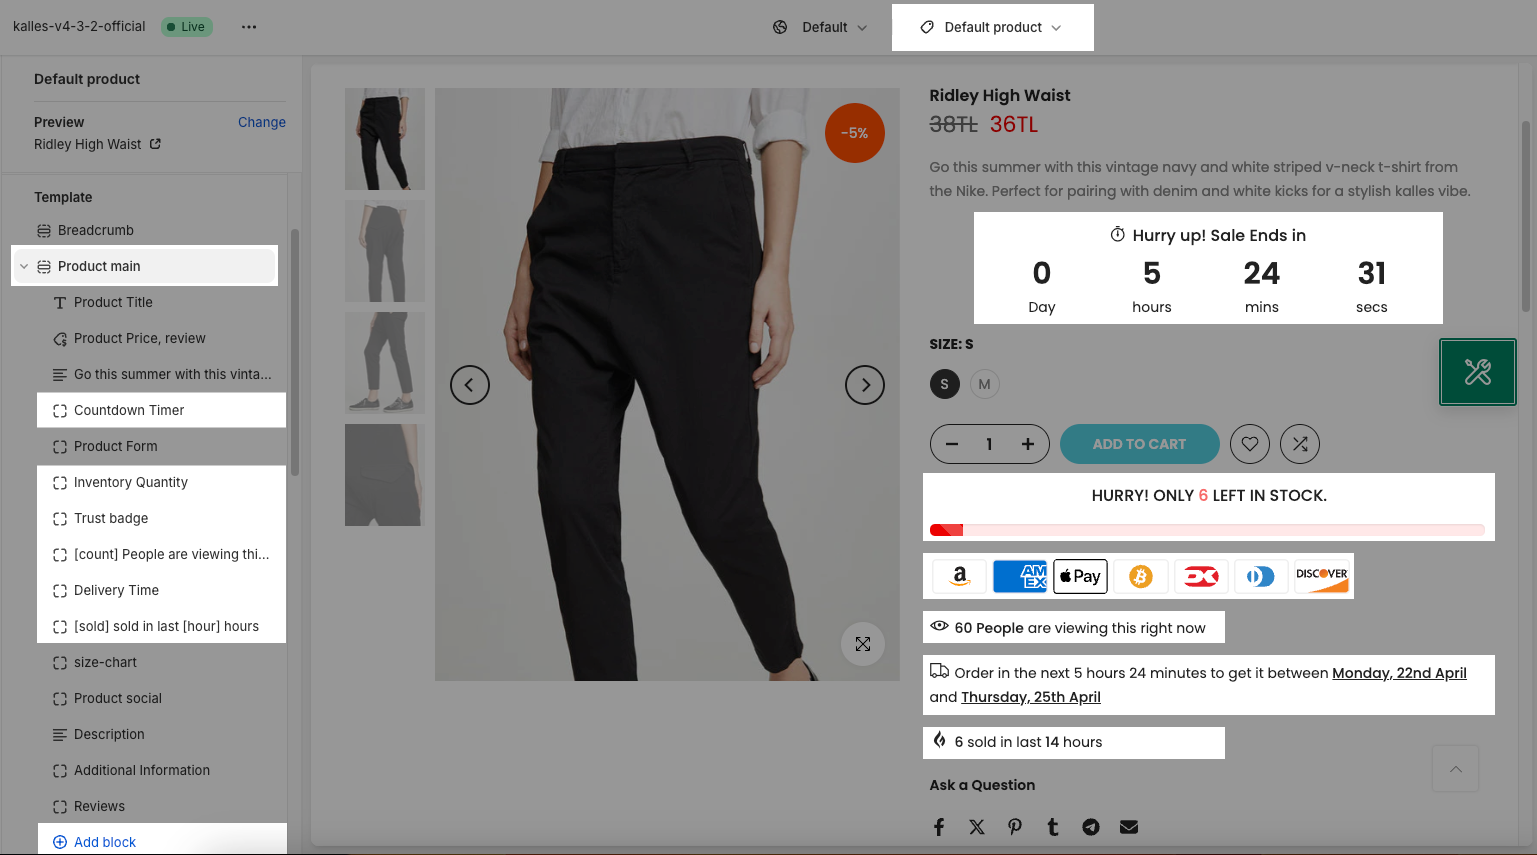
1. Countdown timer
A countdown timer can be defined as a virtual clock that counts down from a certain date or number to indicate the end or start of an offer or event. It can be used to create curiosity and motivate customers to make a purchase before the end of the event.
1.1. General Options
Show countdown timer: This option allows you can select products to show countdown timer. There are 2 types: All products or Only product have tag "has_stock_countdown"
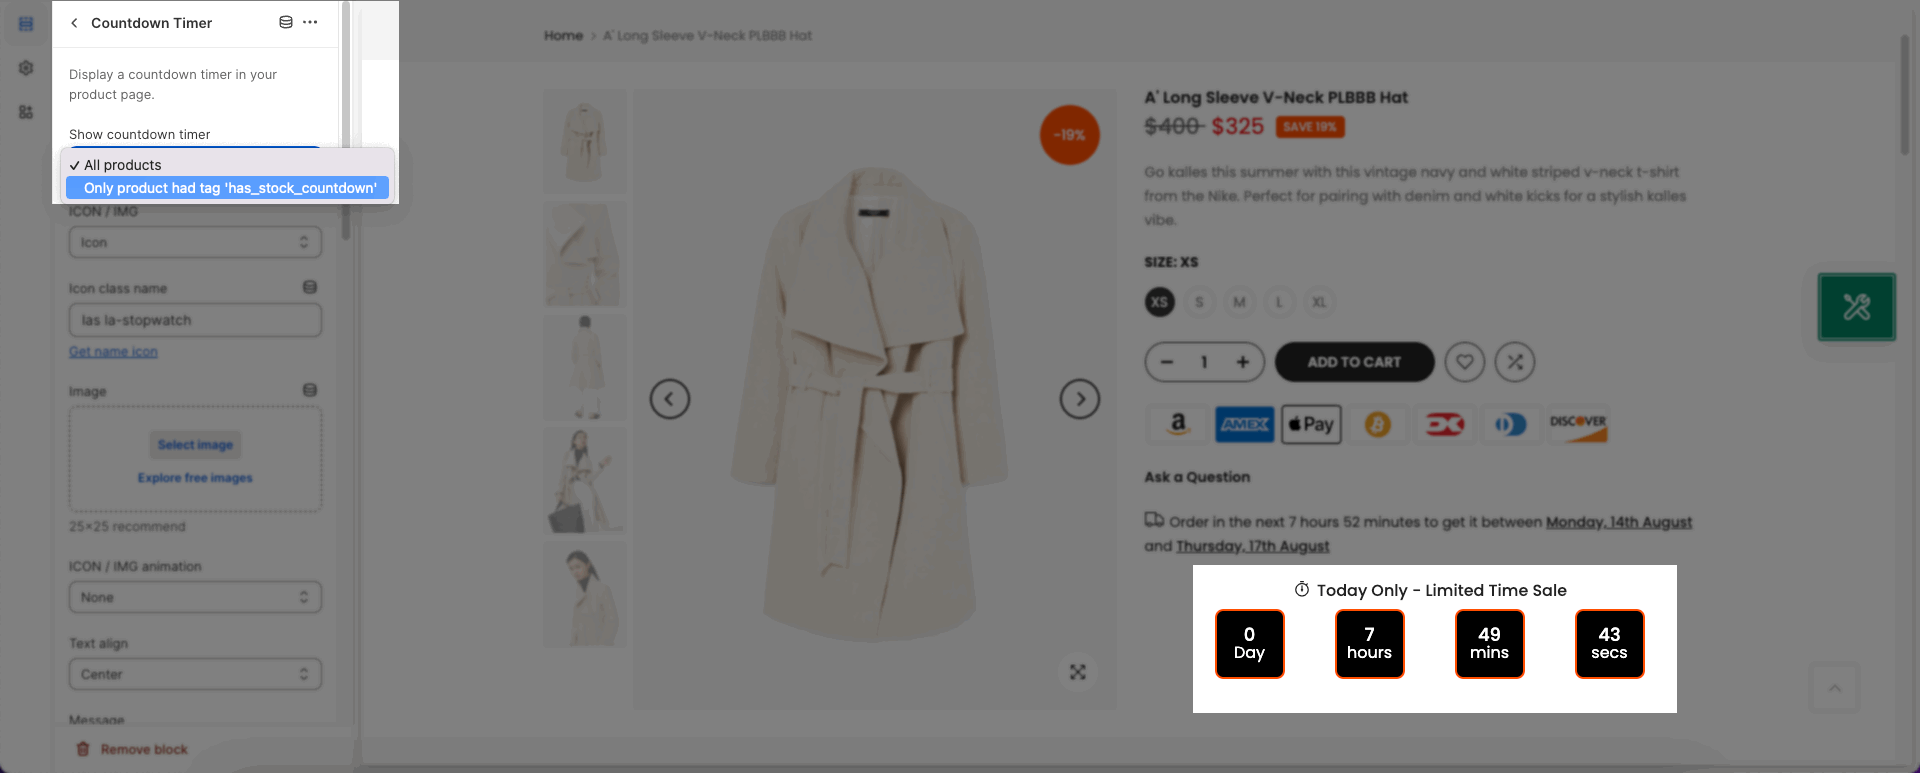
Only products have tag "has_stock_countdown" This option will show if you add the tag "has_stock_countdown" in Products Shopify.
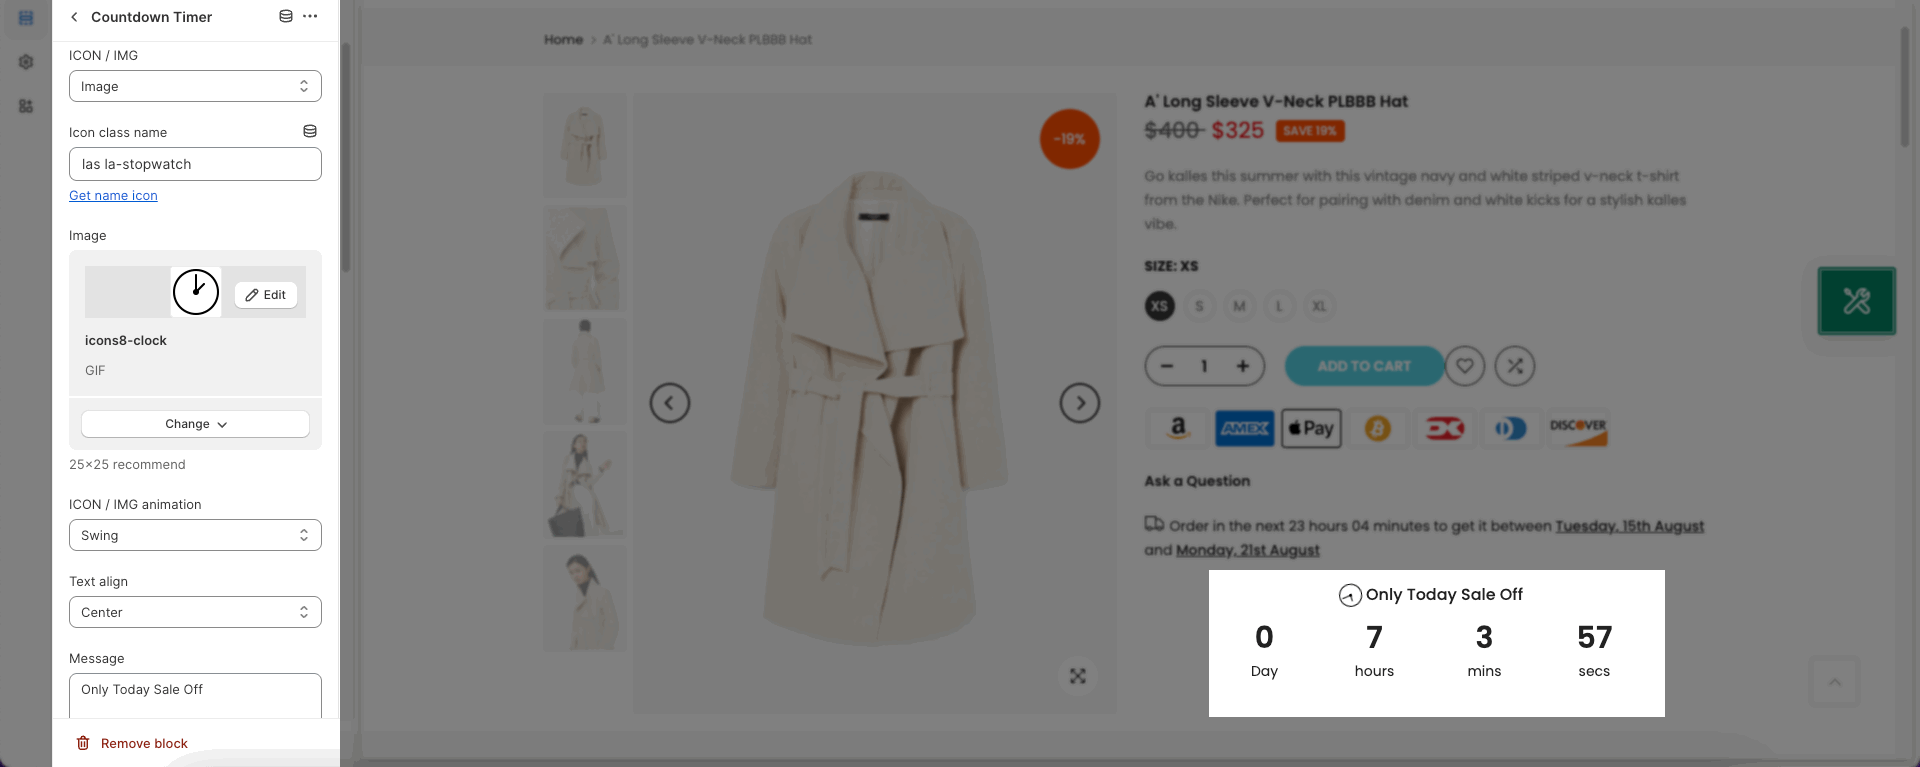
ICON / IMG: You can select the options to show in front of the message.
Icon class name: You can add the icon you want to show.
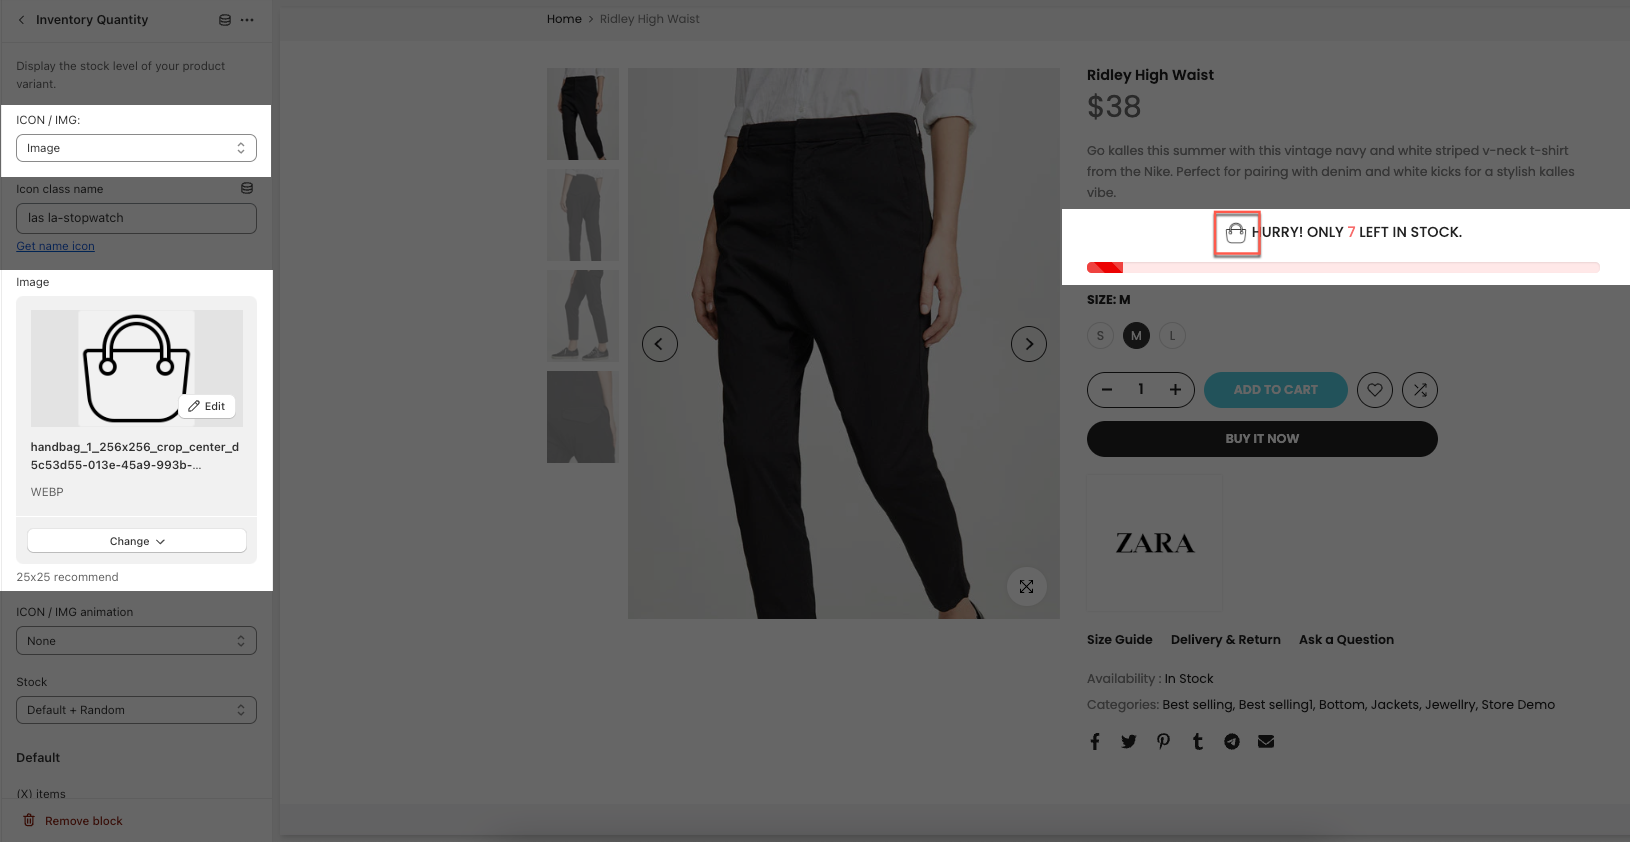
Image: Select the image to show in front of the message.
Text align: You can align the heading left, center, or right.
Message: You can change the content of the countdown time here.
Font size: This option allows you can change the size of the message.
1.2. COUNTDOWN METAFIELDS
Date Range Slider: Reset countdown every X days from an initial date. Set "0" to disable and reset the countdown.
"theme.countdown": Please follow this guideline to know more about this key.
1.3. COUNTDOWN TIMER LOOP DAY
Looping or repeating the countdown timer, you just need to enter your timer between each loop. After the first interval of the loop is over, it will move on to the 2nd loop and so on until the end. If you want it to be repeated on the following days then enable the option "Use Loop Countdown".
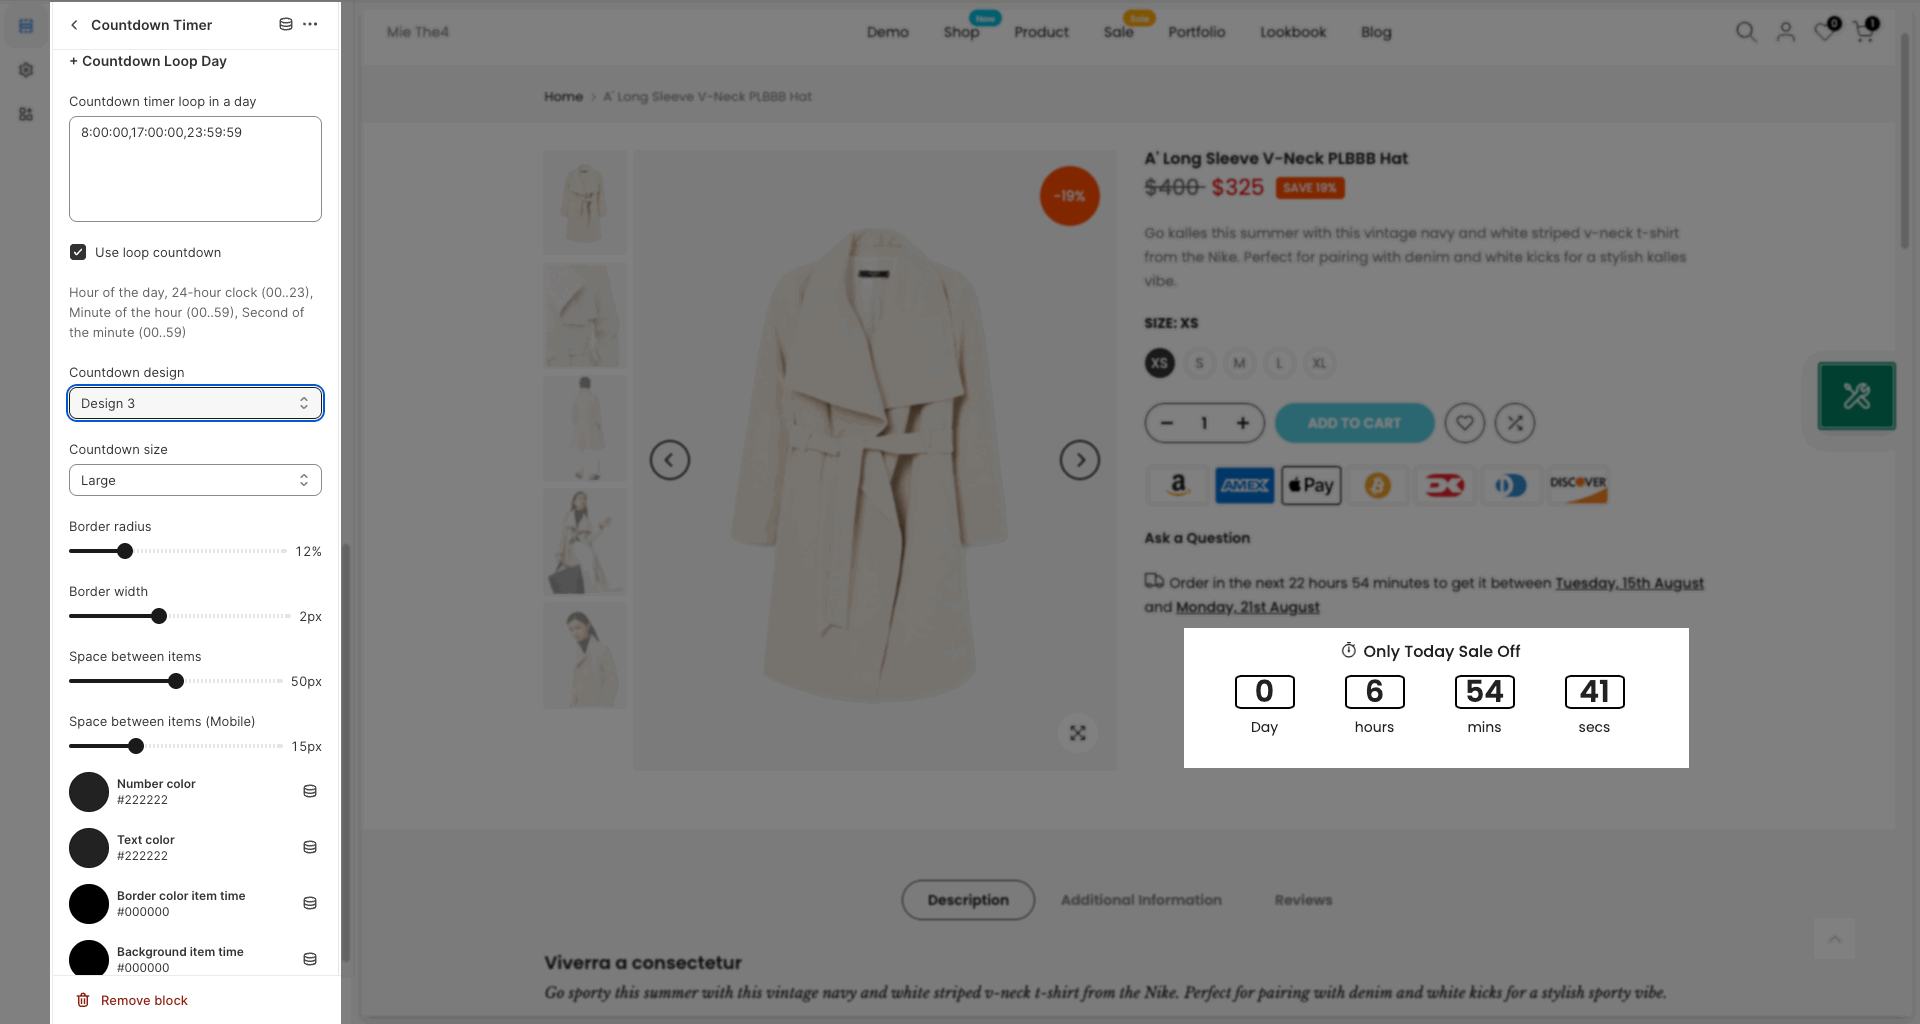
Countdown design: There are 3 types of design for countdown timer.
Countdown size: You can change the size of countdown timer.
Border radius/ Border width/ Space between items/ Space between items (Mobile): These options allow you to configure the countdown timer.
Number color/ Text color/ Border color item time/ Background item time: These options will help you to change the color of elements' countdown timer.
If you want each product to show a different countdown timer then use metafields, otherwise the countdown will show the default time in the theme.
theme.countdown_day: This metafield helps you configure the loop day. Please follow my video:
Step 1: You need to add the metafield, please click on Settings > Custom data > Products > Add Definition.
Step 2: You need to fill the key "theme.countdown_day" and select content type is "Single line text".
Step 3: Add the countdown loop day in the Product custom metafield. Please fill hour of the day, 24-hour clock (00..23), minute of the hour (00..59), second of the minute (00..59) such as 8:00:00,16:00:00,23:59:59
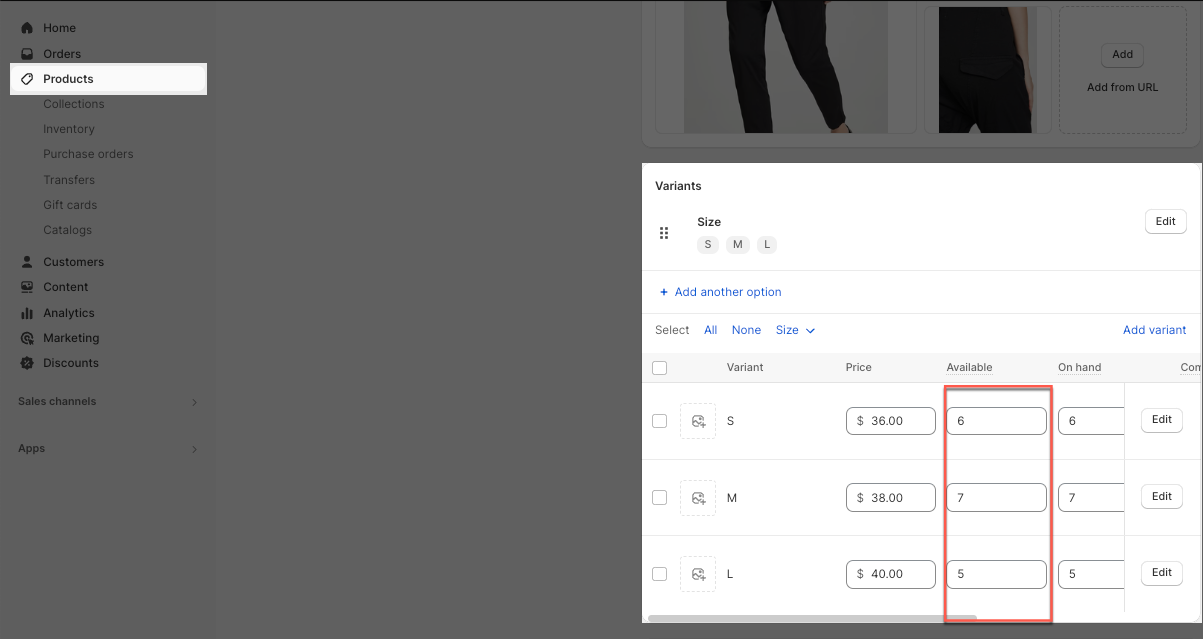
2. Inventory Quantity
Note: Inventory Quantity will not show on "Pre-order" products
Icon/ IMG format: You can show an icon or a custom image here. Choose None if you don't wanna use a custom icon/ image.
Icon class name: works when choose the Icon format. Click the Get name icon button to navigate to the The4 Line Awesome icons Library.
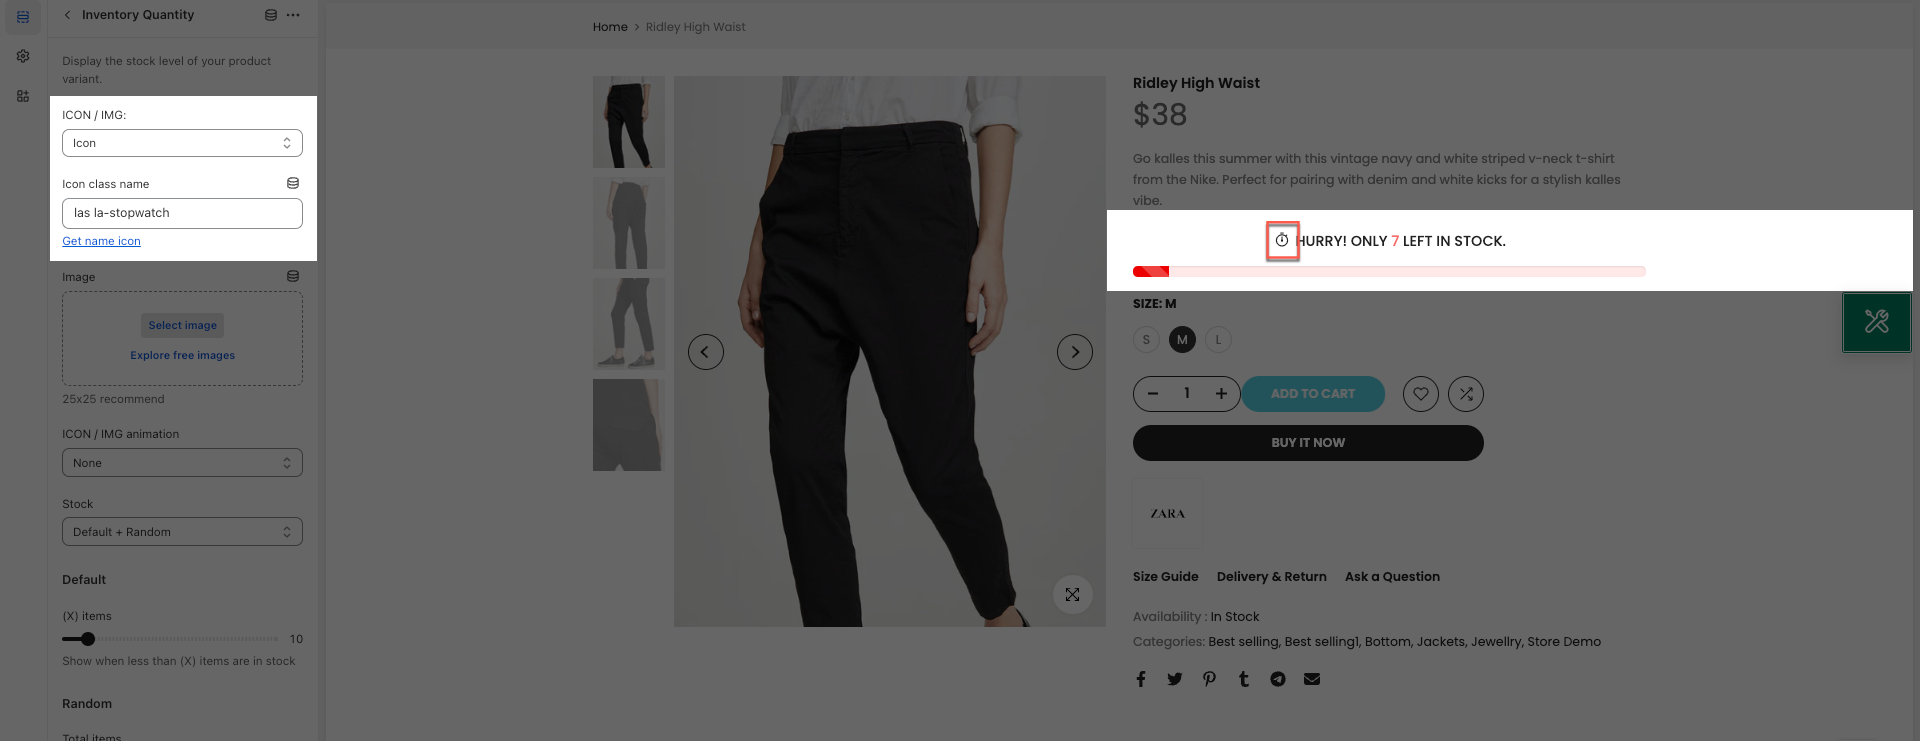
Image: works when choose the Image format, you can upload your custom image here.
ICON / IMG animation: Choose an animation style for the icon/ image. If you don't wanna use animation, please choose None.
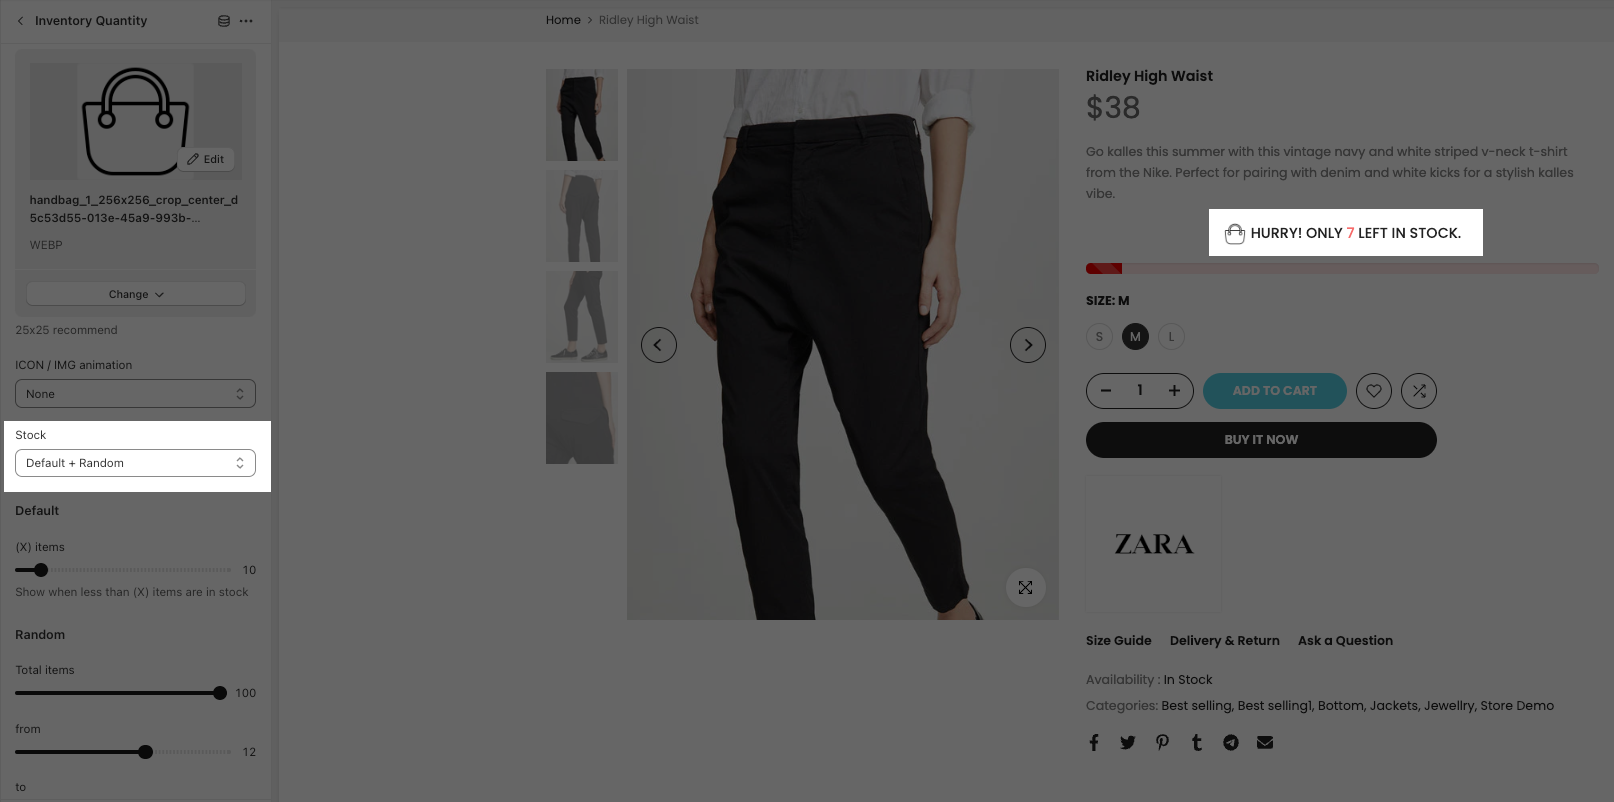
Stock: You can choose between Random and Default. If you choose Random, you can adjust the maximum quantity (fake quantity). If you choose Default, the real product quantity will show here.
Show Quantity by Default (Real quantity)
(X) items: You need to configure the total quantity of items larger than the actual quantity of the product that you configured in Shopify backend > Products.
Show Quantity Random (Fake quantity)
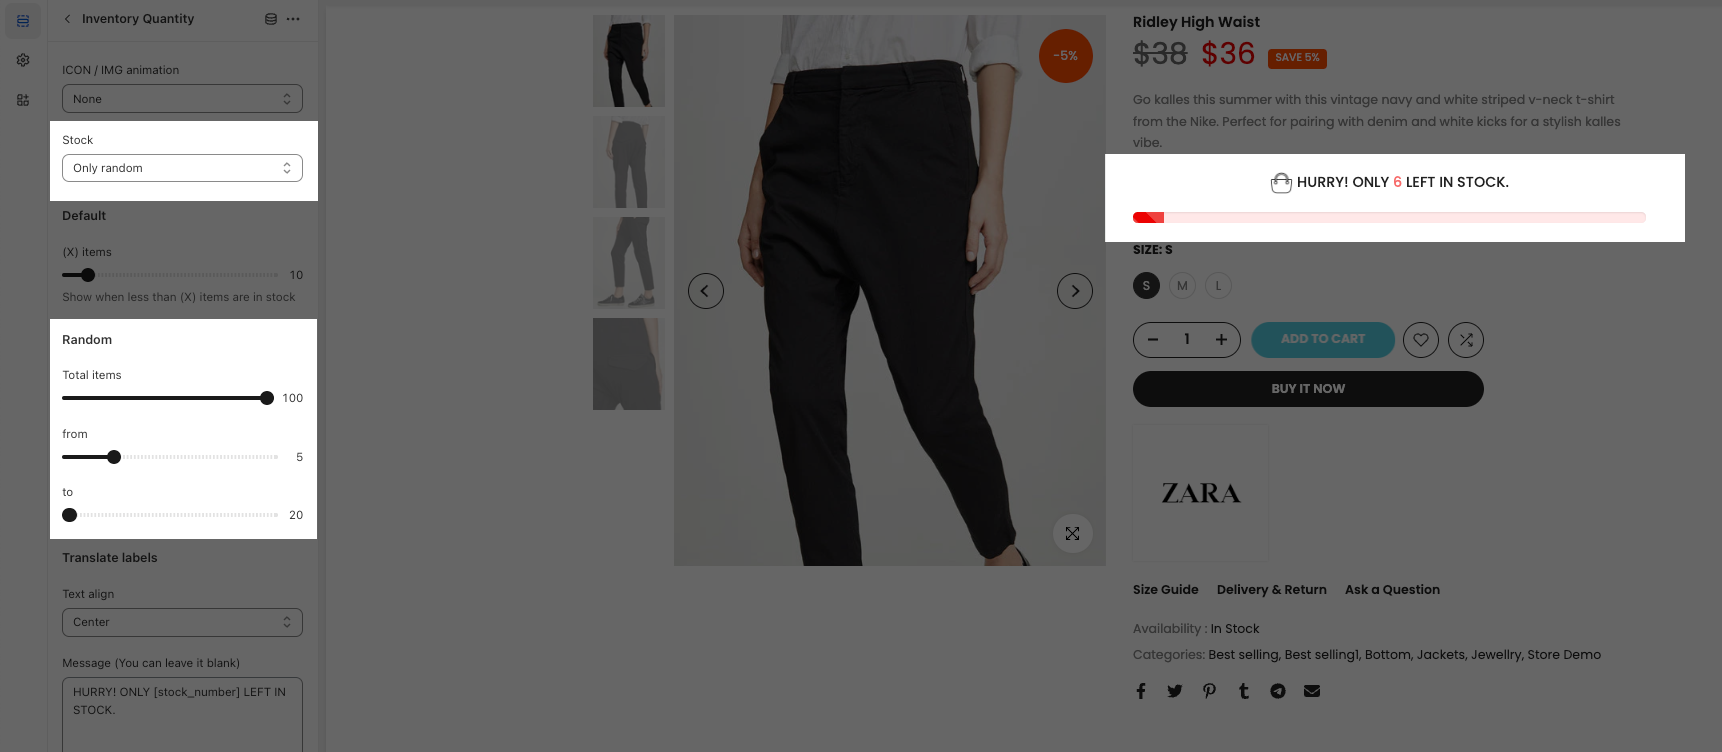
Total items: Configure the total quantity items that you wanna show in the
from (minimum number): Configure the minimum quantity number here.
to (maximum number): Configure the maximum quantity number here.
- Show Quantity Default + Random option will get the sum from random to be able to run the progress bar.
Translate Labels
You are allowed to adjust Text align, Message, Font size for the Inventory Quantity message
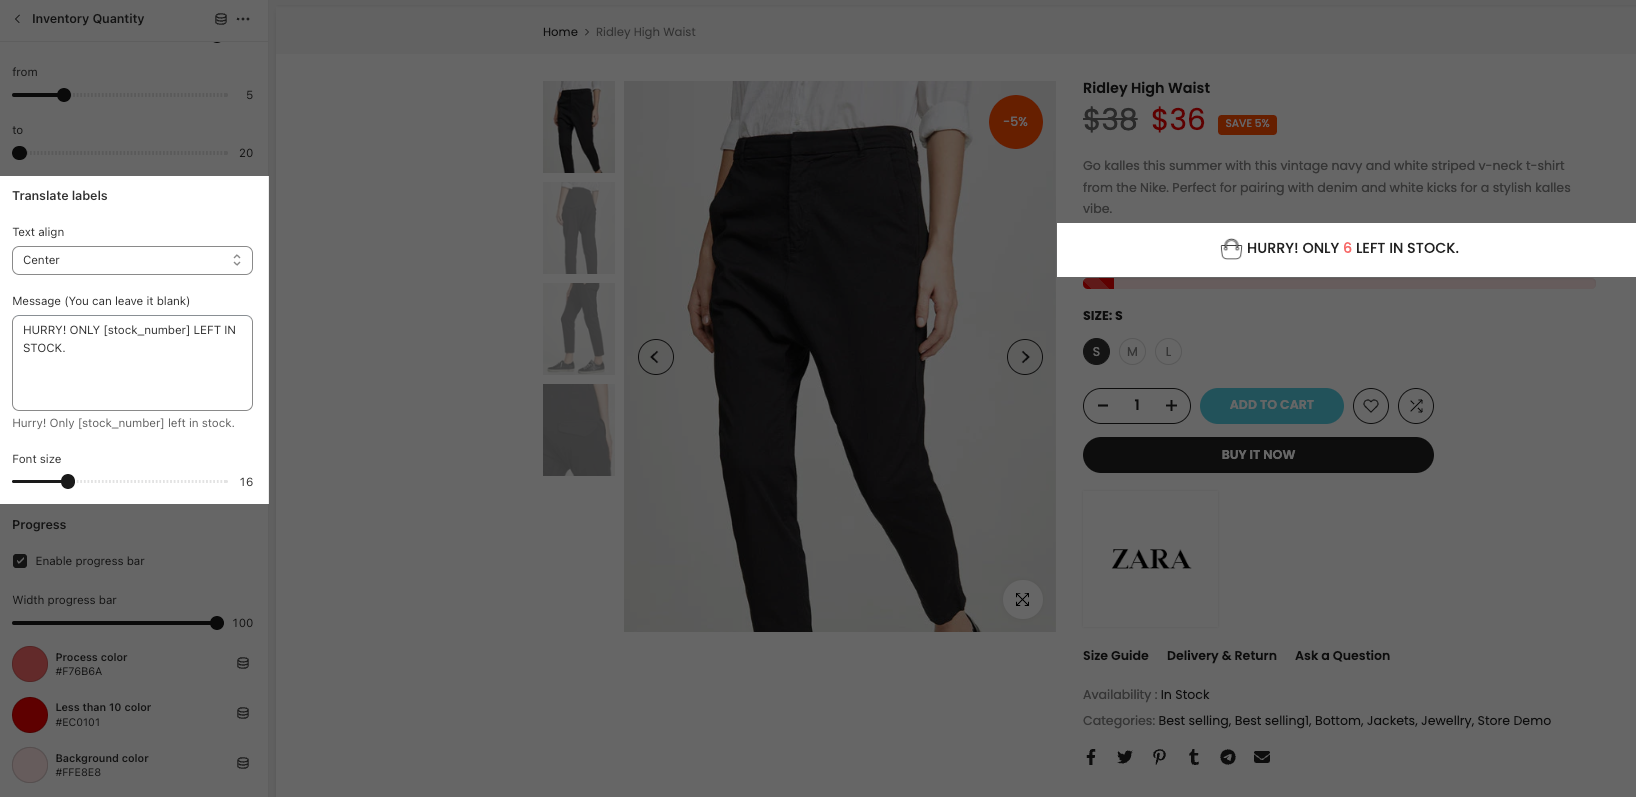
Progress Bar
Note: The Progress Bar will not work if you choose Show Quantity by Default
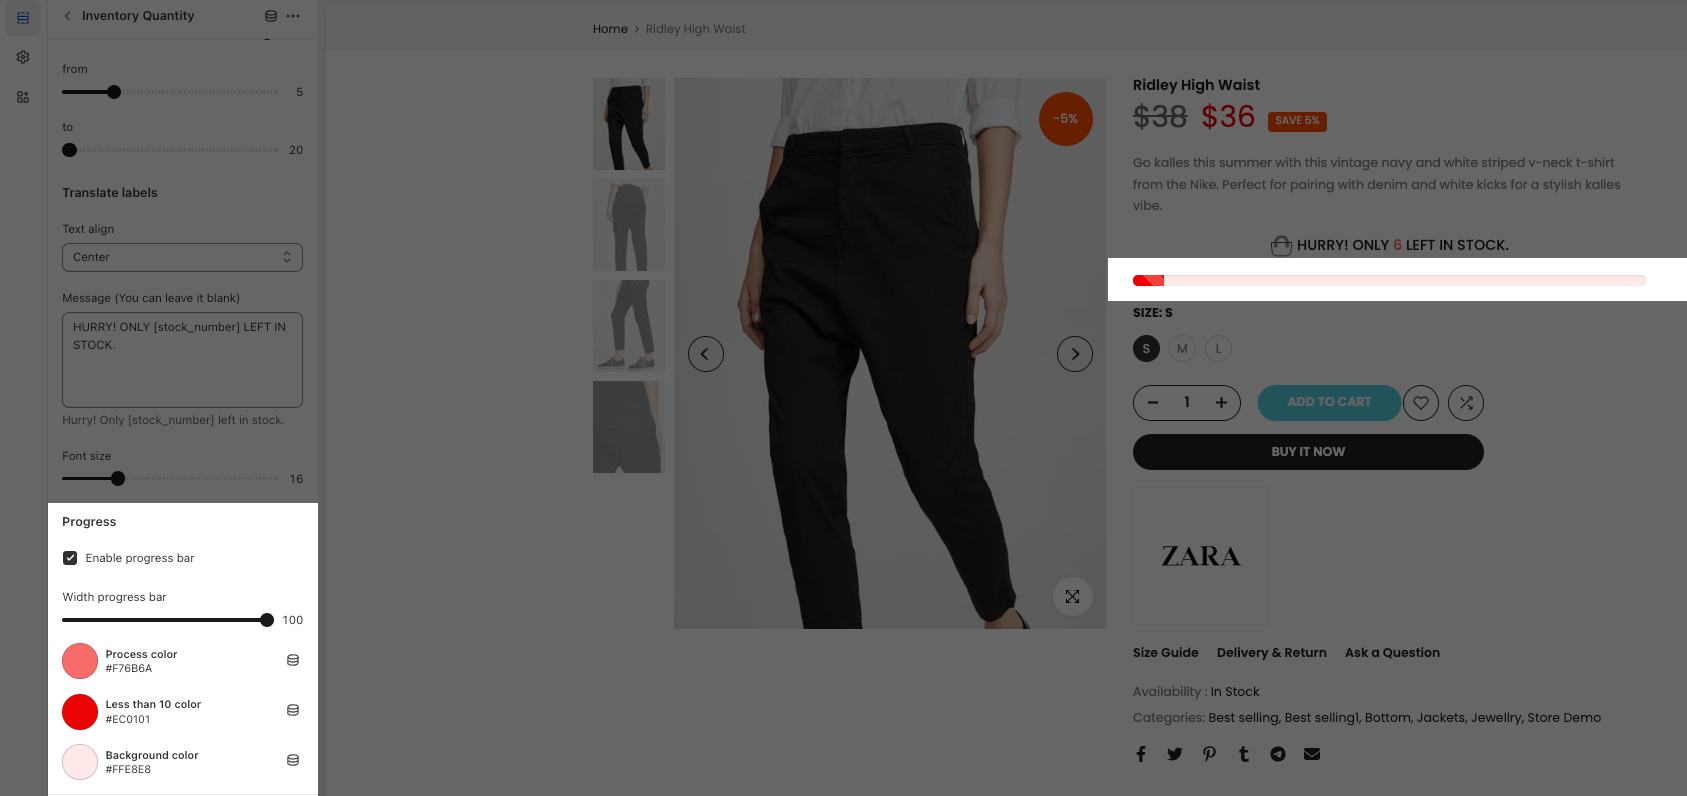
Enable progress bar: Tick on this checkbox to show the Inventory Quantity progress bar.
Width progress bar: Configure the width for the progress bar here.
Config the color for progress bar with Process color, Less than 10 colors, Background color
3. Trust badge
Using the Trust Badge helps create customer trust regarding products.
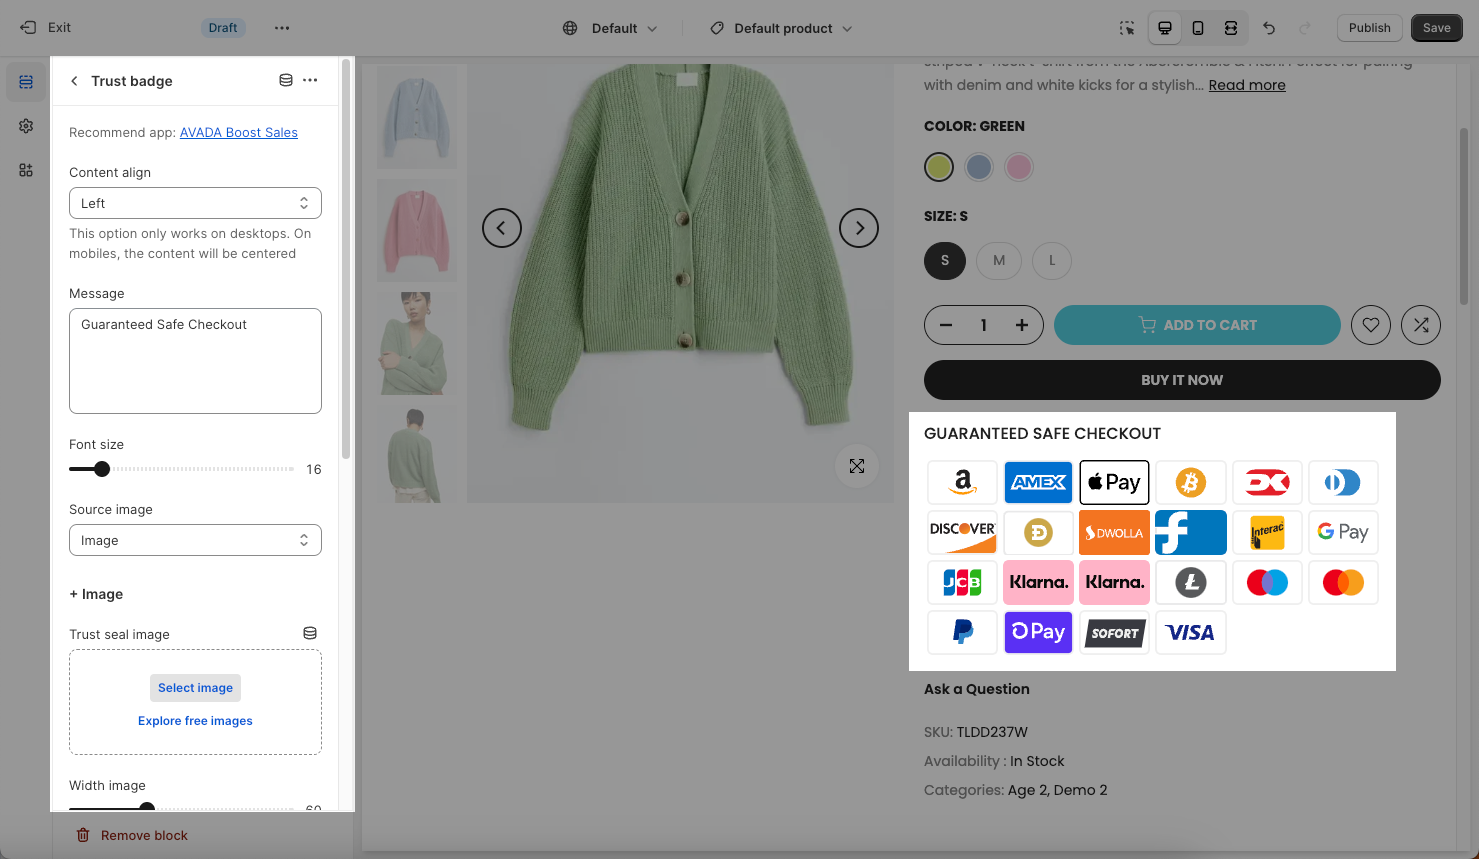
Content align: Configure the alignment for the Trust Badge content here. You can choose to align content Left, Right or Center.
Message: This option allows you to enter text for Trust Badge.
Font size: Adjust the font size for the message on the Trust Badge option here.
Source Image: You can choose between Image and SVG.
3.1. Trust Badge - Image
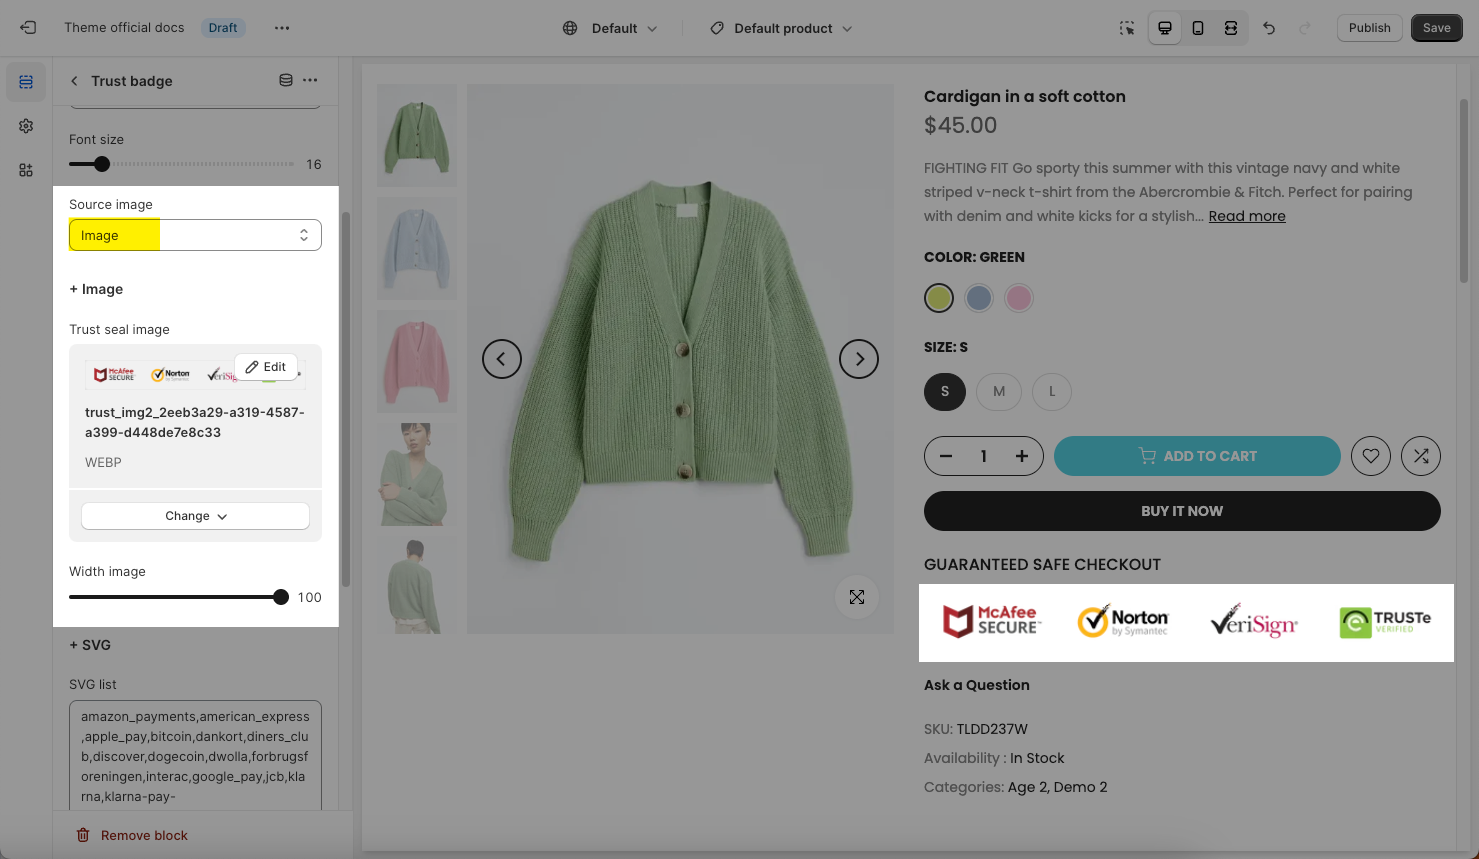
Trust seal image: You can upload a custom image for the Trust Badge here.
Width image: Configure the size for the Trust Badge image here. Drag the bar to increase/ reduce the width of the image.
3.2. Trust Badge - SVG Icons
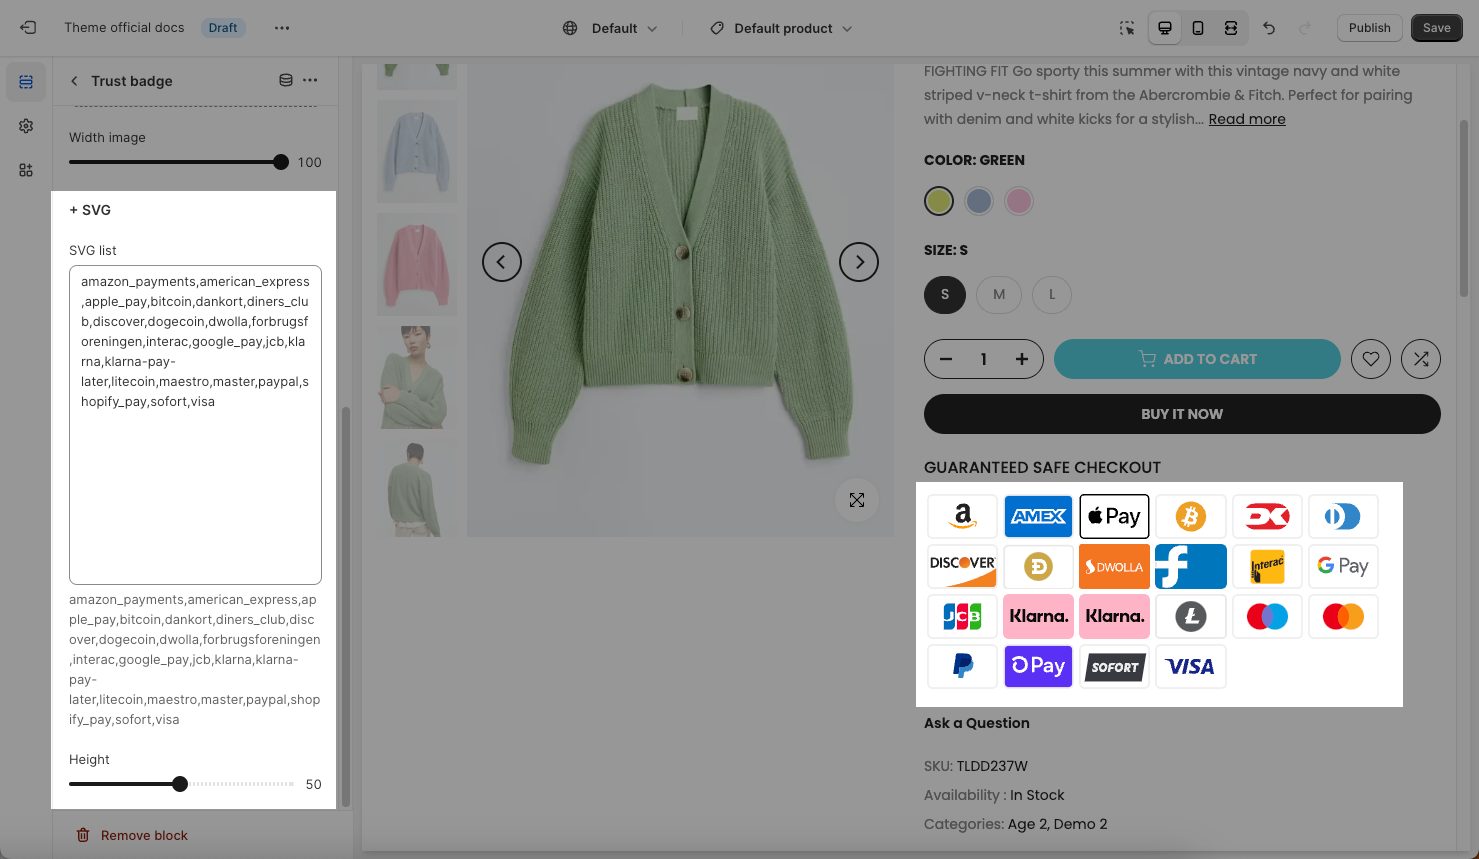
SVG List: You can enter or delete SVG icons for Trust Badge here. The list icon is supported in the list below. You can copy them into the field.
Height icon: Configure the size of the Trust Badge SVG icons here.
4. Live view
This is a fake feature – to help store owners boost sales in the store.
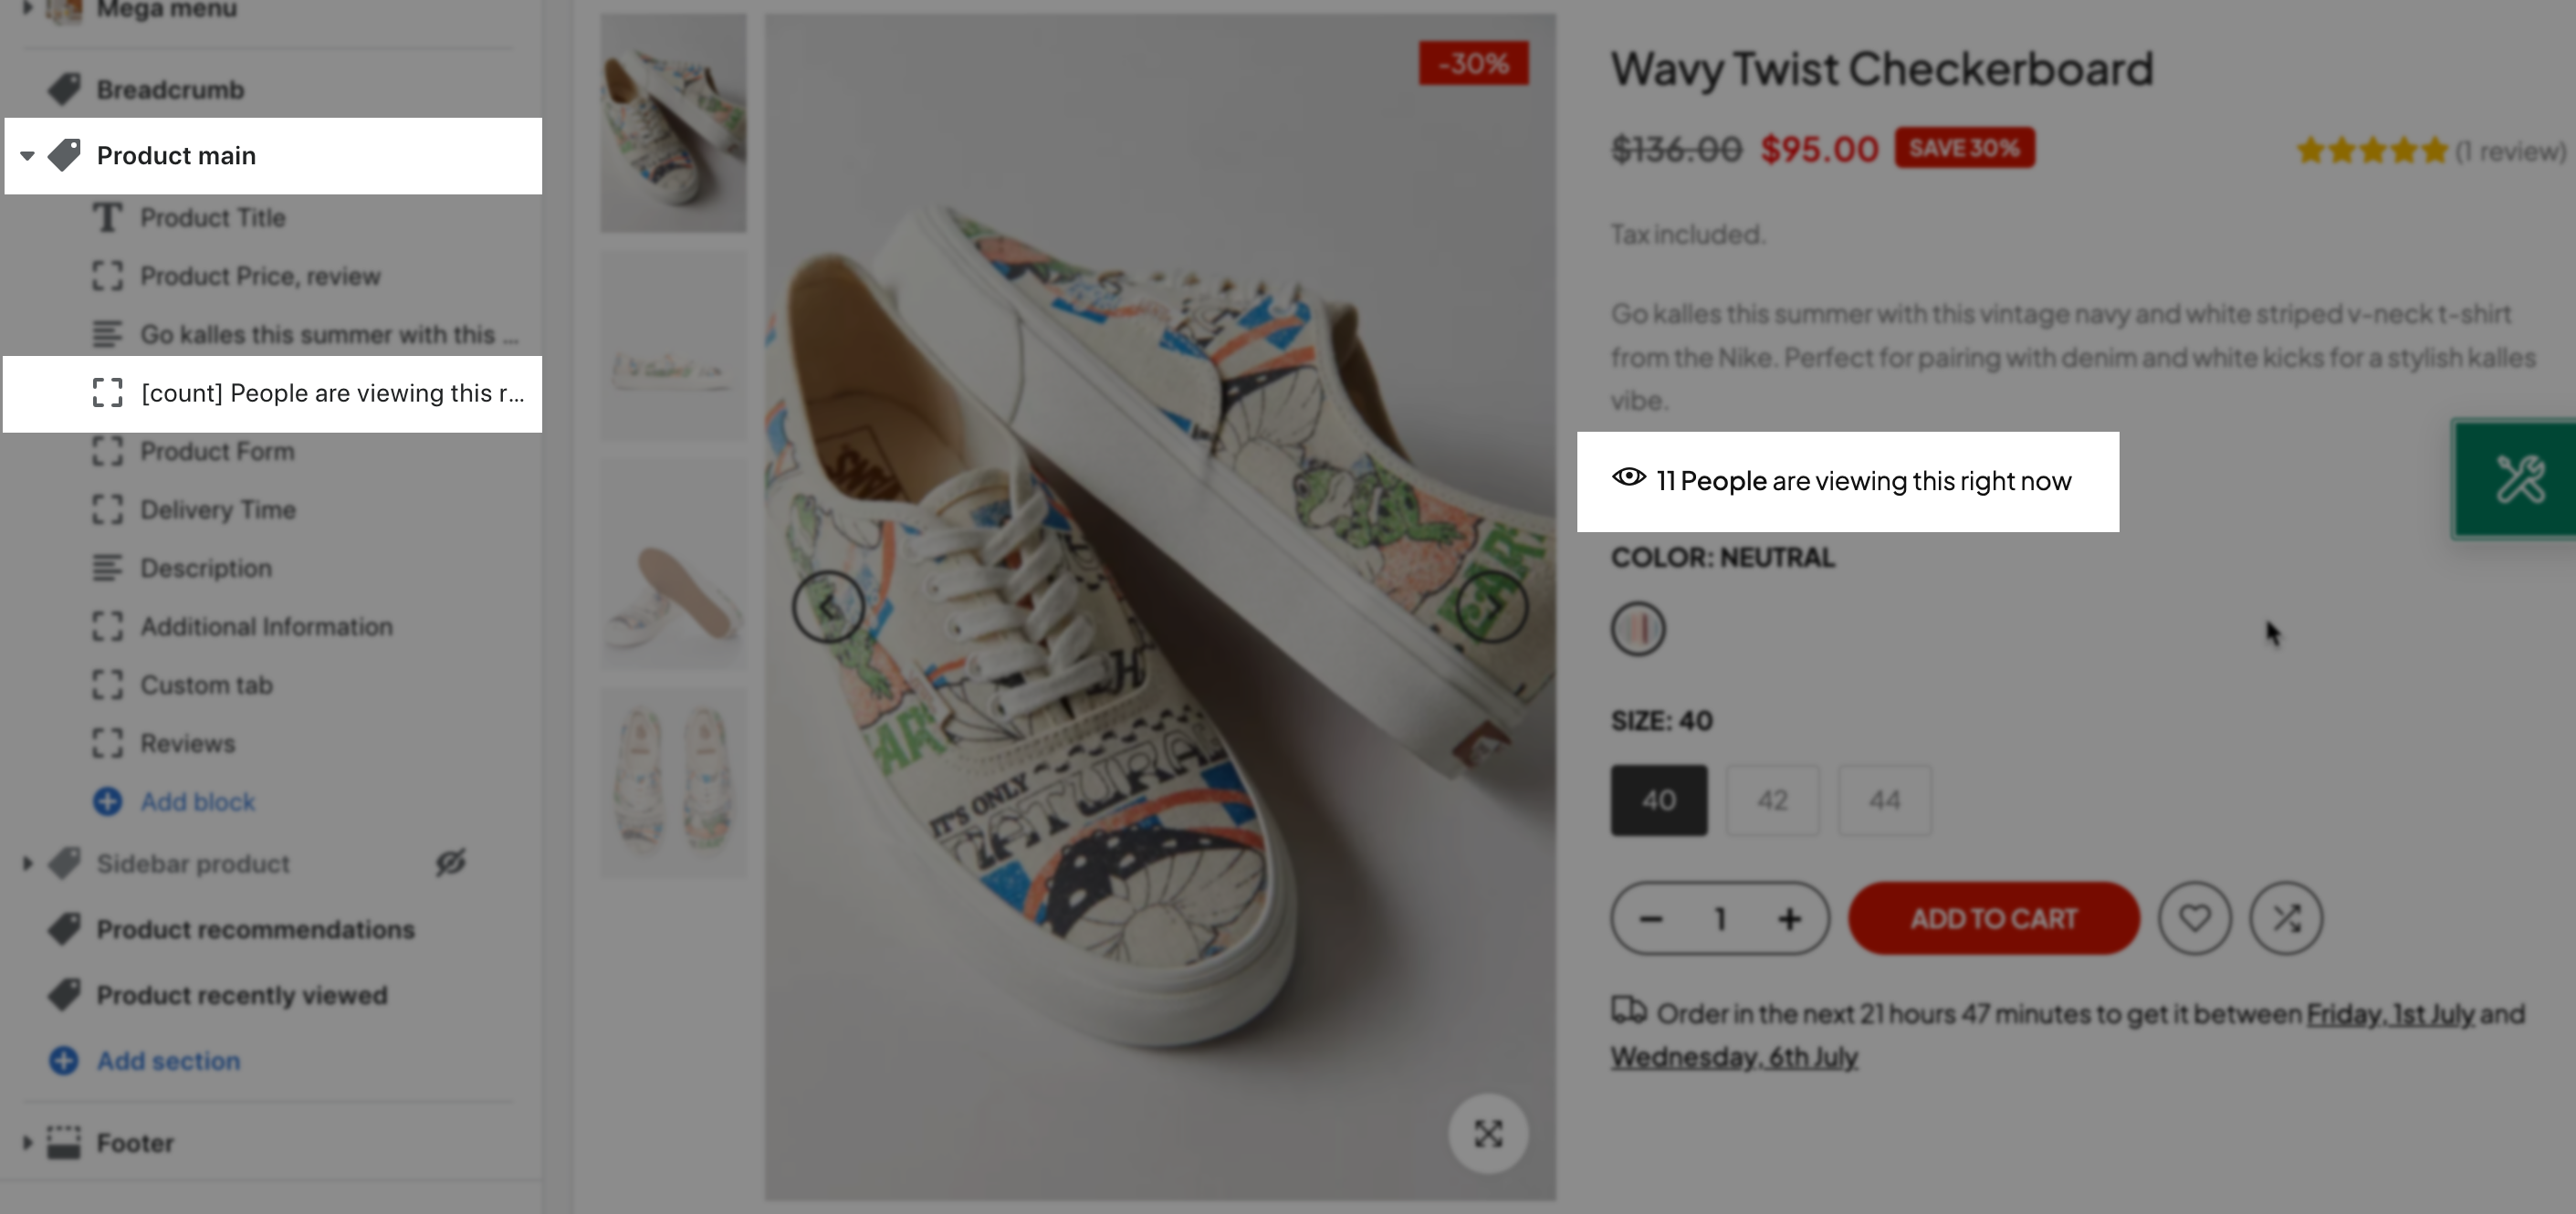
Click on the Live view block, the settings sidebar will open and you guys can configure some options below:
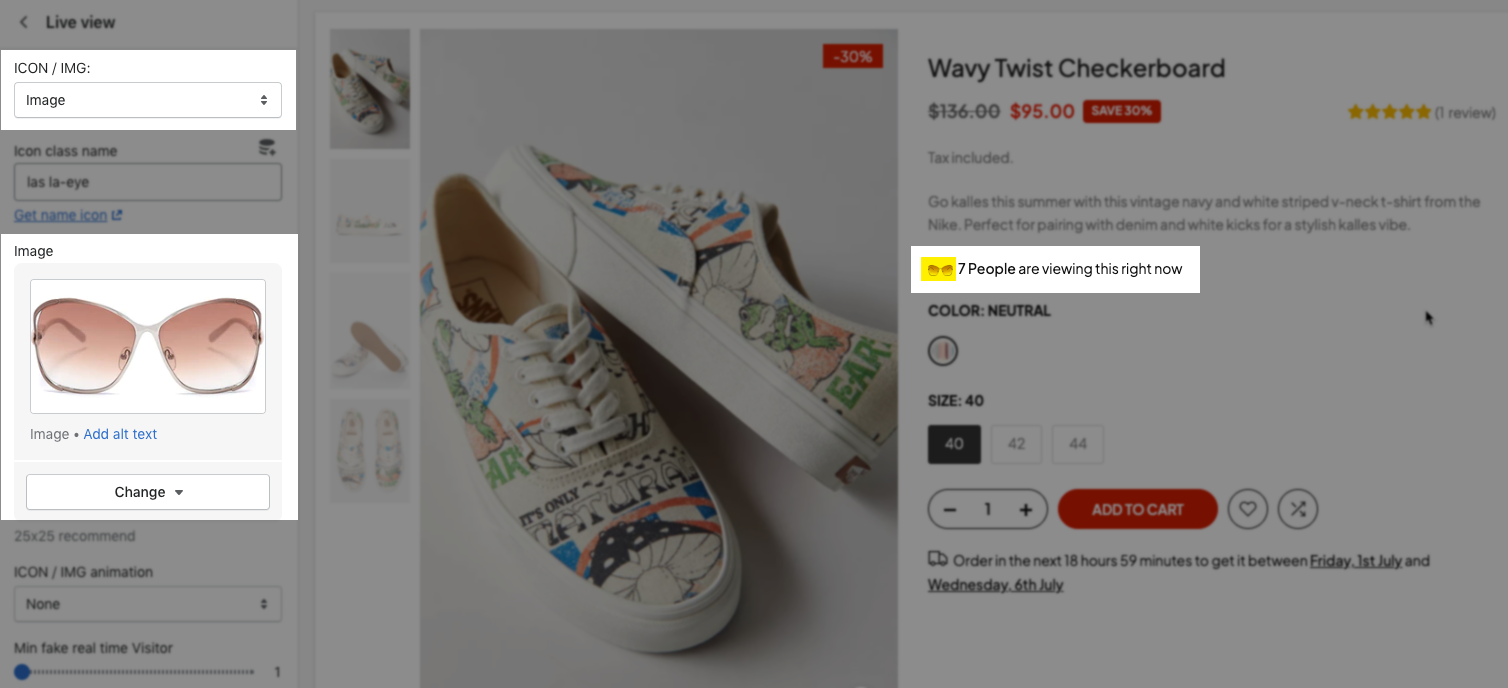
Icon/ IMG format: You can choose the format for the Live view logo here. Our theme supports showing an icon or a custom image here. Choose None if you don't wanna use a custom icon/ image before the Live view message.
Icon class name: If you choose the Icon format, you can get an icon on Line Awesome and paste the name of the icon here, it will show on the Live view message. Click the Get name icon button to navigate to the The4 Line Awesome icons Library. This option also supports configuring Metafield, so you can change the Live view icon class for every single product by clicking the Connect Dynamic Source button.
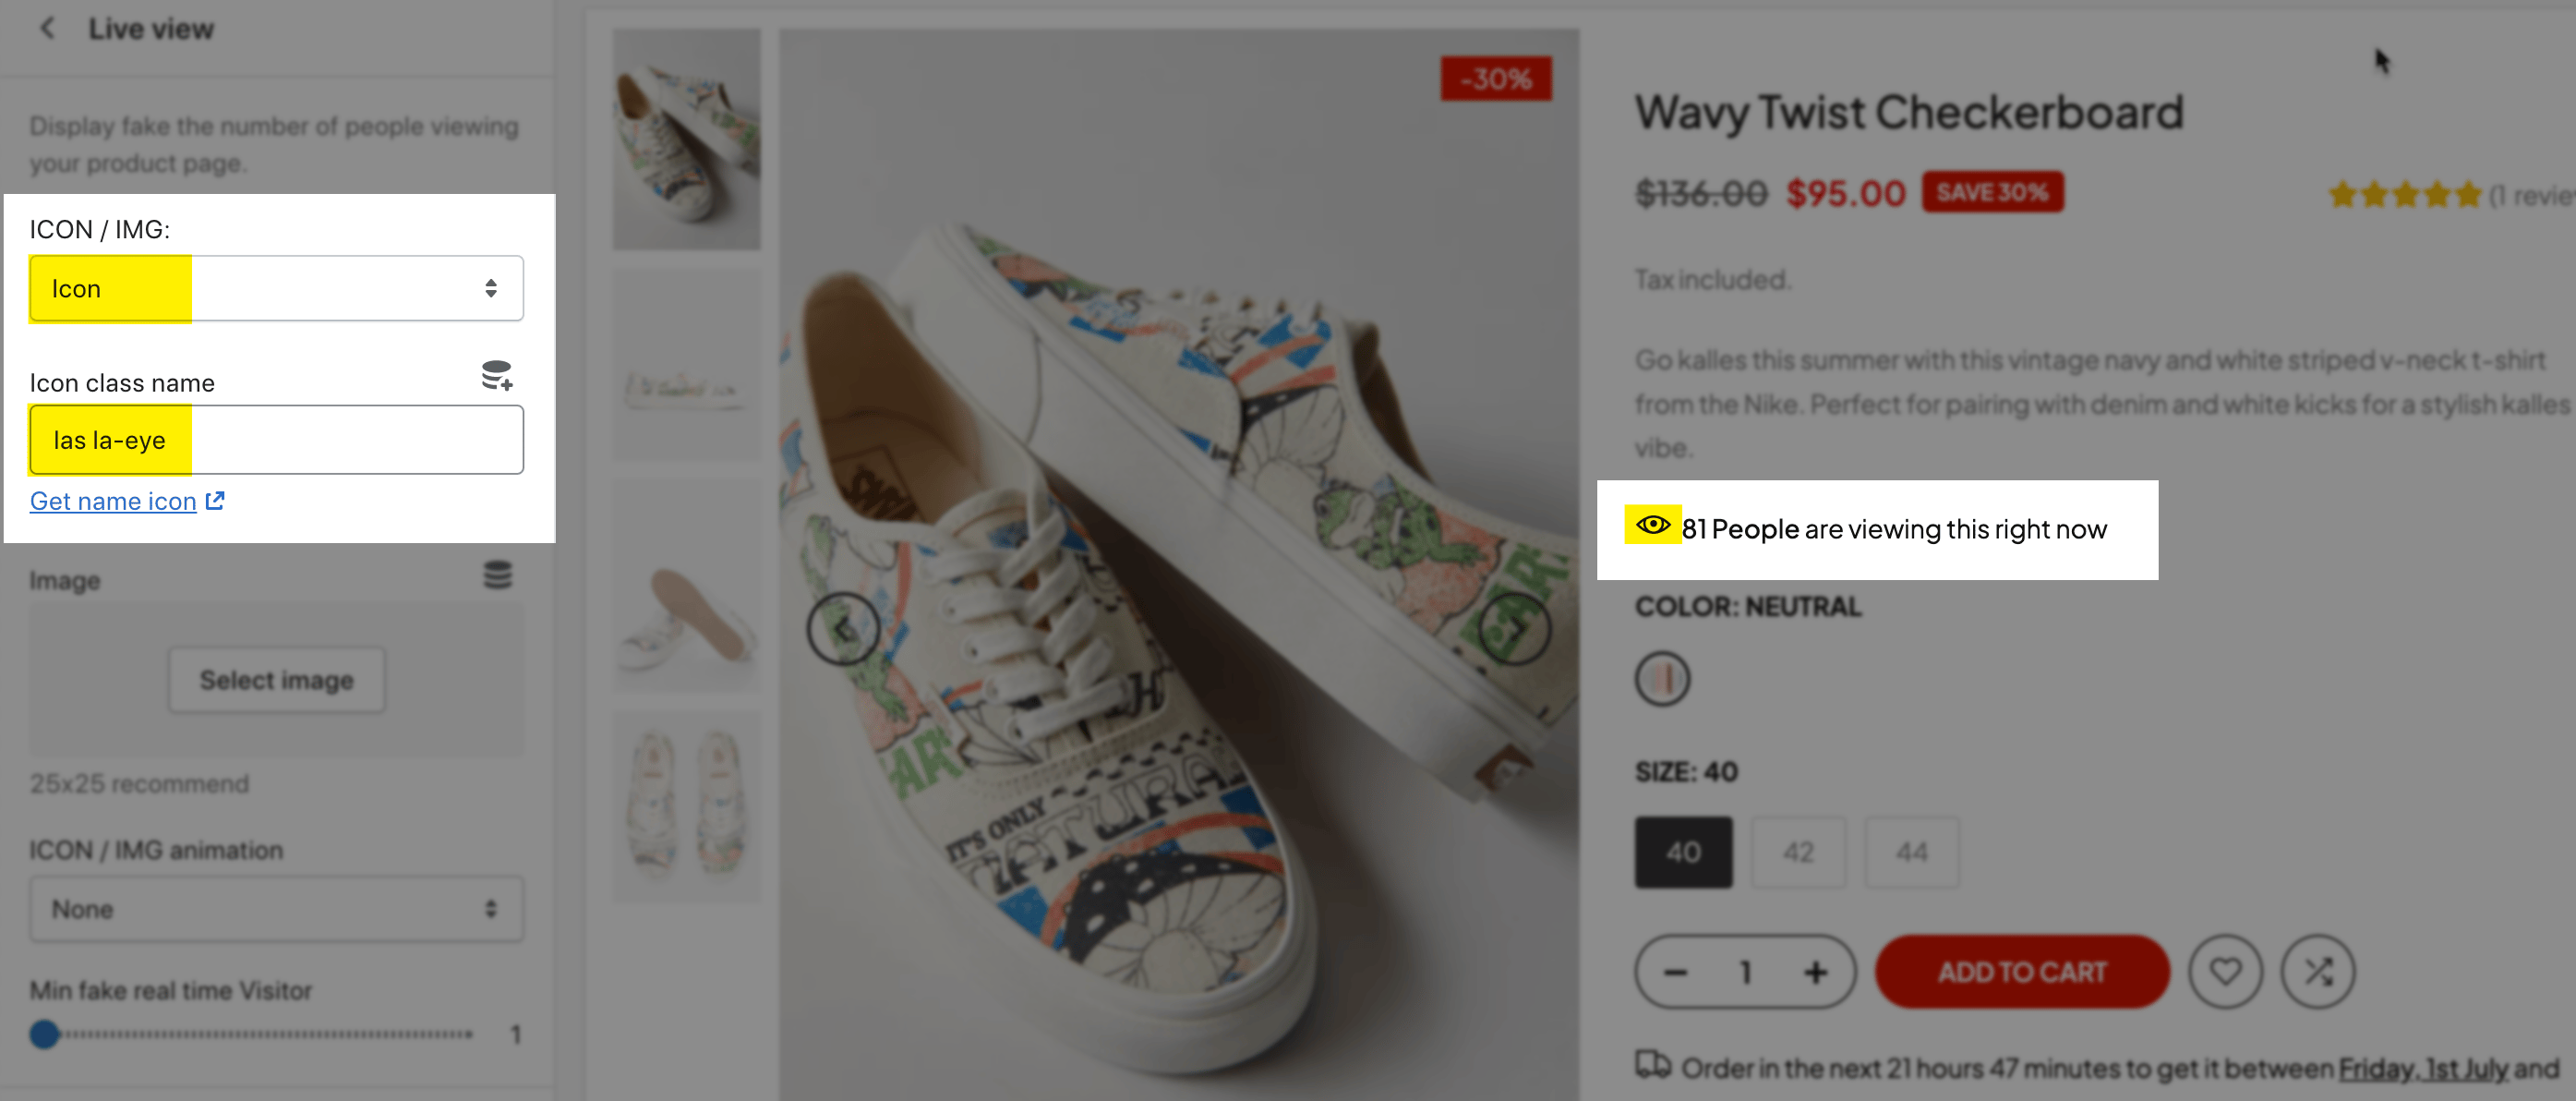
Image: If you choose the Image format, you can upload your custom image here. This option also supports configuring Metafield, so you can change the Live view custom image for every single product by clicking the Connect Dynamic Source button.
ICON / IMG animation: Choose an animation style for the Live view icon/ image. We have total of 7 animation styles for you to choose. If you don't wanna use animation, please choose None.
Min/ Max fake real-time Visitor: Configure the number of the minimum/ maximum visitor in real-time of the Live view option here.
Interval time: You can configure the time (seconds) that the number of visitors will change here. For example, The number of visitors will change every 5 seconds.
Live View Text box: You can add the content that you wanna show on the Live View message here.
5. Delivery time
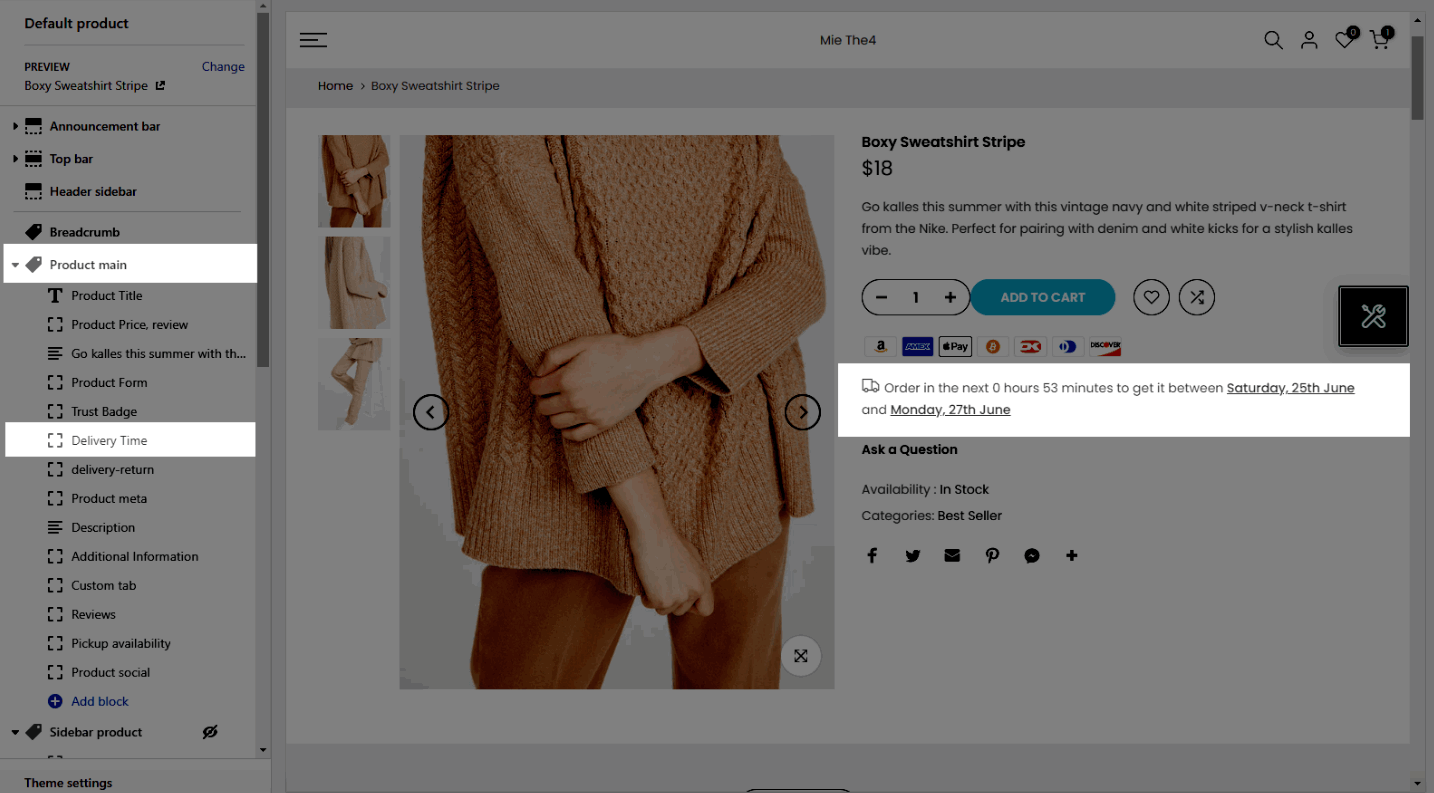
Click on the Delivery Time block, the settings sidebar will open and you guys can configure some options below:
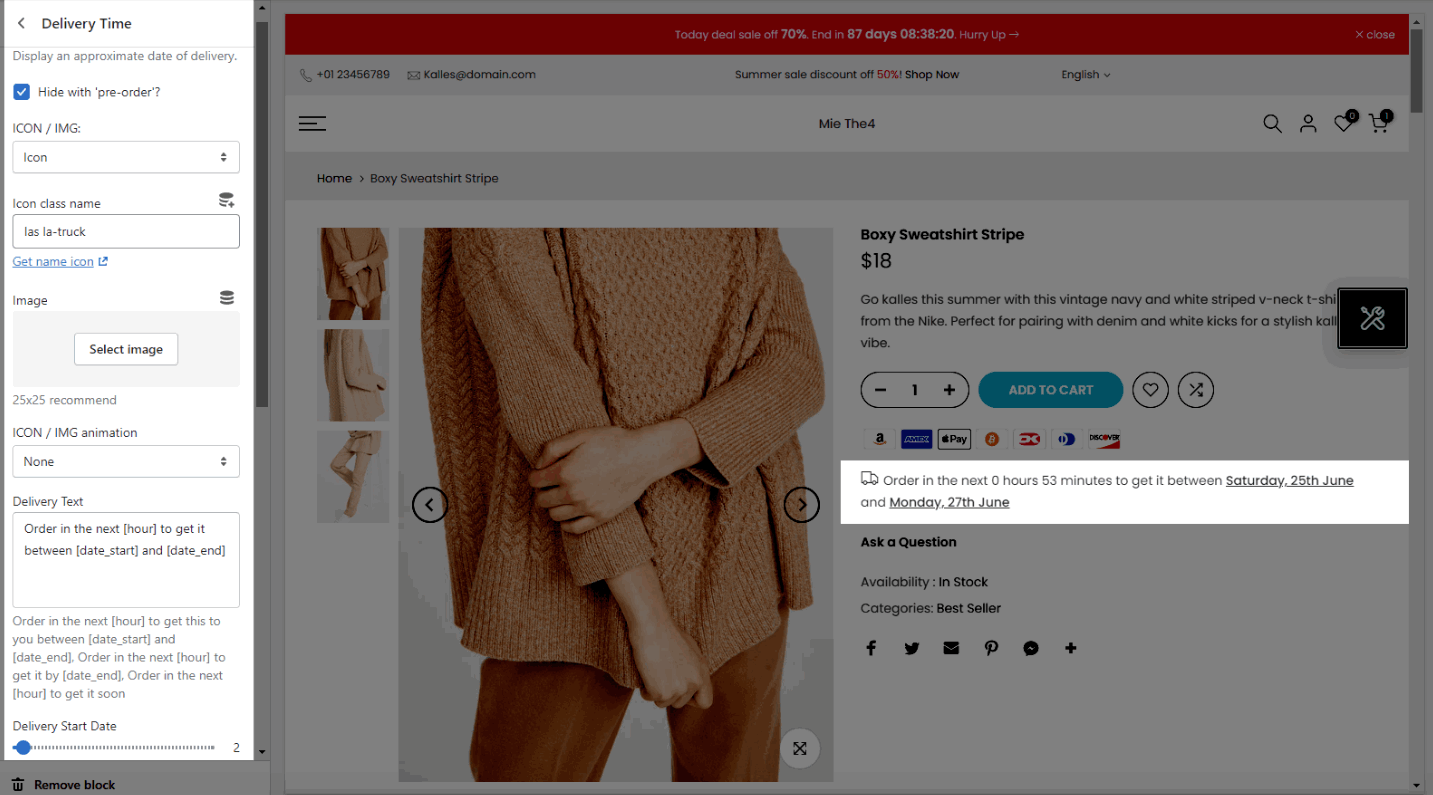
Hide with ‘pre-order’ checkbox: Tick on this checkbox to hide/ remove the Delivery time message on all Pre-order products.
Icon/ IMG format: You can show an icon or a custom image here. Choose None if you don't wanna use a custom icon/ image.
Icon class name: works when choose the Icon format. Click the Get name icon button to navigate to the Line Awesome icons Library.
Image upload: works when choose the Image format, you can upload your custom image here.
ICON/IMG animation: Choose an animation style for the Live view icon/ image. If you don't wanna use animation, please choose None.
Delivery Text: You can add the text that you wanna show on the Delivery Time here. The value: hour, date_start, and date_end should be put in [...] otherwise it cannot show the time correctly.
Exclude Days From: This option allows you to configure the time set for Only Delivery and Shipping & Delivery.
5.1. Exclude Days From: Only Delivery
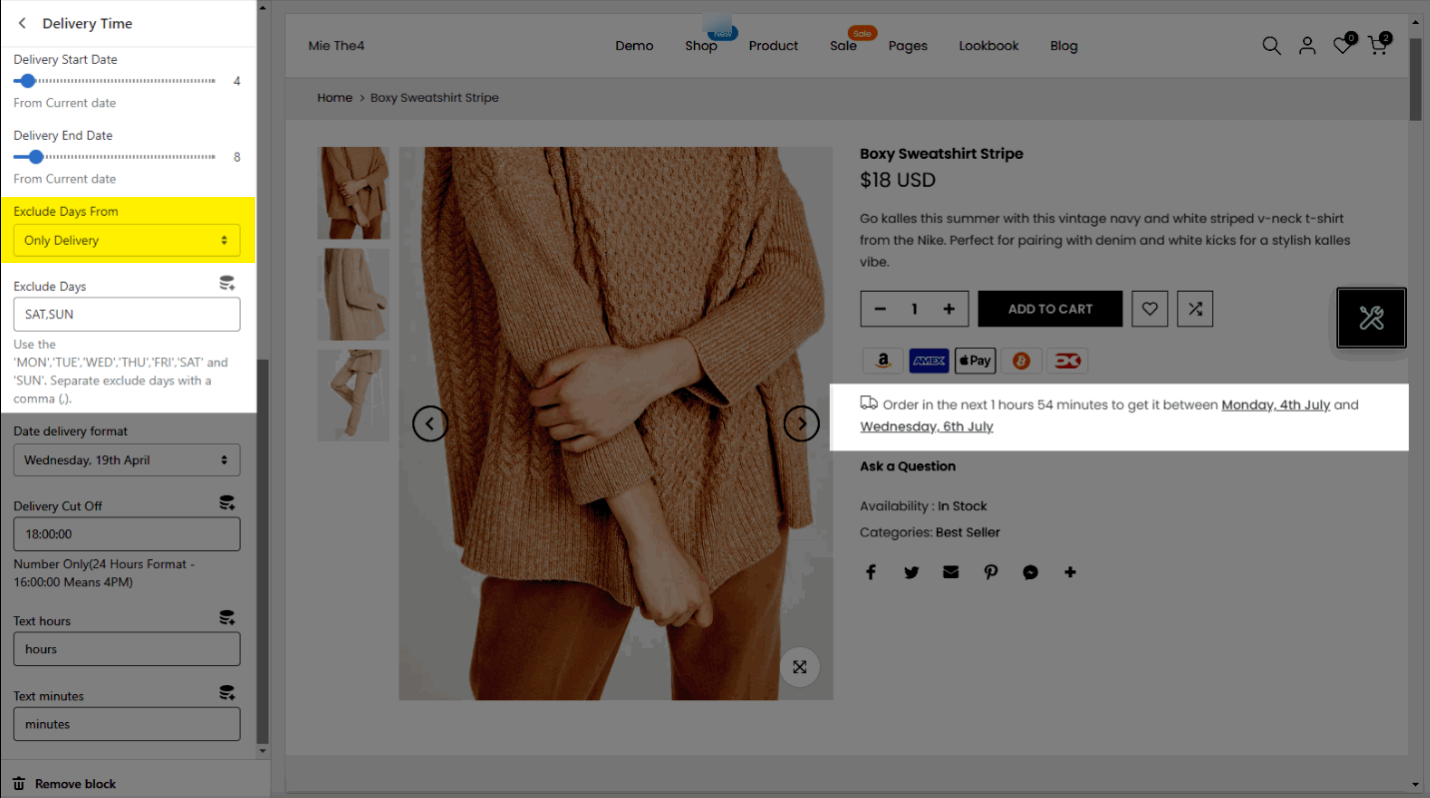
Note: For only delivery, if your shipping and delivery dates overlap with the exclusion date, the time will be rolled over to the next day (the date does not overlap with the exclusion date).
Delivery Start Date: You set Delivery Start Date: 4 days; today is Tuesday, 28th June and Exclude Days as SAT, SUN (You have excluded Saturday, 2nd July and Sunday, 3rd July).
=> Tuesday, 28th June + Delivery Start Date: 4 days = Saturday, 2nd July; however the shipping date overlaps with the exclusion date, and your time will be moved to Monday, 4th July.
Delivery End Date: You set Delivery End Date: 8 days; today is Tuesday, 28th June and Exclude Days as SAT, SUN.
=> Tuesday, 28th June + Delivery End Date: 8 days = Wednesday, 6th July is the Delivery End Date (Because your delivery date does not coincide with the exclusion date)
5.2. Exclude Days From: Shipping & Delivery
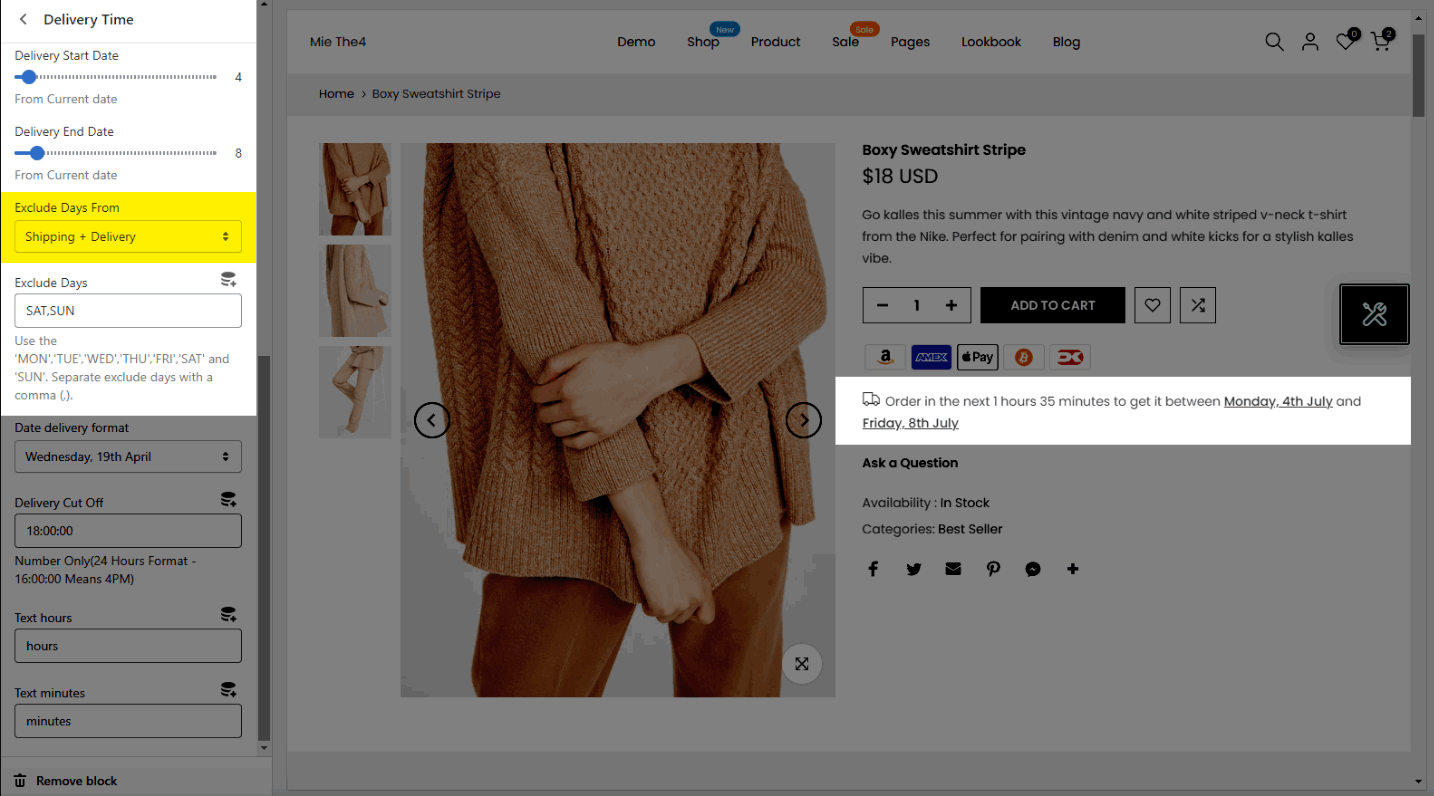
Shipping & Delivery times are calculated as follows: If your shipping and delivery times coincide with an exclusion date, add that date to your total shipping and delivery dates. Follow the example to explain below:
Delivery Start Date: You set Delivery Start Date: 4 days; today is Tuesday, 28th June and Exclude Days as SAT, SUN (You have excluded Saturday, 2nd July and Sunday, 3rd July).
=> Tuesday, 28th June + Delivery Start Date: 4 days = Saturday, 2nd July; however the shipping date overlaps with the exclusion date, and your time will be added 2 days. So the shipping time is Monday, 4th July.
Delivery End Date: You set Delivery End Date: 8 days; today is Tuesday, 28th June and Exclude Days as SAT, SUN (There are have Saturday, 2nd July and Sunday, 3rd July)
=> Tuesday, 28th June + Delivery End Date: 8 days + 2 days excluded = Friday, 8th July. This day the product will be delivery for customer.
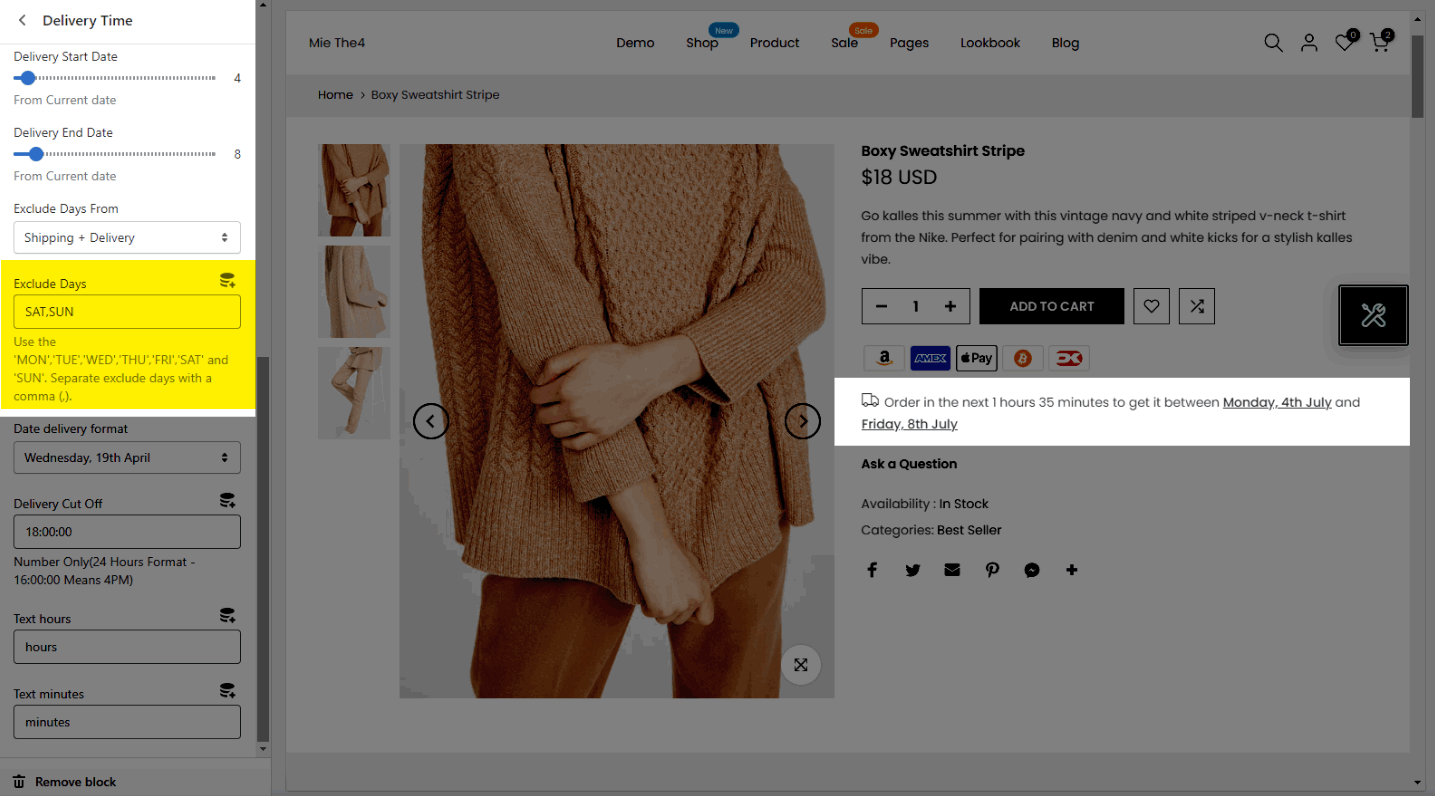
Exclude Days: You can add the day in a week that you wanna exclude here.
Delivery date format: The theme has a total of 12 formats for the date, you can pick a format that you wanna use.
Delivery Time Cut Off: You can set the time in the day that you want to cut off the delivery here.
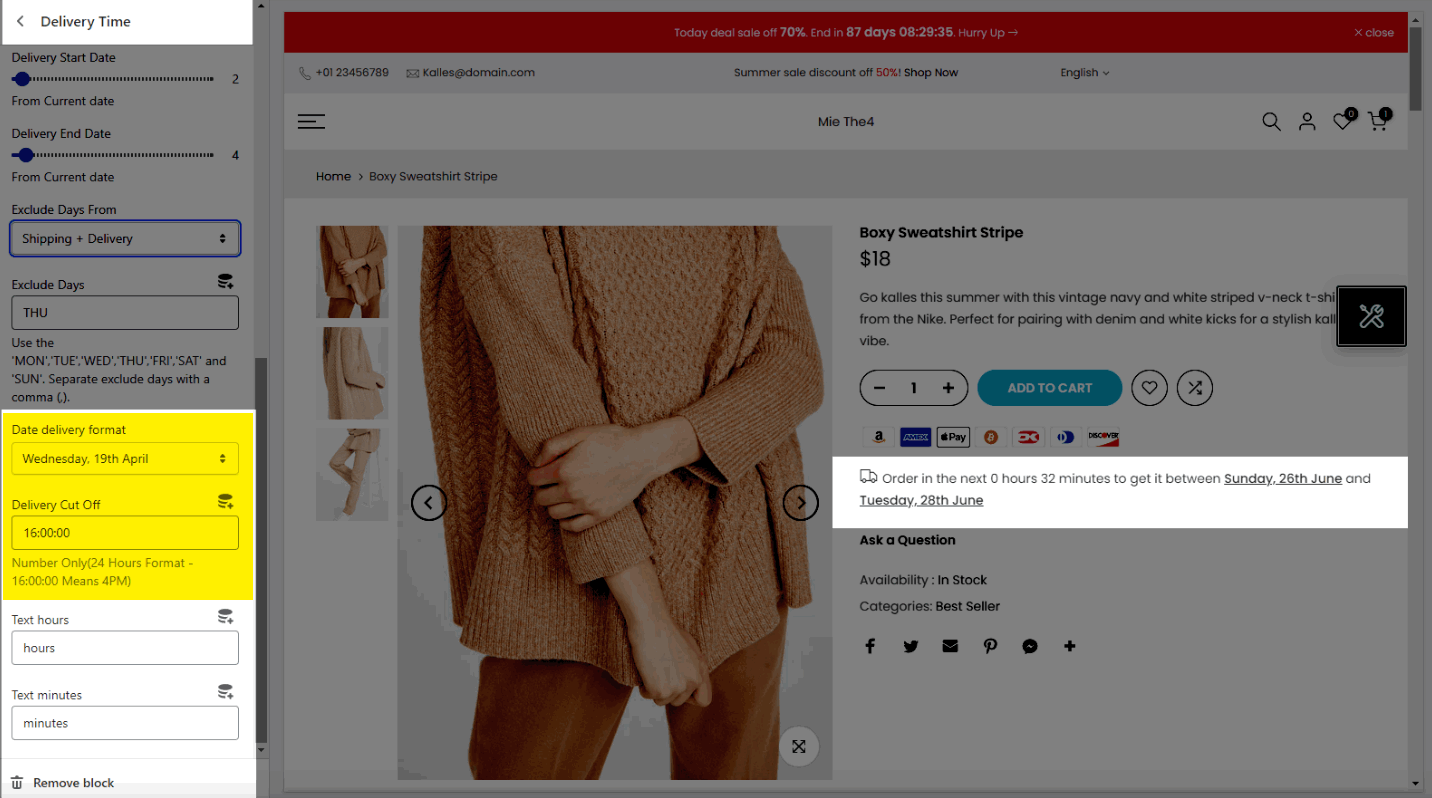
Example: You wanna cut-off Delivery time at 16:00 pm and after that, the time will move to the next day and show the countdown timer. You can use Metafield to configure the Delivery Time Cut Off for some specific products.
Text hours/ minutes: This option allows you can customize the text of the Text hours/ minutes. Example: In your language, the hours/ minutes are Stunden/Minuten. You can use Metafield to configure the text of the time for some specific products.
5.3. Delivery time with metafield
You can read this article to know how to use Metafield to configure different Delivery Start/ End dates for specific products.
6. Total Sold Flash
This is a fake feature that helps store owners boost sales!
This block shows the number of products that were bought at a specific time. This block will help customers trust your product and may result in a faster purchase.
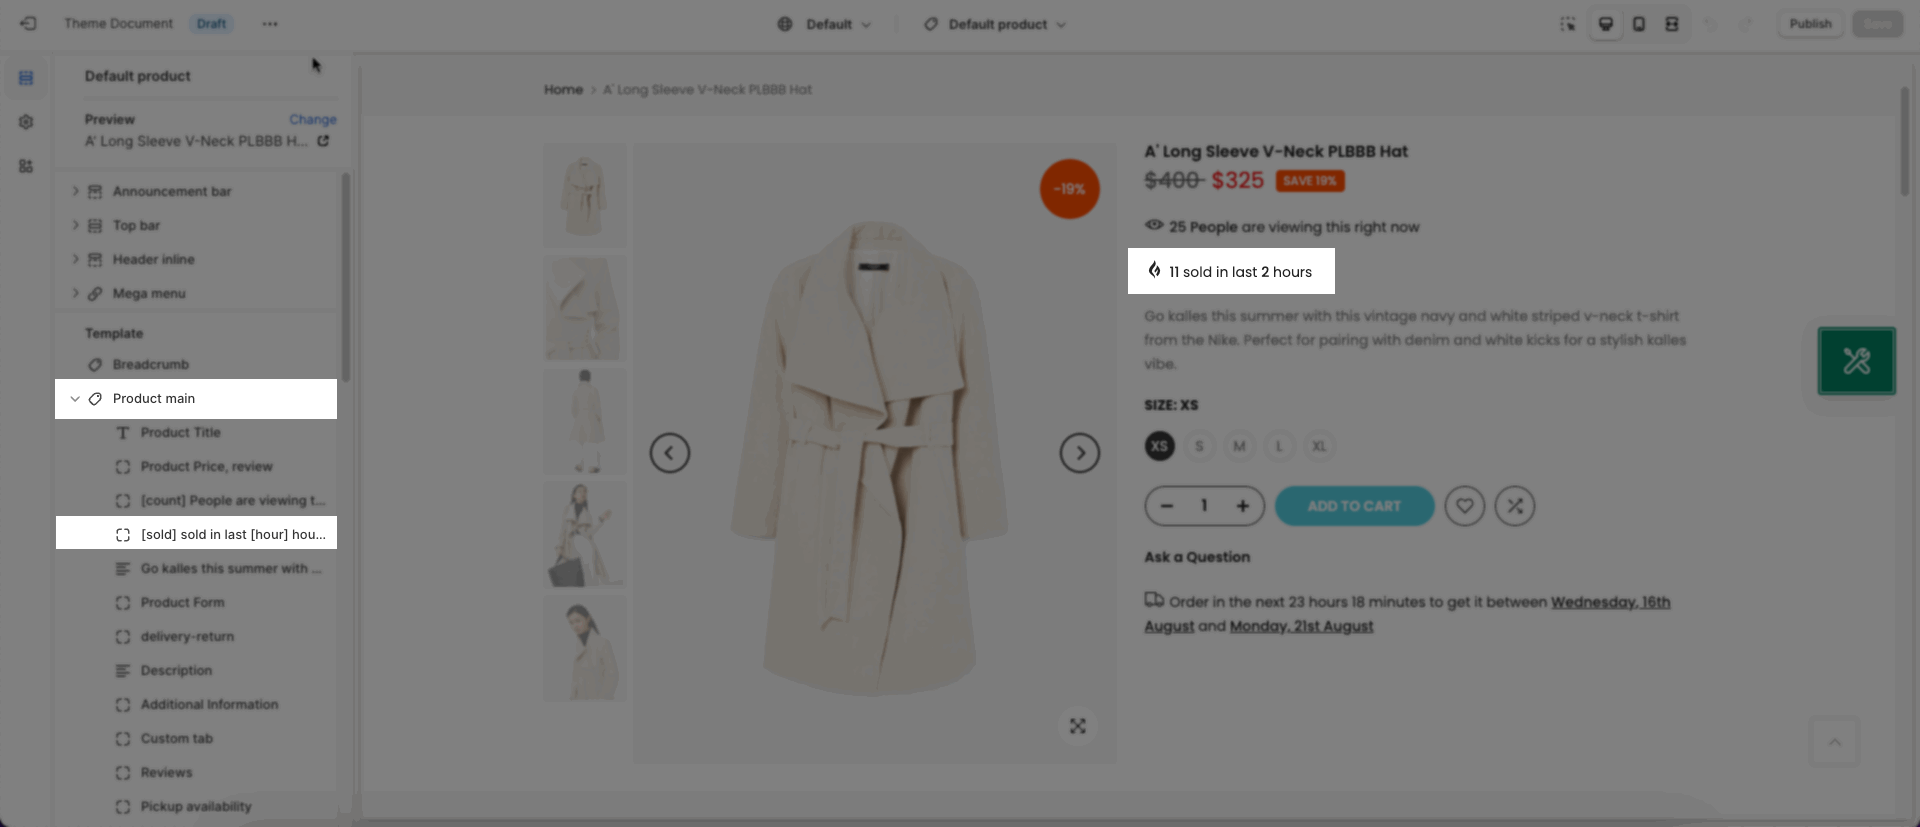
Click on the Total Sold Flash block, the settings sidebar will open and you guys can configure some options below:
Icon/ IMG format: You can choose the format for the Total sold flash icon here. Our theme supports showing icons or custom images here. Choose None if you don't want to use a custom icon/ image before the Total sold flash message.
Icon class name: If you choose the Icon format, you can get an icon on Line Awesome and paste the name of the icon here, it will show on the Total sold flash message. Click the Get name icon button to navigate to the The4 Line Awesome icons Library.
Image: If you choose the Image format, you can upload your custom image here.
ICON / IMG animation: Choose an animation style for the Total sold flash icon/ image.
Min/ Max quantity: The product quantity will be shown randomly. However, you can adjust the min/max product quantity that was sold on Sold Flash option here.
Min/ Max time: You can configure the number of the minimum/ maximum time that will show on the Total sold flash option.
Text: You can enter the content that you wanna show on the Total sold flash option here.


