In WordPress, a Menu is a customizable navigation tool that allows you to create and manage links to various pages, categories, and custom content on your website. You can easily set up and organize these menus through the WordPress Customizer dashboard.
A Multi-menu setup involves using several menus to improve site navigation and user experience. This approach helps to organize content effectively and makes it easier for visitors to find information.
1. Creat a Menu
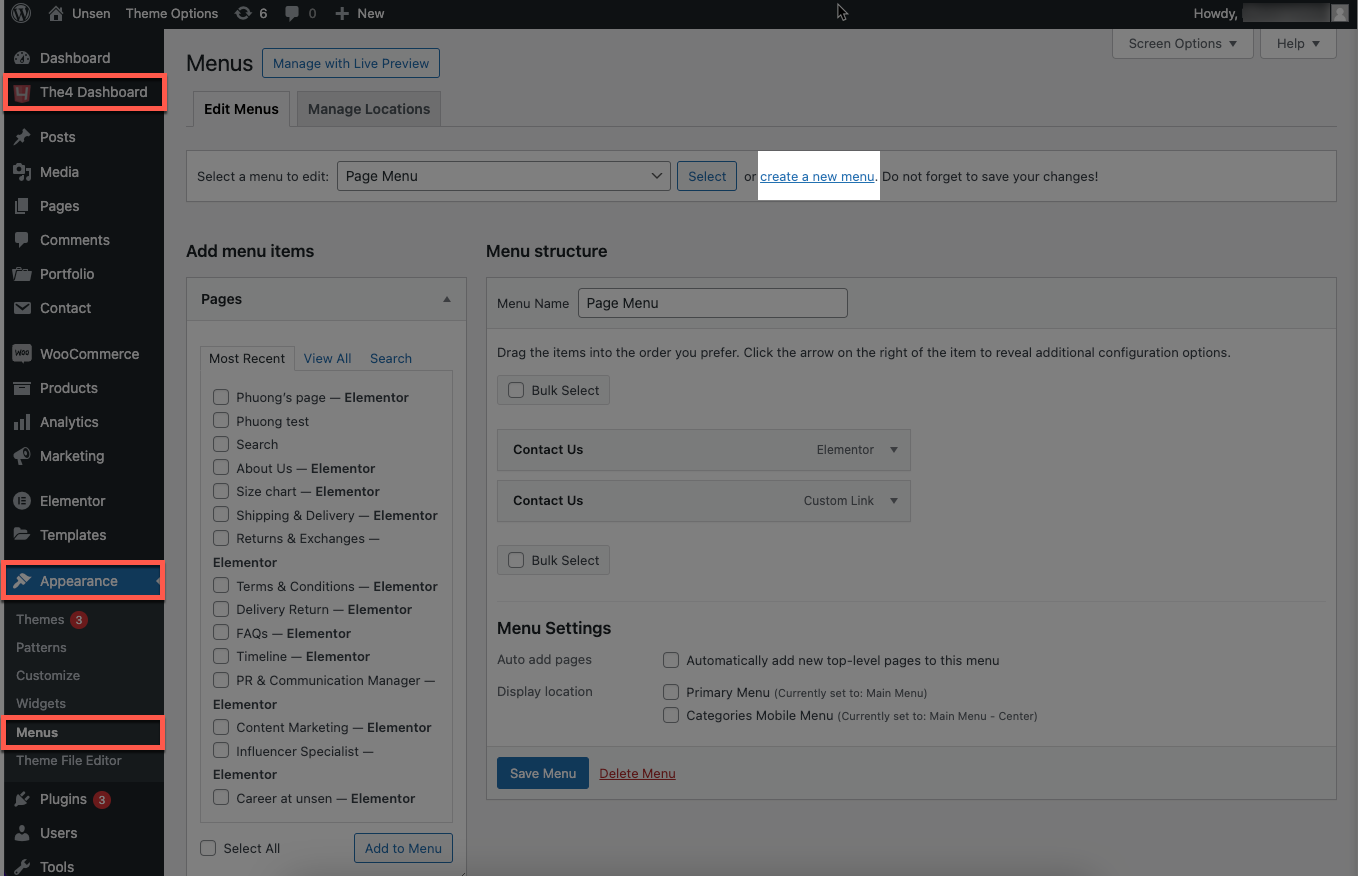
Step 1. From the left sidebar of the Dashboard, select the The4 Dashboard > Appearance> Menus> creat a new menu link to bring up the Menu Editor.
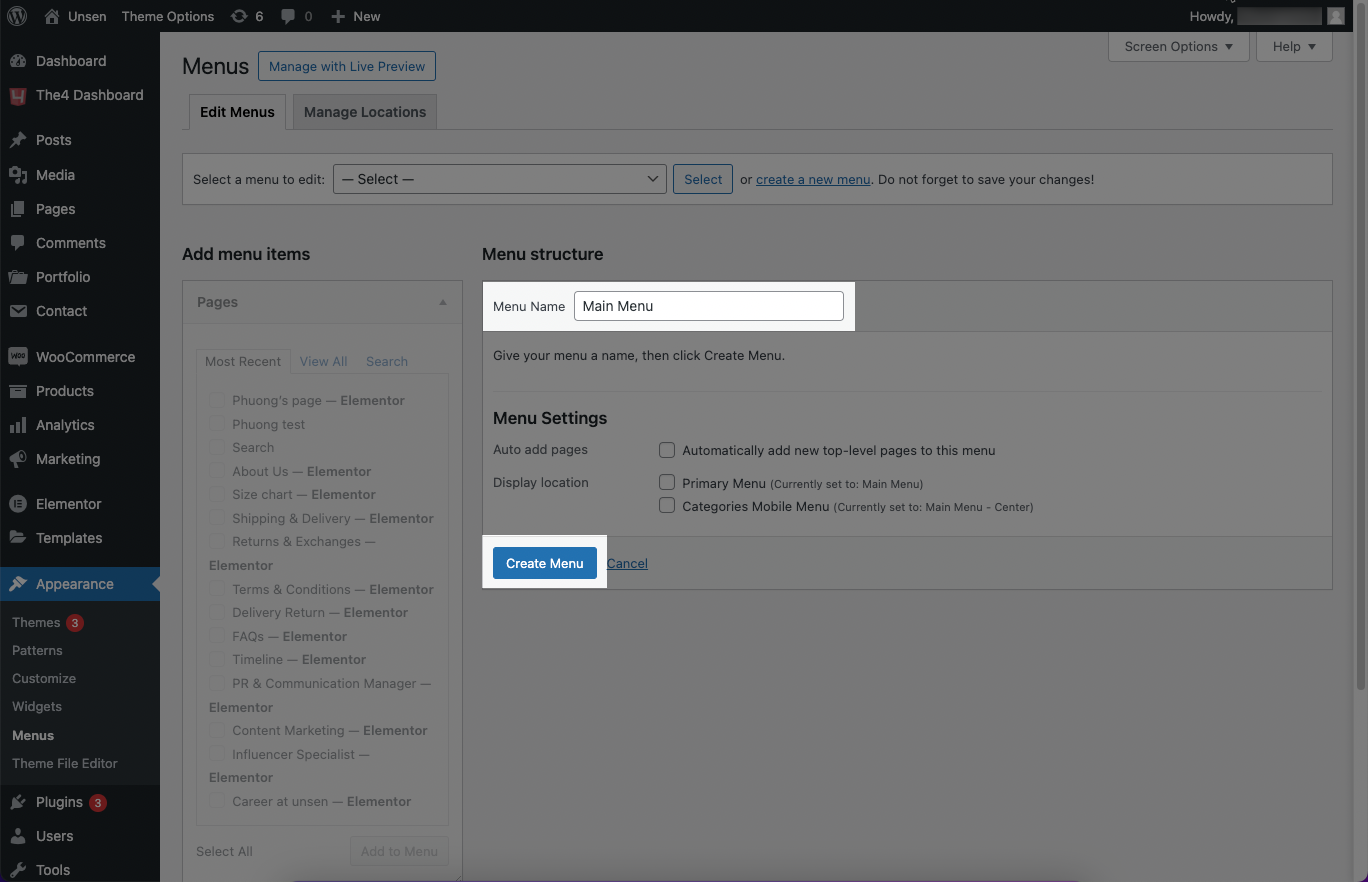
Step 2. Enter a name for your menu in the Menu Name box. Then click the Creat Menu button
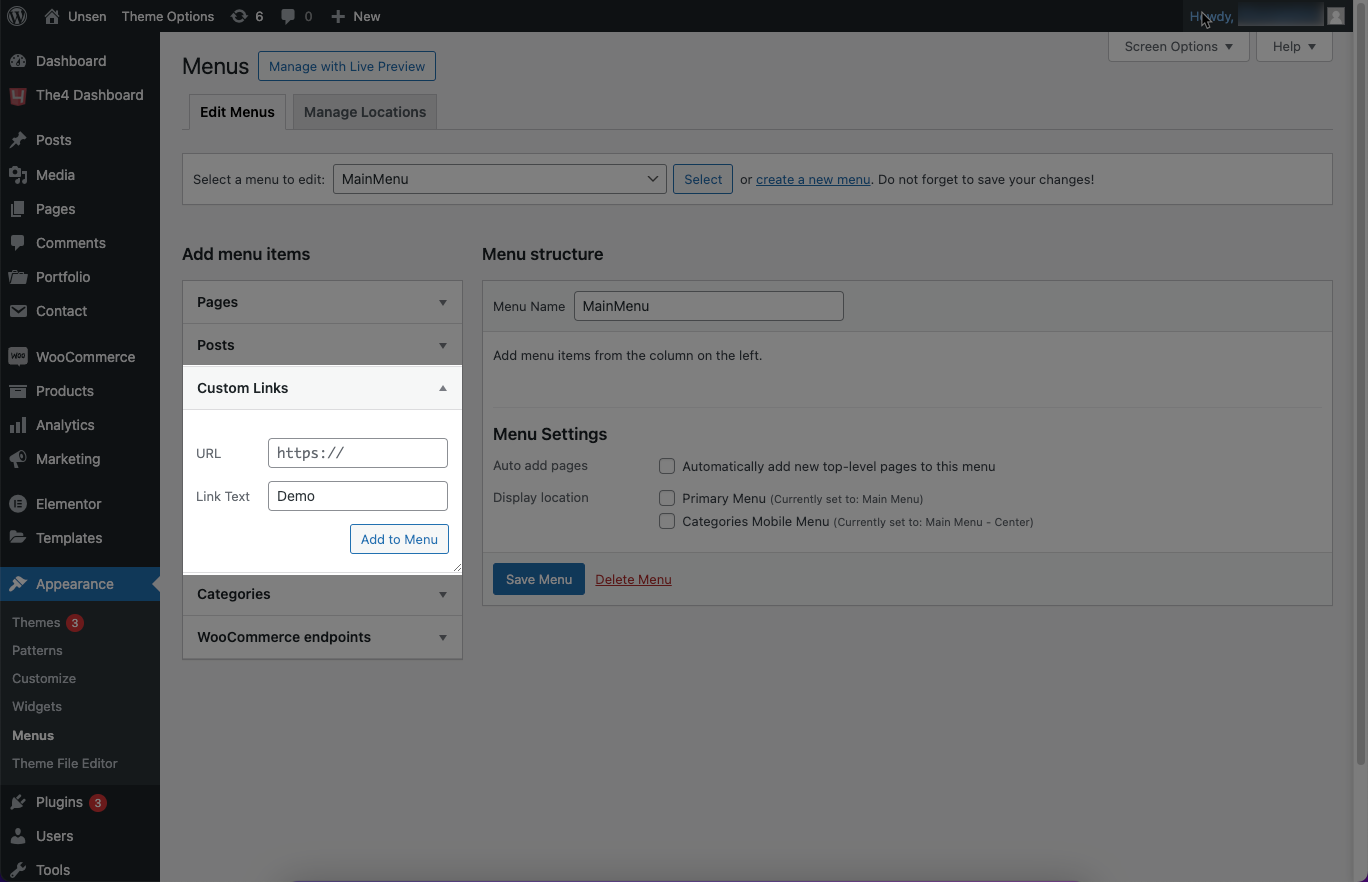
Step 3. Add menu items. Open Custom links tab then enter link URL and Link Text to add menu
You can watch video bellow:
So you have created a simple menu, besides with each link you can set up Lable title, Lable color, Menu icon, Enable megamenu,... Click Custom link to do that. Results:
2. Creat a Multi-menu
2.1 Creat a template header
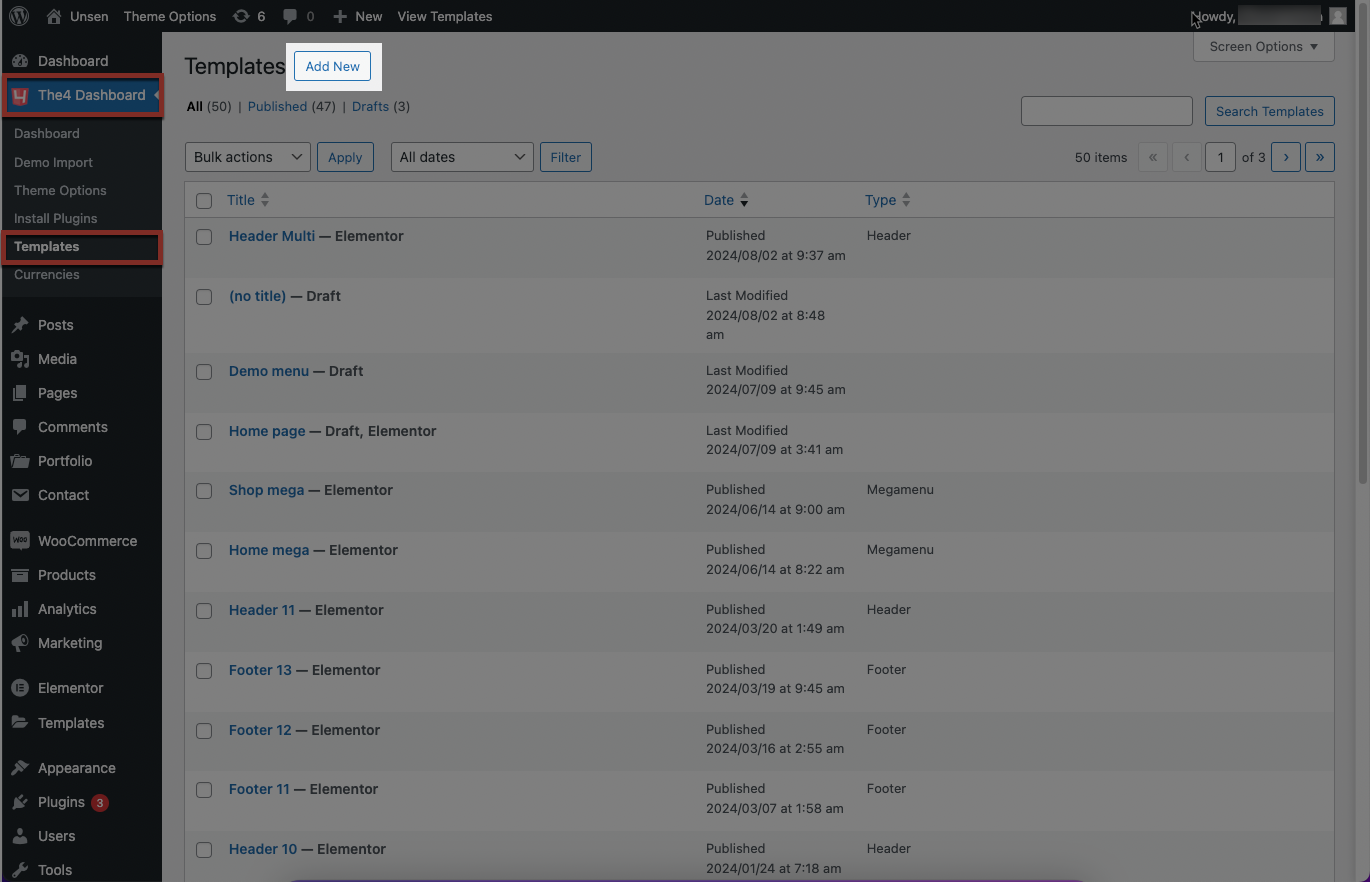
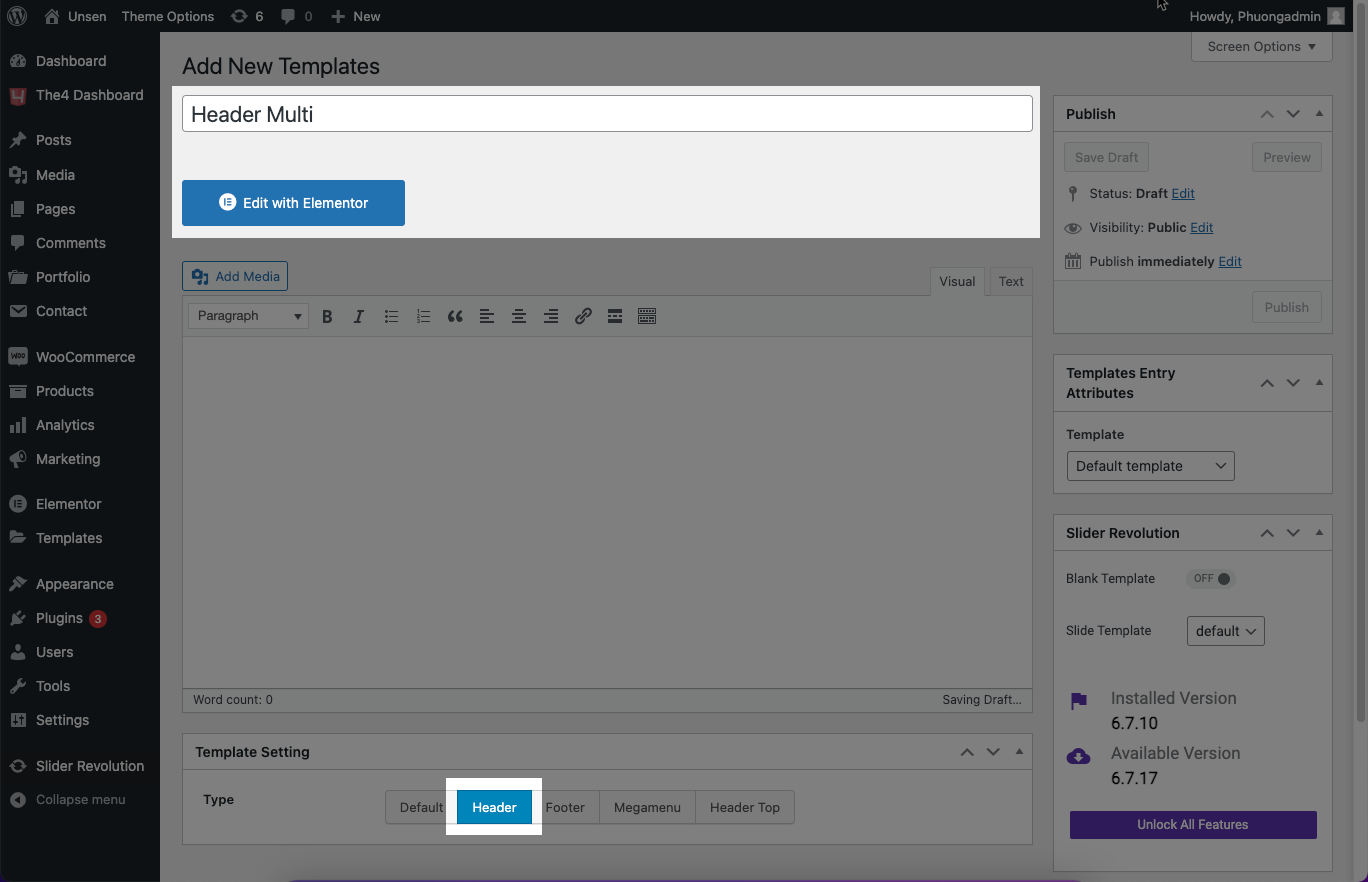
Step 1: Add new template. From the left sidebar of the Dashboard, select the The4 Dashboard > Templates > Add New option to bring up the Menu Editor.
Step 2: Choose type is Header. Enter a title for your new multi menu in the Add title box. Then click the Edit with Elementor button to launch the Elementor interface.
2.2 Design Your Multi-menu Using Elementor
From Header Multi created in 2.1 section, you continue to use elementors like Unsen Nav Menu, Unsen Logo, Unsen Header Action,... to create and edit a multi-menu, detailed instructions below


