


Step 1: Import XML
Log in to your WordPress dashboard.
Go to
Tools>Import.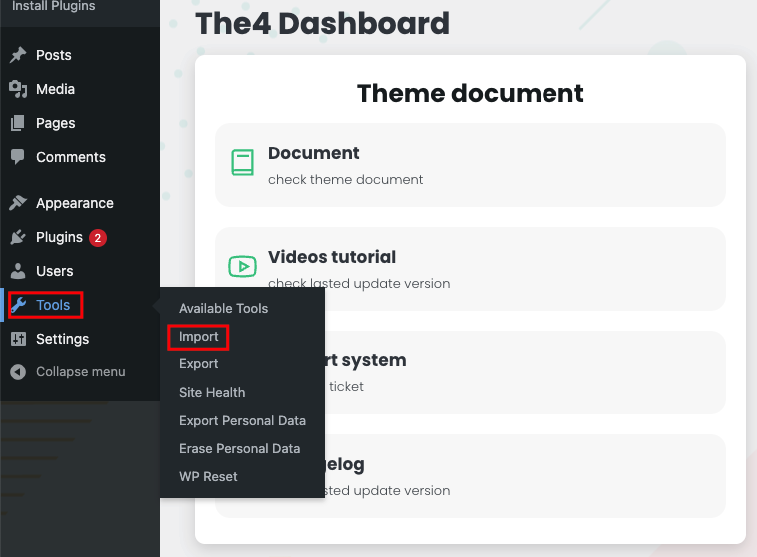
Choose
WordPressfrom the list and install theWordPress Importerplugin if you haven't already.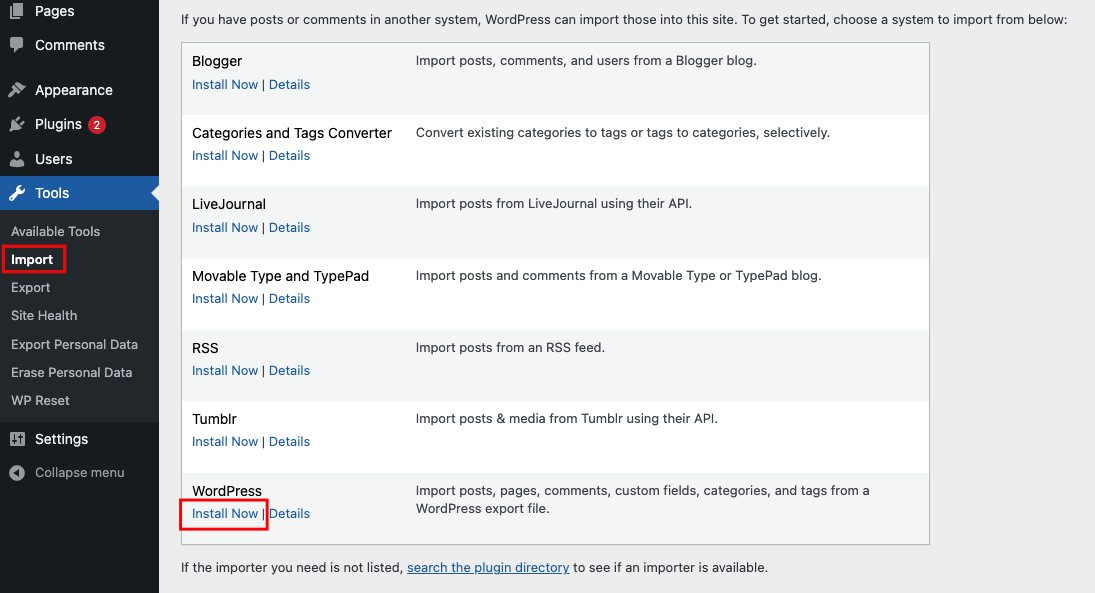
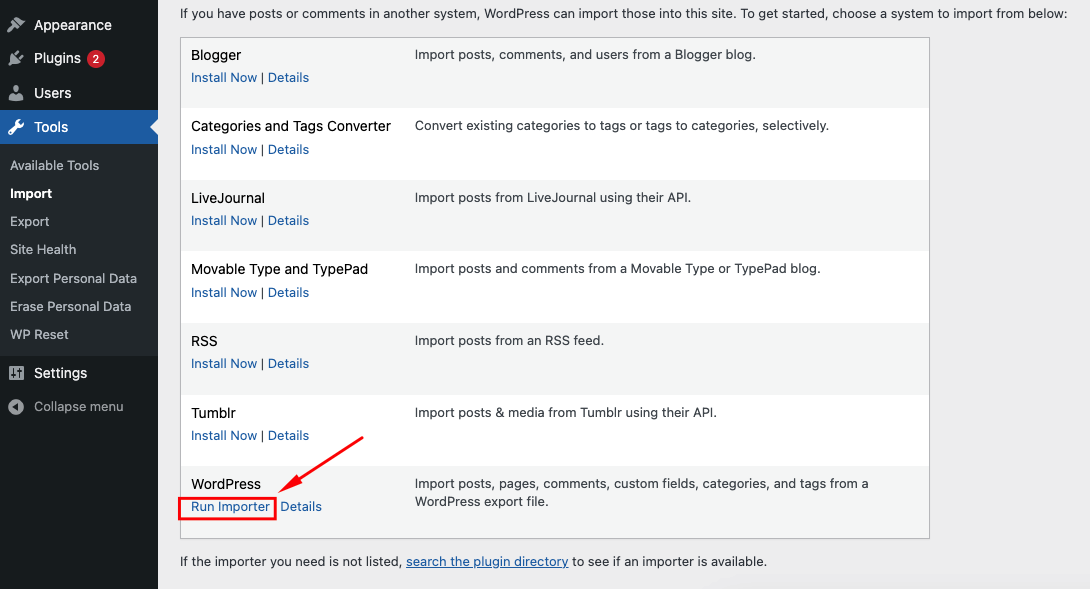
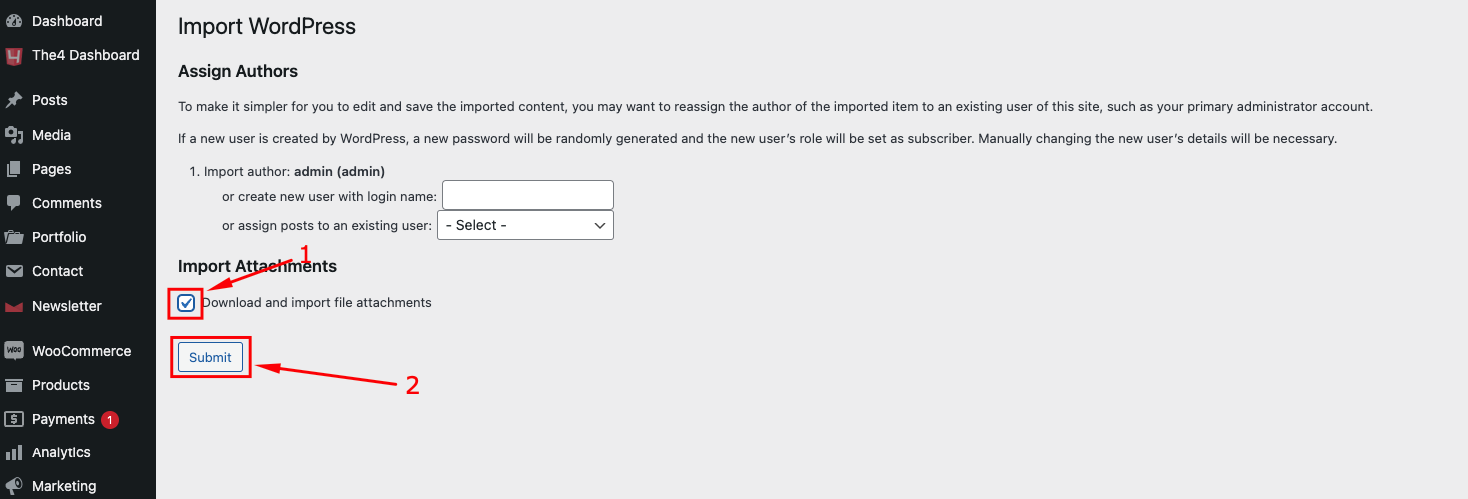
Upload the XML file provided with your demo data (attachment-data.xml and content-data.xml).
Follow the path: Theme package > demo-data > fashion > content to get XML file.

Step 2: Import Slider
Navigate to the Slider Revolution plugin.
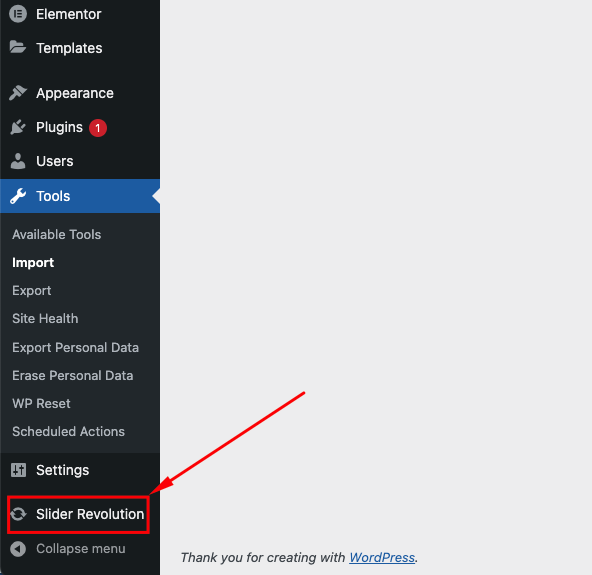
Find the
Importfunction within the plugin settings.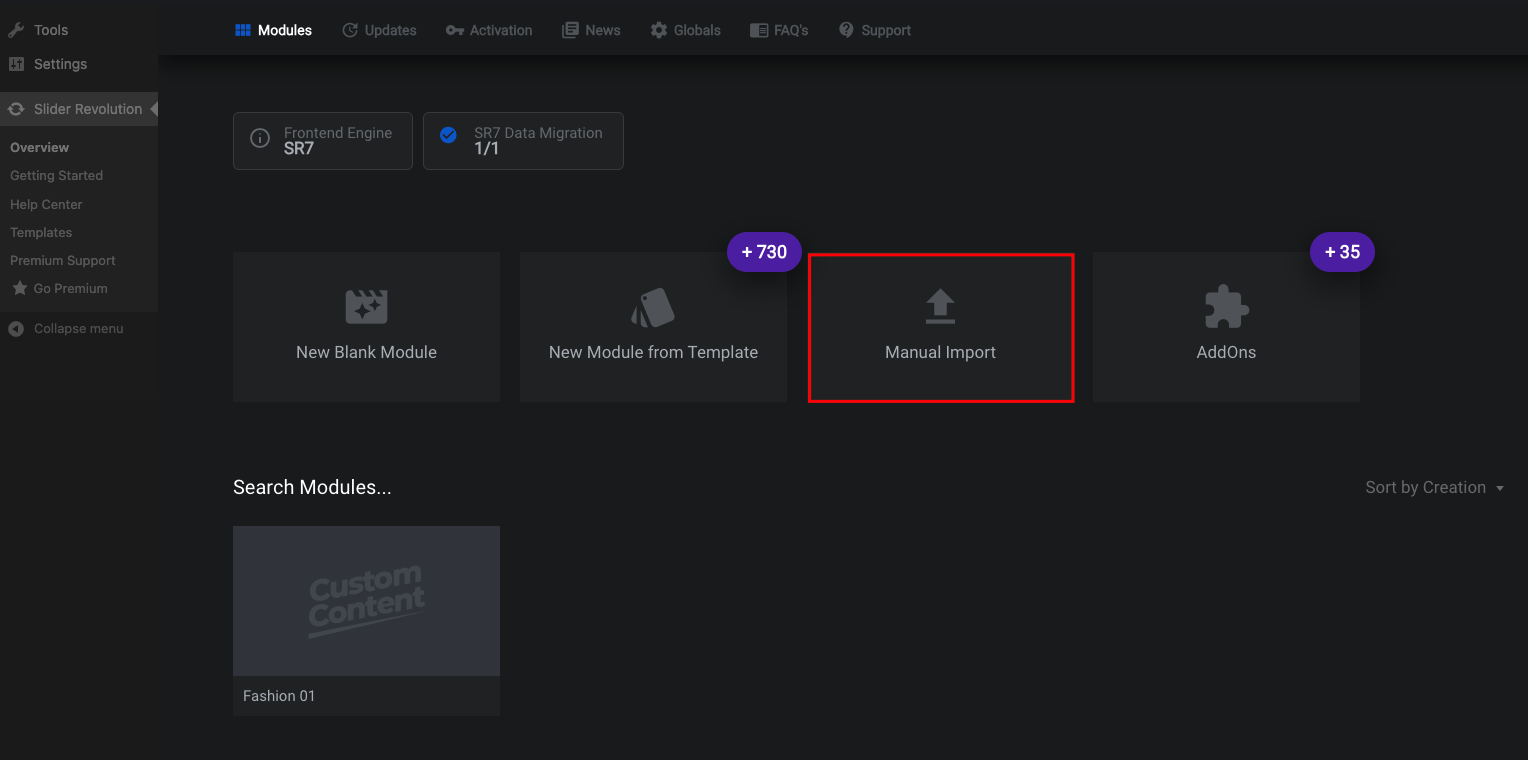
Upload the slider file provided with your demo data (usually a
.zipor.jsonfile).Follow the path: Theme package > demo-data > fashion > revslider and choose the slider of the demo that you want to import.
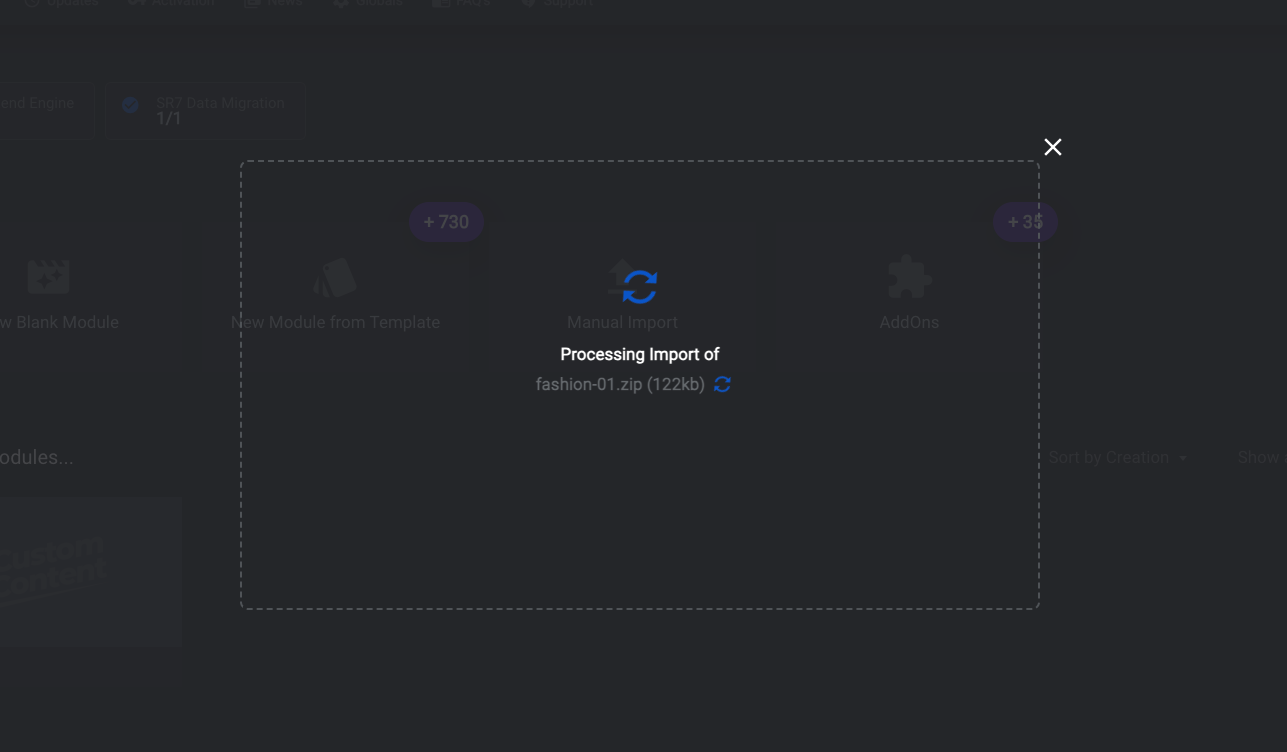
Follow the plugin's instructions to complete the import.
Step 3: Import Options
Locate the theme options panel in your WordPress dashboard.
This is usually found under
Appearance>Theme Optionsor a similar location specific to your theme.Look for an import function within the theme options.
Upload the options file provided (usually a
.jsonfile).Save the changes.
Step 4: Import Widgets
Install and activate a plugin like
Widget Importer & Exporter.Go to
Tools>Widget Importer & Exporter.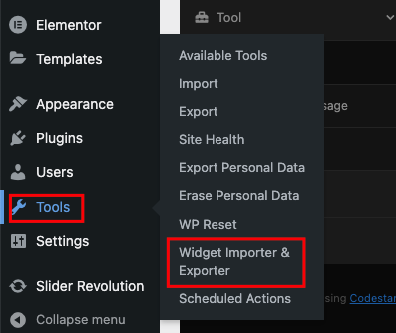
Upload the widget file and click on
Import Widgets.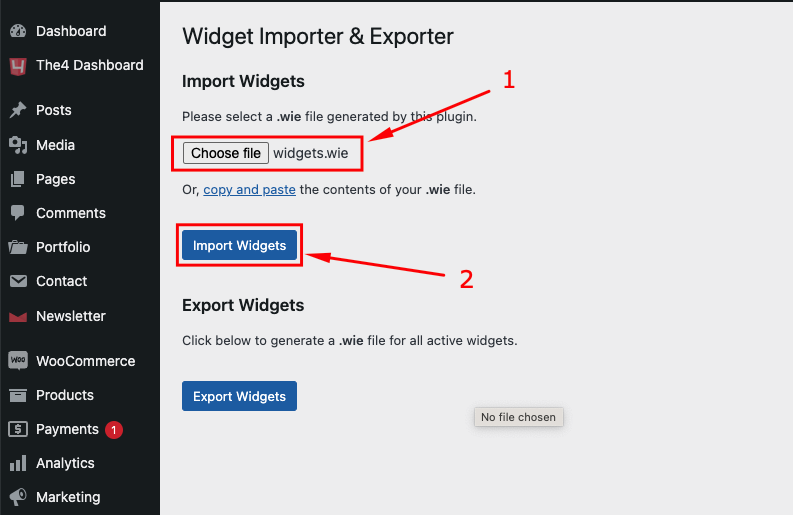
Run the import process and verify that the widgets appear in the correct widget areas.
Final Steps:
Review your website to ensure all data has been imported correctly.
Check pages, posts, sliders, and widgets to confirm their proper placement and functionality.
Customize any settings as needed to match the demo layout and design.
Following these steps should help you successfully import the demo data and achieve a perfect website setup manually.


