The theme is responsible for the design and layout of your website. Whereas, the plugin controls the behavior and functionality of a site. While most of these plugins are not required to make full use of the theme, they’re fully integrated into it and provide useful functionality you can take advantage of.
To install the required plugins for the theme, follow these steps:
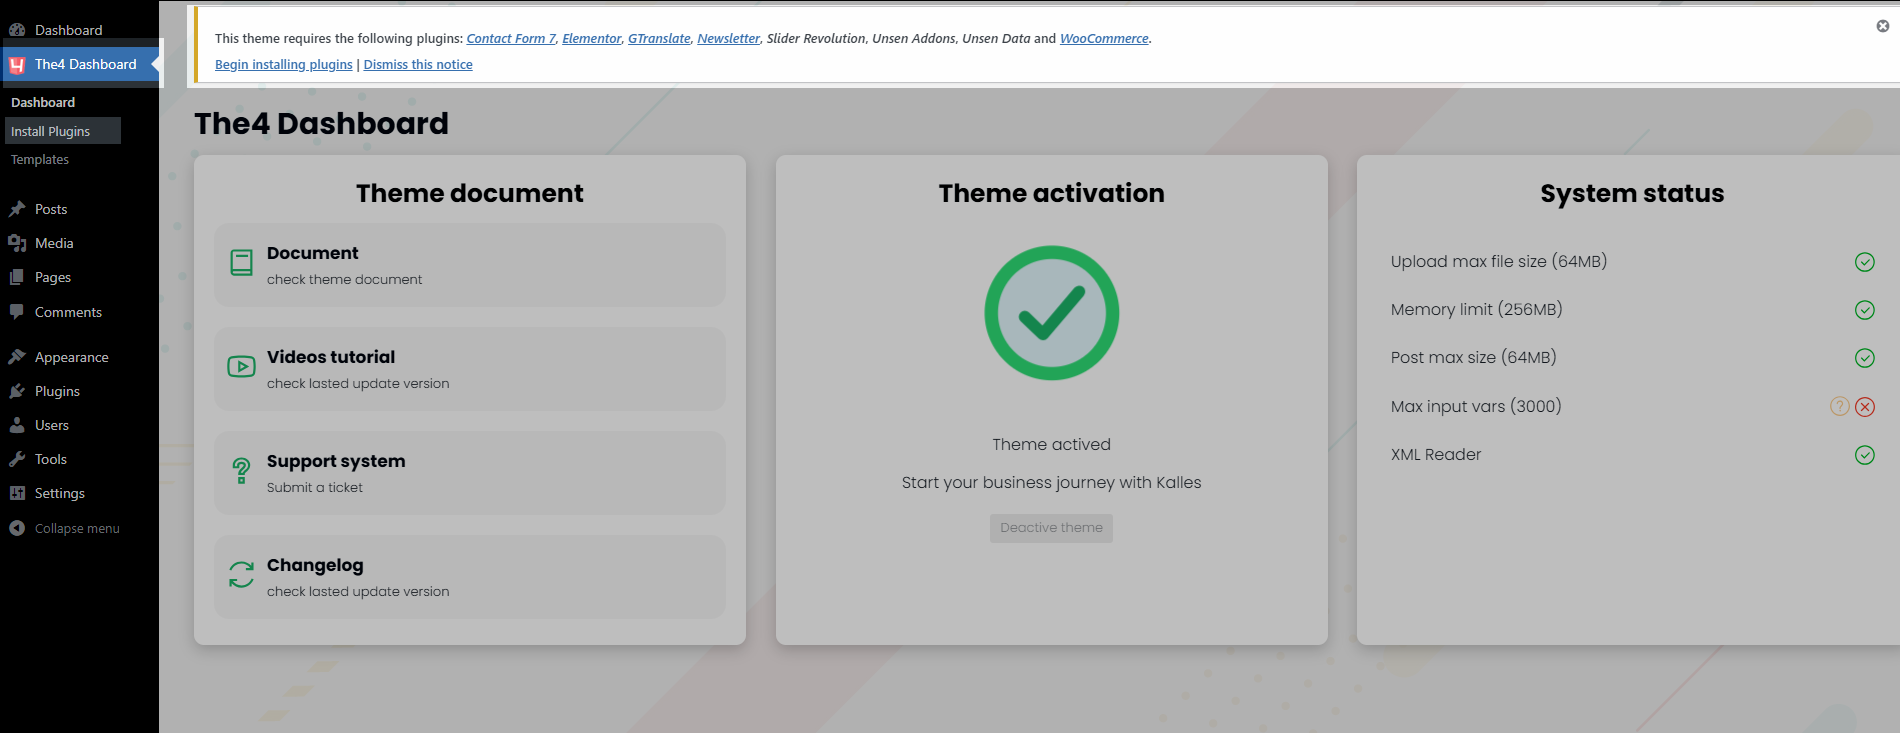
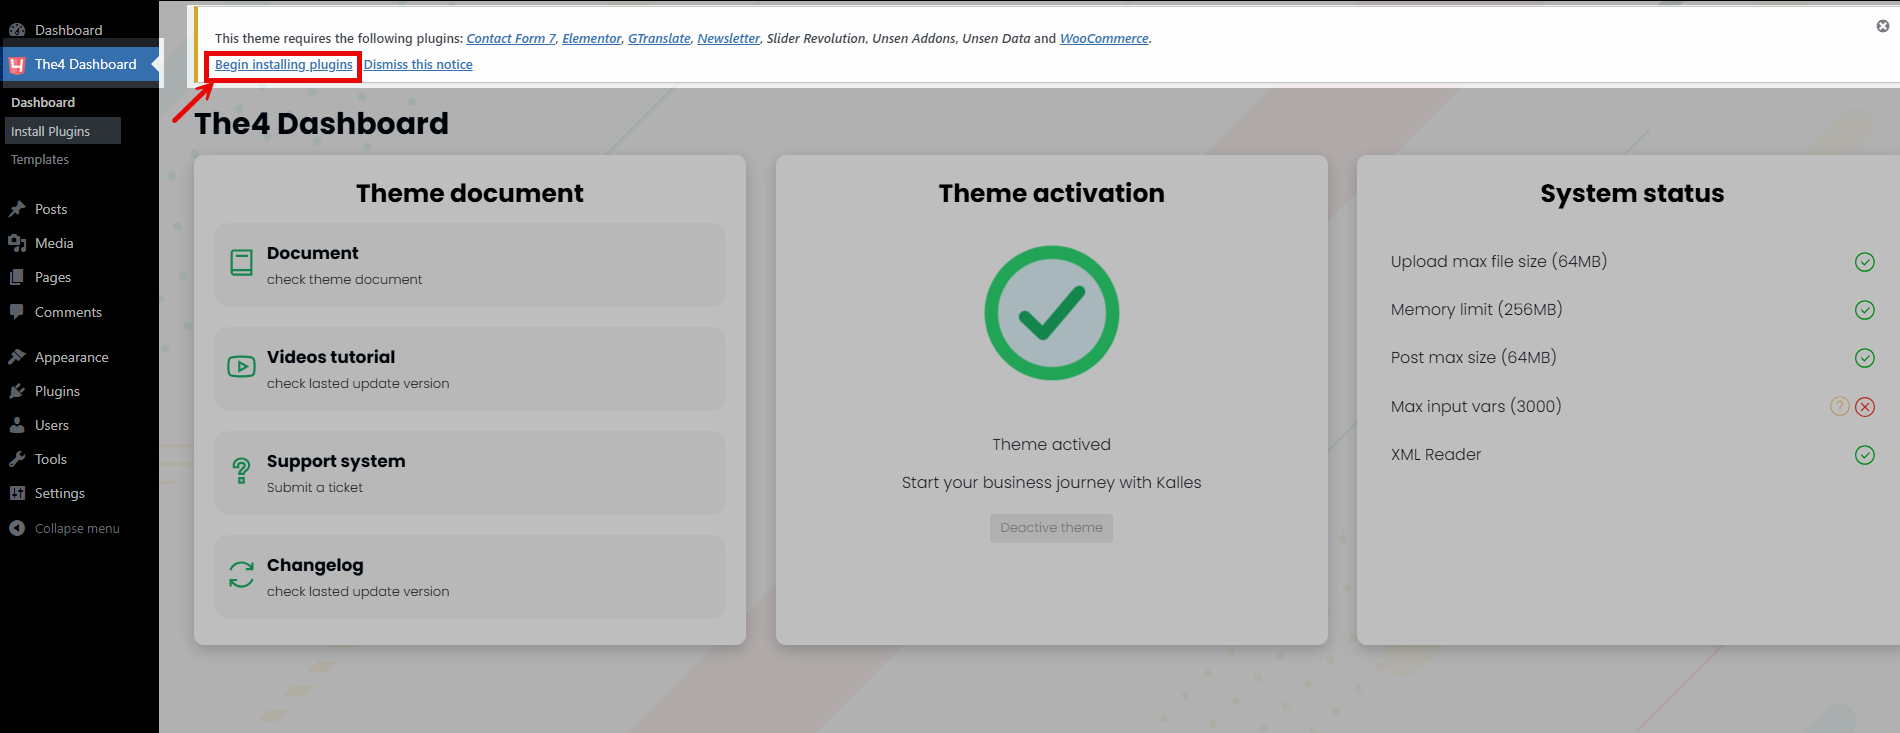
Step 1: Once the theme is installed and activated you will see a message “Begin Installing plugins” at the top of the screen that advises which plugins are required and recommended for the theme. Or you can go to The4 Dashboard > Install Plugins to open the “Install Required Plugins” screen.

Step 2: Click on the “Begin installing plugins” link under this message you will be taken to the “Install Required Plugins” screen.

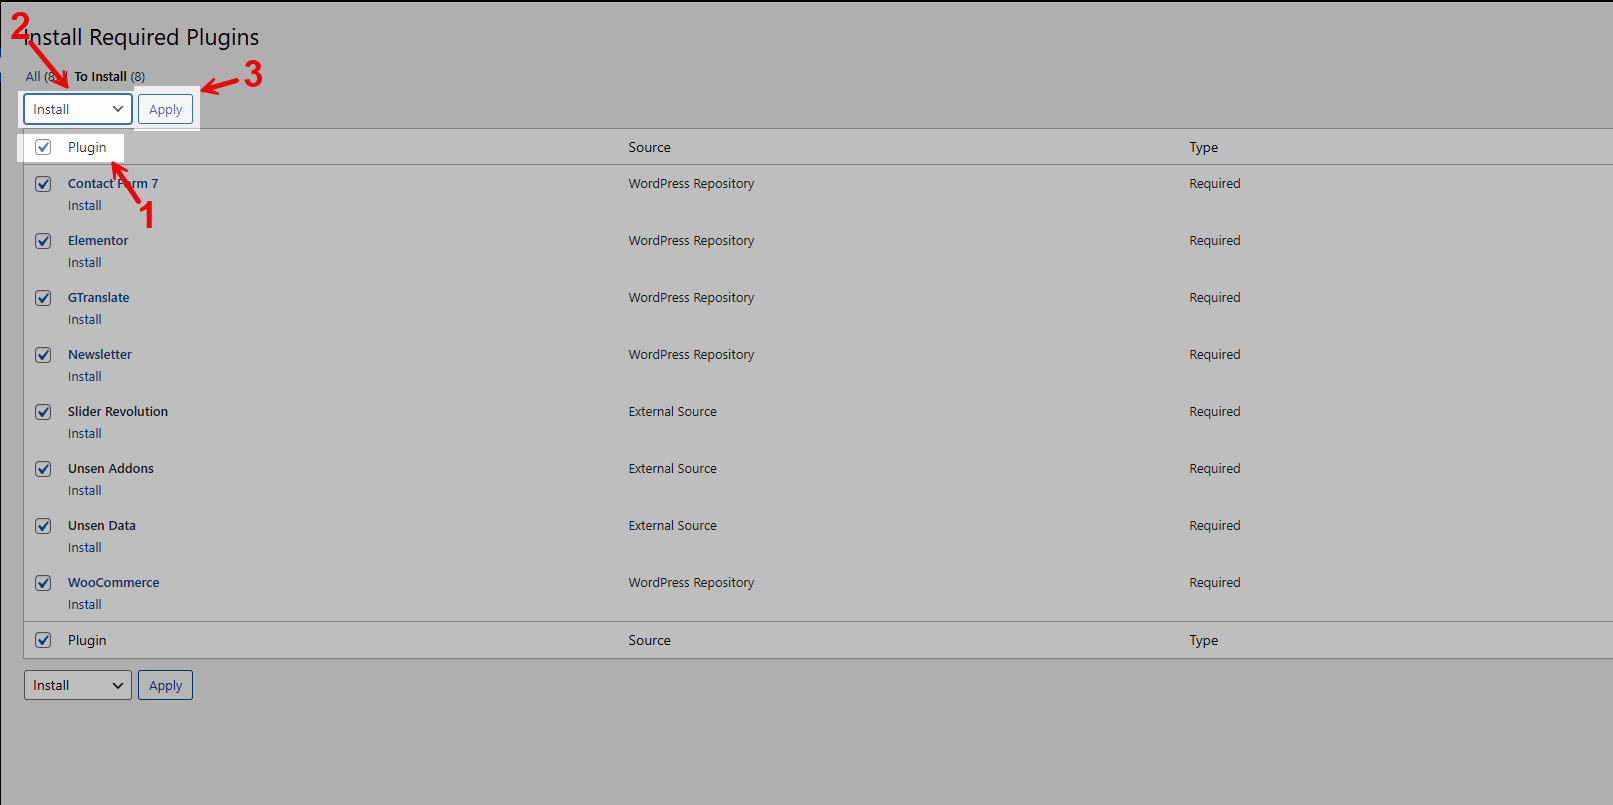
Step 3: Here you will see a list of the plugins that need to be installed and activated. Click in the tickbox to the left of the “Plugin” title to add a tick to every plugin, then in the “Bulk Actions” drop-down list, select “Install” and click Apply.

Note: At this step you absolutely don’t need to select the recommend plugins if you don’t plan on using the functionality that comes with the theme.
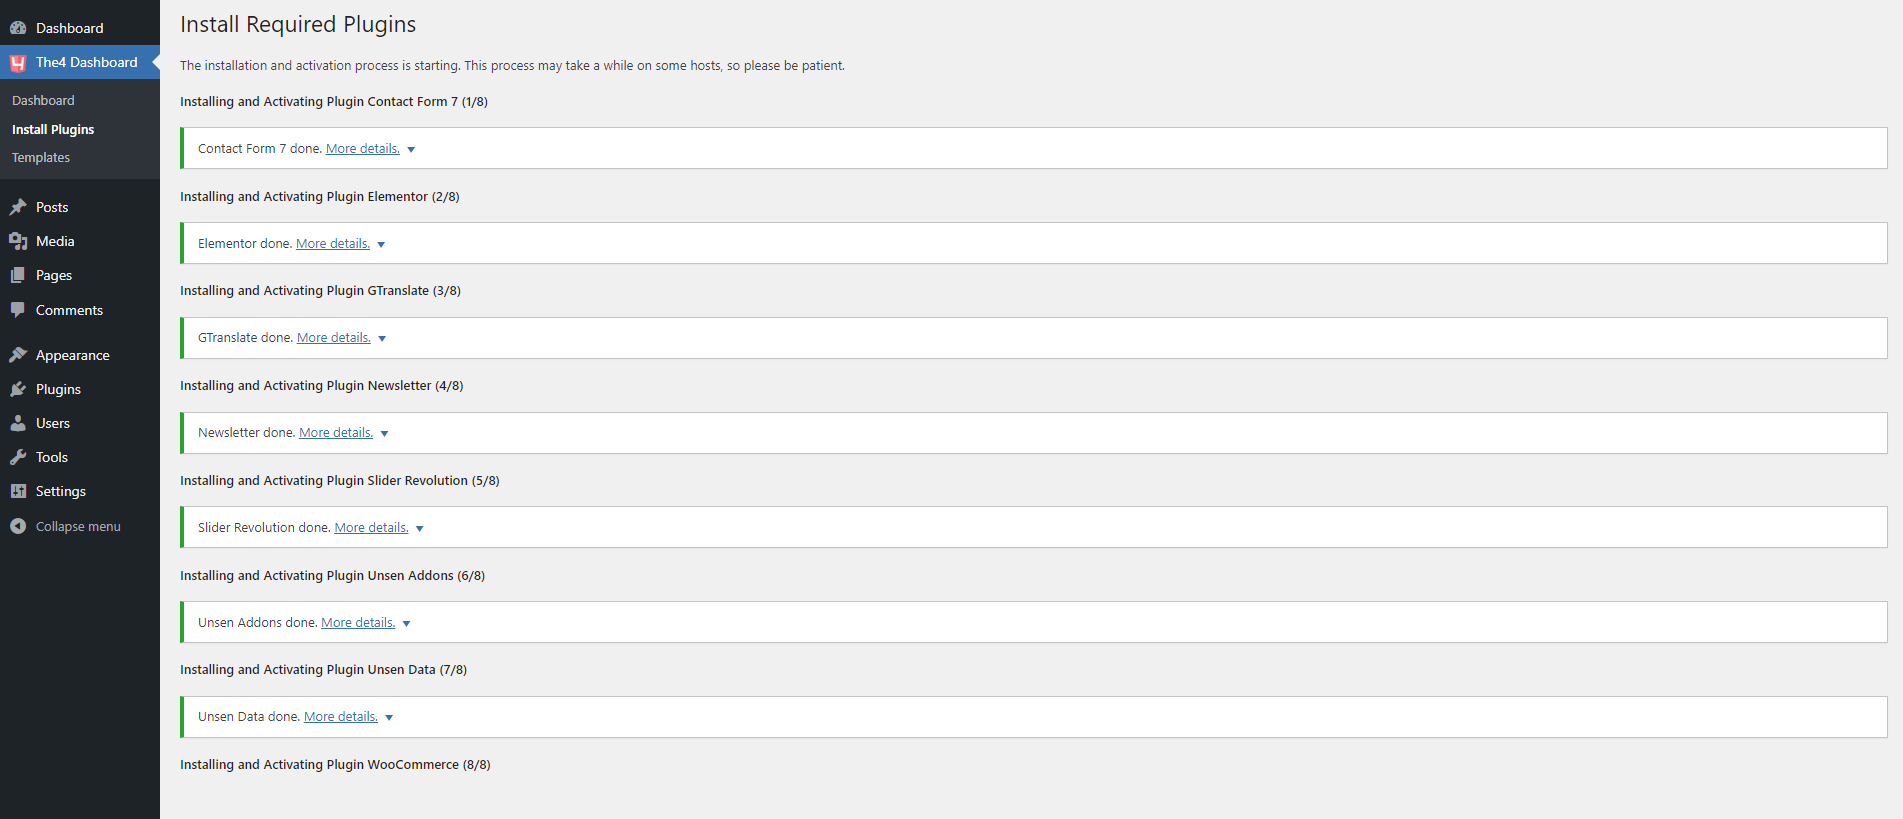
And that’s it all the required and recommended plugins are now installed and activated.
Result:


