Product Upsell Features allow you to add various elements that help increase conversion rates by creating urgency, building trust, and providing social proof. With features such as:
Countdown timer
Delivery time
Live review
Total sold flash
Inventory status
Trust badge
Social media

In this guide, we’ll walk you through how to configure each of these elements step by step.
1. Countdown timer
The countdown timer will automatically display if the product has a metaobject named 'theme_countdown' or a metafield named 'countdown'.
1.1. Same countdown for all products
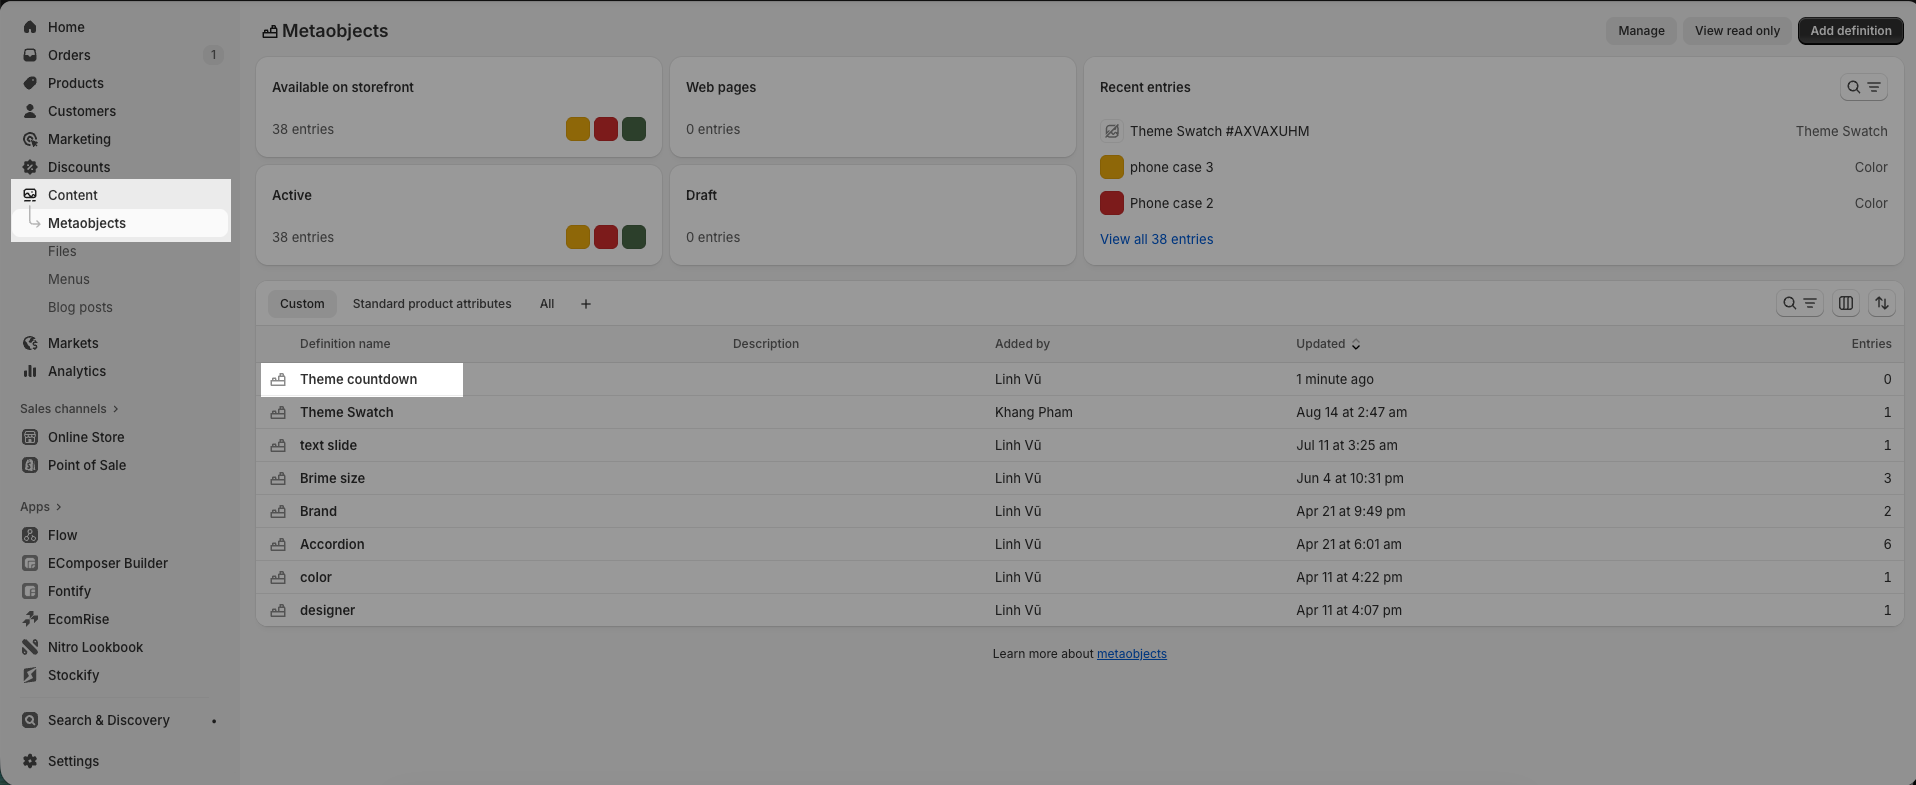
Step 1: Create a MetaObject definition
- Go to Content > MetaObjects > Add definition.
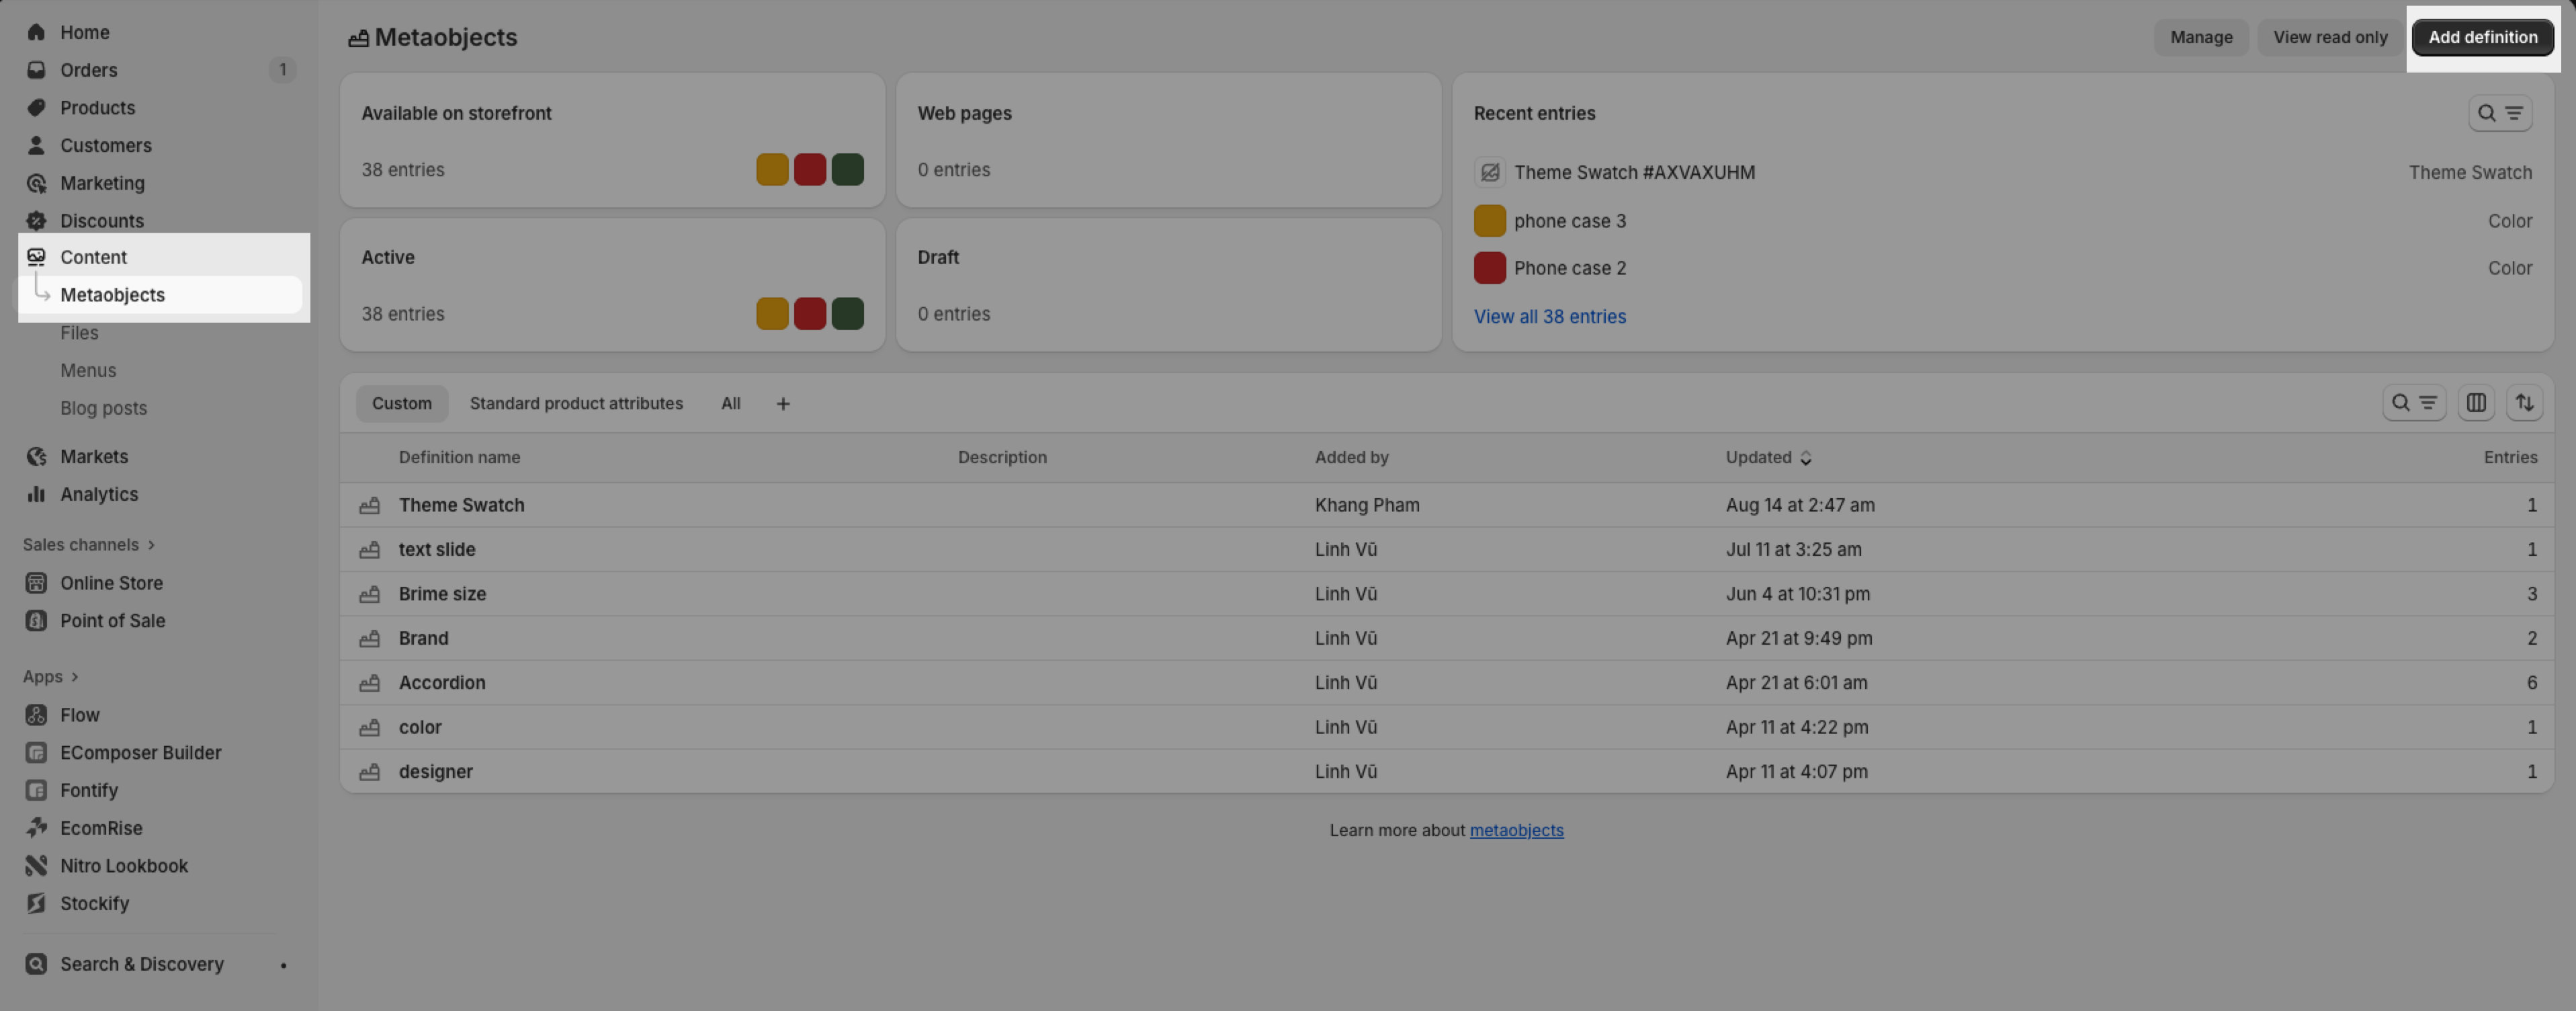
- Enter the basic information:
Name (required): Theme countdown
Key: theme_countdown
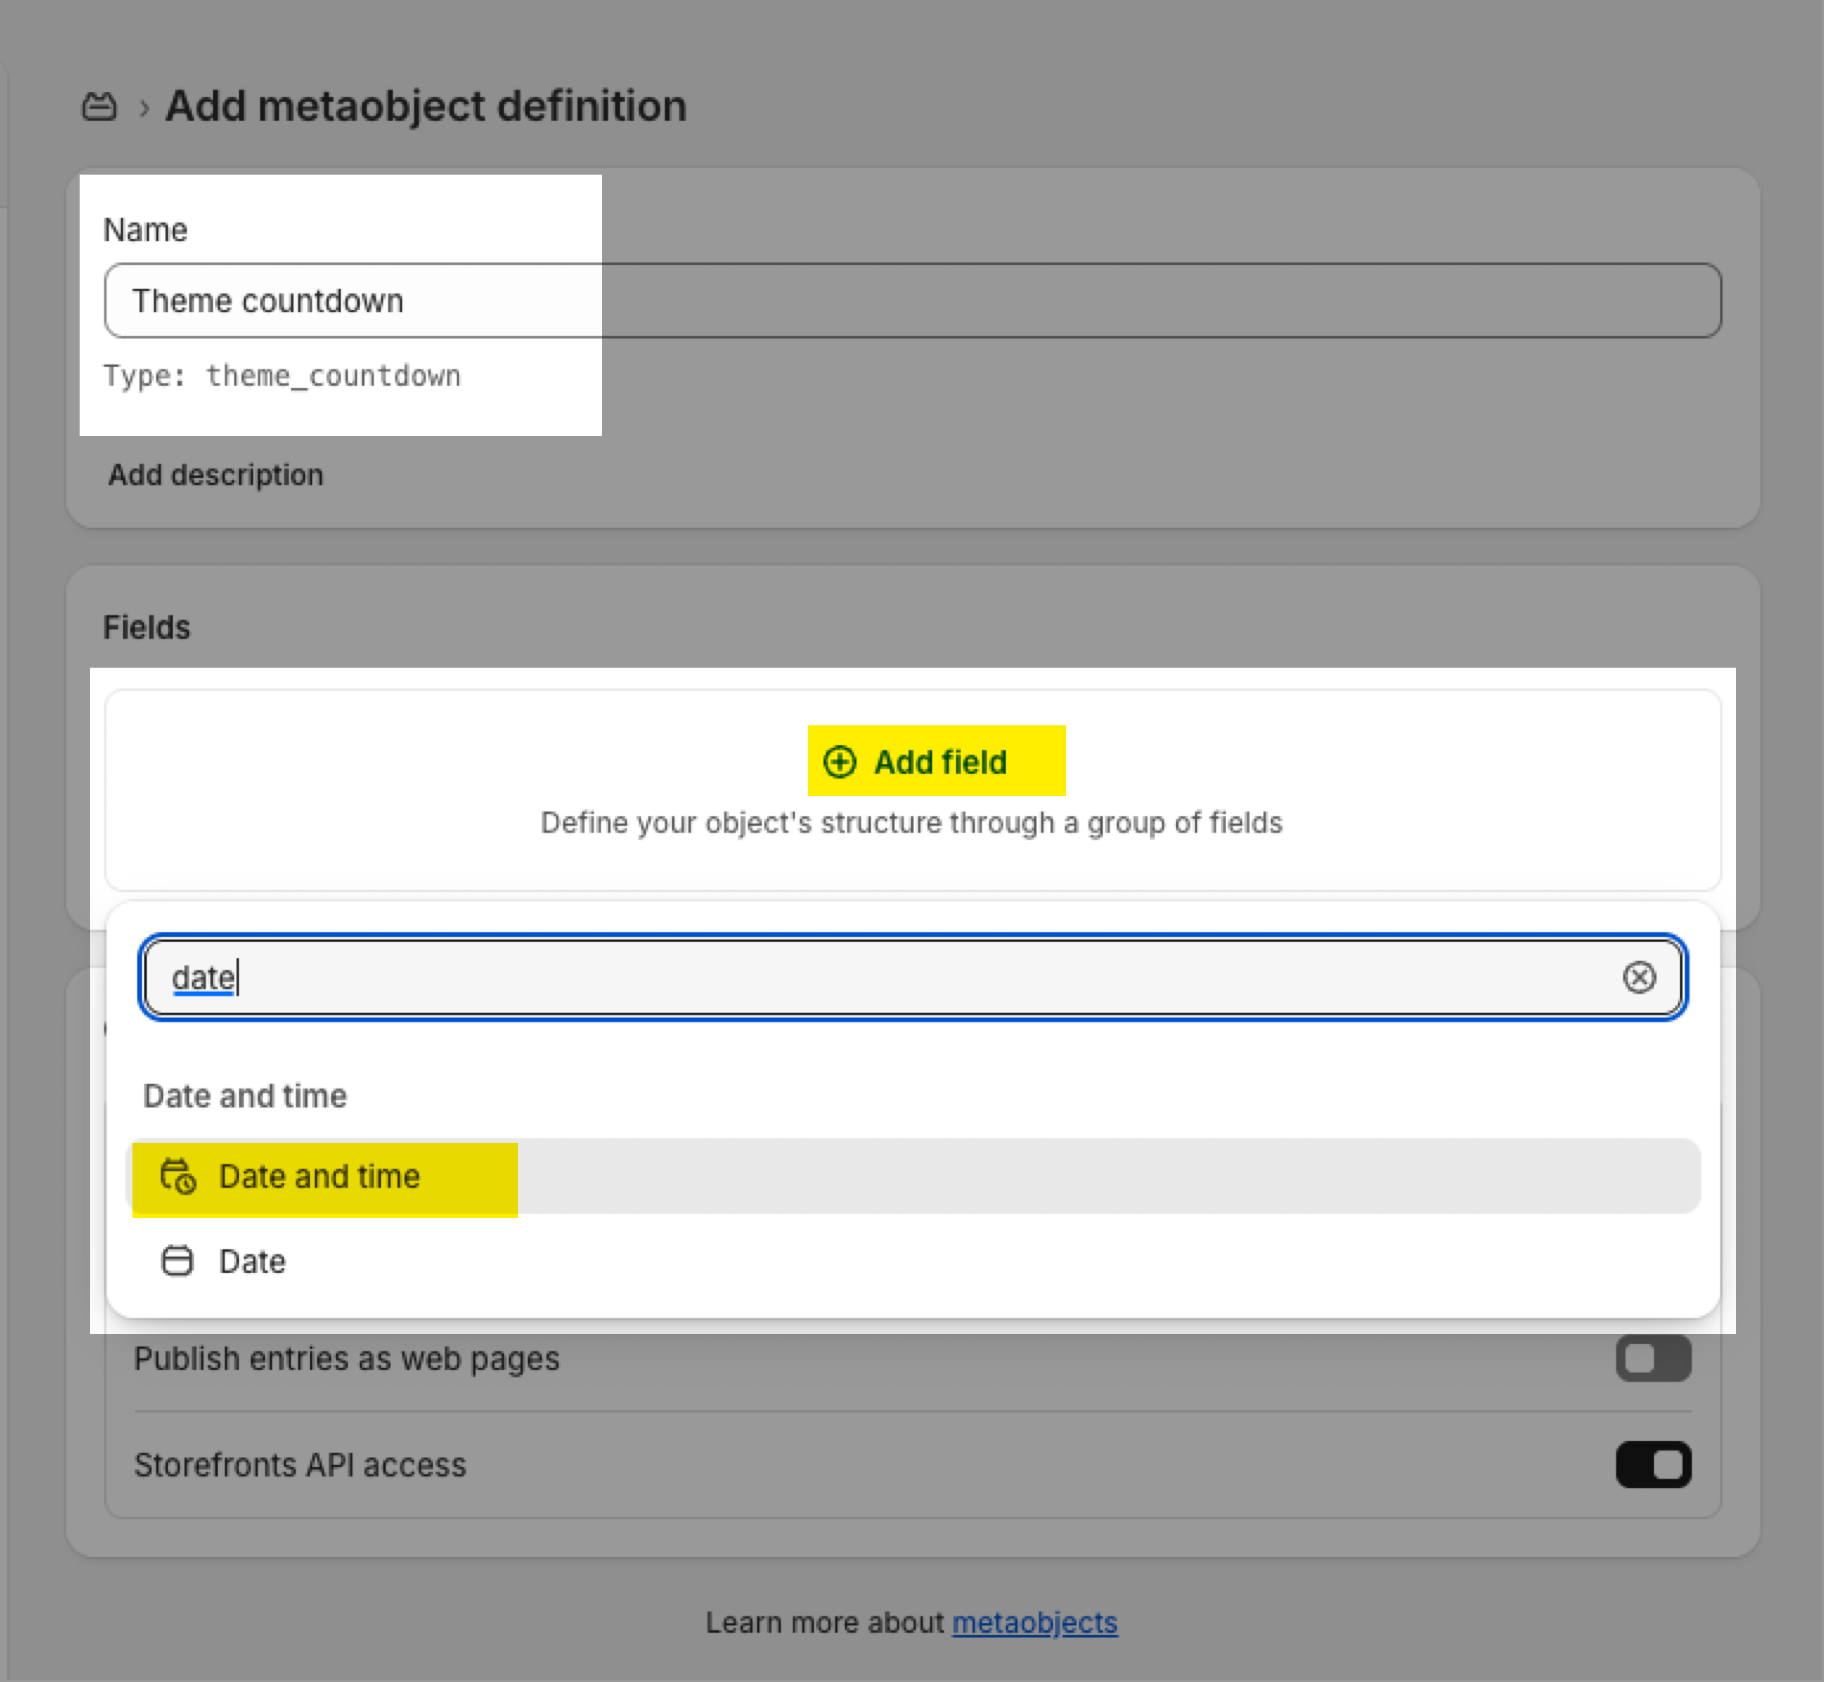
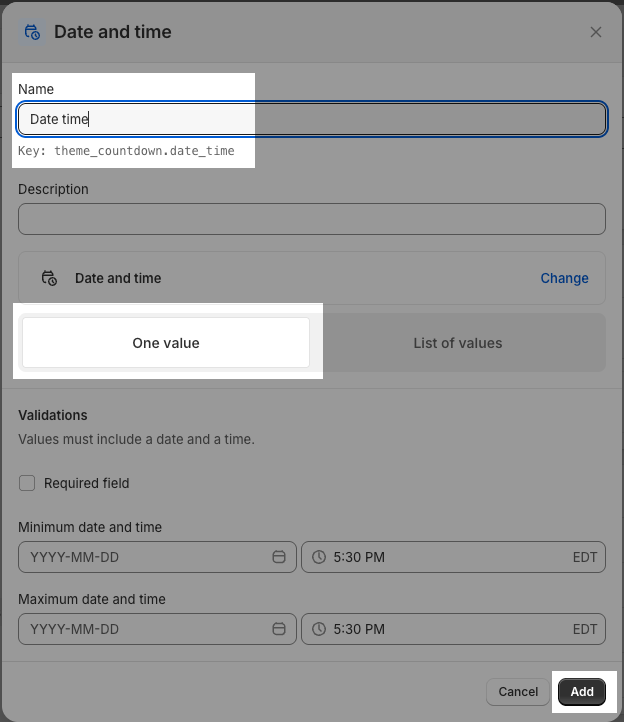
- Click Add field and set it up as follows:
Type (required): Date and time (one value)
Name (required): Date time
This MetaObject will be used to store the countdown end date.
Step 2: Add an entry
1 - Go to Content > MetaObjects > Theme countdown > Add entry.
2 - Fill in the countdown date you want to apply (this date will be displayed on product pages).
1.2. Different countdown for each product
Note: You need to remove the MetaObject entry at 1.1 if you want different countdown for each product.
Please follow this document to create a countdown metafield, so you can display a different countdown for each product.
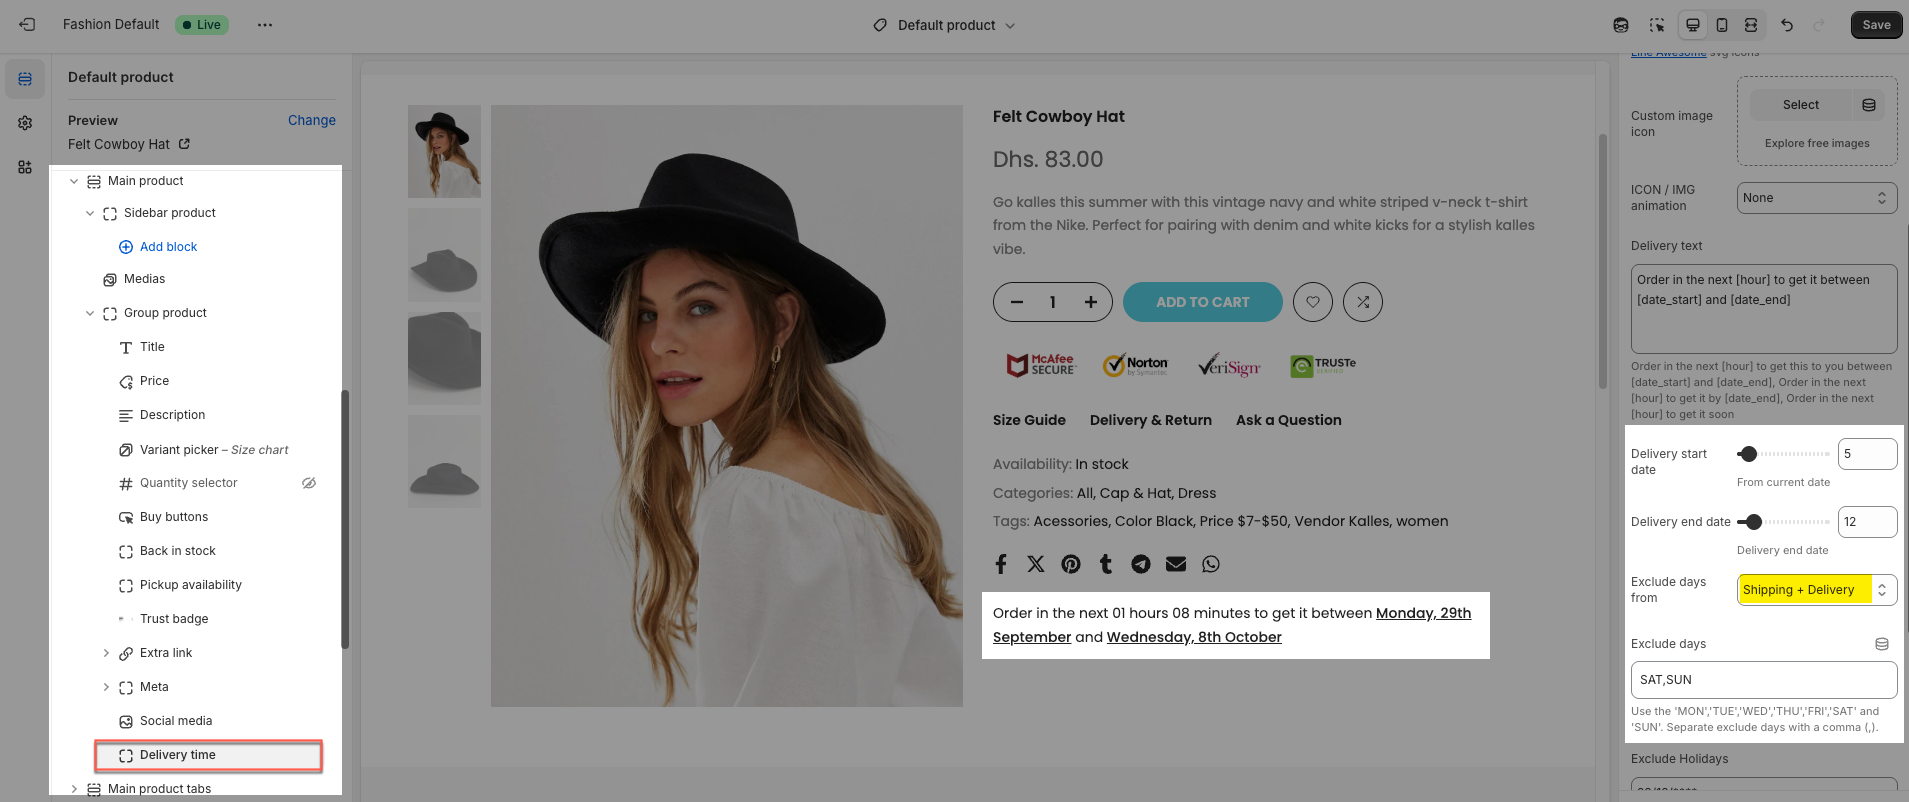
2. Delivery time
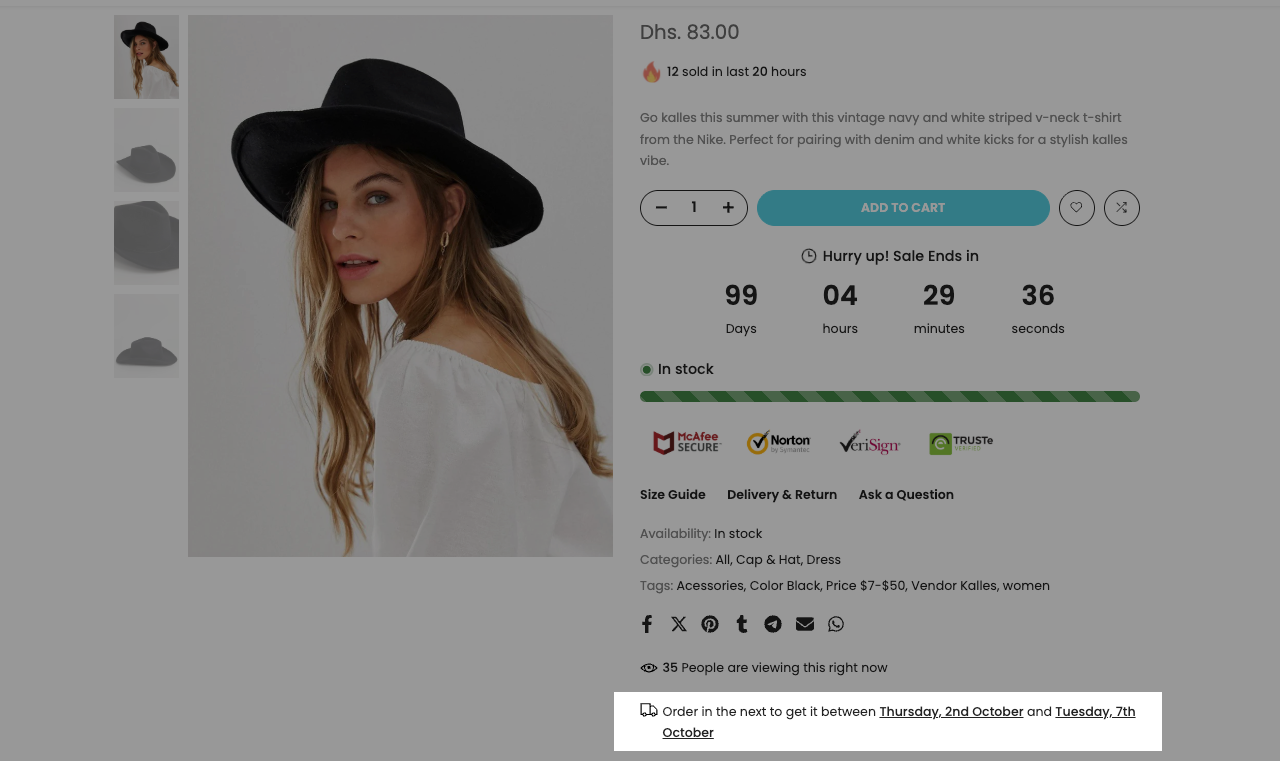
This block allows you to display the estimated delivery date on the product page with multiple customization options.
Hide with ‘pre-order’: When enabled, the block will be hidden if the product is in pre-order status.
Icon and animation for the icon
Delivery Text: You can add the text that you wanna show on the Delivery Time here. Use shortcode: [hour], [date_start], and [date_end] to show the time correctly.
Delivery start date, Delivery end date: You choose the start date and end date from the current date.
Delivery Date Format: Select the date format (e.g.,
dd/mm/yyyy,mm/dd/yyyy).Delivery Time Cut Off: Set a daily cut-off time for processing orders. Example: if you set the cut-off time to 15:00, orders placed after 3 PM will be counted from the next day.
Exclude Holidays: Add the particular holidays every year to exclude.
Exclude Days allows you to define which days are considered non-working days (for example: Saturday, Sunday).
Exclude Days From determines how these excluded days are applied when calculating delivery times.
Let's do an example for further understanding!
Current date (Today): 22/09 (Monday)
Delivery start: 5 days
Delivery end: 12 days
Excluded days: Saturday, Sunday
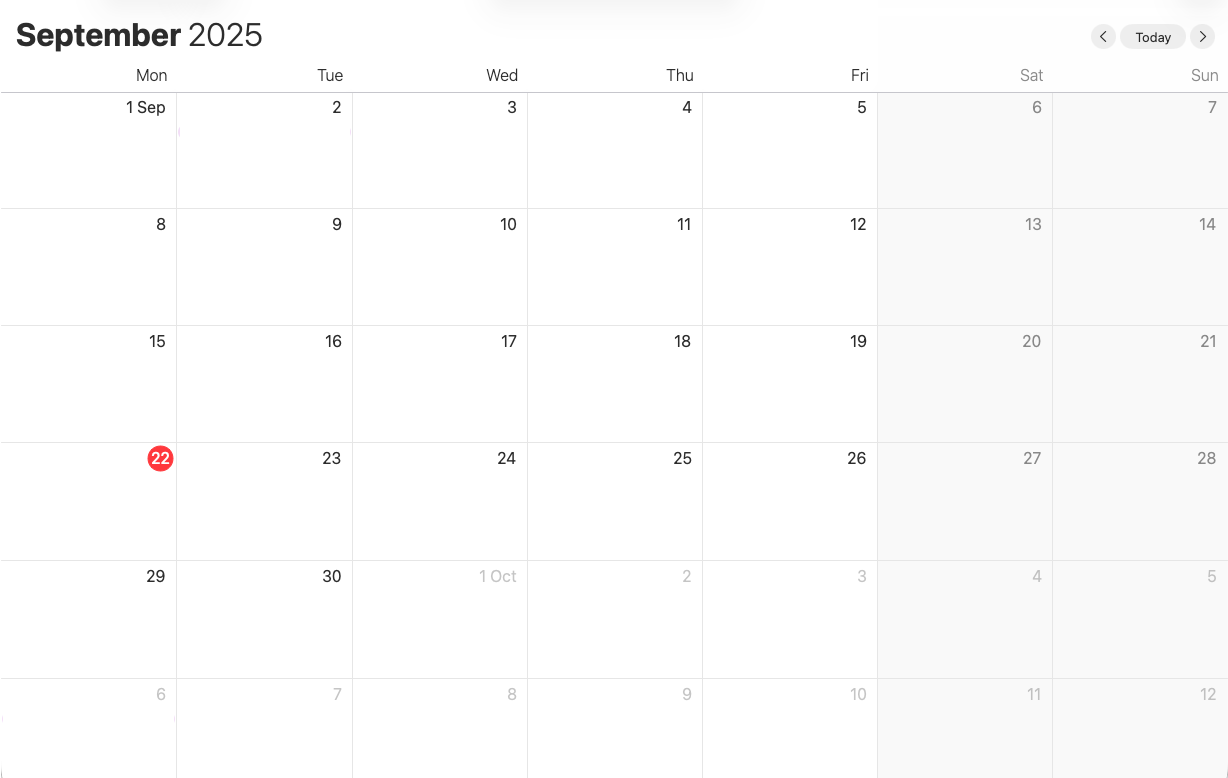
2.1. Exclude Days From: Only Delivery
Start date: Add 5 days from 22/09 → estimated 27/09 (Saturday). If the calculated date falls on an excluded day (Saturday or Sunday), the start date is moved to the next working day
→ Result: 29/09 (Monday)
End date: Add 12 days from 22/09 → estimated 06/10 (Monday). Weekend days between start and end are not excluded
→ Result: 06/10 (Monday)

2.2. Exclude Days From: Shipping & Delivery
Start date: Same as above
→ Result: 29/09 (Monday)
End date: Original end date is 06/10, but now weekends are excluded. Add 2 extra days for Saturday and Sunday
→ Result: 08/10 (Wednesday)
2.3. Delivery time with metafield
To set different delivery times for each product, please read this document.
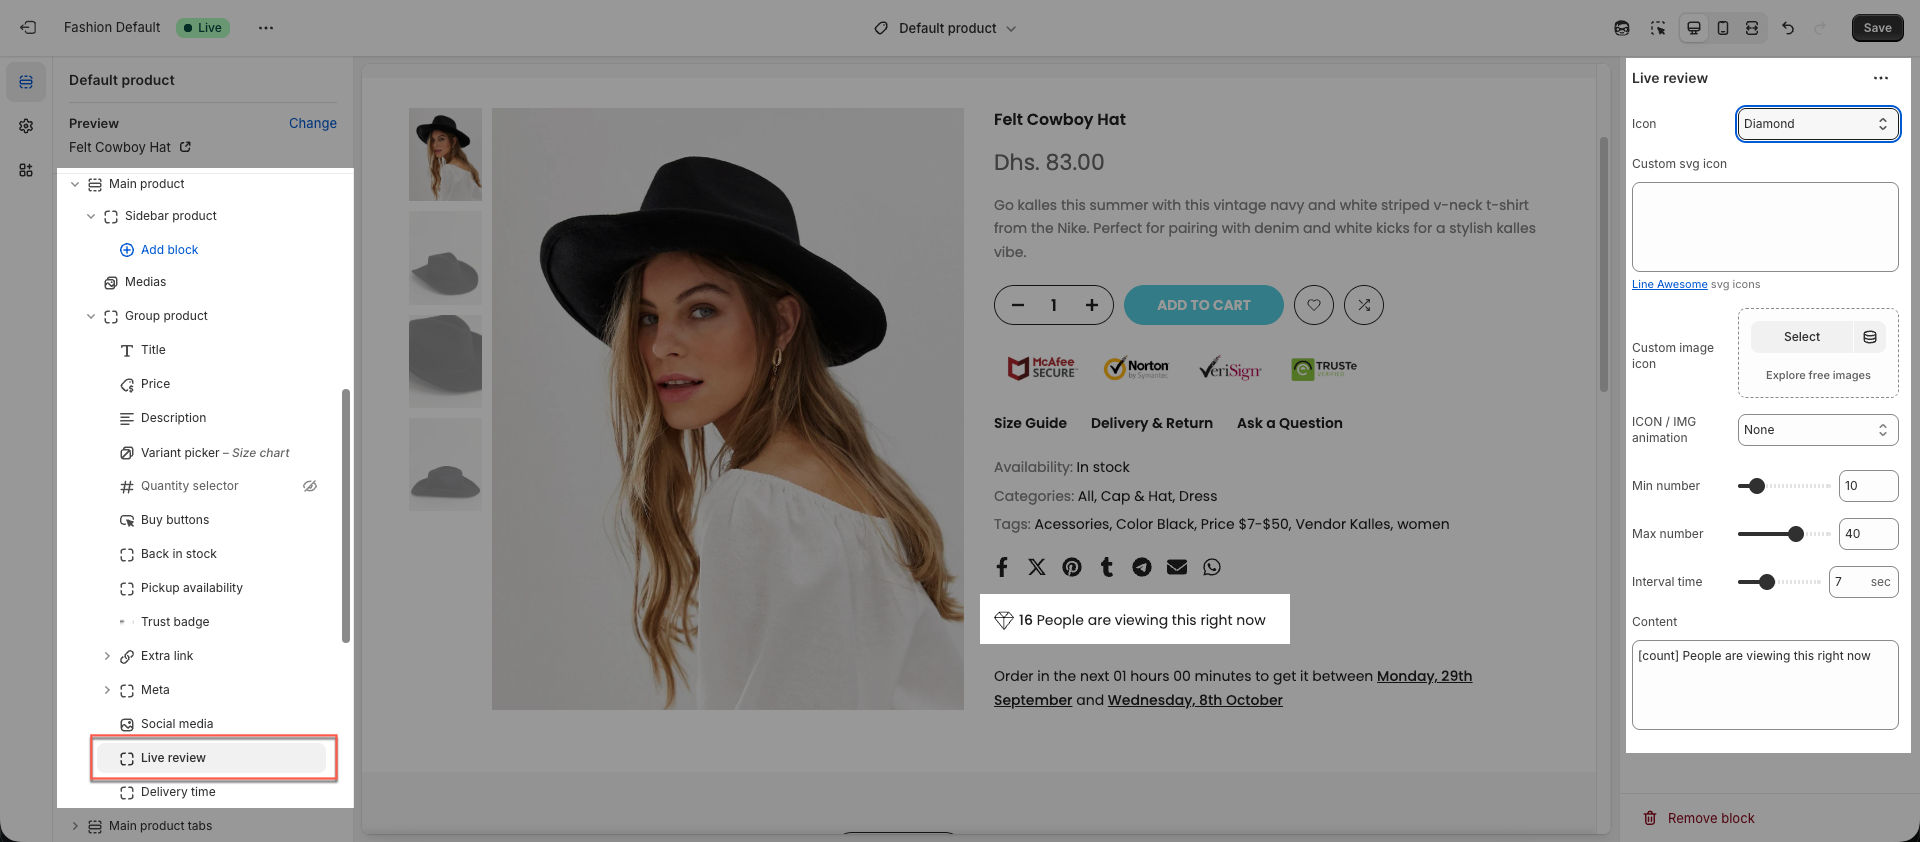
3. Live review
This is a simulated feature designed to help store owners boost sales.
You can set a minimum and maximum number, and the [count] value will display a random number within that range.
4. Total sold flash
This is a dynamic block showing the total number of products sold. This block can update automatically to create urgency and encourage purchases.
You can set a minimum and maximum time, as well as a minimum and maximum quantity, so that the value is randomly generated within these ranges.

5. Inventory status
This block displays the available quantity of a product or variant. You can show it as text or include a progress bar.
6. Trust badge
You can use a trust badge as an image or select a built-in SVG.
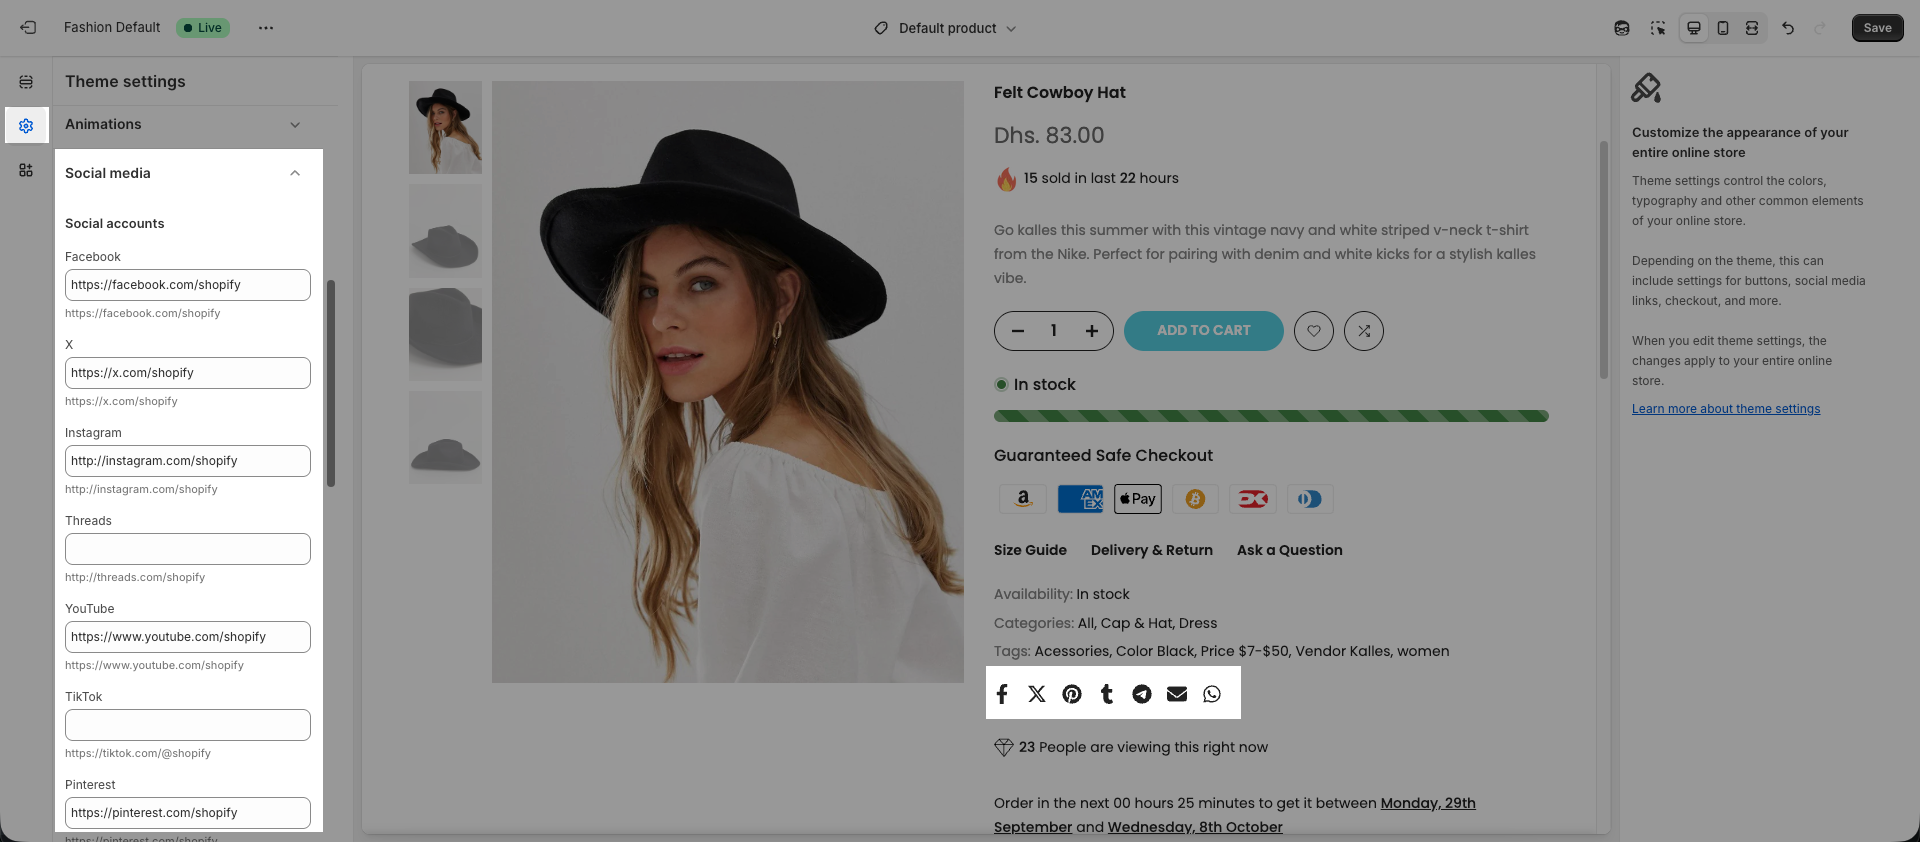
7. Social media
Social media icons display the links added in theme settings. You can follow the account or share content by clicking an icon.
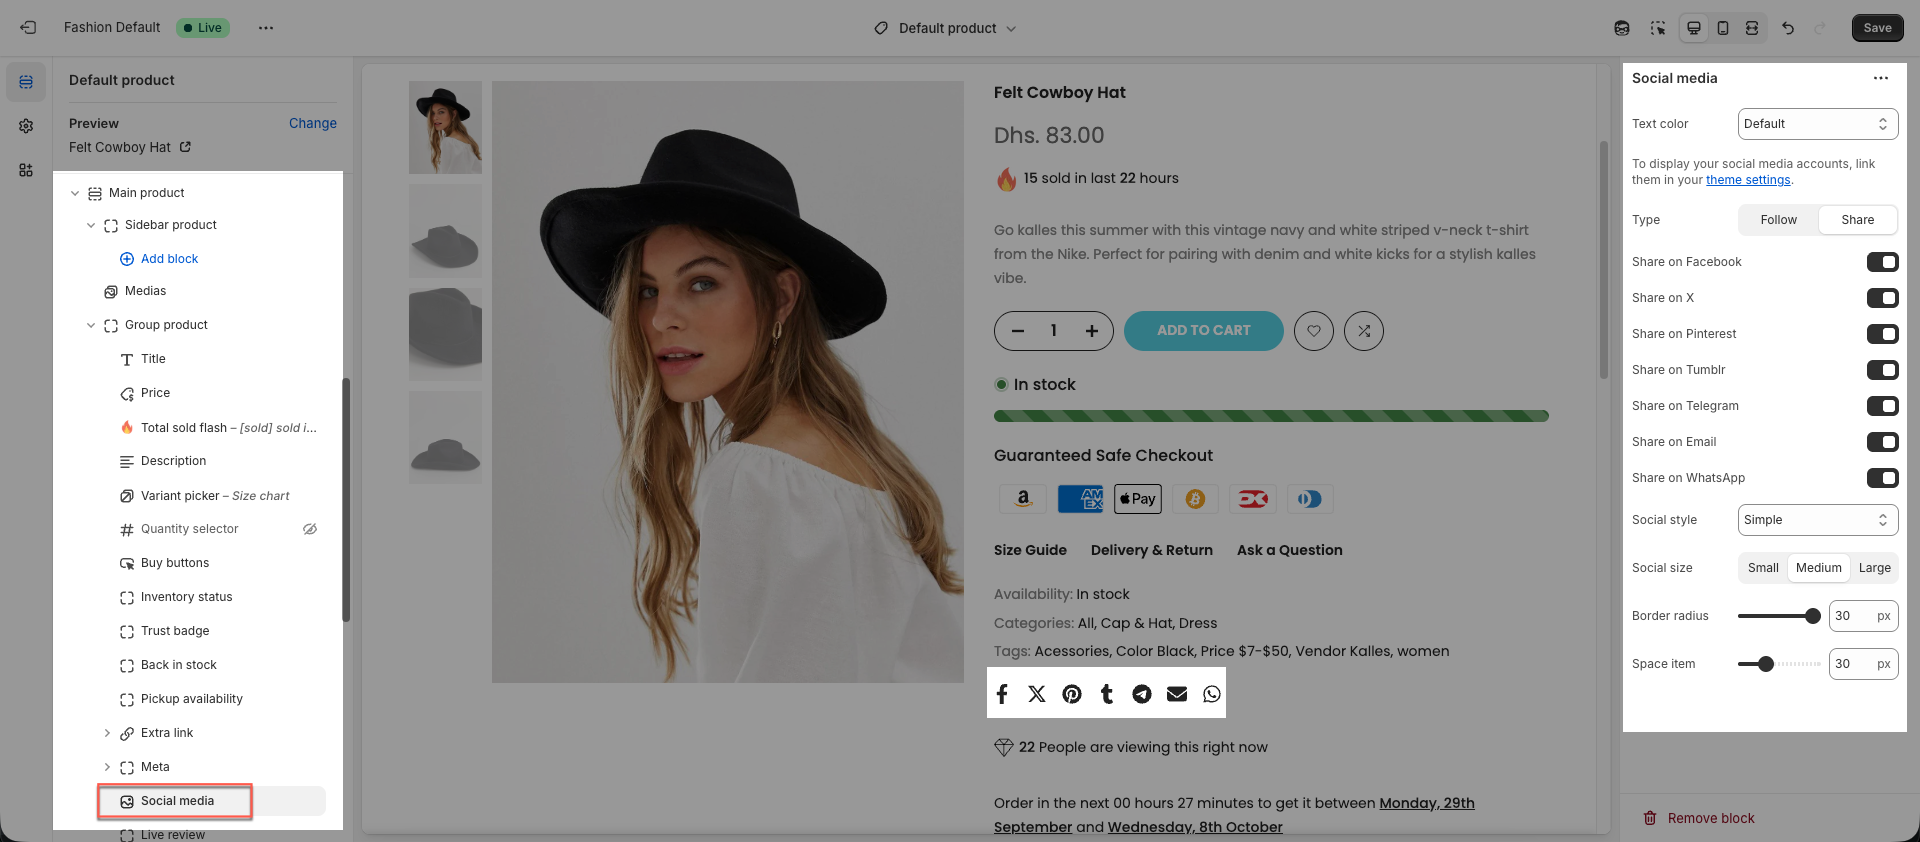
To hide an icon, simply remove its link in Theme settings.