


If you need a section that shows clear Before–After images with side-by-side comparison?
Add customer testimonials (optionally metrics/timeframe) to validate results.
The Testimonials – Before & After section is the right pick to boost trust and conversions.
How to Configure the Section?
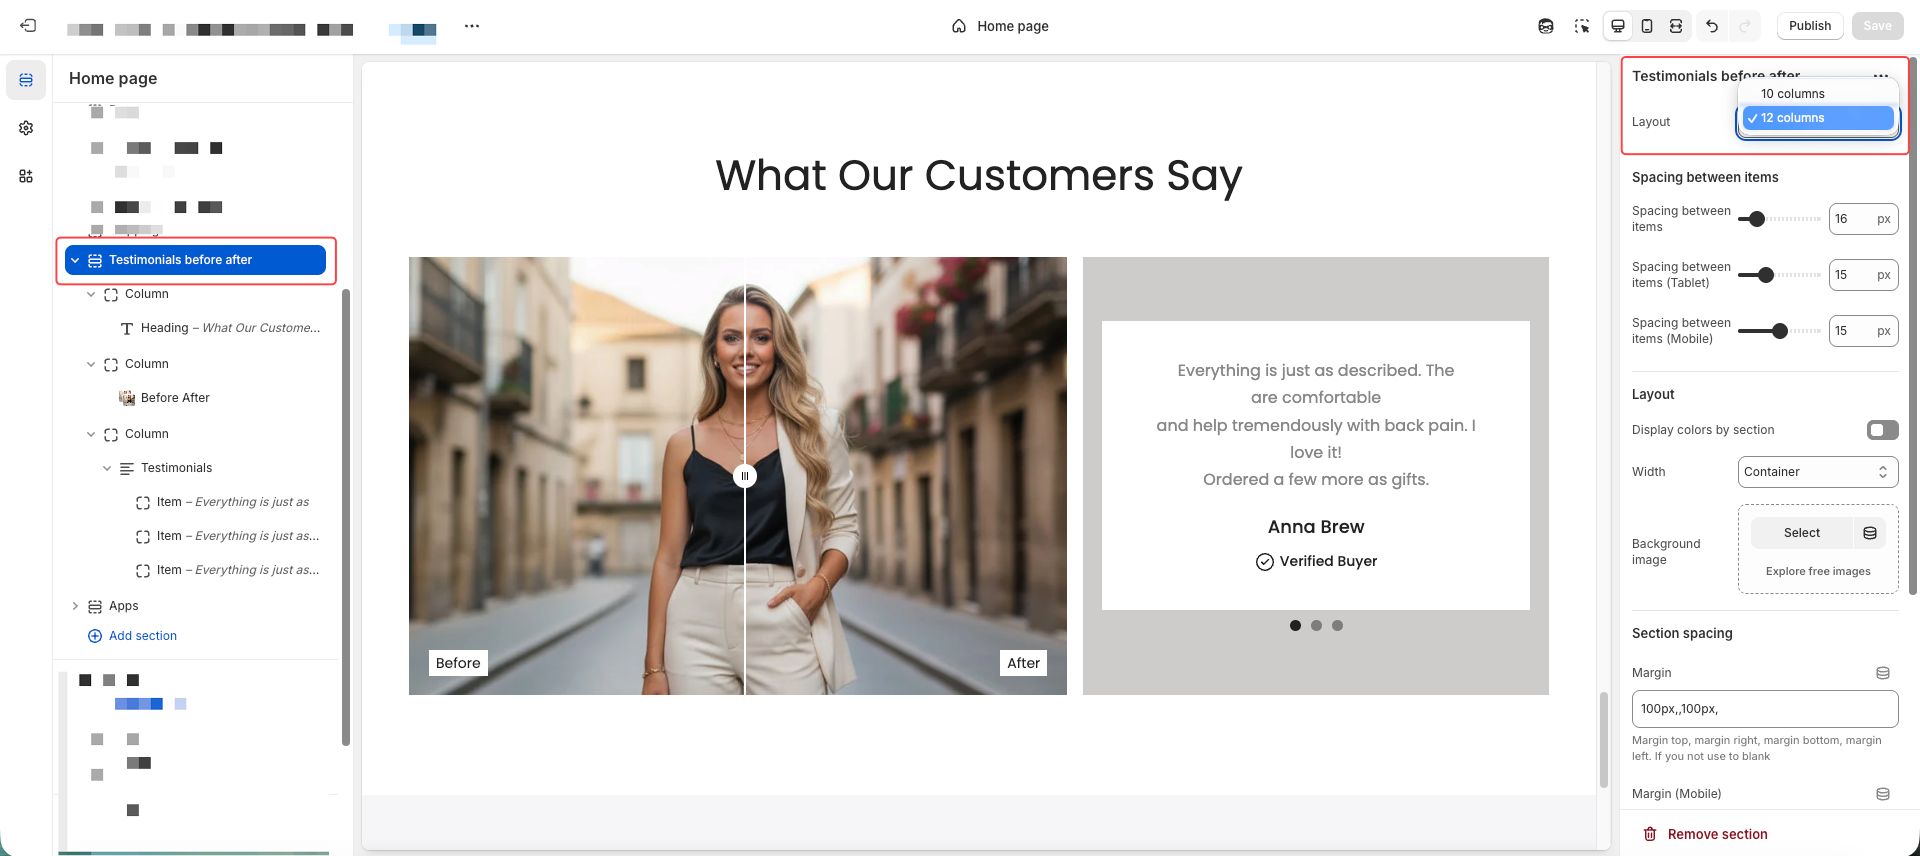
Add the section: Testimonials Before After. This section includes a column layout option of 10 columns or 12 columns.
With 10 columns, you will divide the layout into even numbers such as 10%, 20%, 30%, etc.
With 12 columns, you can divide into more flexible fractional values such as 8.33%, 16.66%, etc.
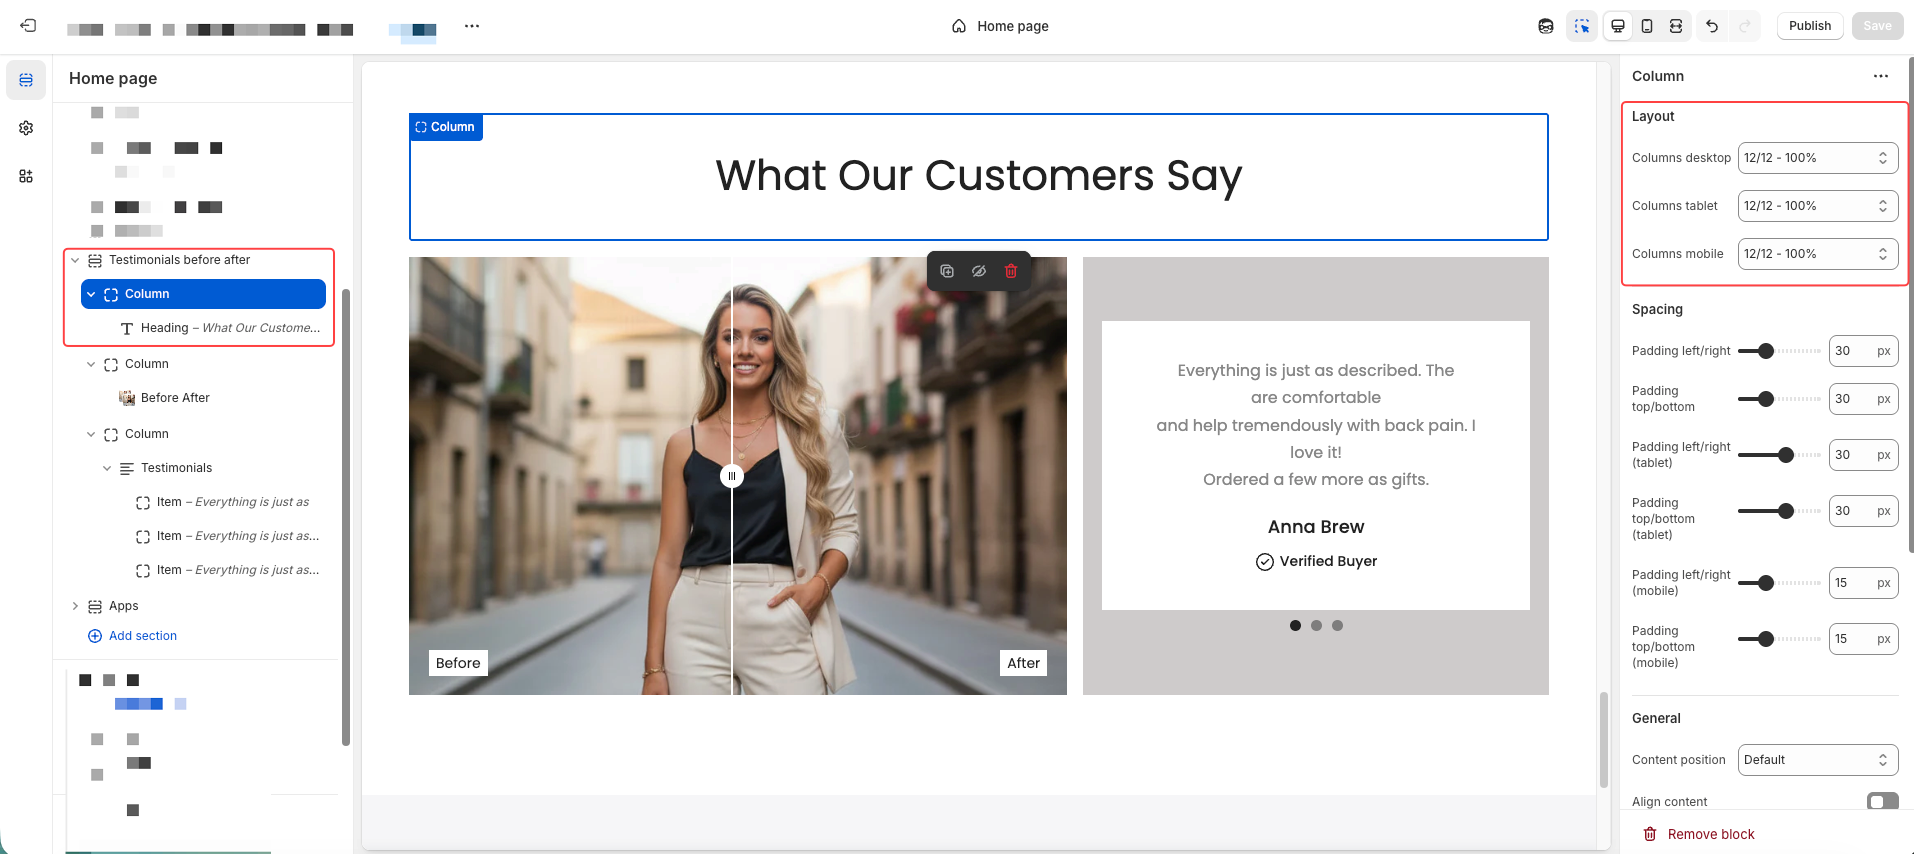
1. Show Heading
Add a column with 100% width and insert a Heading block so the heading stays on a separate full row at the top.
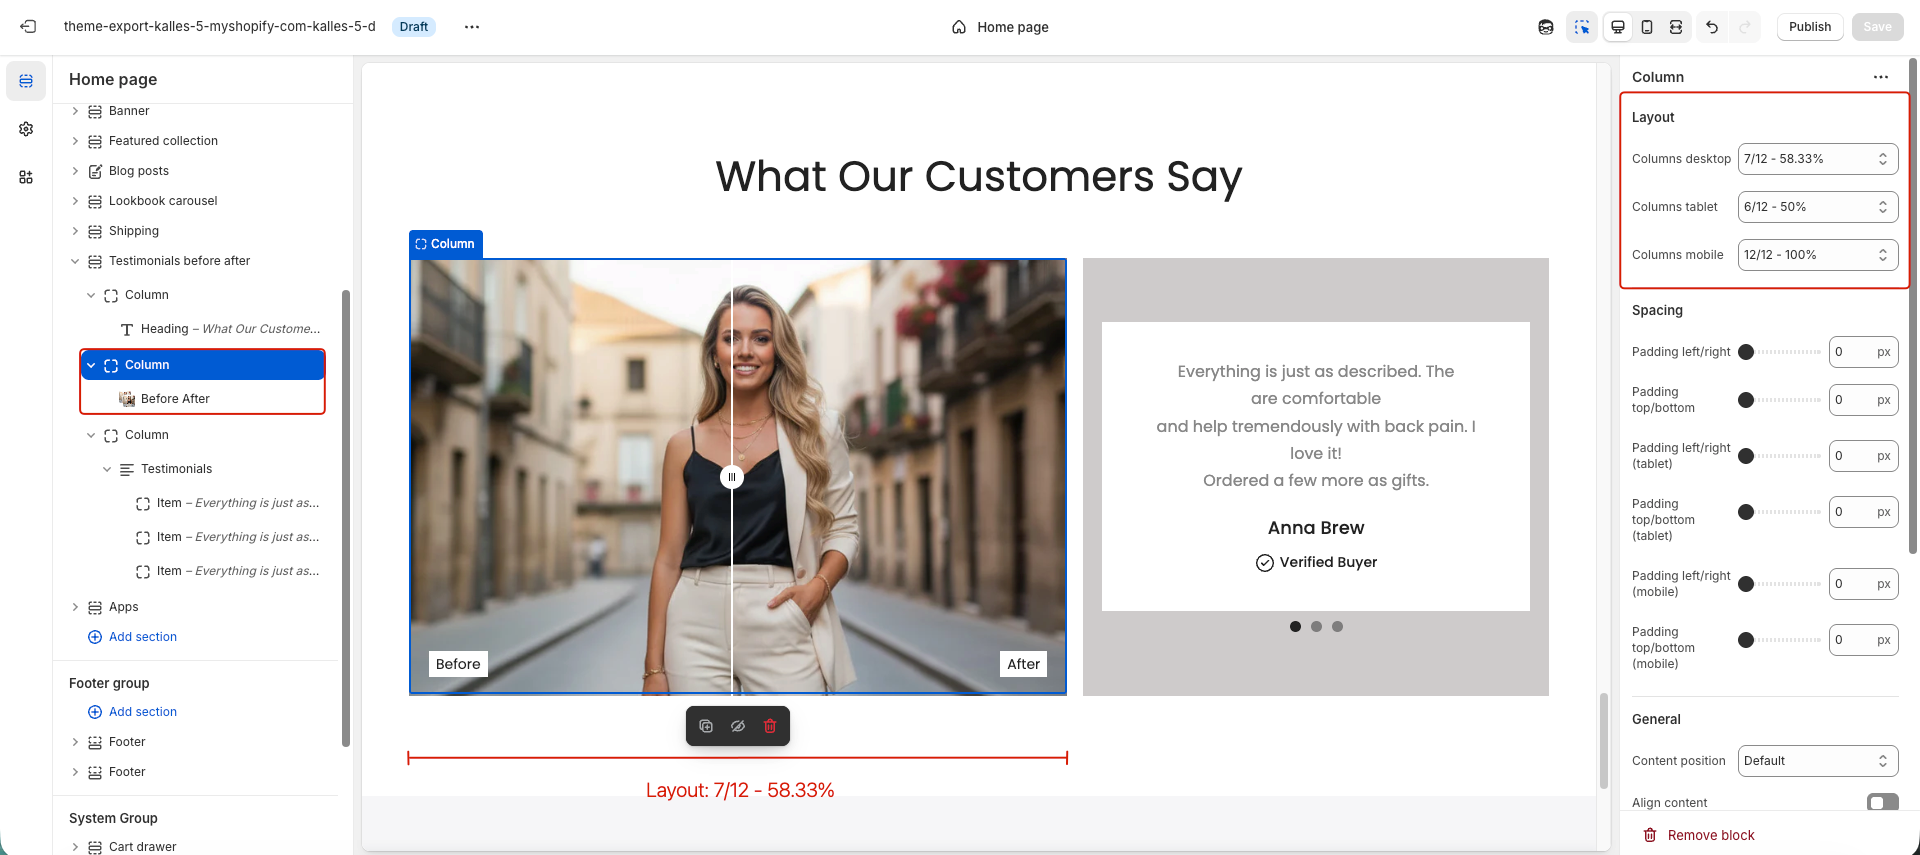
2. Add Before/After Image
Add a new column for the image.
For example, in our demo, the column width is 58.33%.
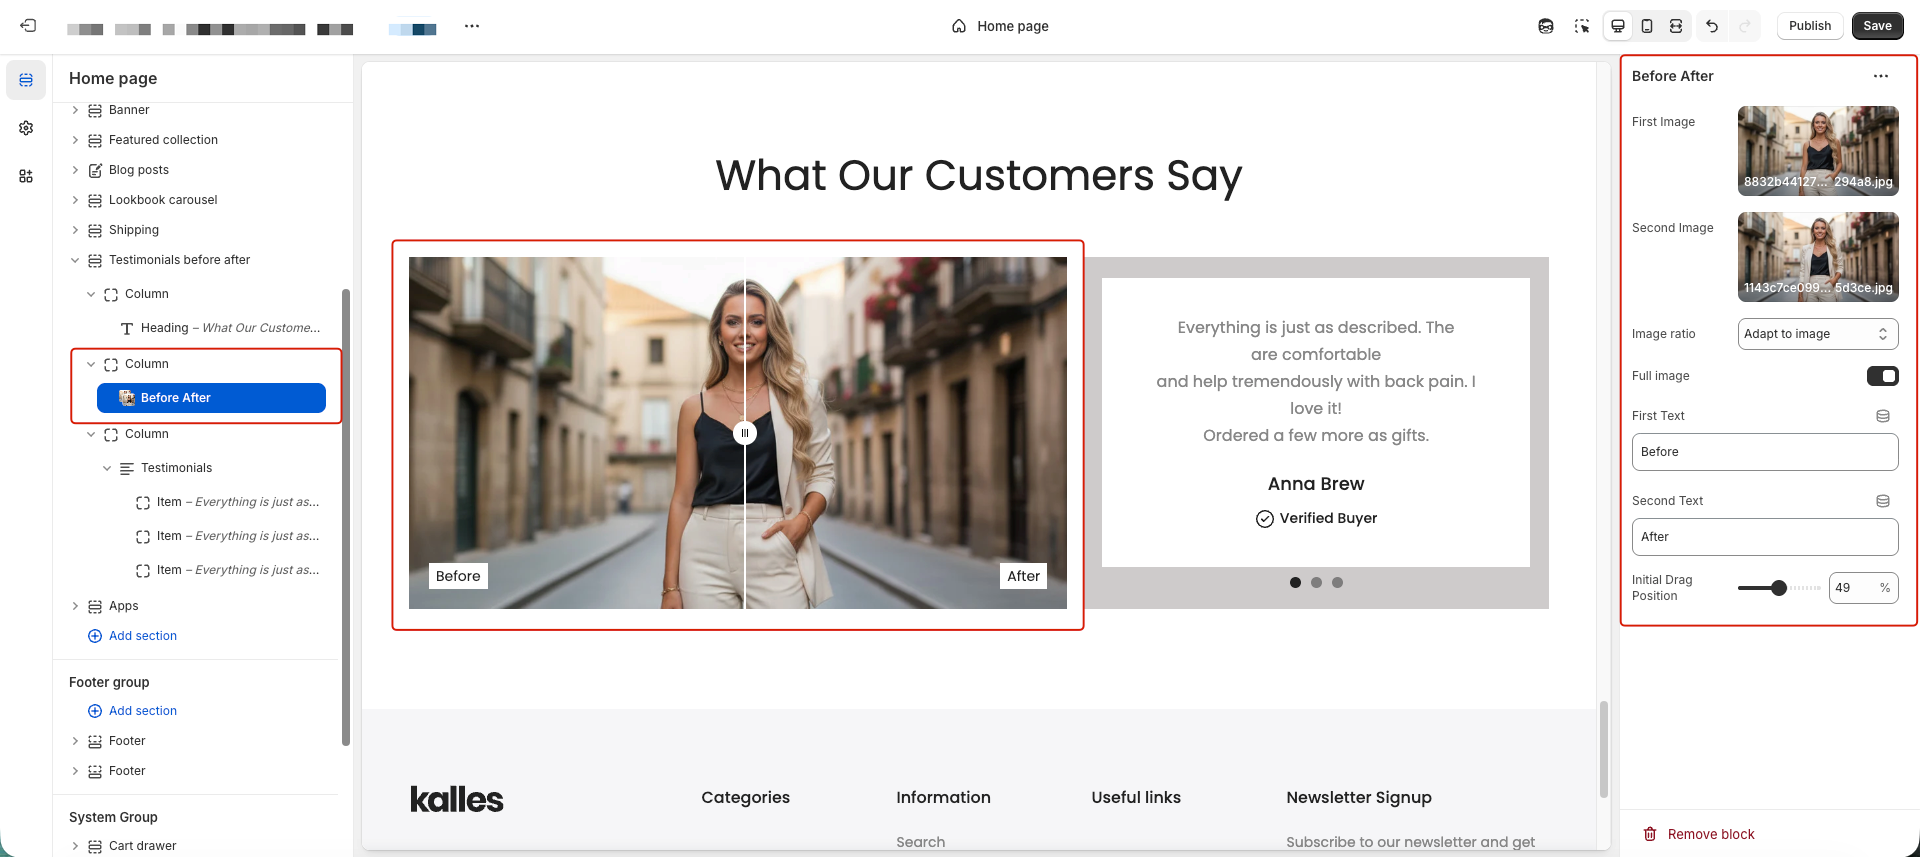
Then, select two images for Before and After, configure Image ratio, enable Show Full Image, update the Before/After text, and adjust the Initial Drag Position using the available settings.
3. Add Testimonial
Create a separate text column for the testimonial with a width of about 41.66%.
If you want both the Before/After image and the testimonial to be aligned in the same row, make sure the total width together equals 100%.
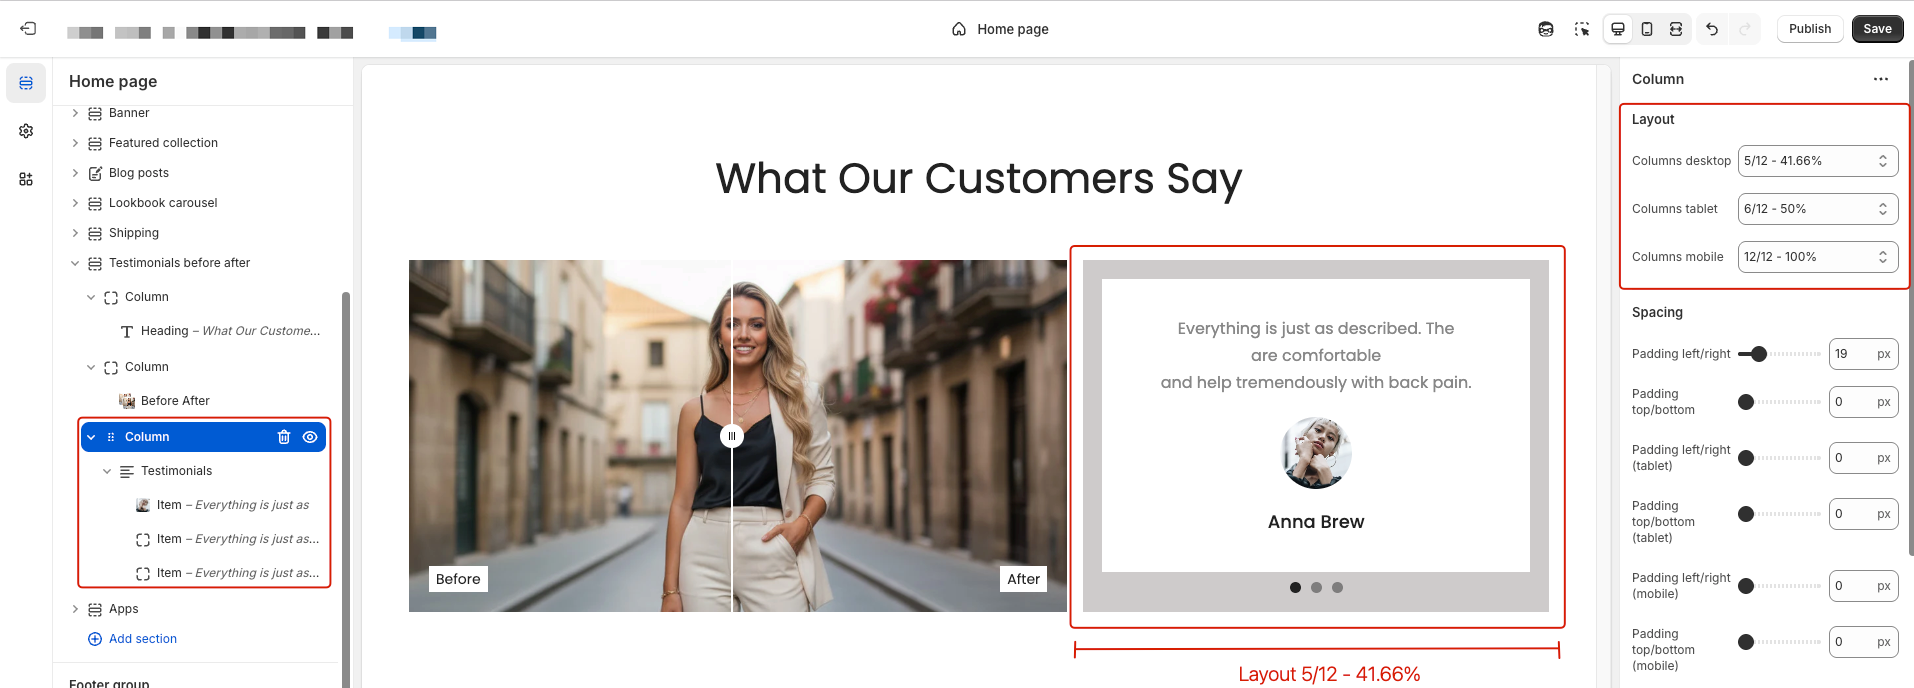
In this column, you can add multiple testimonial items such as Text, Avatar, Name, and Verified Buyer.


