


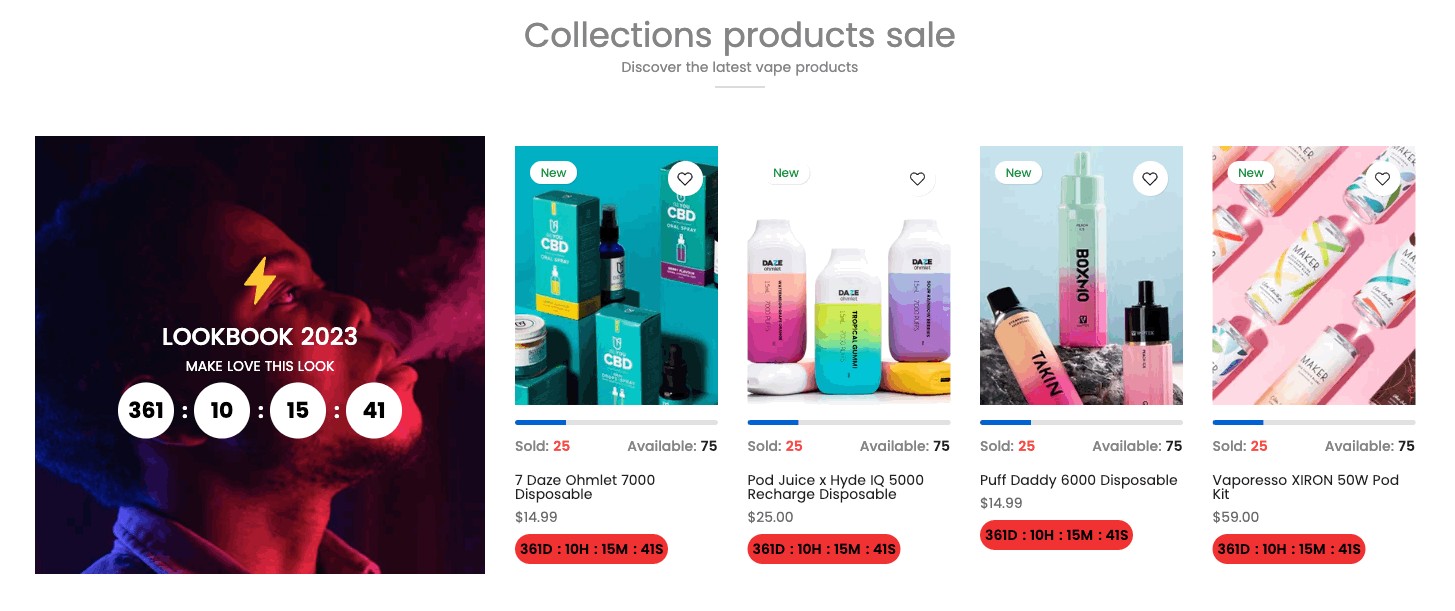
This section show the products with countdown timer next to the banner. It is suitable for product discount campaigns. It is usually located on Homepage. However, Shopify 2.0 allows you to add the Featured Product section to any pages that you wanna use.
Steps
In the theme editor (Customize), click Add section
Search Discount products banner
Click Save
1. Discount products banner Content
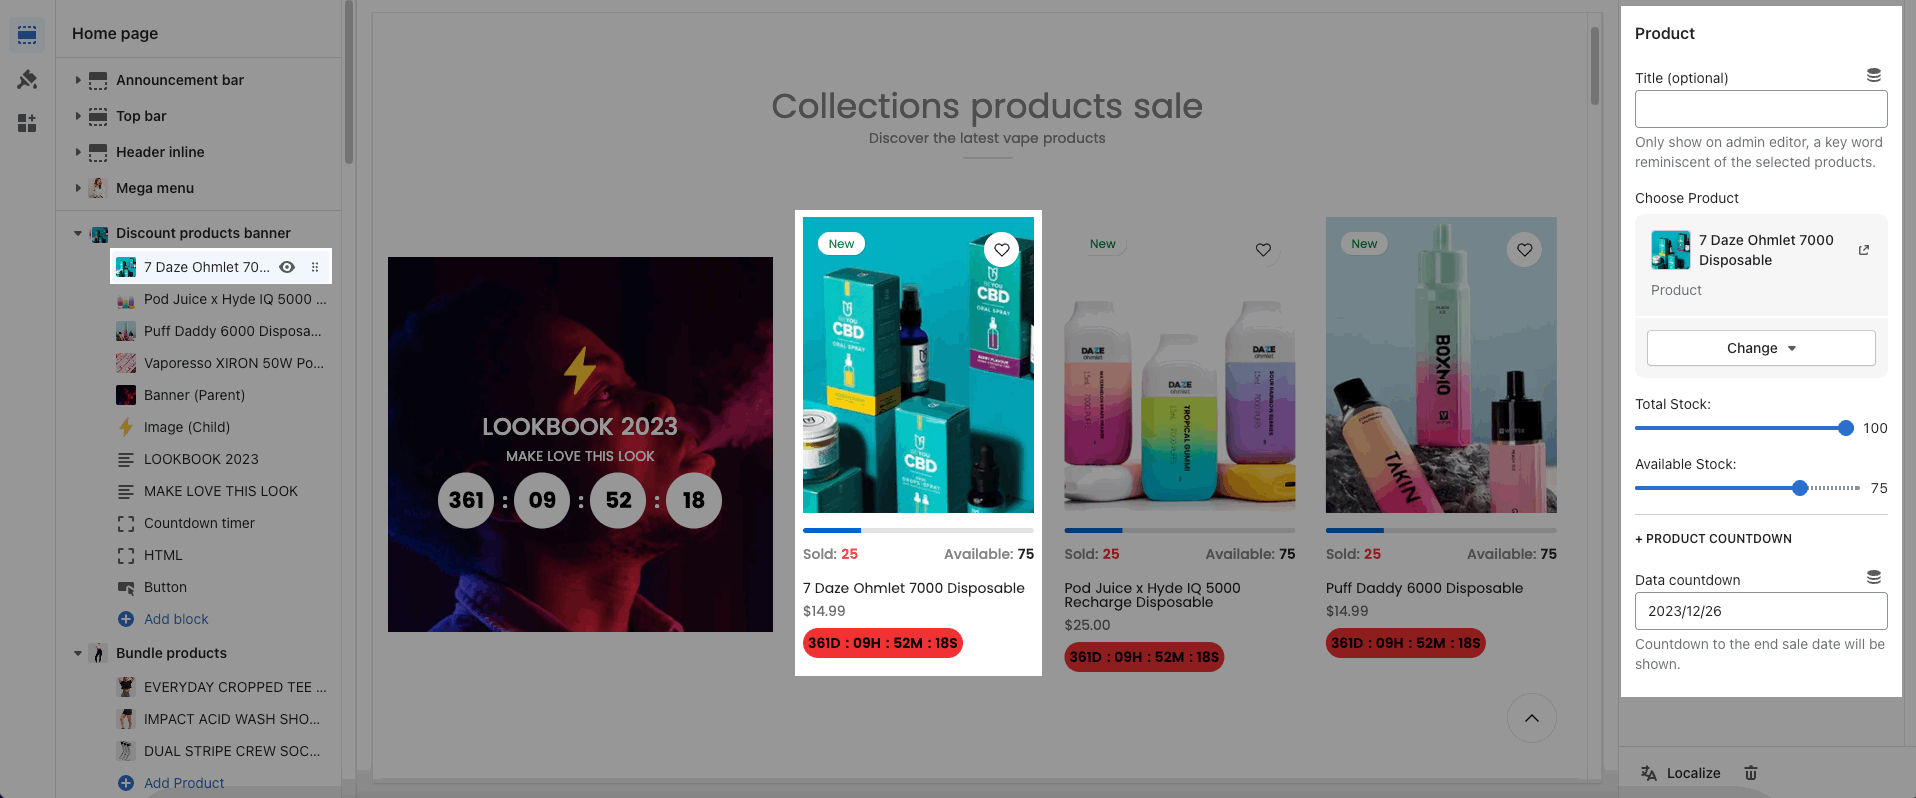
1.1. Product
The Product block only shows when you leave the Select products blank.
In this block, you can choose Product, Total Stock, Available Stock and Data countdown for each Product.
1.2. Banner (Parent)
You can choose and config an image for the banner. Moreover, you can config the content align, height banner, vertical/horizontal position, overlay/background/border for the banner and content. Please see this video to know more:
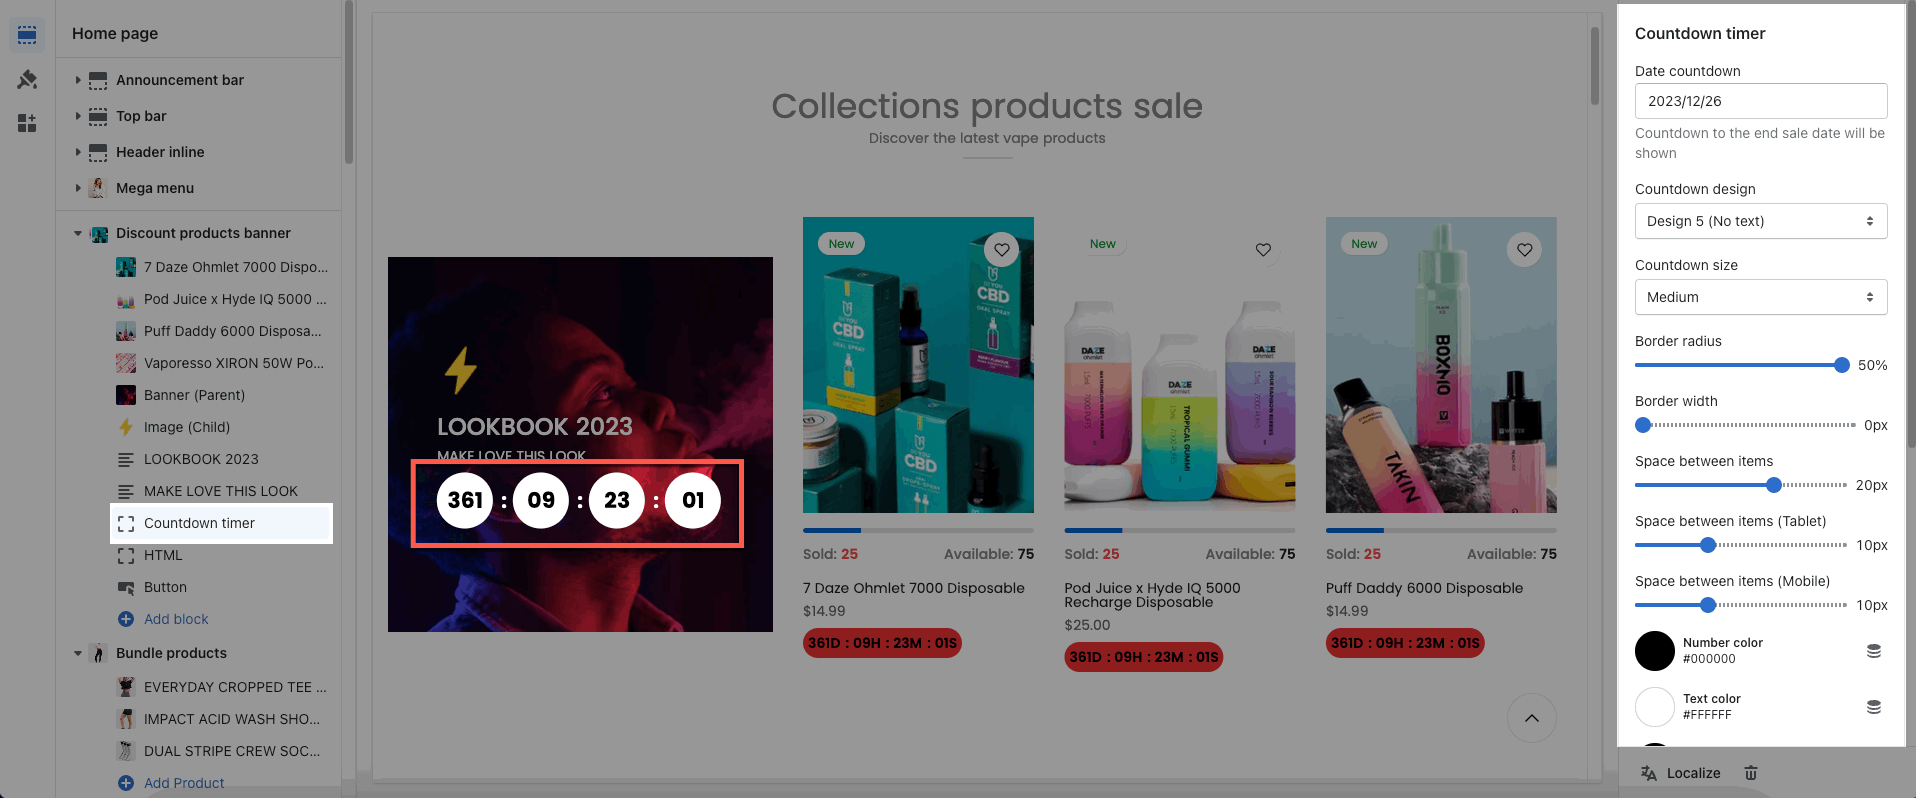
1.3. Countdown timer
This block allows you to config the Date Countdown, Countdown design, Border, Spacing and Color of text and number.
1.4. Other blocks
You can refer to the video below to know about other blocks: Text, HTML, Image (Child), Button, Newsletter and Space HTML.
2. How to configure the Discount products banner section?
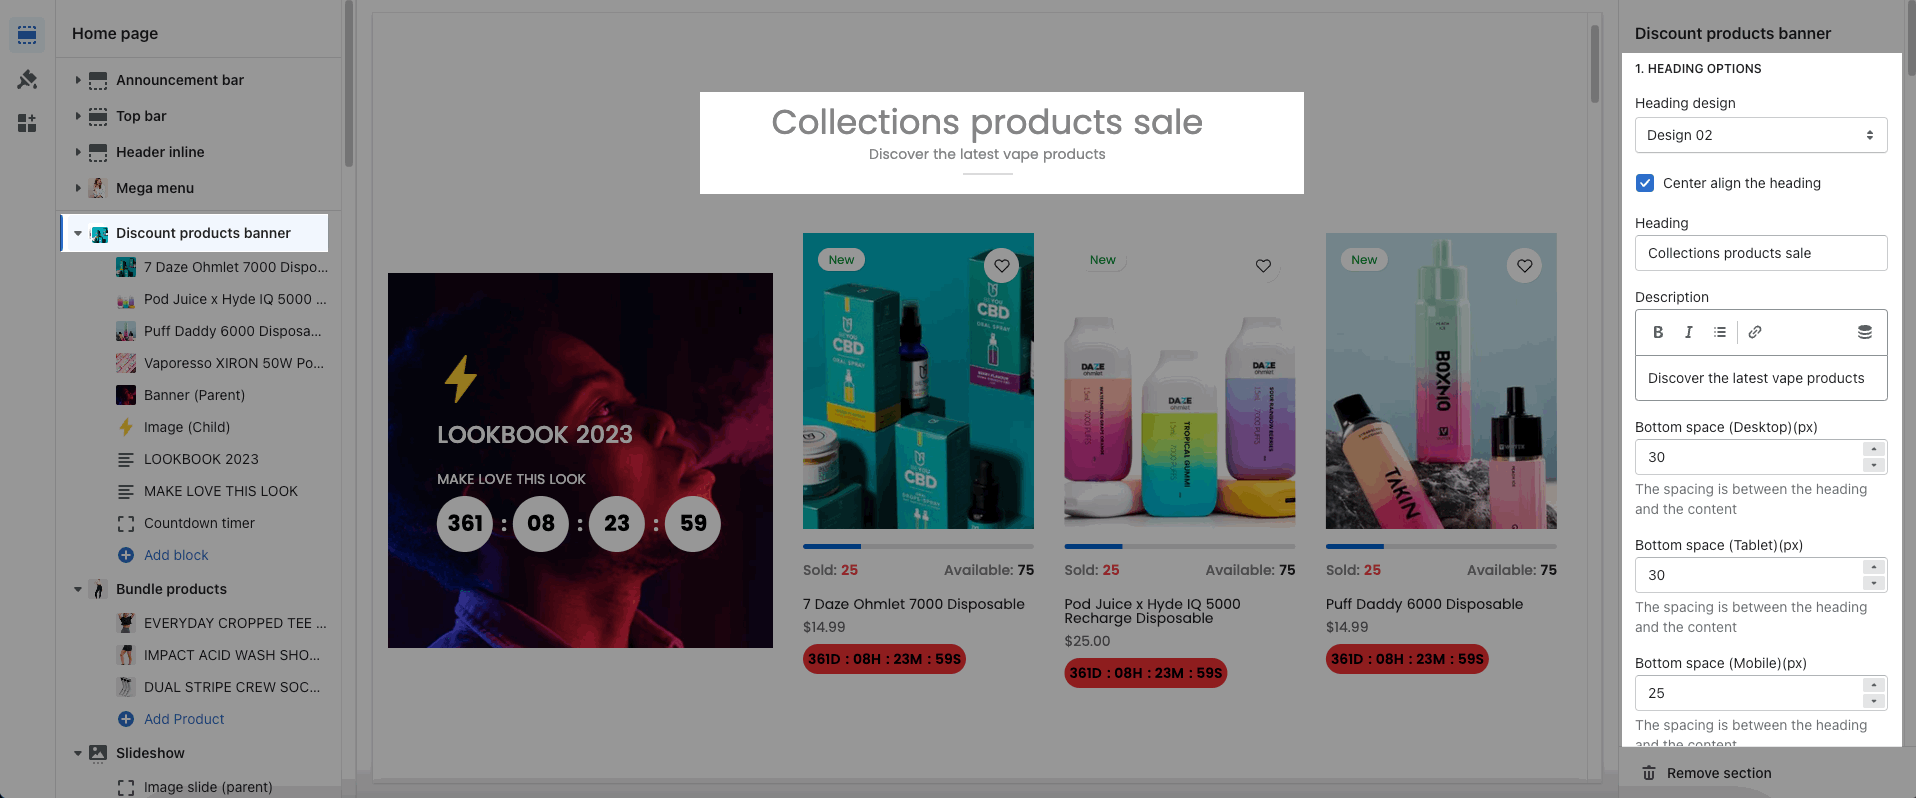
2.1. HEADING OPTIONS
You can choose the design for the heading, also can choose center align and bottom space.
2.2. GENERAL OPTIONS
List products position: choose position left or right for list products
Enable border product image
List products background: choose background color for list products
Select product: choose a list of products to show. Leave blank to use product added
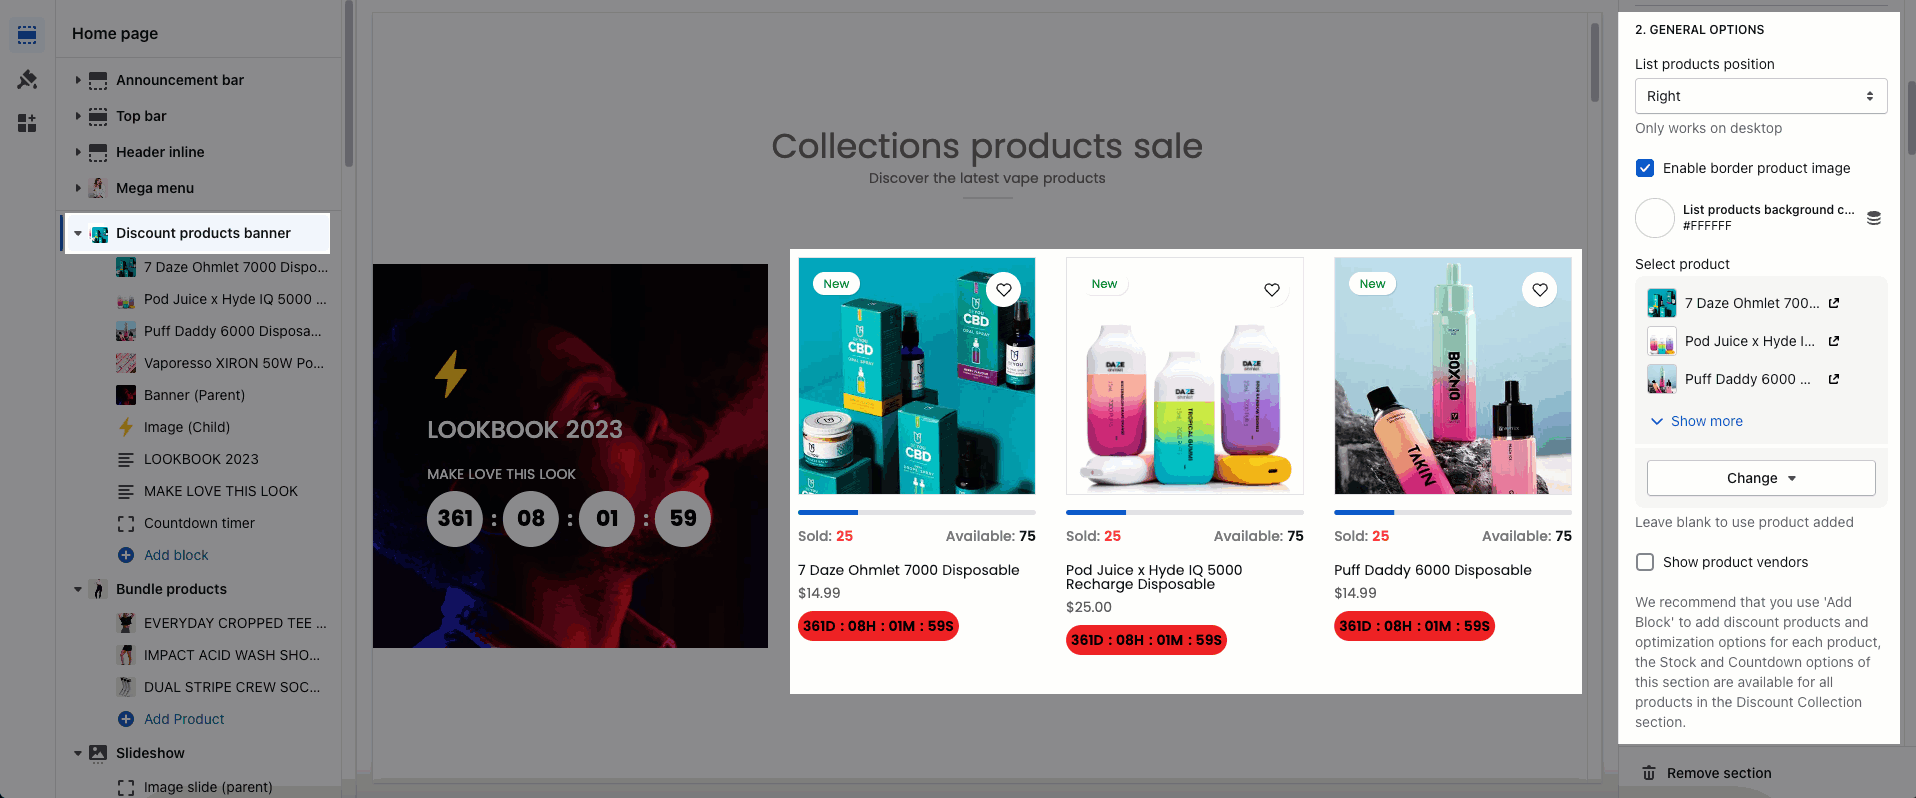
We recommend that you use 'Add Block' to add discount products and optimization options for each product, the Stock and Countdown options of this section are available for all products in the Discount Collection section.
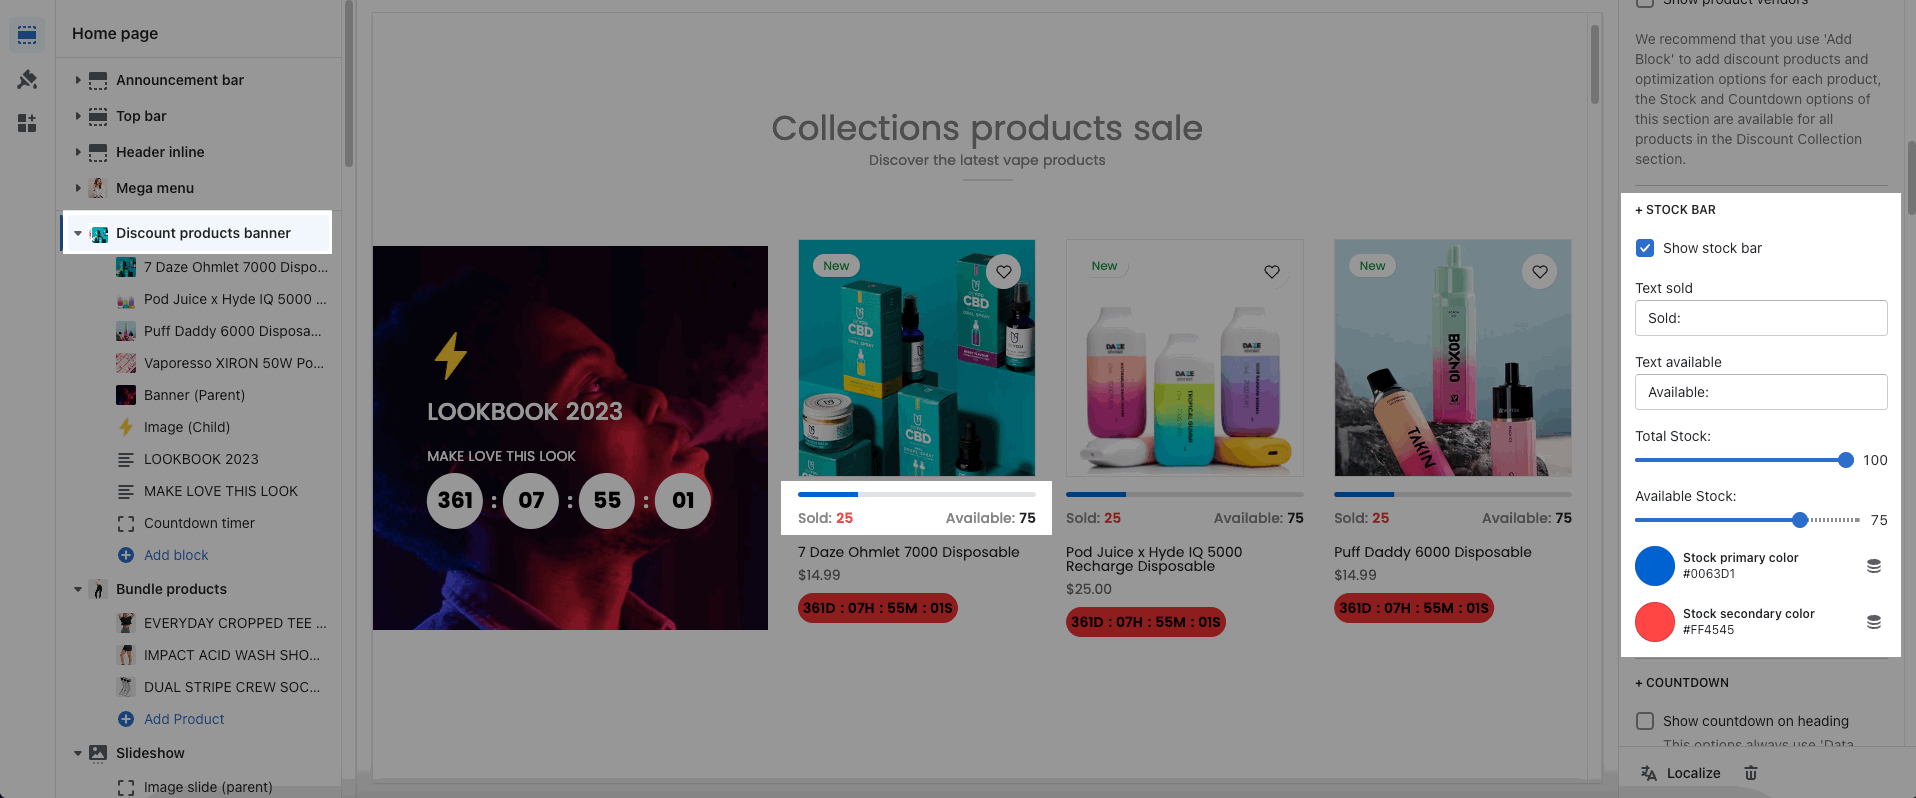
STOCK BAR: the stock bar will be applied for all products in product list.
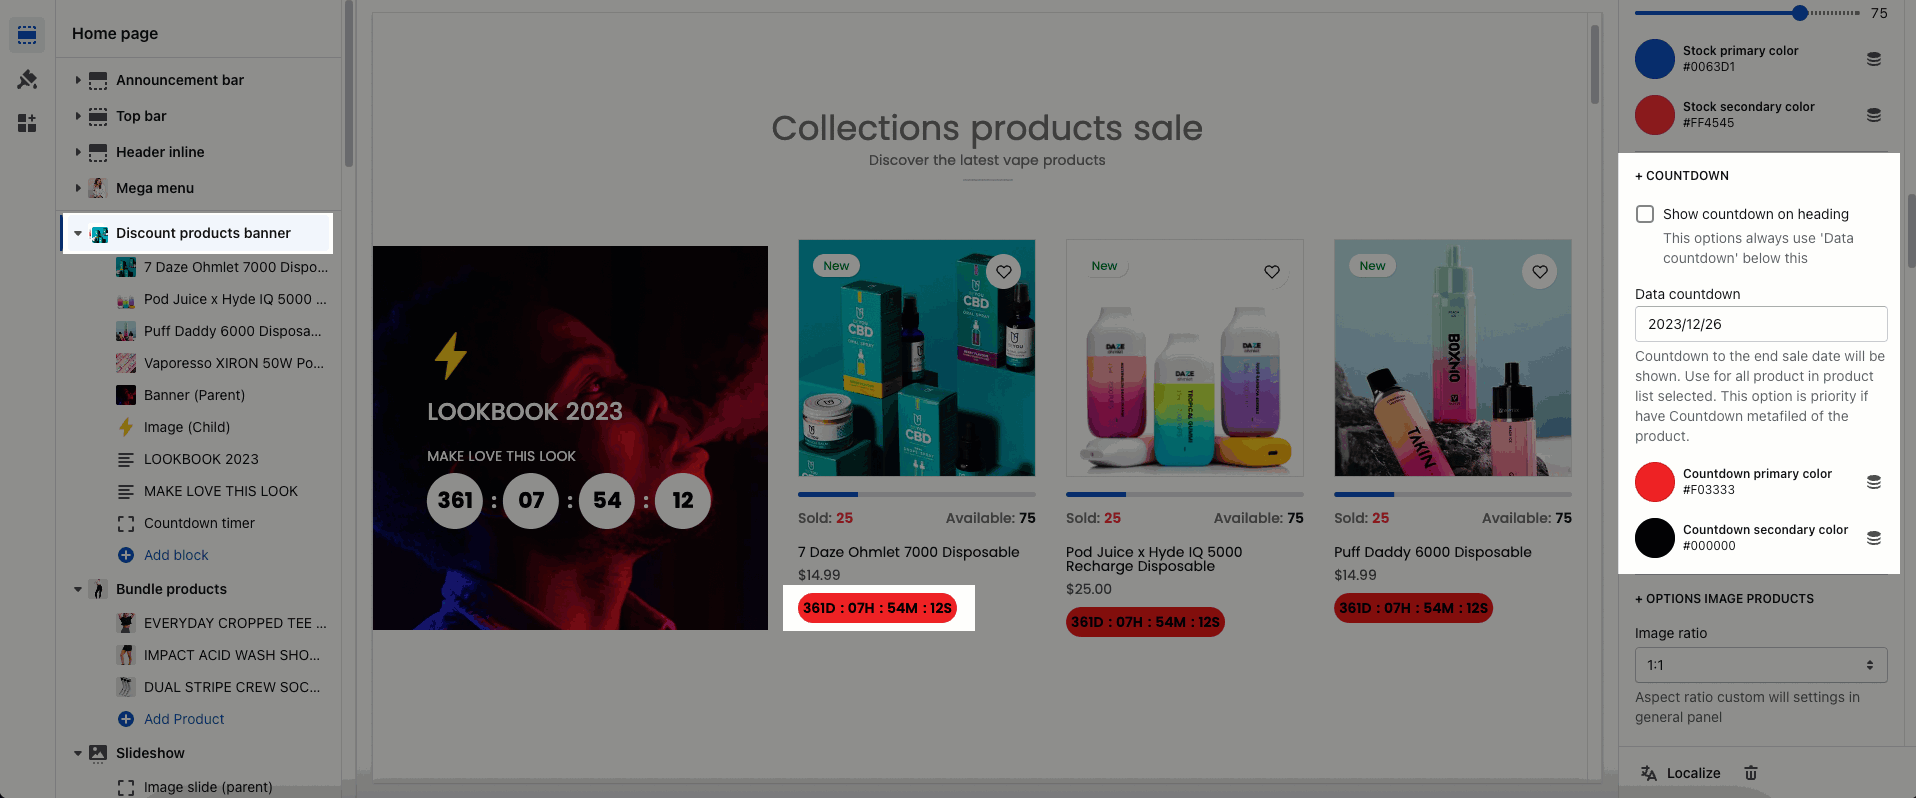
COUNTDOWN: Use for all product in product list selected. This option is priority if have Countdown metafiled of the product.
To config the countdown metafield for each product, please follow this guide.
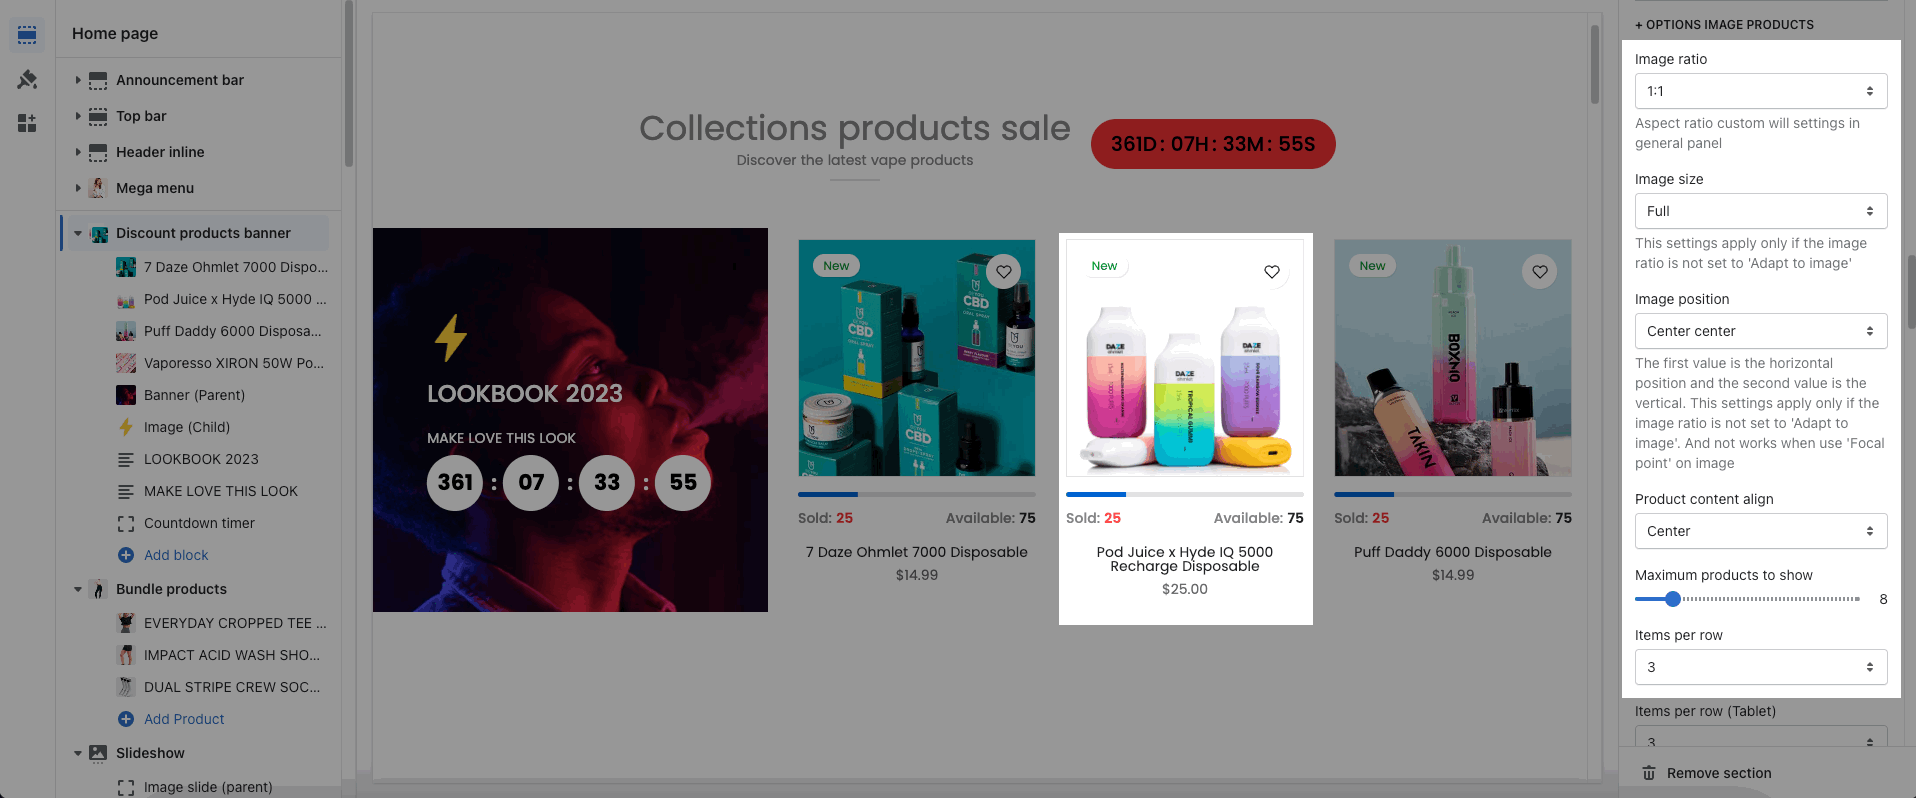
2.3. OPTIONS IMAGE PRODUCTS
These options allow you to config the image: Image ratio, Image size, Image position. In addition, you can choose Product content align, Maximum products to show, Items per row, Space horizontal/vertical items.
2.4. BOX OPTIONS
You can choose Layout design: Carousel or Grid. Please see this video to know more:
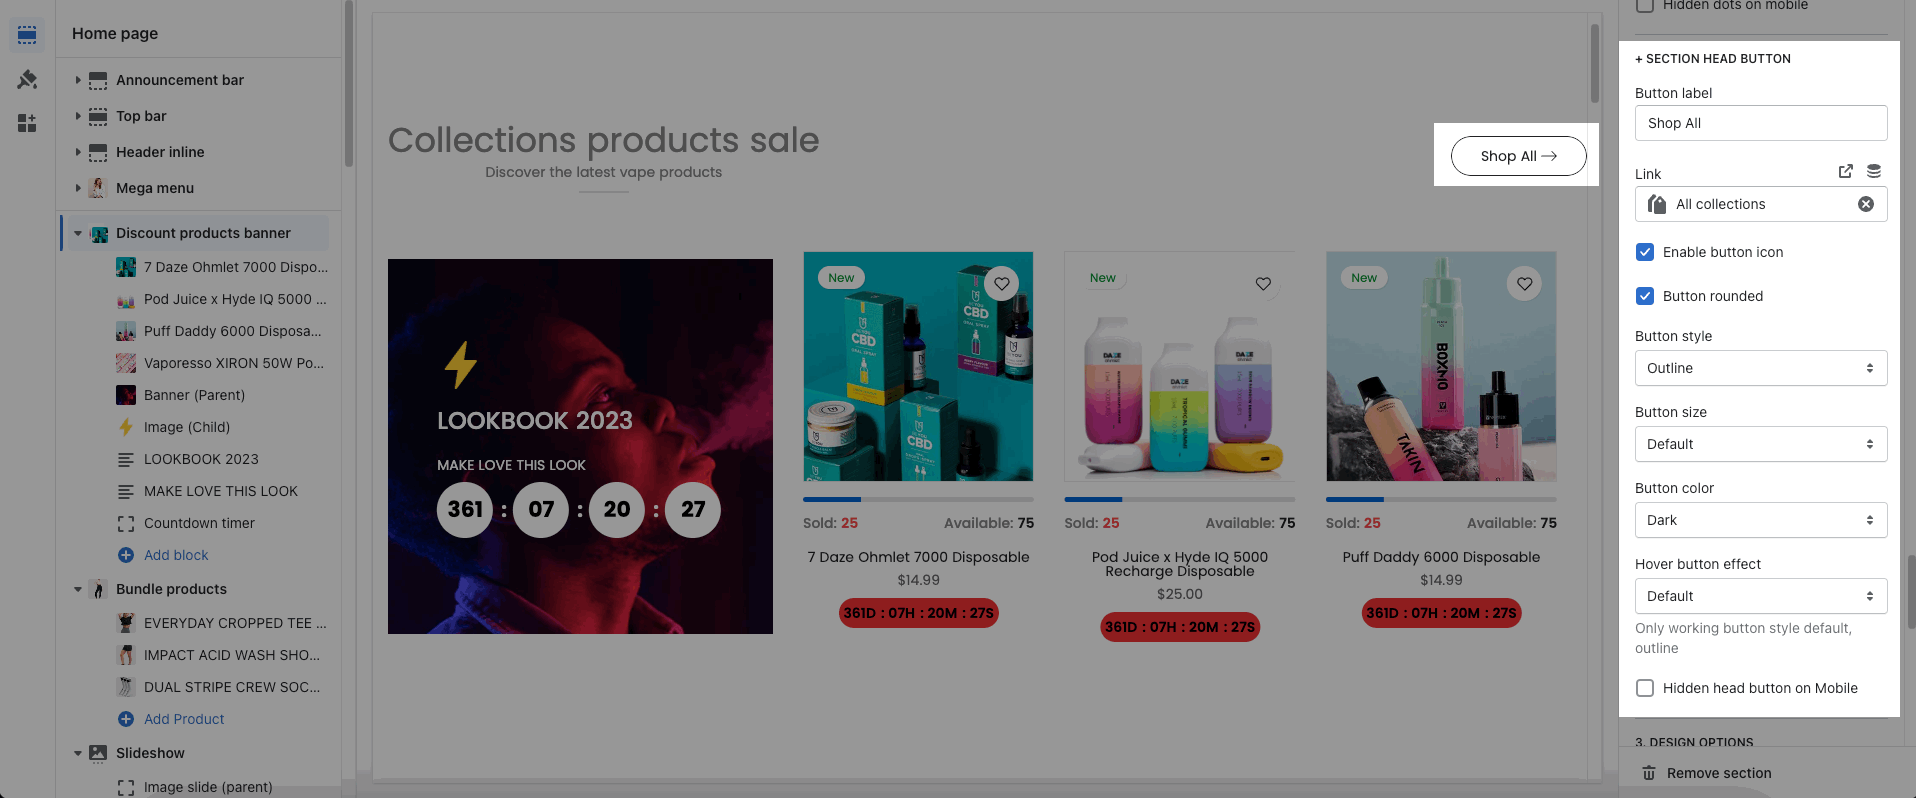
2.5. SECTION HEAD BUTTON
You can enter the Button label and many other options to choose the design for the button.
2.6. DESIGN OPTIONS
Please follow this guideline to config Layout, Background, Margin/Padding for the section.


