


Contact Form allows customers to leave contact information to support marketing campaigns. Besides, customers also have information about the online store to contact. It is quite important in a website, with Shopify 2.0 you can add sections in many places.

Steps: Theme editor (Customize) > Add Section > Contact Form > Save
1. Contact Form Setting
Use map option and you can change the address of your store on Google Maps.

To embed a map, please follow this video:
Design Options:
Please follow this guideline to config Layout, Background, Margin/Padding for the section.
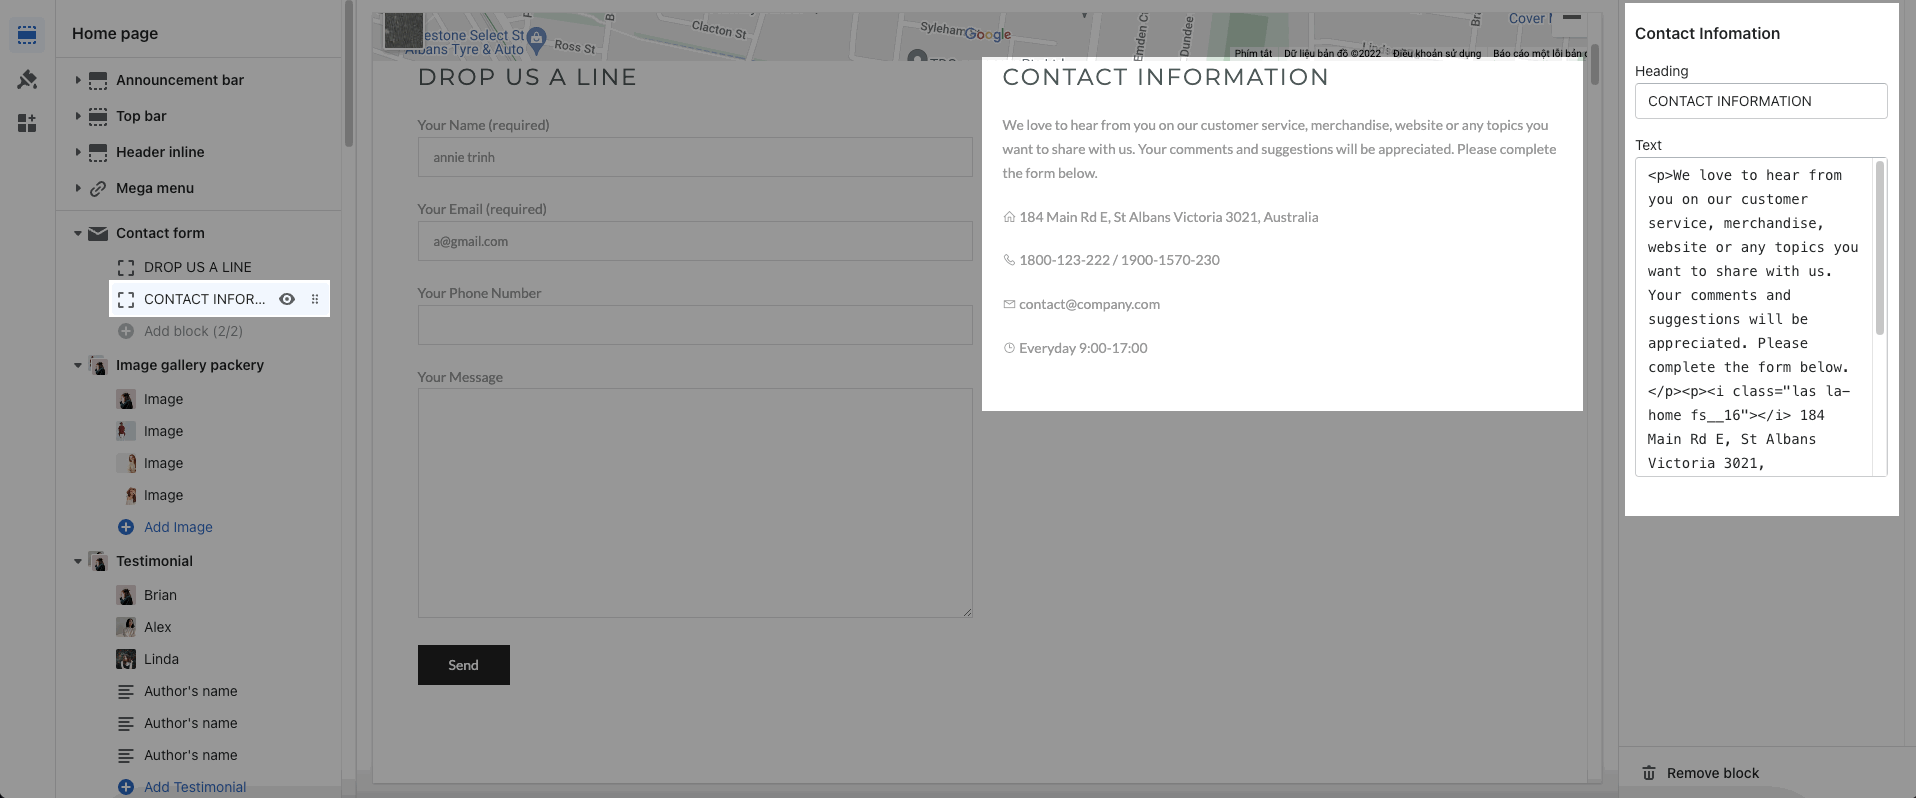
2. Contact Form Content
Contact Form: This block helps customers can leave information such as name, email, phone number and message.

Contact information: It allows you can add your information to contact such as an address, timetable, etc.
Note: When a customer sends you information, it will be sent to your email that is registered to receive notifications in Store Details. If you don't see Shopify email please check Spam Email.
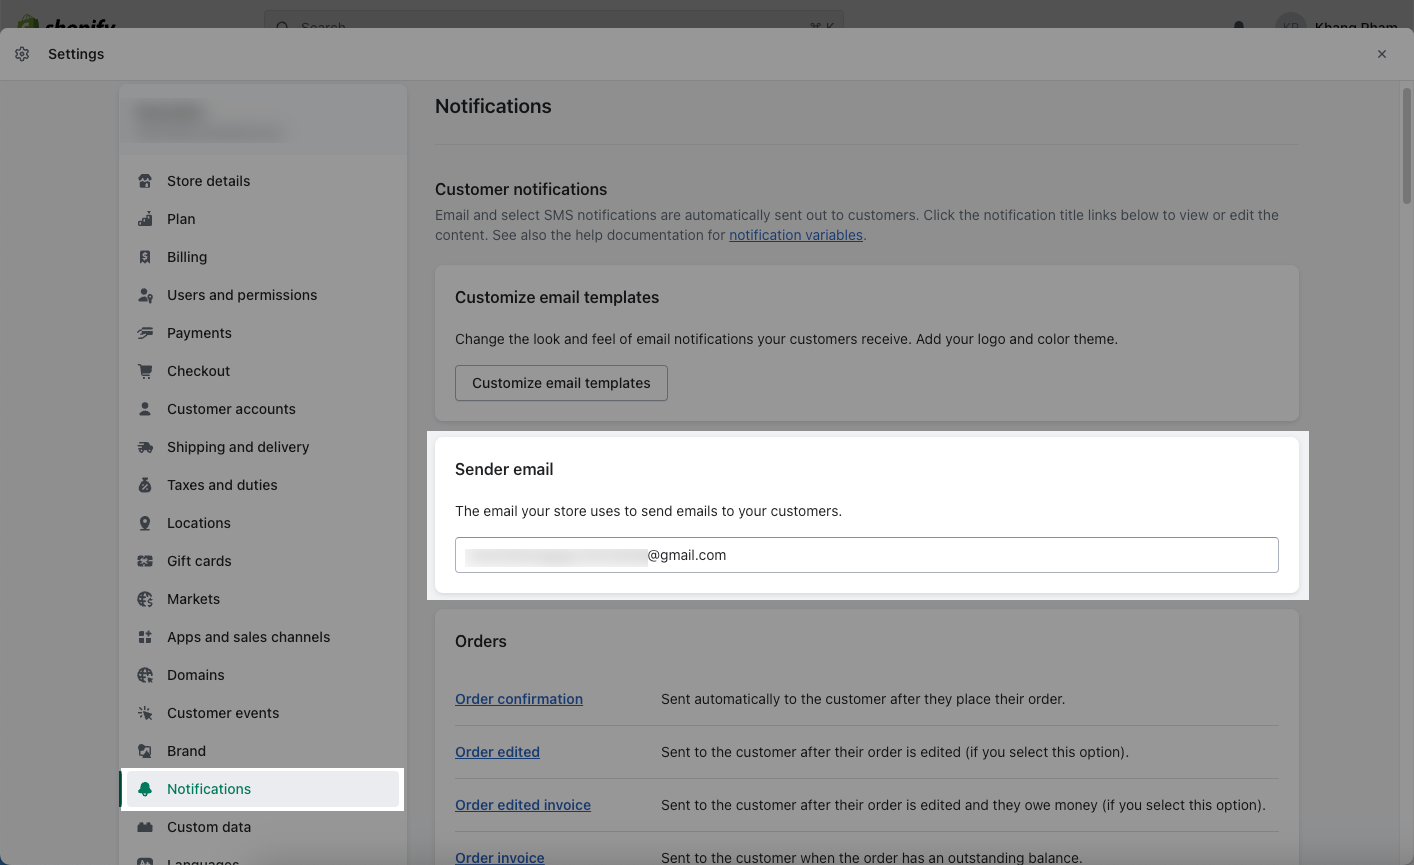
This is the email from Shopify sent you if you have a customer leaving the information.


