


Newsletters are one of the most powerful digital marketing tools at your disposal since they let you communicate directly with your customers in a personalized way when they subscribed.
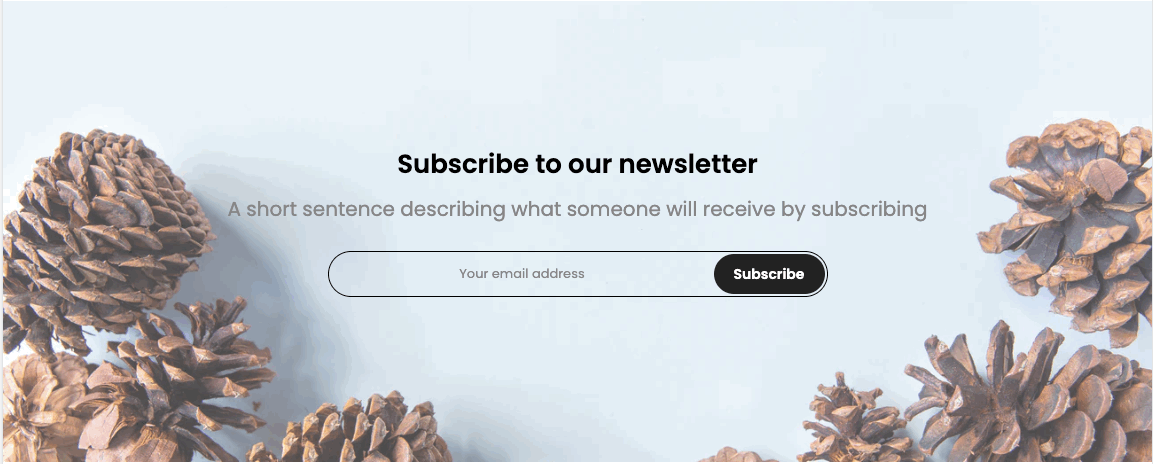
Note: After the customer fills in the email in the newsletter form, the customer's email will be saved in Shopify admin > Customers or in the email marketing app that you use. This belongs to the setting in Theme settings > General. You can refer to this guide for details Link

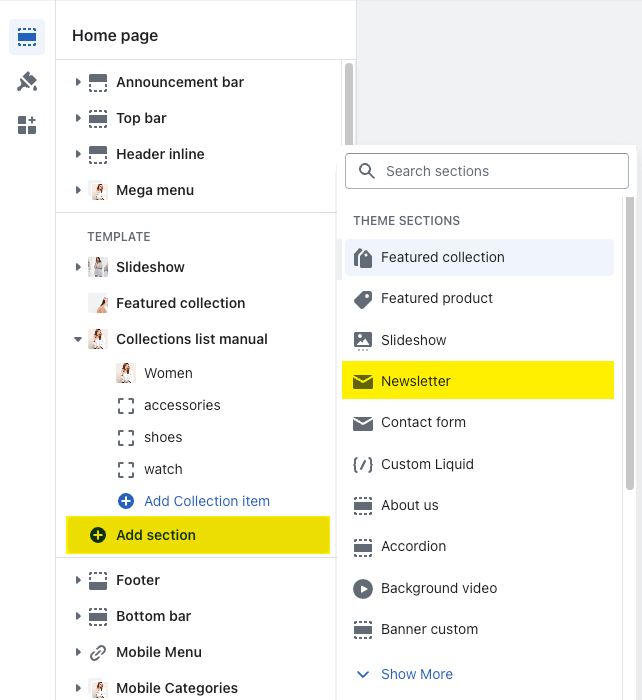
Steps: In the theme editor (Customize) > Add section > Newsletter > Save.
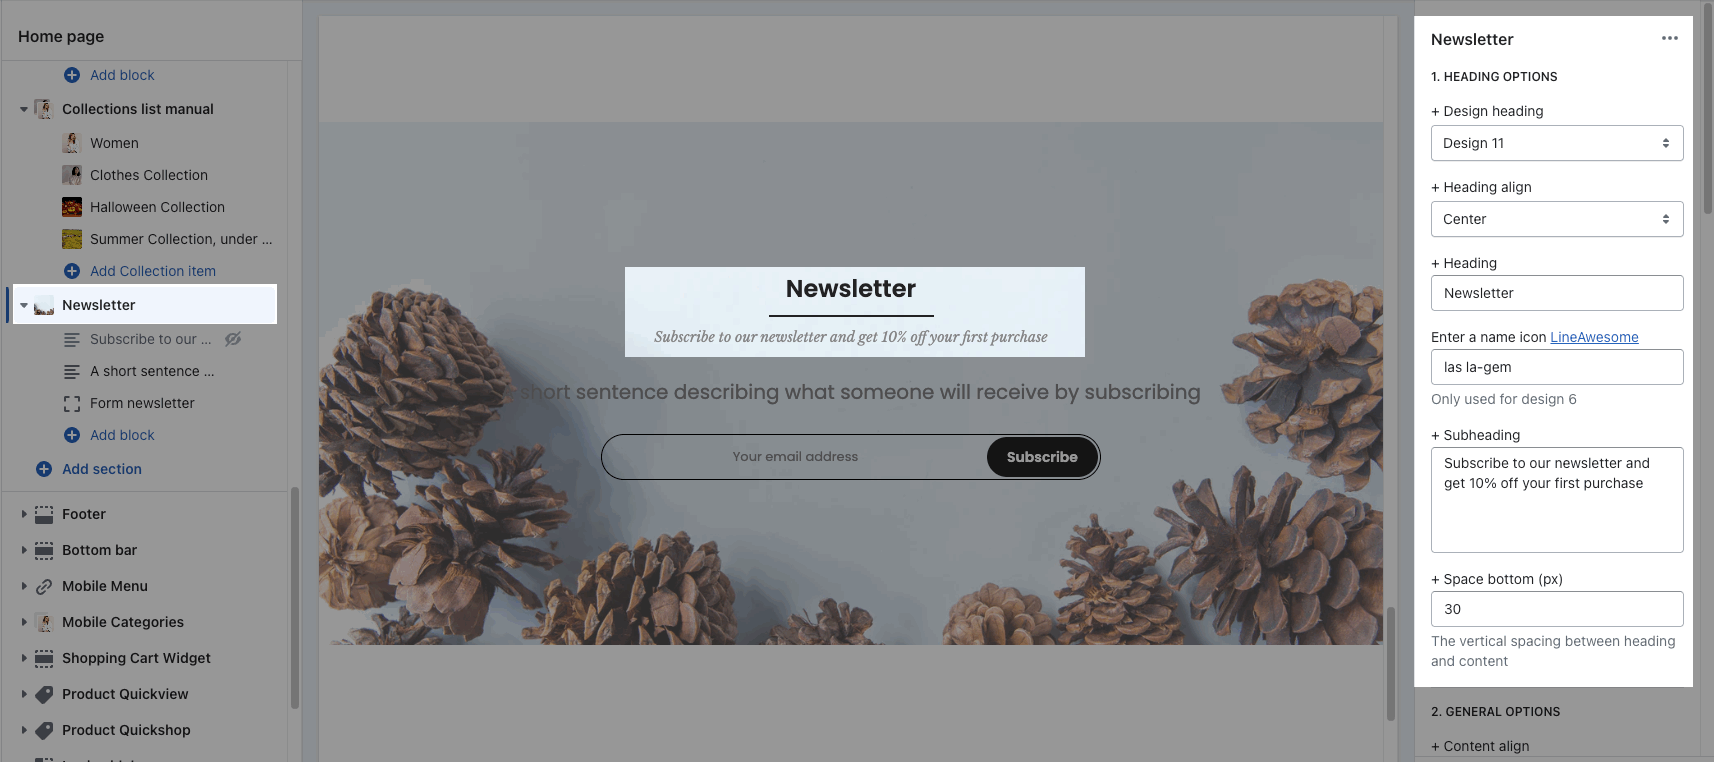
1. Newsletter item content
You are allowed to add Text, Button, HTML, Image(Child), Countdown timer, Space HTML to this section.
Click on Newsletter > ADD BLOCK > choose the block you want to add.
You can refer to this video to know more about these blocks:
2. How to configure the Newsletter section?
Heading options: You can freely add the section heading and customize it with many design options.
General options: You can choose a layout, design and set the content align, Enable border of newsletter box for the section.
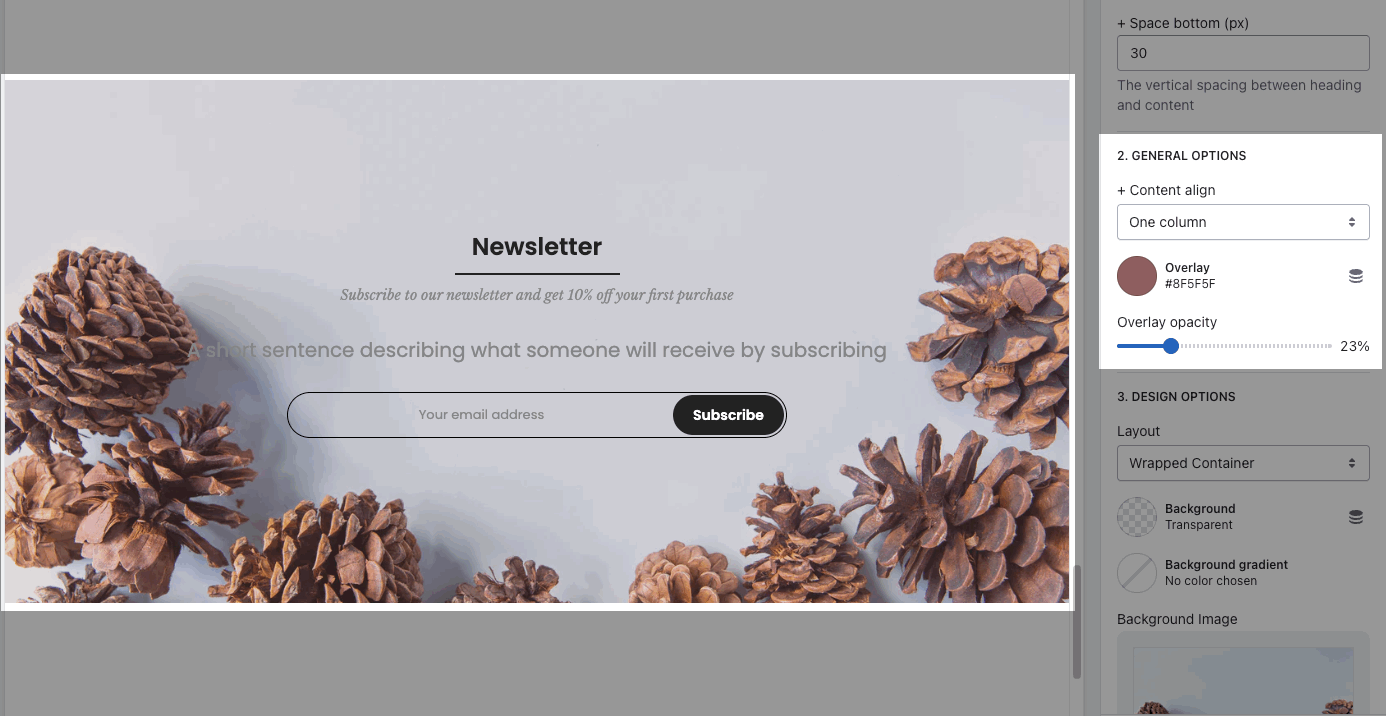
Design options: Please follow this guideline to config Layout, Background, Margin/Padding for the section.
Enable parallax scroll: you can check video below about this feature.


