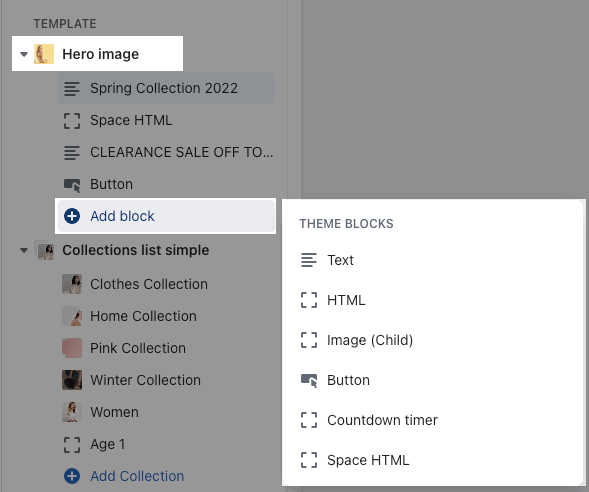
This section allows you to add an image as a big banner. You also can add texts, call-out buttons for them. It is usually located on Home Page. However, Shopify 2.0 allows you to add the Slideshow to any pages that you want.

Steps: In the theme editor (Customize) > Add section > Hero image > Save.
1. Hero image contents
Click on Hero image > ADD BLOCK > choose the block you want to add.

Text: you can add a text to the banner image and you can adjust text with many options like Font family, Font size, color, etc.
Button: This block allows you to create a button for the banner, you can customize this button with many options like add a link, style, effect, color, etc.
HTML: you can add a HTML codes
Image (Child): With this block, you can add a Image(child) inside the main image.
Countdown timer: This block helps you add the countdown timer and set it very easily just by adding the date countdown into.
Space HTML: This block allows you to create a separator line for this section.
You can refer to this video to know more about these blocks:
2. How to configure the Hero image section?
GENERAL OPTIONS:
Section Height option: This option allows you to configure the height for the Slideshow section. There are many choices for you to choose, if you choose the Custom height option, you can configure the height for all devices: Desktop, Tablet and mobile devices.
Please check this video to know more:
CONTENT POSITION:
Content align, Content position: please follow the video below to config it.
Notice: Content position option only works with Content width: Auto
CONTENT BACKGROUND, COLOR OPTIONS: help you config the color/design for the content box.
ANIMATION OPTIONS:
Config the animation time when this section appears with Duration animation each block, Time animation delay
DESIGN OPTIONS:
Please follow this guideline to config Layout, Background, Margin/Padding for the section.


