


There are 2 bundle features for you to choose: Bundle product (as known Frequently Bought Together) and Linked products (Advanced product types). Let's stick to this guideline to know how to configure them.
1. Bundle product (Frequently Bought Together)
1.1. Enable Bundle product
Go to Theme Customize > Product page (Default product) > Product Page > Add block > Bundle product.
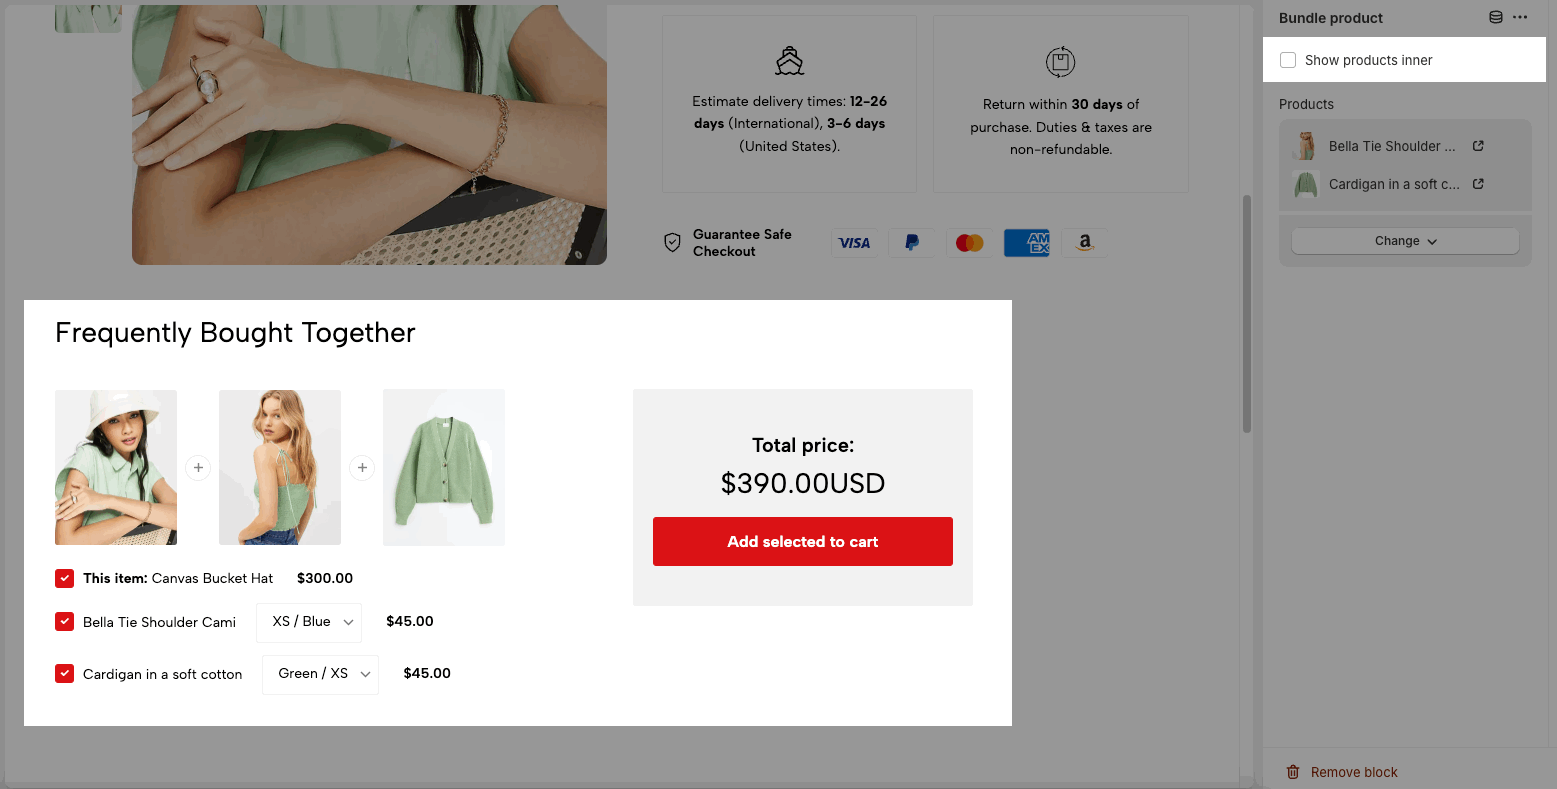
Show products inner:
Tick this option to display bundle products inside Product information column.
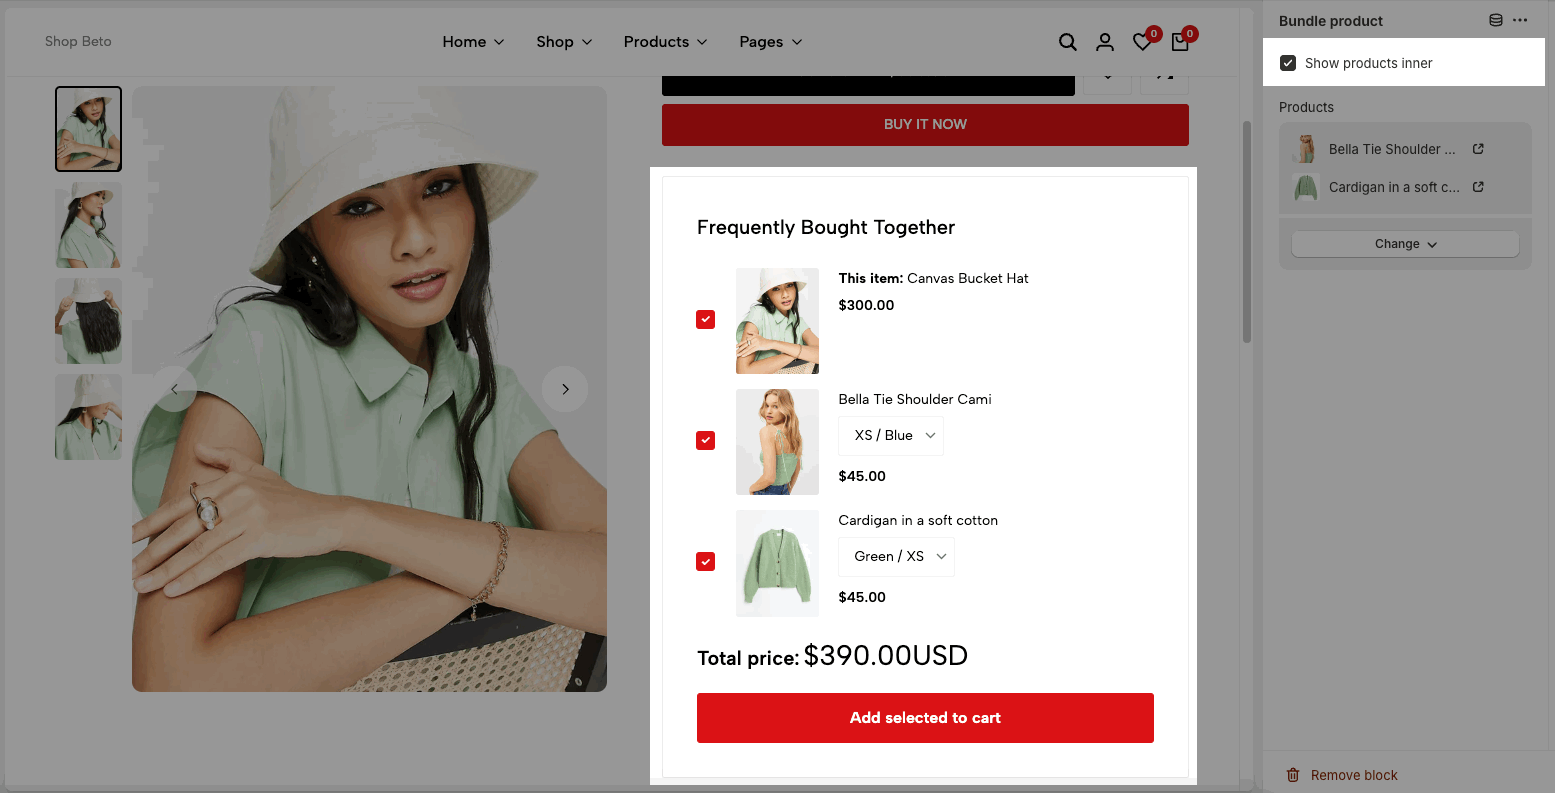
Untick it to display it as a separate section under main product.
1.2. How to add products in Bundle product?
You can choose some products in 'Bundle product option' > Products.
However, bundle product automatically prioritizes the list from 'Complement product' of 'Search & Discovery' app first.
If Complement product is blank, then it takes the product list from Theme Customize > 'Bundle product option'.
Please check this video to understand it:
If you select a sold-out product, it will not display in Bundle products.
2. Linked products (Advanced product types)
Linked products display separated products as options (swatches) in product information. When clicking on each product-linked item, it redirects to a product page.
You can look over this video:
2.1. Enable Linked products
Firstly, go to Theme Customize > Product page (Default product) > Product Page > Add block > Linked products.
In this block, you can add Option name, Option values (the values are separated by a comma), Products, Linked product type and size. If you fill in the information directly in this block, it will show the same for all products. Please check this video:
If you want to display different Linked products on particular product page, you need to configure it by metaobject.
Configuring linked products requires many steps, exact name and type in each step. So please follow and check the guidelines very carefully. If there is any missing step, this feature can not work.
2.2. Create metaobject
Go to Content > Metaobjects > click 'Add definition'.
Name: Theme Linked variant
Please follow this video:
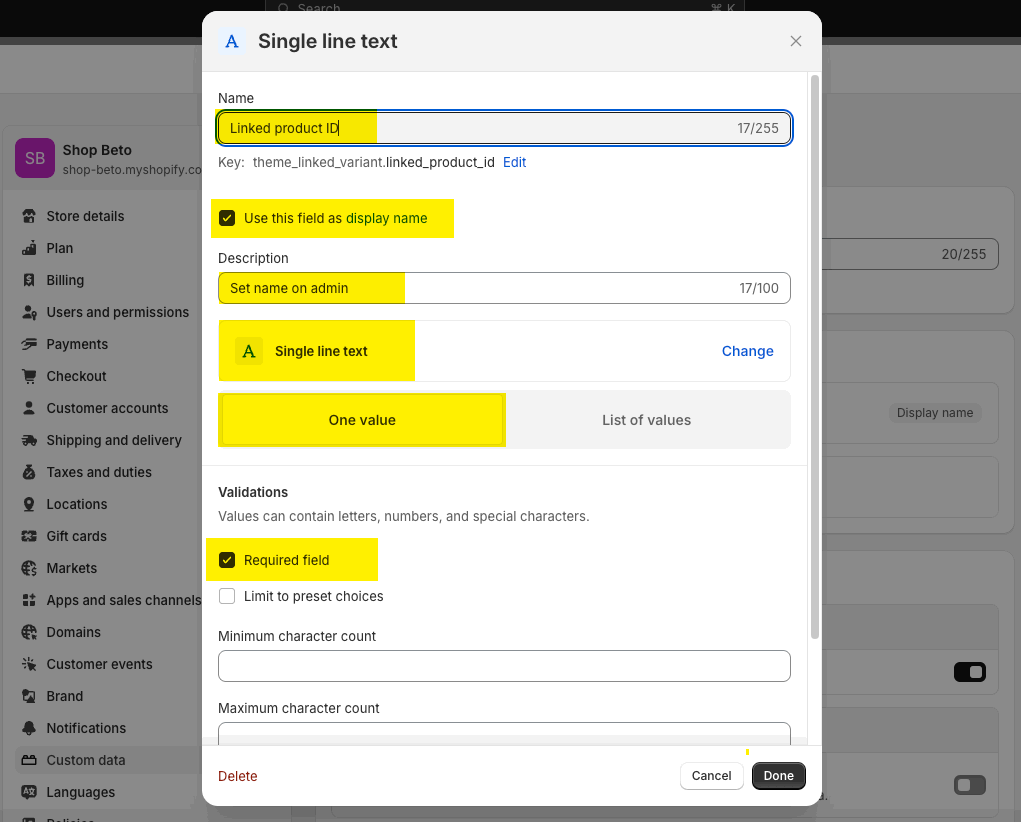
2.3. Add Linked product ID
In Field > click 'Add field'. You need to set up it with the following:
Type: Single line text
Name: Linked product ID
Use this field as display name: Checked (default)
Description: Set name on admin
Required field: Checked
After you have done the settings above, click 'Add'.
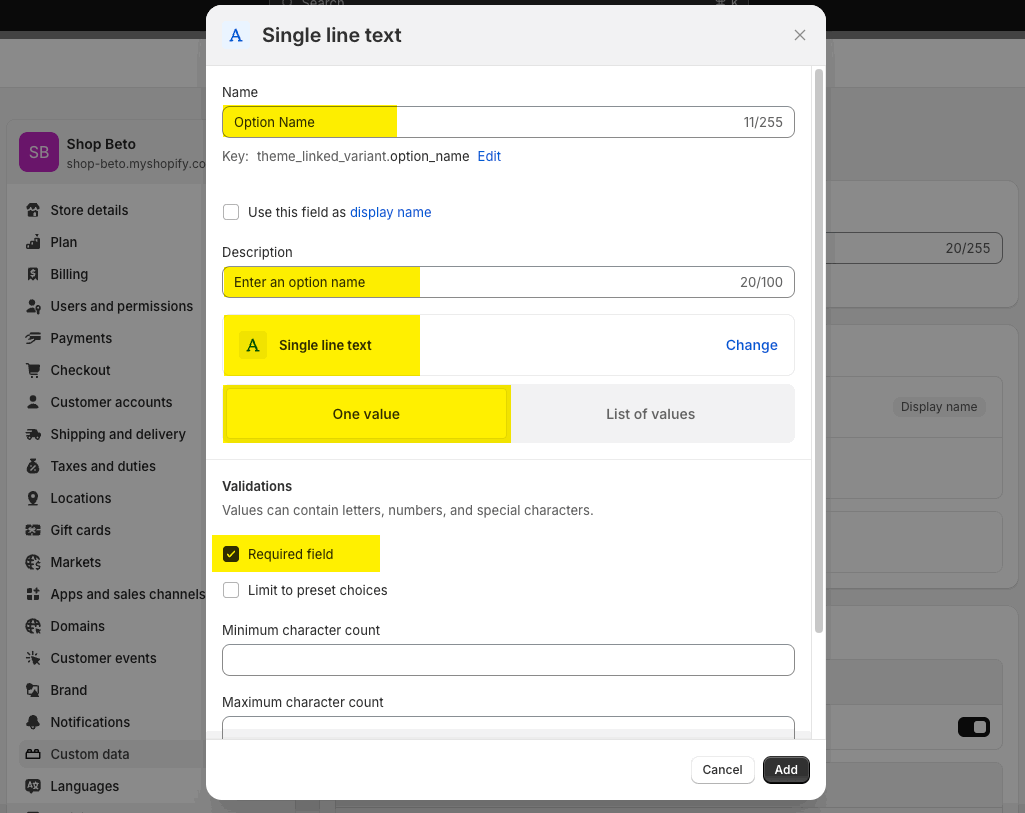
2.4. Add Option Name
In Field > click 'Add field'. You need to set up it with the following:
Type: Single line text
Name: Option Name
Description: Enter an option name
Required field: Checked
After you have done the settings above, click 'Add'.
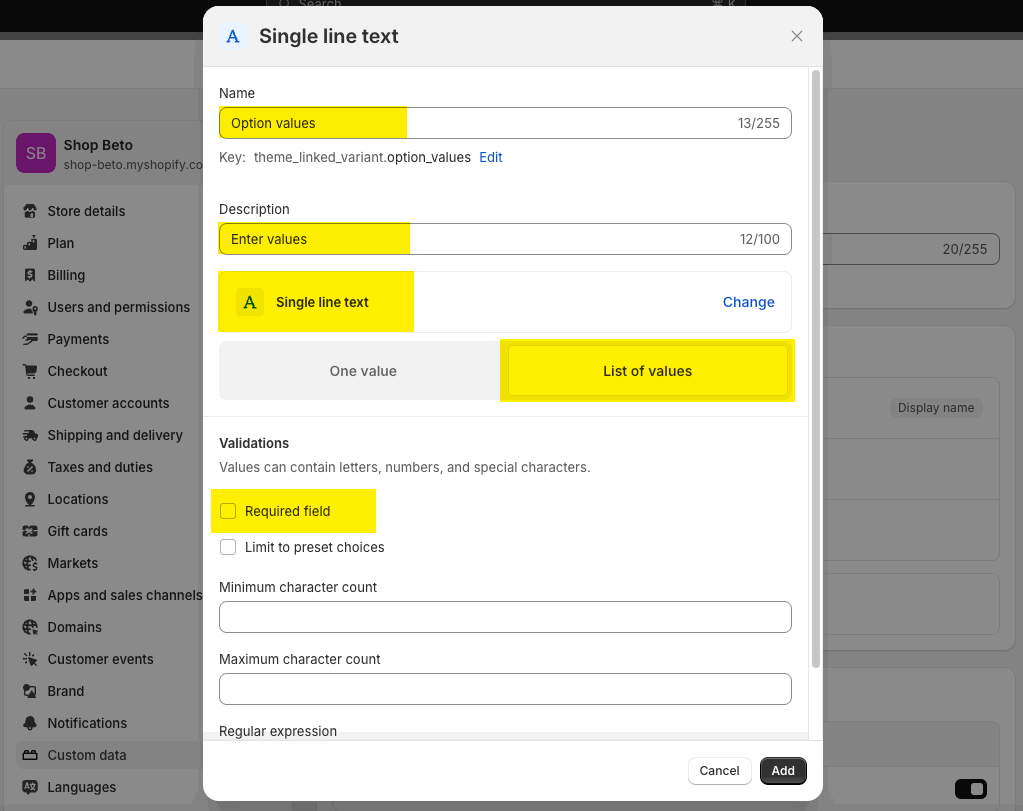
2.5. Add Option values
In Field > click 'Add field'. You need to set up it with the following:
Type: Single line text
Name: Option values
Description: Enter values
Choose: List of values
After you have done the settings above, click 'Add'.
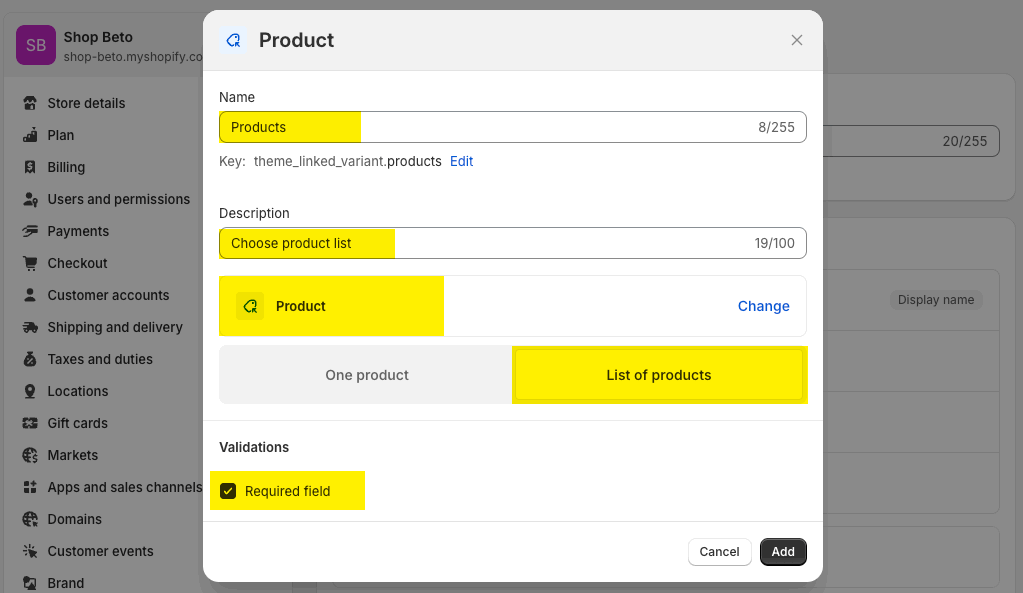
2.6. Add Products
In Field > click 'Add field'. You need to set up it with the following:
Type: Product
Name: Products
Description: Choose product list
Choose: List of products
Required field: Checked
After you have done the settings above, click 'Add'.
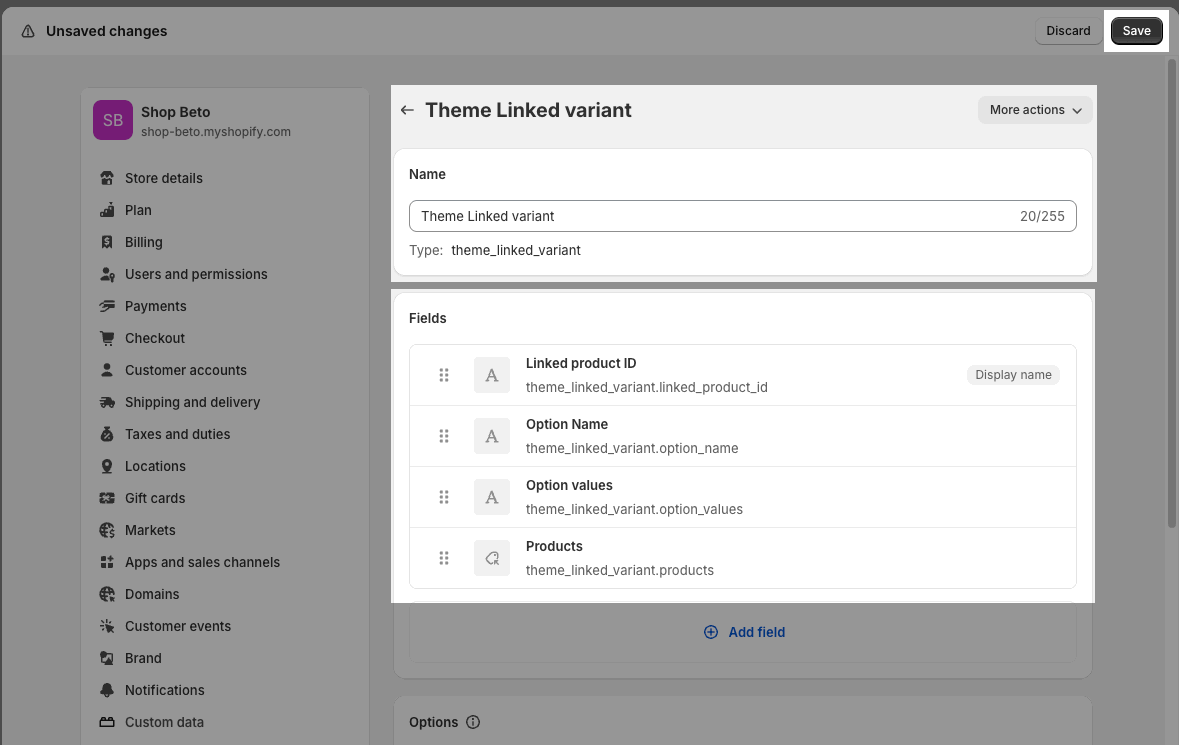
Result: Click 'Save' > then you will get a metaobject with 4 fields as in the image below:
2.7. Create metafield with metaobject type
Go to Settings > Custom data > Metafields > Products > click 'Add definition'. You need to set up it with the following:
Name: Linked product
Namespace and key: theme.linked_product
Select type: Metaobject
Reference: Theme Linked variant (which you created in step 2.1)
Click 'Save'. Please follow this video:
2.8. Add linked products
Add entries for metaobject: Go to Content > Metaobjects > click 'Add entry' > 'Theme Linked variant' > you enter all information for the entry.
Note: If you don't add value for 'Option values', it takes the product title to show on live page.
Select an entry in product metafield: Go to Products > open product you want to set up Linked products > scroll down to 'Linked product' metafield > select an entry for this product.
You can select the same Entry for a group of products, then those products will have the same Linked product list.
Please follow this video:
2.9. Linked products in Theme customize
Go to Theme Customize > Linked products and connect it with metaobject. Follow the video below:
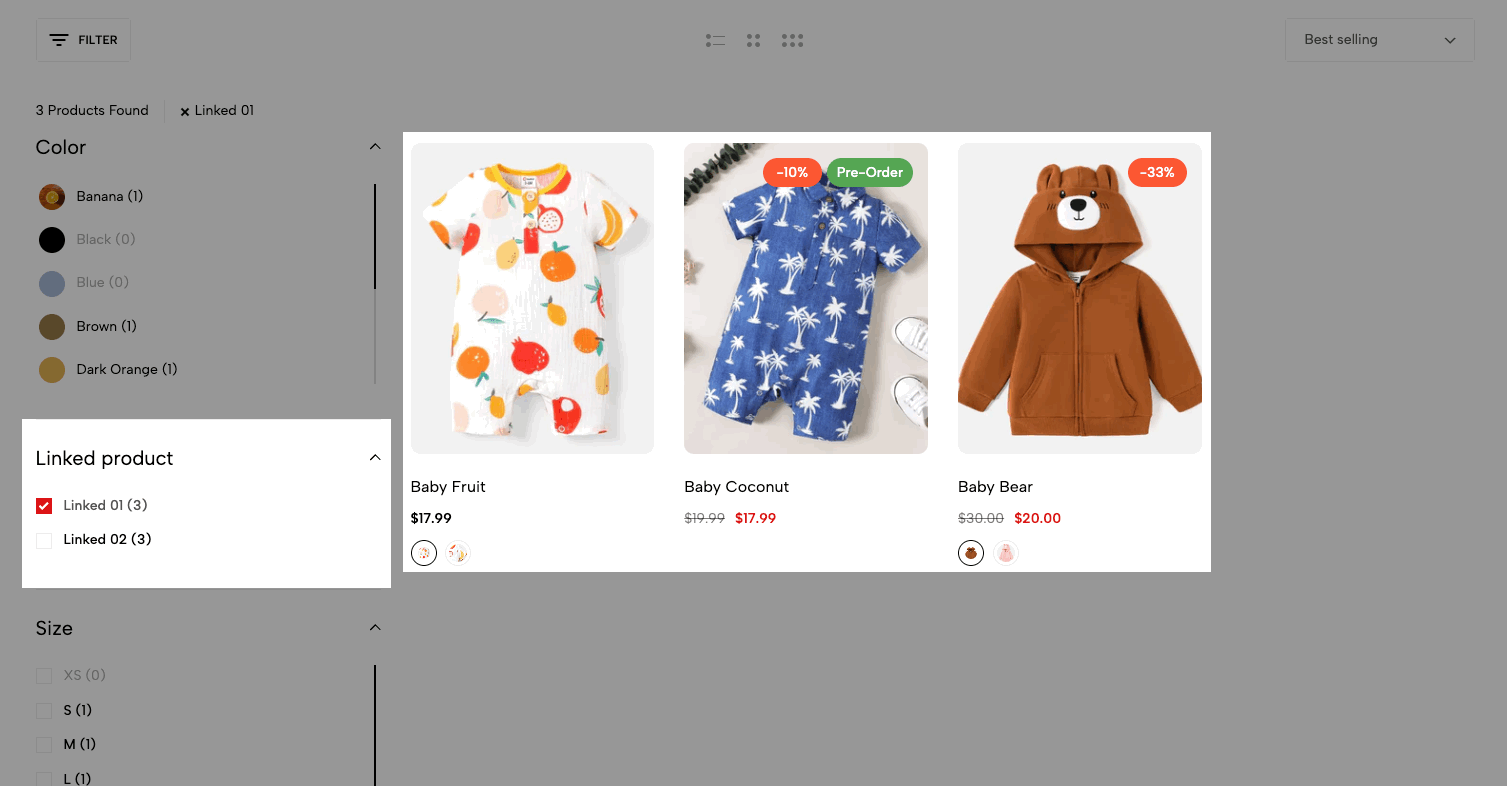
You can create another entry for another group of products, for example: Linked 02 in this video.
You can add Linked products in Search & Discovery app, then display them in Filter on collection page
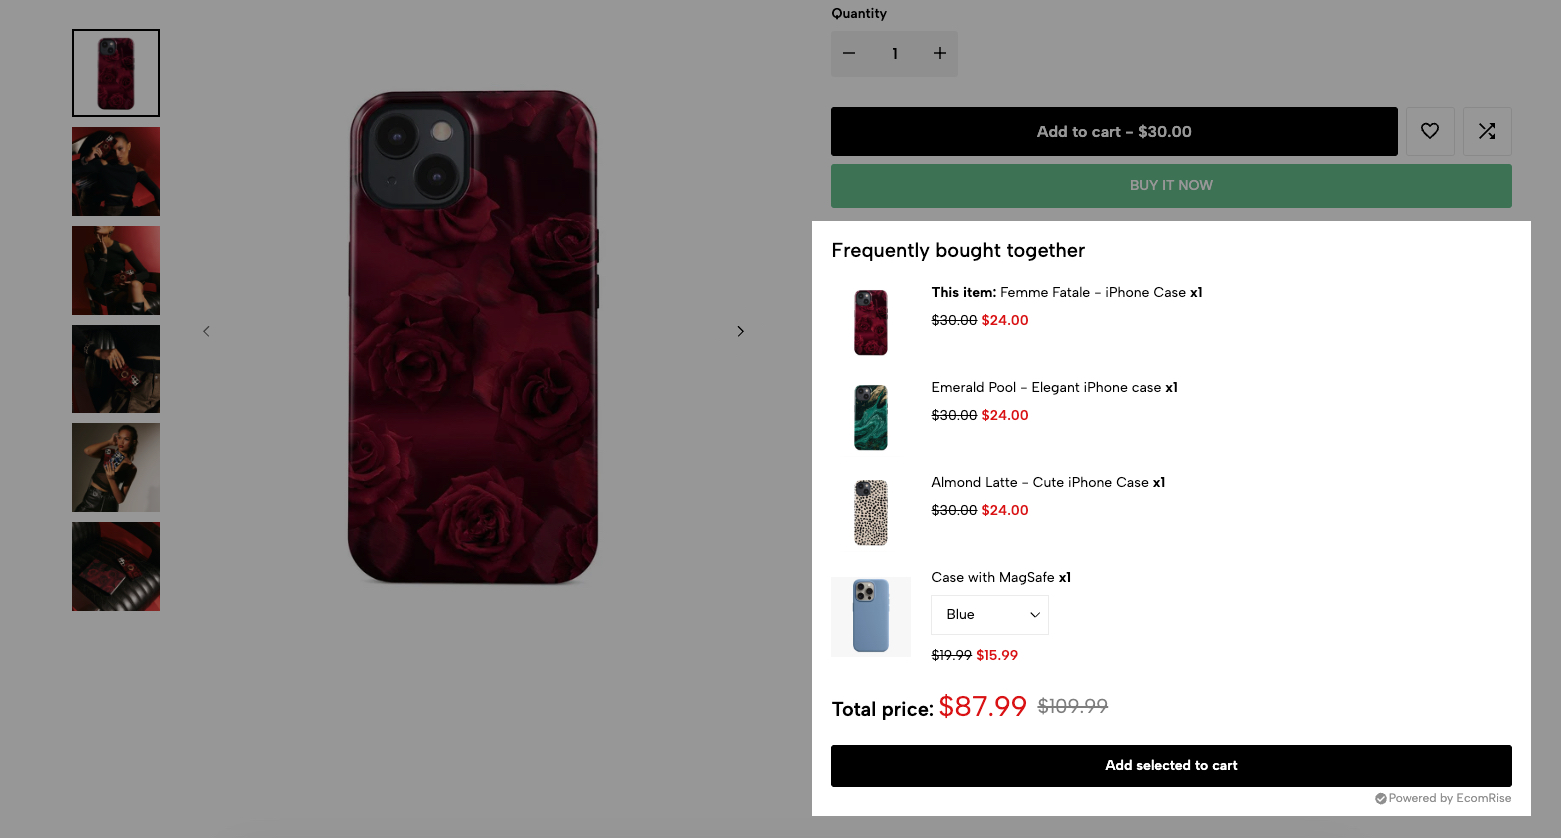
3. Frequently Bought Together (by EcomRise app)
Ecomus theme supports FBT feature as you can see in section 1. Bundle product (Frequently Bought Together). It is a basic feature and does not provide discounts on products.
However, if you want more advanced settings, discounts, and analytics on this feature, you can use EcomRise app.
This is a demo product (password: 4)
To set up FBT by EcomRise, you follow this guide.


