


The Brands section showcases a curated collection of fashion and lifestyle brands organized alphabetically for easy navigation. Users can browse through the full list or filter by letter to discover a wide range of labels, from emerging designers to well-established names.

1. How to access the Brands section?
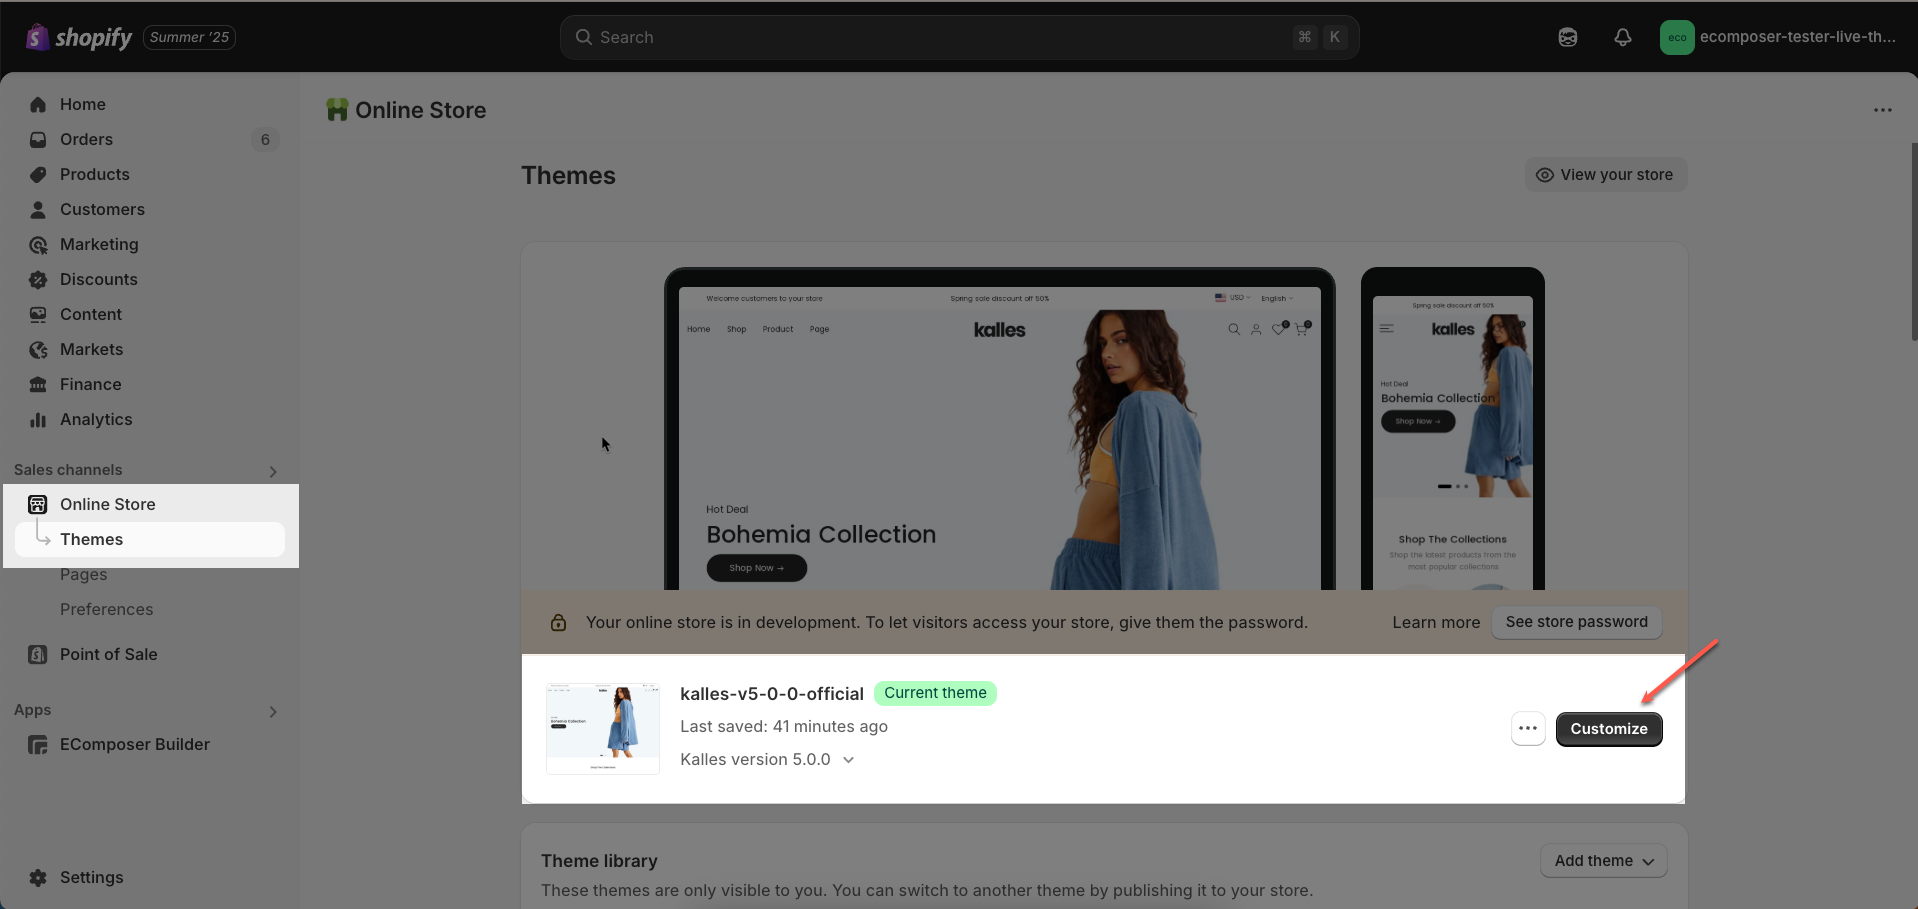
Step 01: From Shopify Admin, click on Online Store > Select Themes > In the Current theme section, click the Customize button.
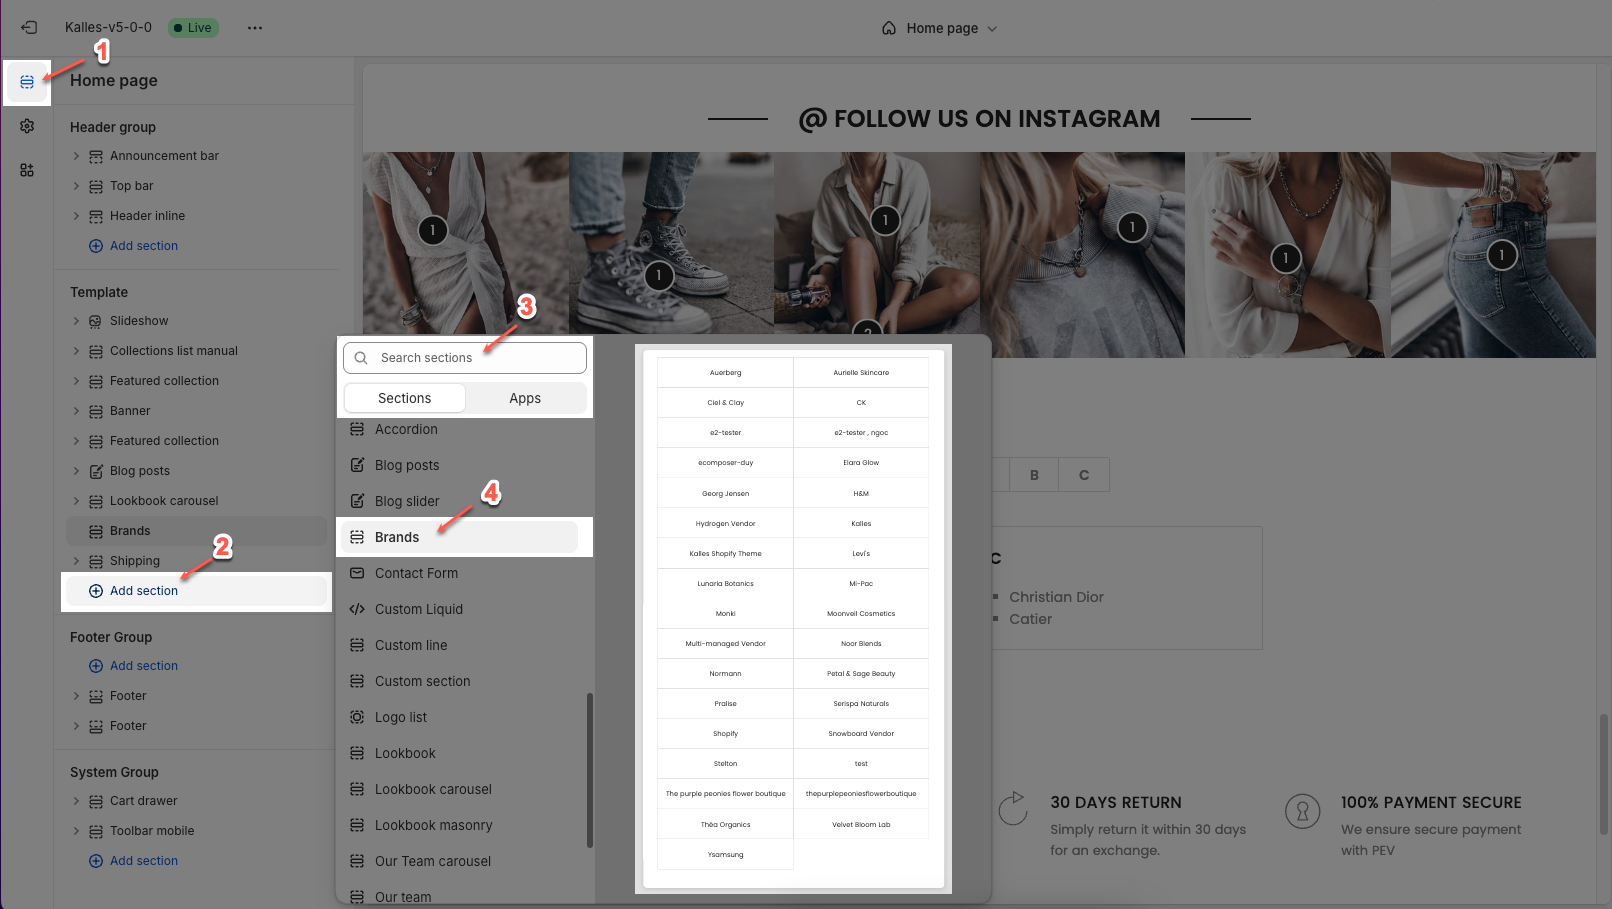
Step 02: In the theme editor (Customize), click the Sections button > Click the Add section button > In the Sections tab, scroll through the list or use the search bar to find and select the Brands section.
2. How to create the Brands menu?
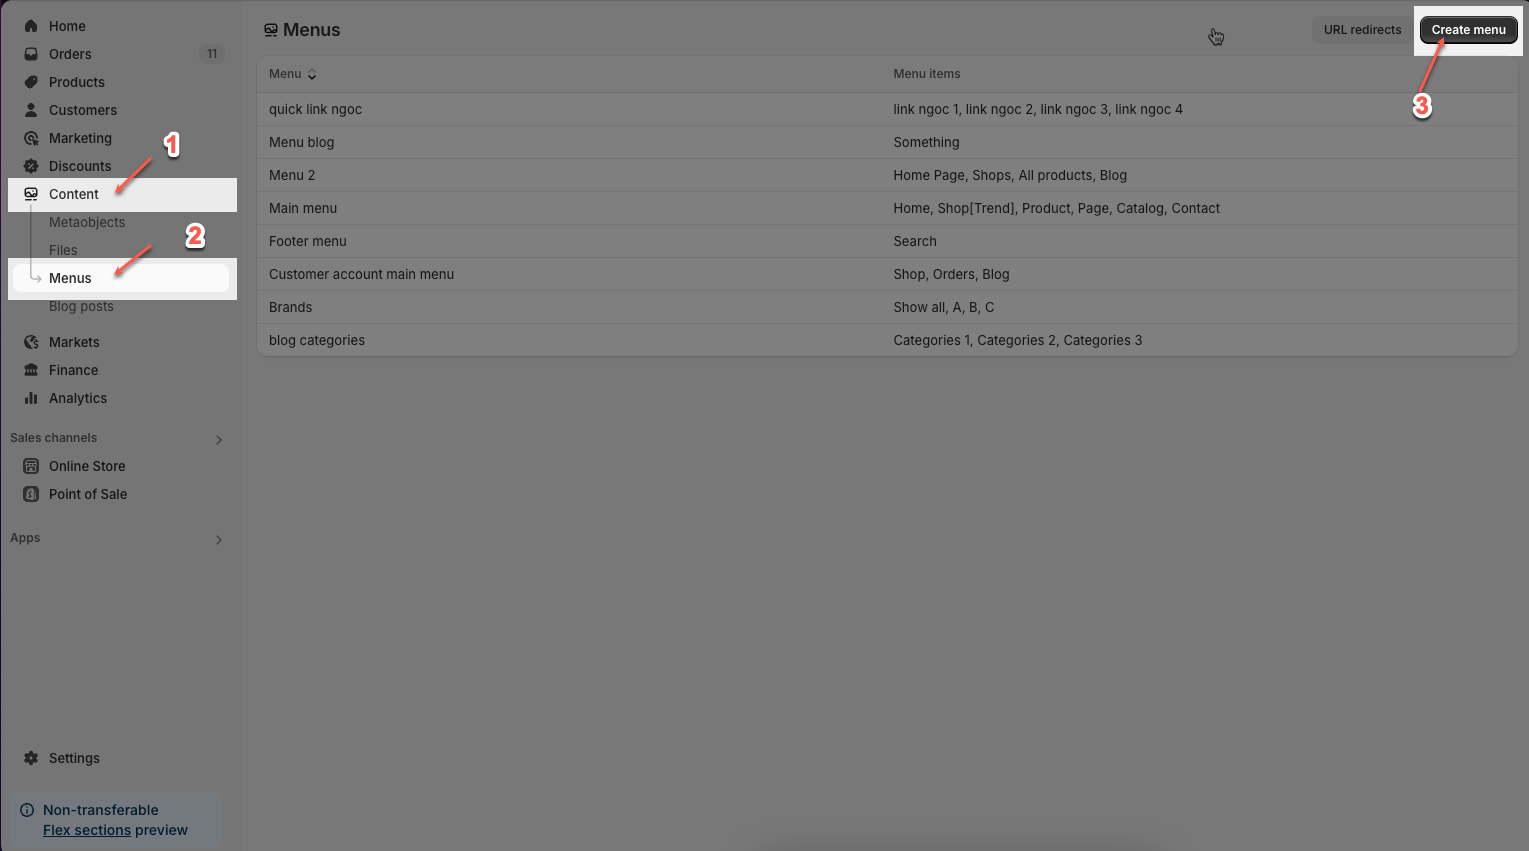
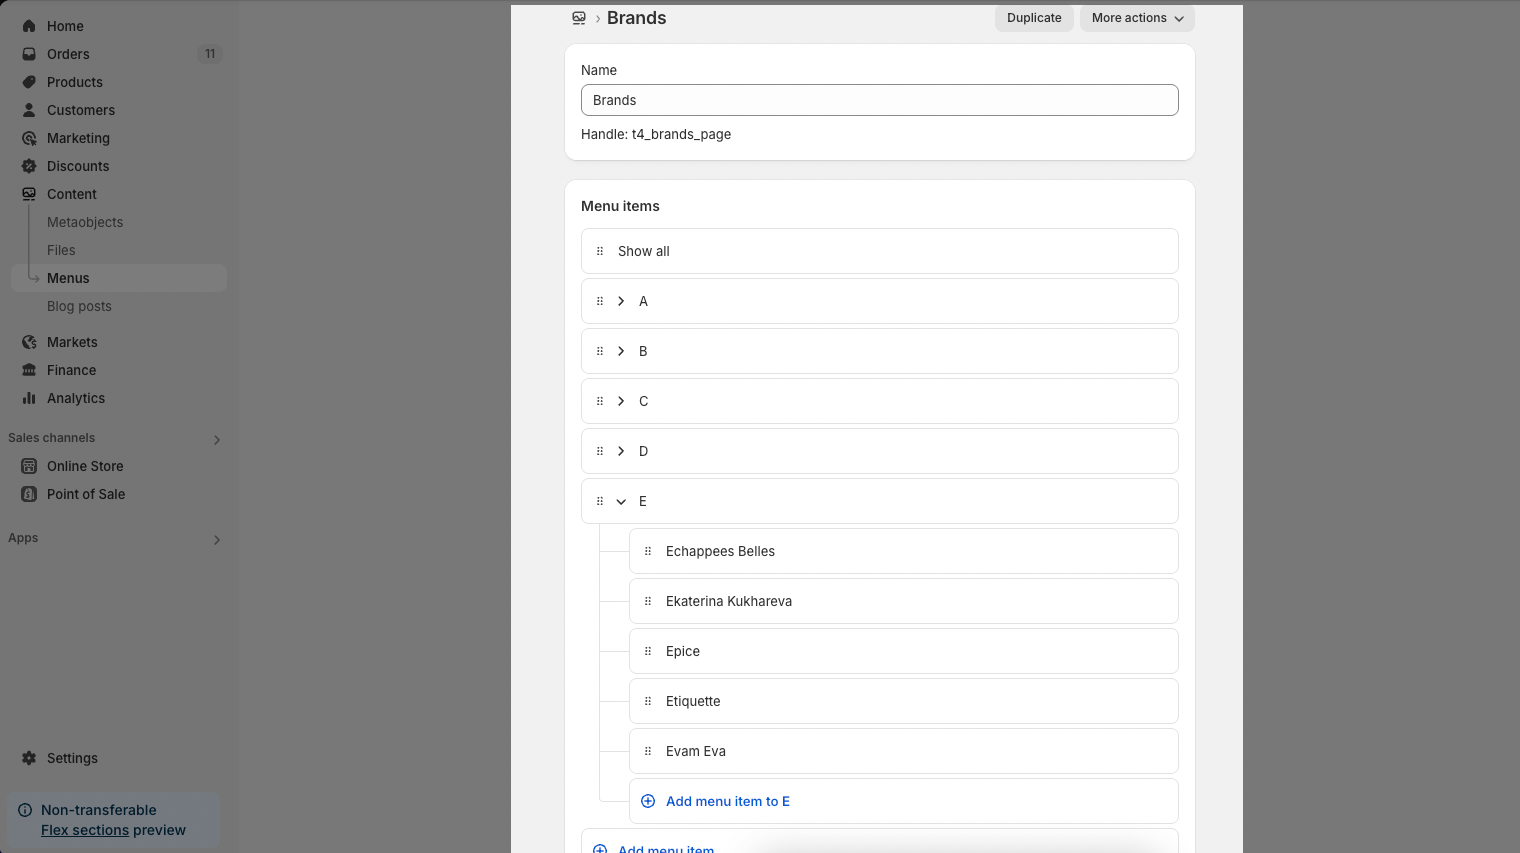
Step 1: From the Shopify store home screen > click open Content tab > open the Menus tab > click Create menu button
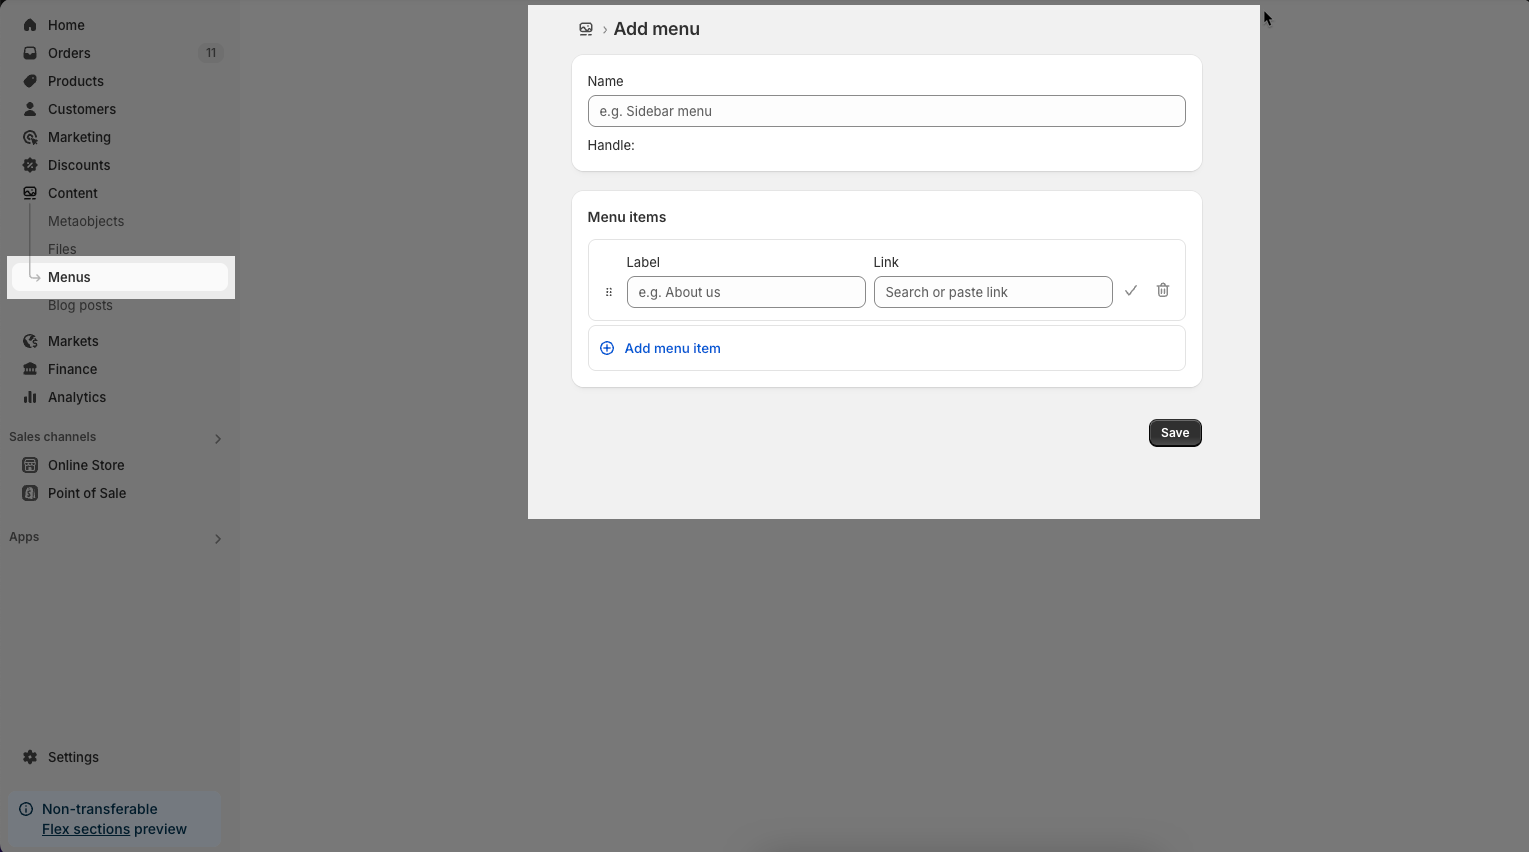
Step 2: Here, you can enter the Menu name, add Menu items, includes enter lable and link for items > click Save button
Results Brands menu below:
3. How to Customize the Brands section?
Here’s how you can customize the Brands section to best fit your content and layout. Below are the available options for customization:
3.1. Brands
Source: Choose where the brand list pulls from.
Vendor: Automatically displays brand names based on the product vendors.
Linklist: Uses a manual menu (link list) that you've created.

Choose Menu: If Linklist is selected, choose a specific menu from your Shopify navigation to populate the brands.
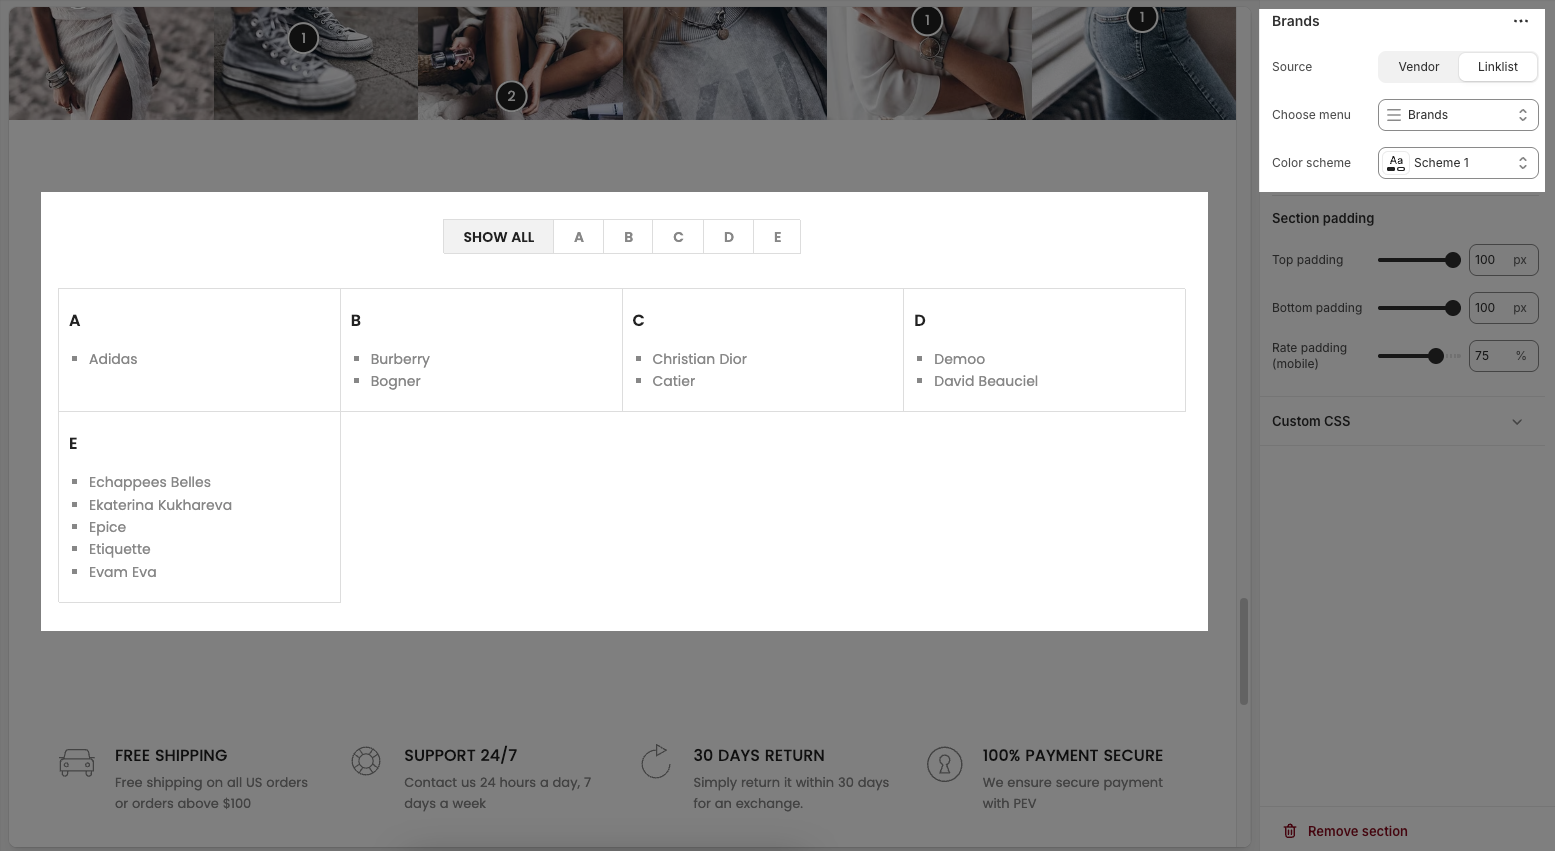
Color Scheme: Applies a predefined color scheme (like text, background, border colors) to this section. Useful for matching your site's branding.
3.2. Section padding
Padding top: Adds spacing above the content within the section. Measured in pixels
Padding bottom: Adds spacing below the content within the section. Also measured in pixels
Padding rate mobile: Sets the amount of vertical padding on mobile devices as a percentage of the desktop padding. For example, 75% means mobile devices will get 75% of the desktop padding value.
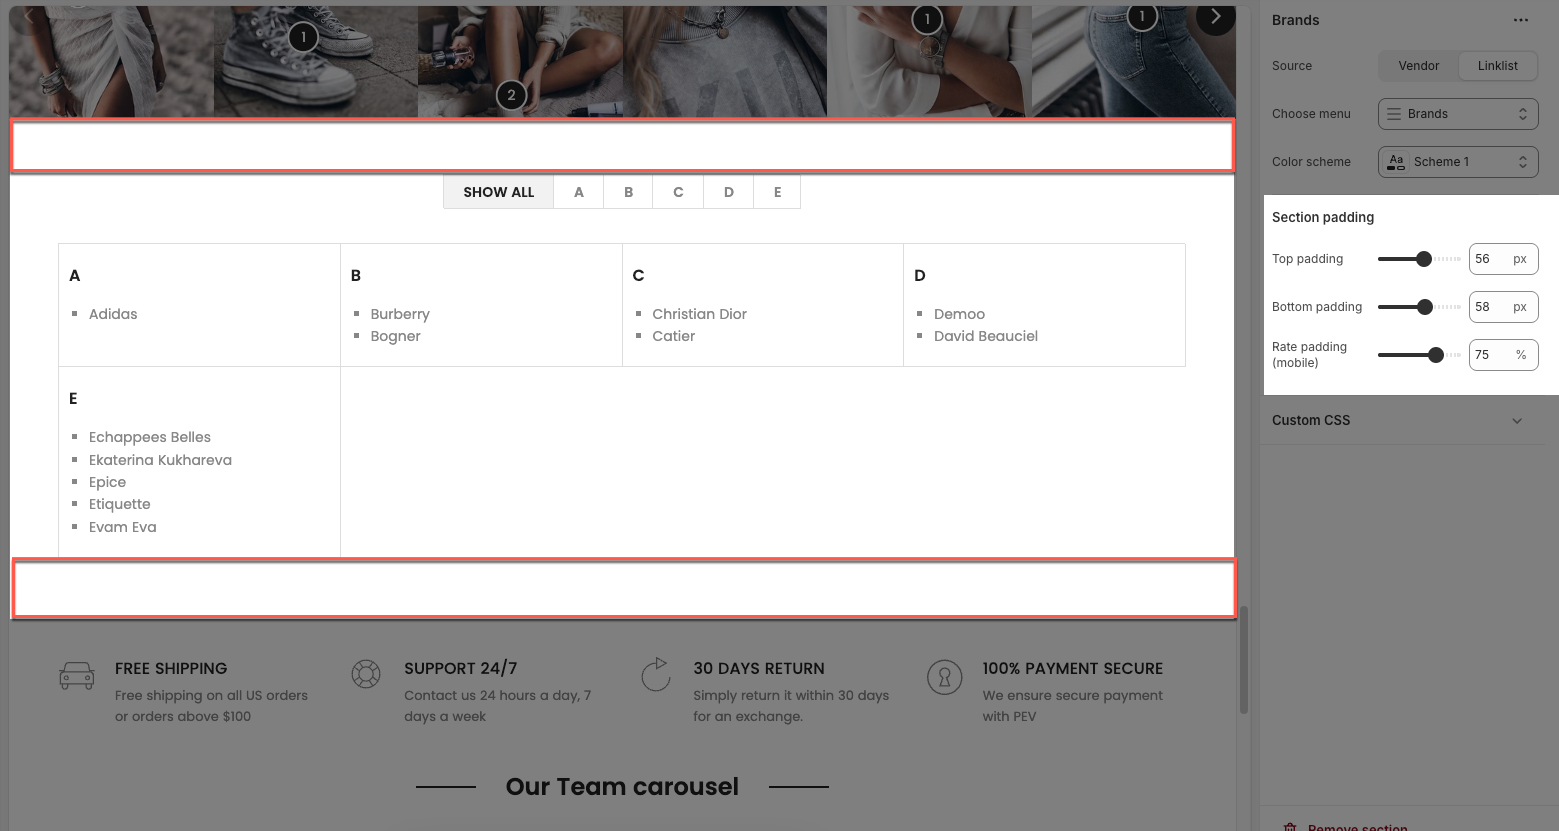
3.3. Custom CSS
Allows users to customize by adding CSS rules, beyond the limitations of default settings. This allows for fine-tuning the design to every detail, to suit specific needs.
Add custom styles to this section only.
To add custom styles to your entire online store, go to theme settings for detailed instructions.


