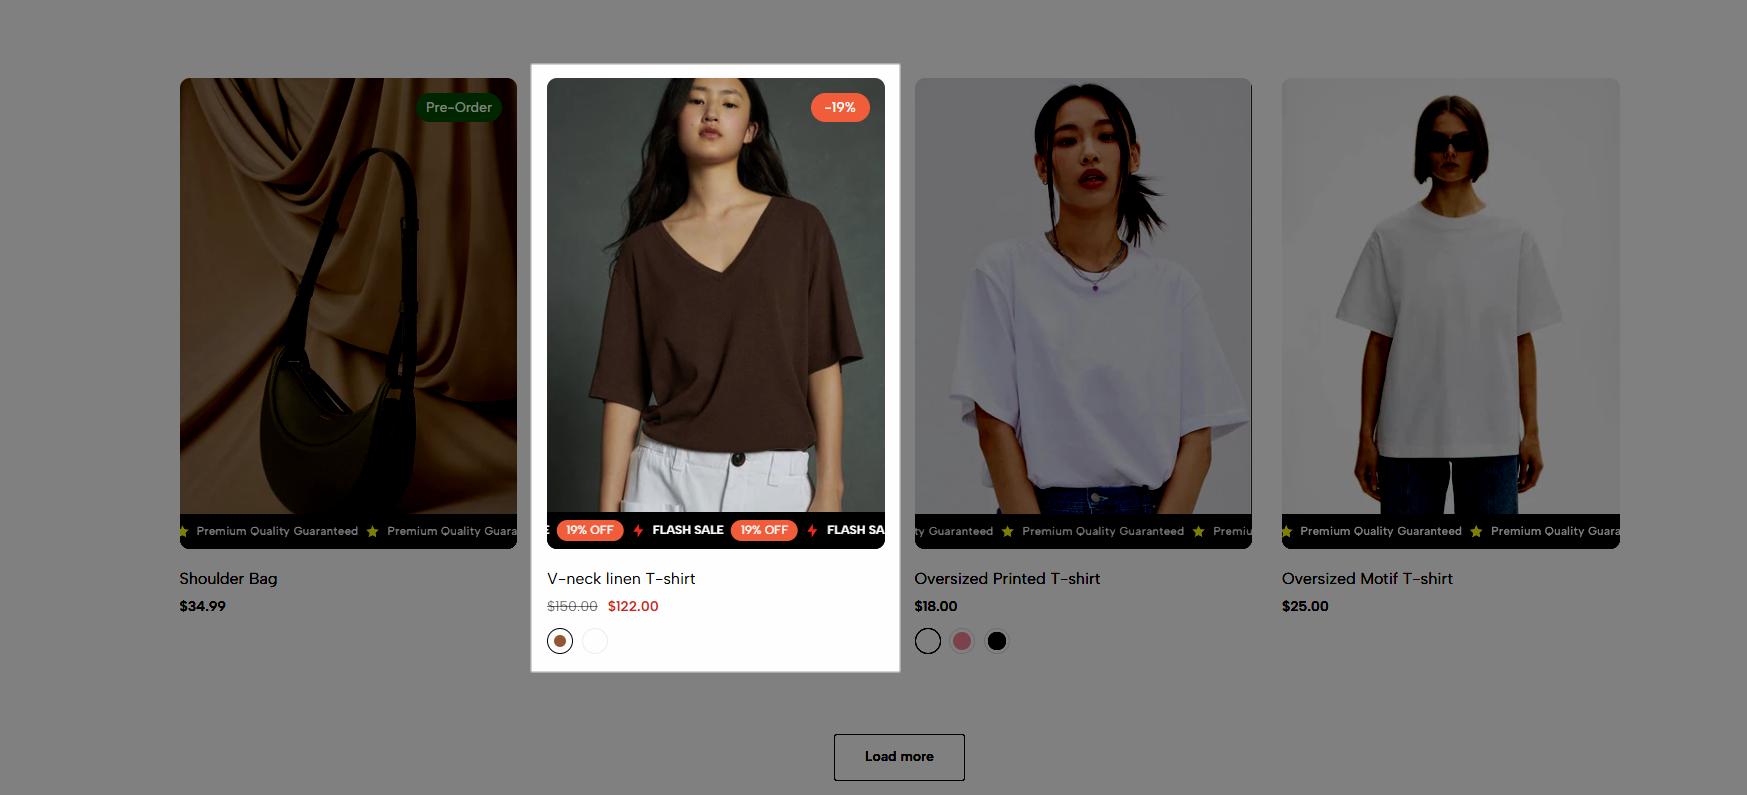
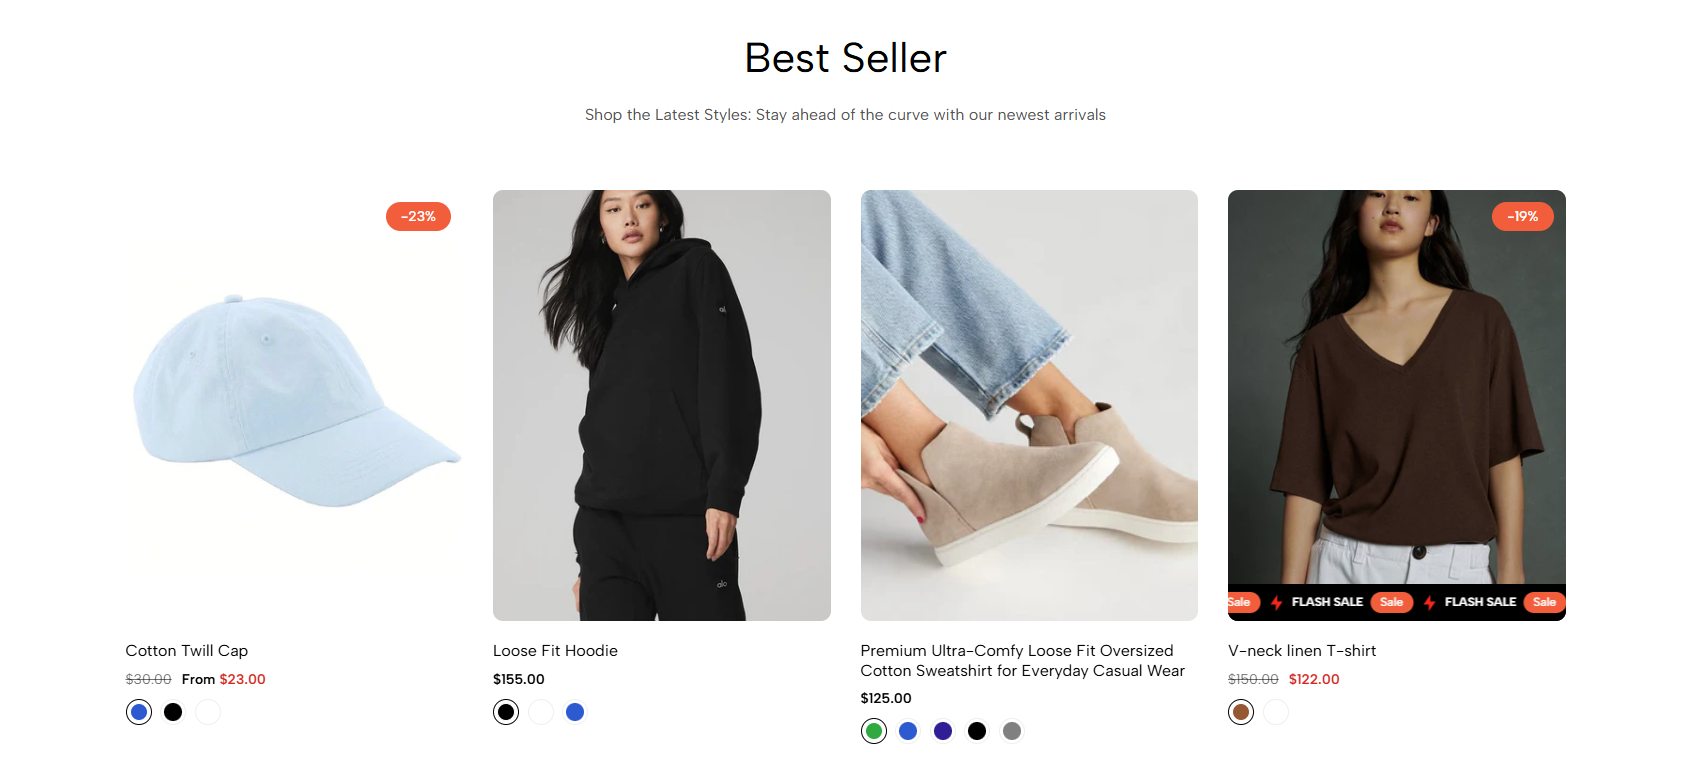
Want to grab your customers' attention right on your product listing? Scrolling Badge displays eye-catching badges (discounts, certificates, promotions, etc.) right below each product with a smooth scrolling effect.
1. How to access the Scrolling badge?
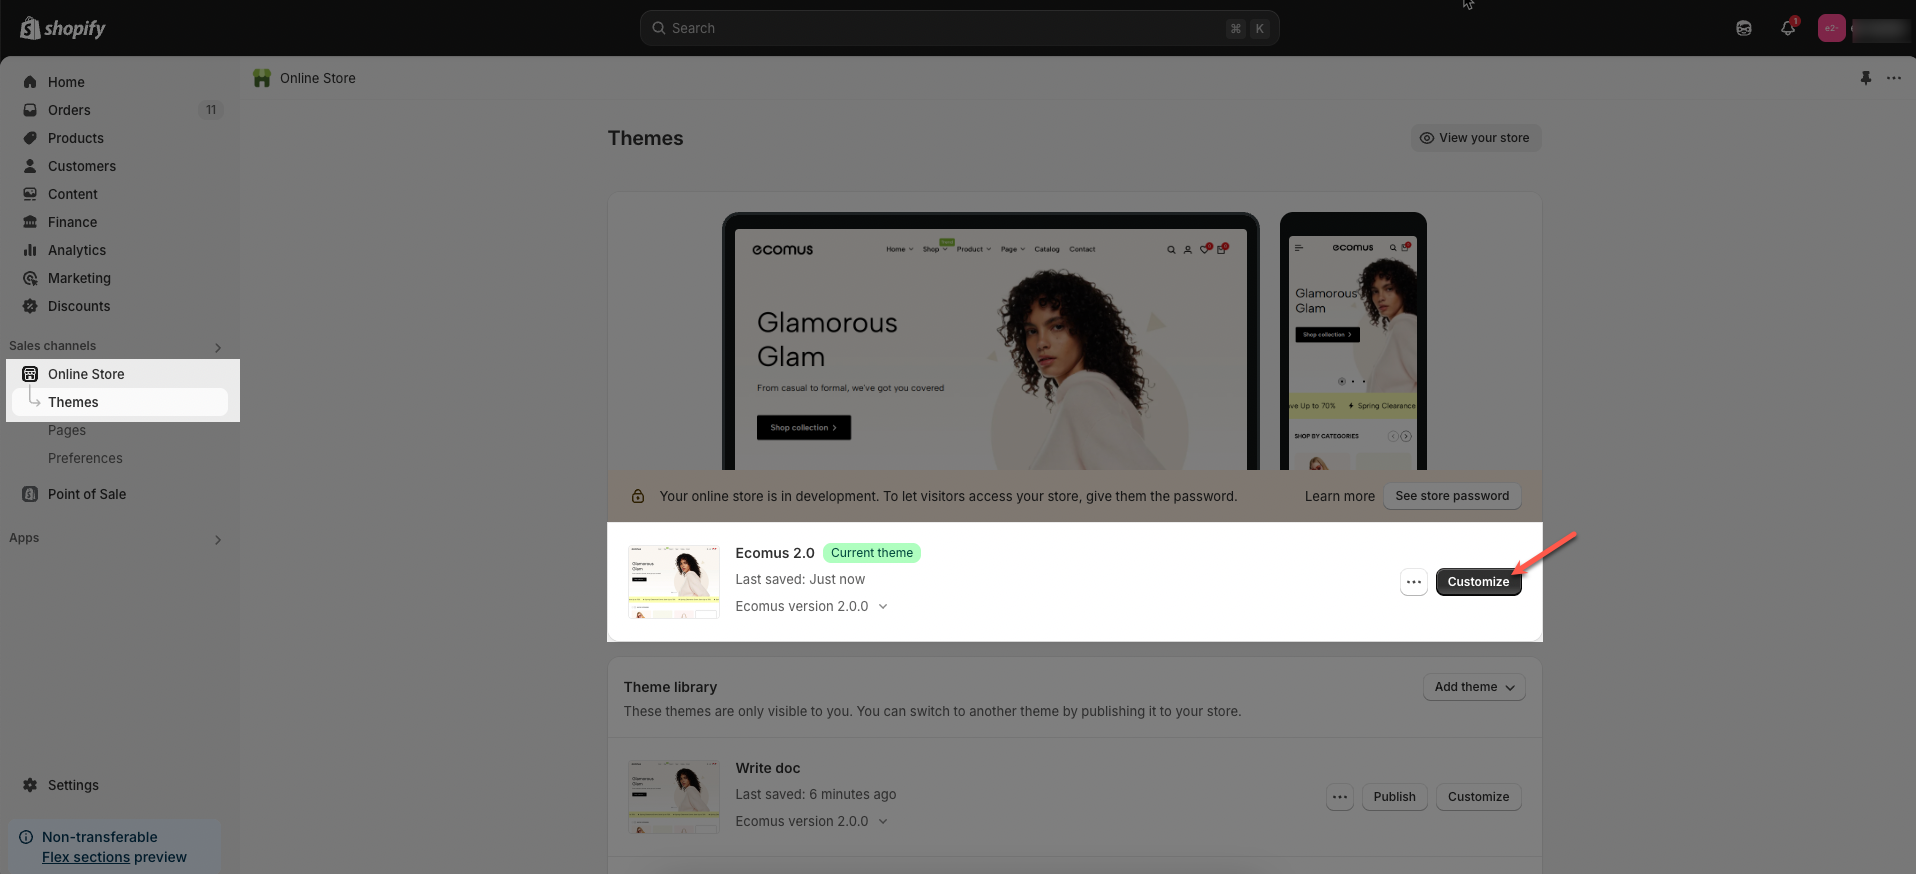
Step 01: From Shopify Admin, click on Online Store > Select Theme > In the Current theme section, click the Customize button.
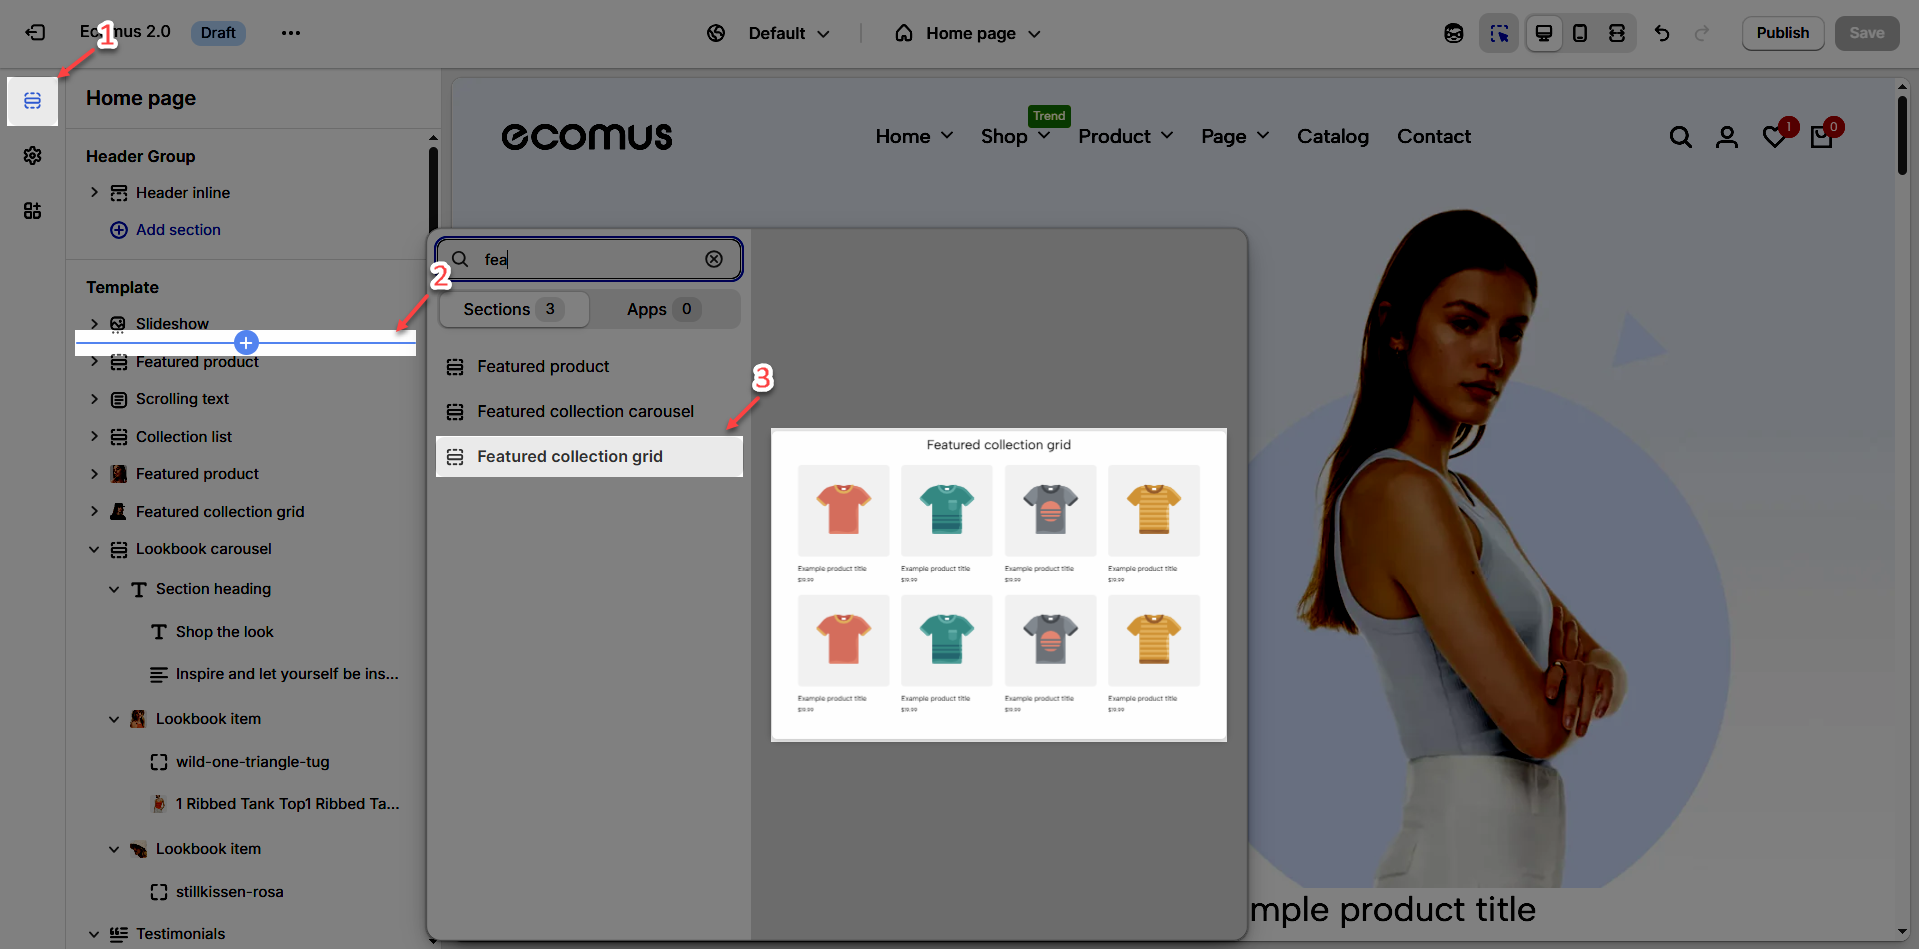
Step 02: In the theme editor (Customize), click the Sections button > Click the Add section button > In the Sections tab, scroll through the list or use the search bar to find and select a Collection product section
Example: Featured collection grid section
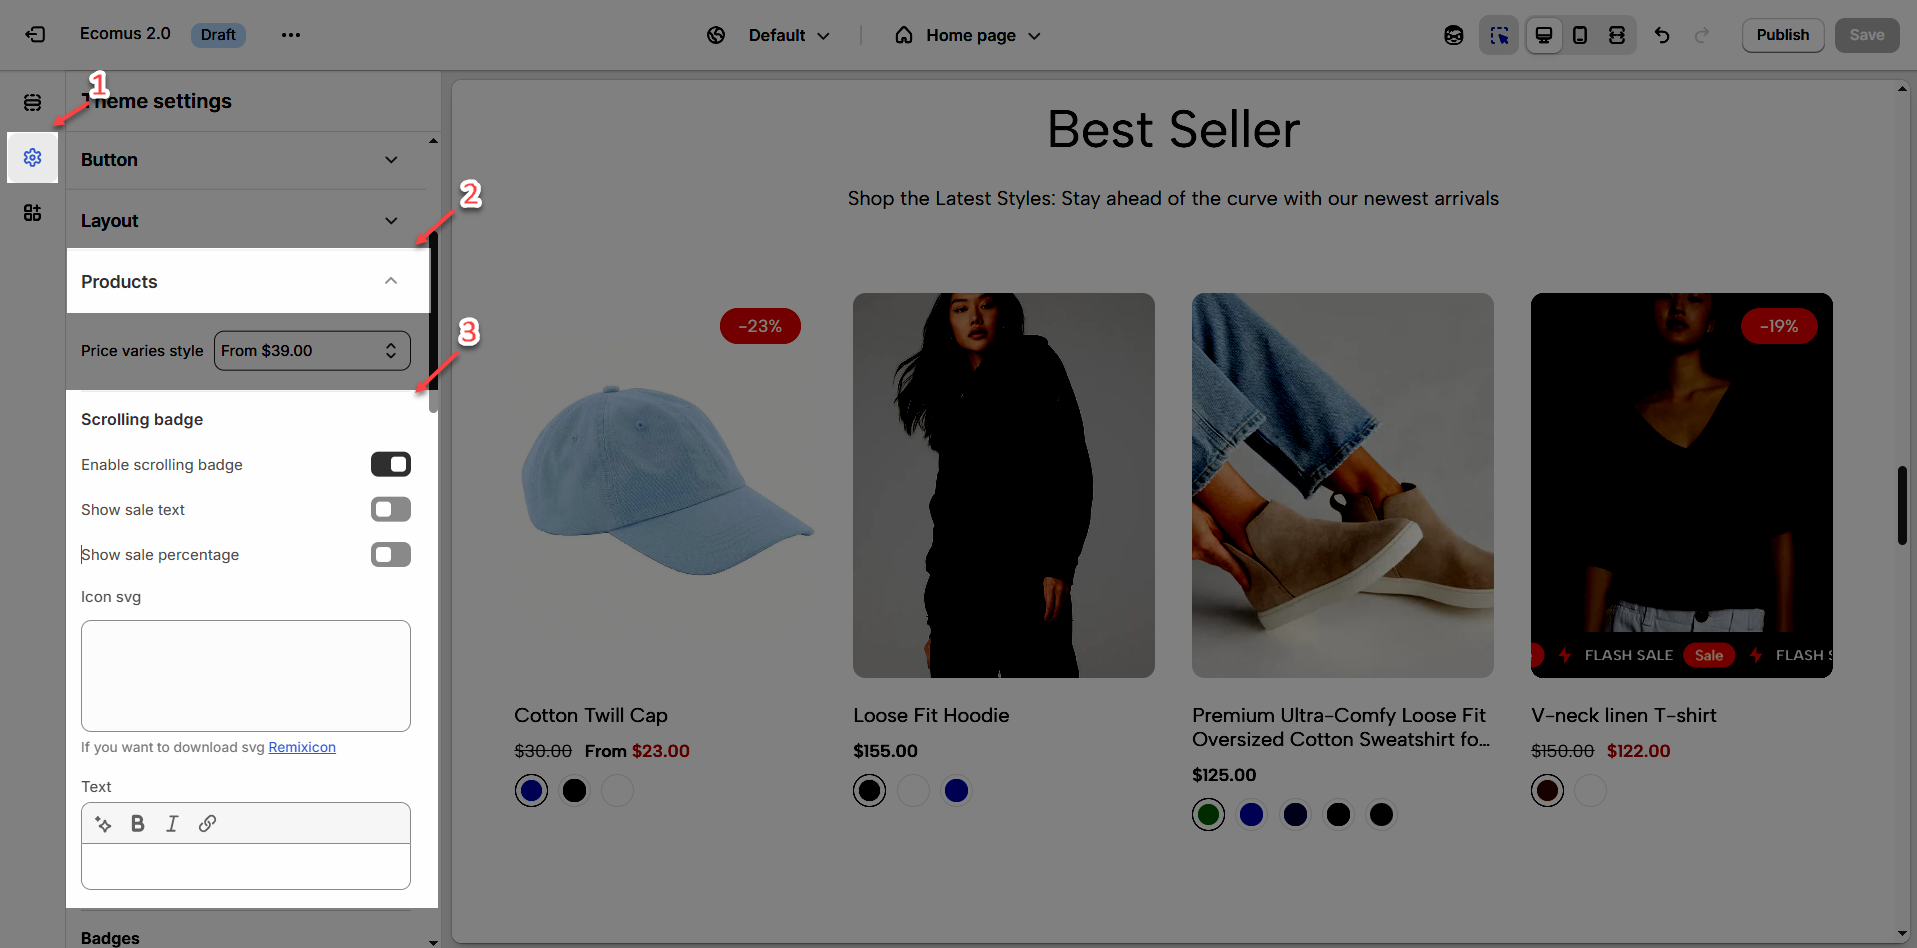
Step 3: In the theme editor (Customize), click the Theme settings button > find and open the Products tab > find Scrolling badge > turn it on & do some more tweaks
2. How to customize the Scrolling badge?
You can add Scrolling Badge to all products or just select specific products as you want.
2.1. Add Scrolling Badge to all products
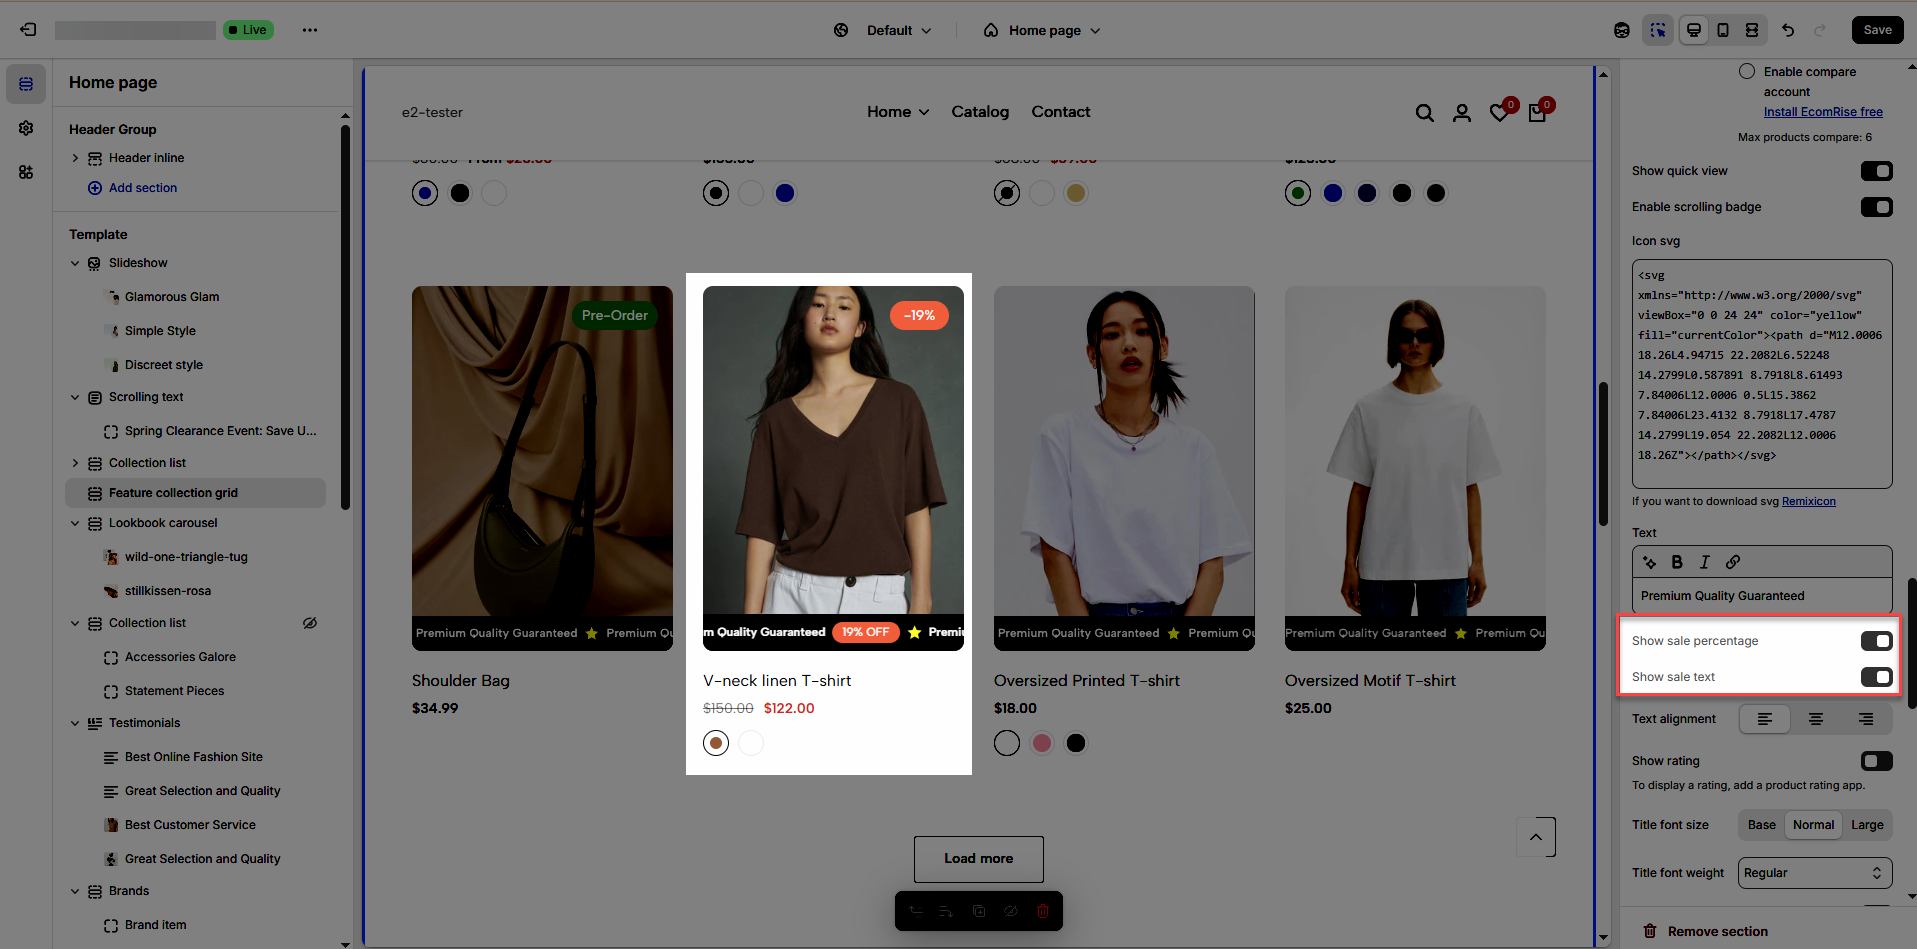
You can add Icon svg & Text
Icon svg: use Remixicon to make it more attractive and eye-catching
Text: use text to promote a promotion or emphasize the benefits of your product.
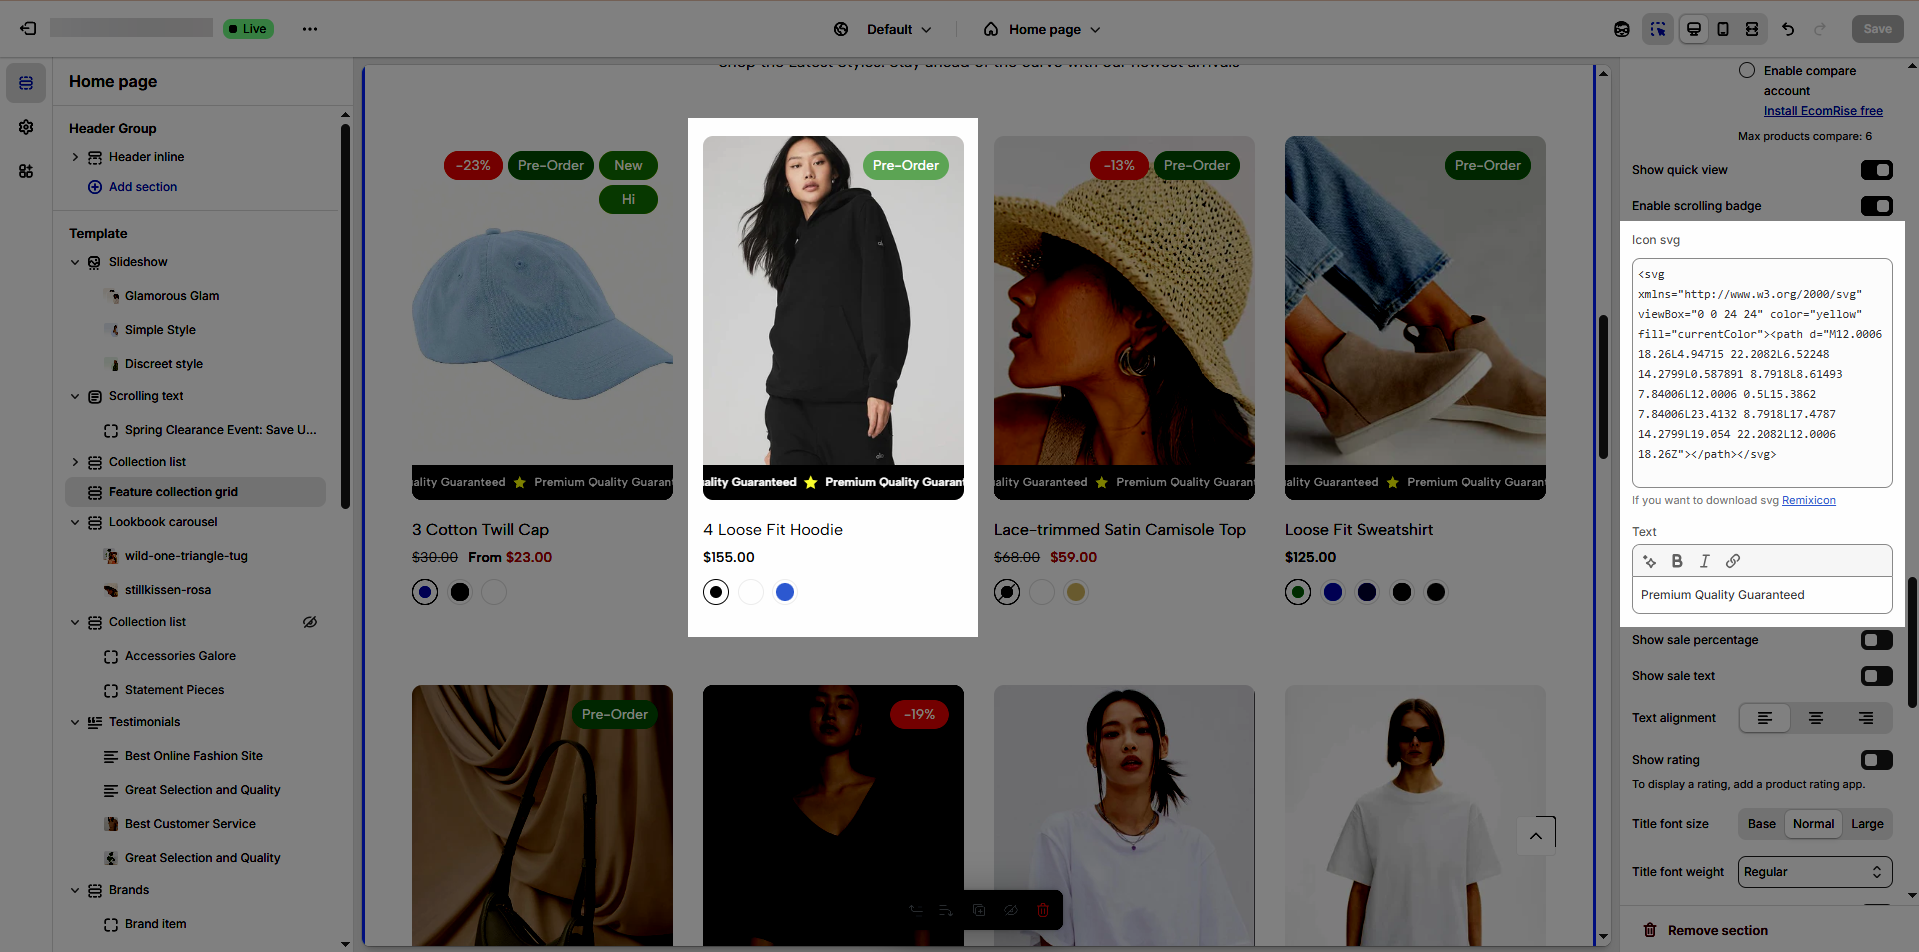
You can also enable sales badges in Percentage or Text format.
Sale percentage will be given priority.
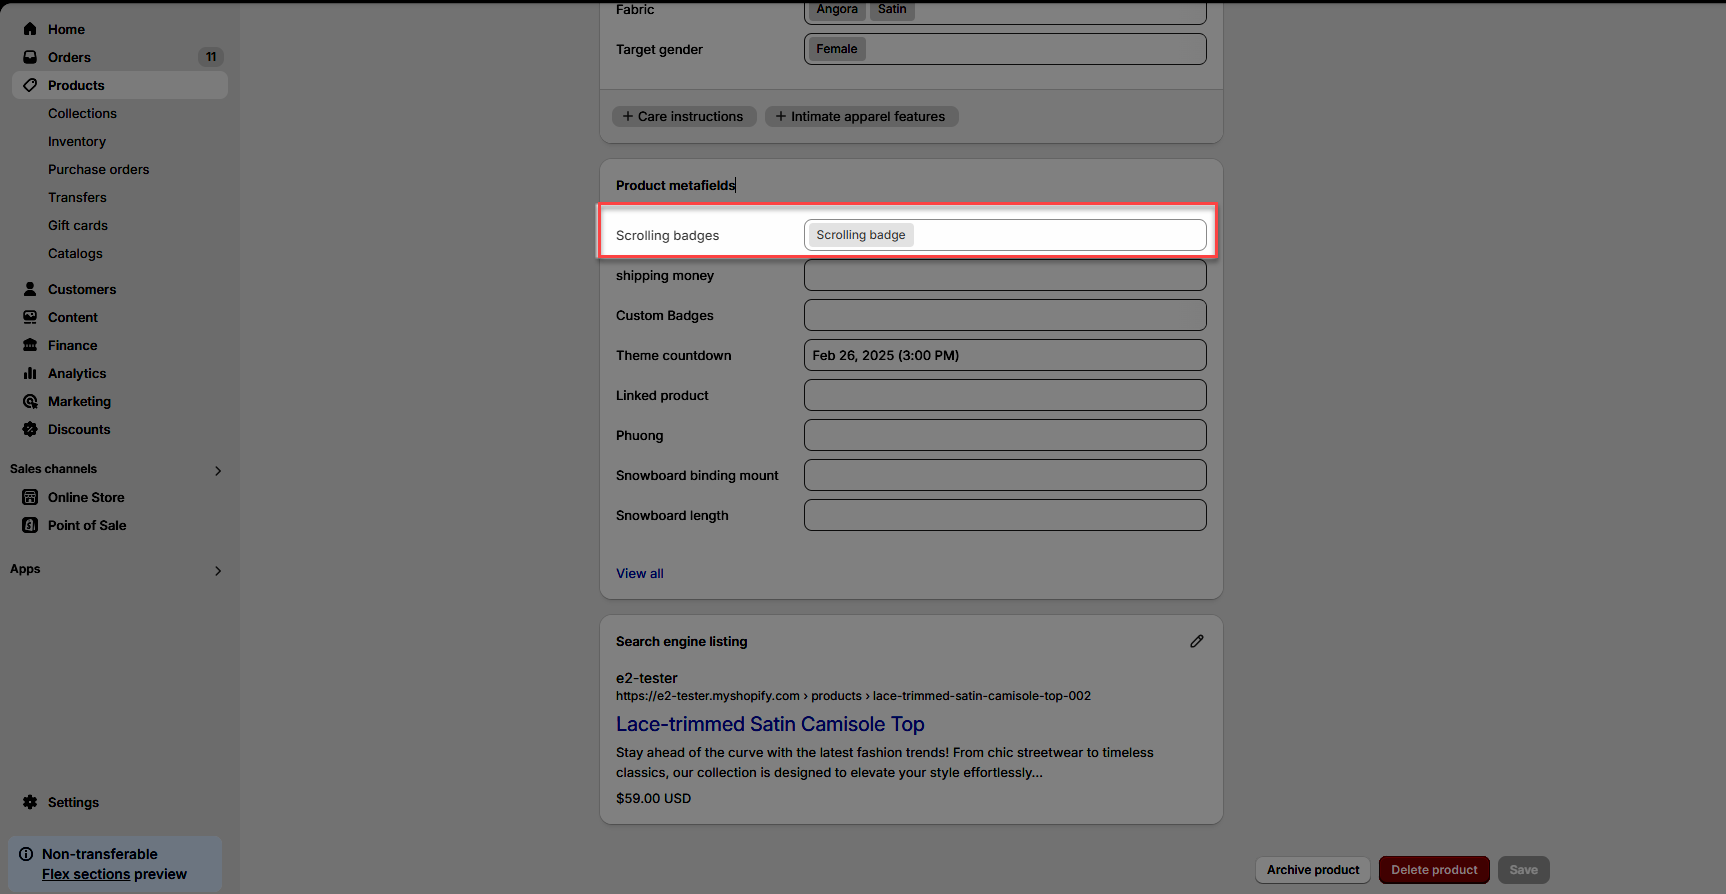
2.2. Add Scrolling badges to specific products
Prioritize getting data from product metafields then settings
2.1. Create metafield
Step 1: From the Shopify store home screen > click open Settings tab > open Custom data tab > open Products metafields > click Add definition button
Step 2: Enter name = Scrolling badge > Namespace and key is theme.scrolling_badge > select type = Metaobject > then Reference will appear > click dropdown to select Entry > click Add definition button
Step 3: In the Add metaobject definition screen > add Name = Scrolling badge > add Fields
With Name field: click Add field button > find and select Single line text type > set name = Name (you can set it as required field or not) > click Add button
With Icon field: click Add field button > find and select Multi-line text type > set name = Icon (you can set it as required field or not) > click Add button
With Text field: click Add field button > find and select Single line text type > set name = Text (you can set it as required field or not) > click Add button
With Show sale text field: click Add field button > find and select True or false type > set name = Show sale text (you can set it as required field or not) > click Add button
With Show sale percentage field: click Add field button > find and select True or false type > set name = Show sale percentage (you can set it as required field or not) > click Add button
Step 4: After adding all the necessary fields > click Save button > return to the Add products metafield definition page to select the newly created Scrolling badge entry > click Save button
Watch our video below...
2.2. Add entry & add metafield to product
Add entry
Step 1: From the Shopify store home screen > click open Content tab > open Metaobjects tab > find & open Scrolling badge data field > click Add entry button
Step 2: Name the badge "Scrolling badge" > visit the Remixicon website to select an icon (click on your chosen icon > then click "Copy SVG") > you can customize attributes like width, height, and color > enter the desired text > choose whether to display the "Sale" label or the sale percentage.
Add metafield to product
Step 1: From the Shopify store home screen > click open Products tab > open Product you want > find & click the Scrolling badge data field > click Add entry button > select Scrolling badge entry
Step 2: view result