


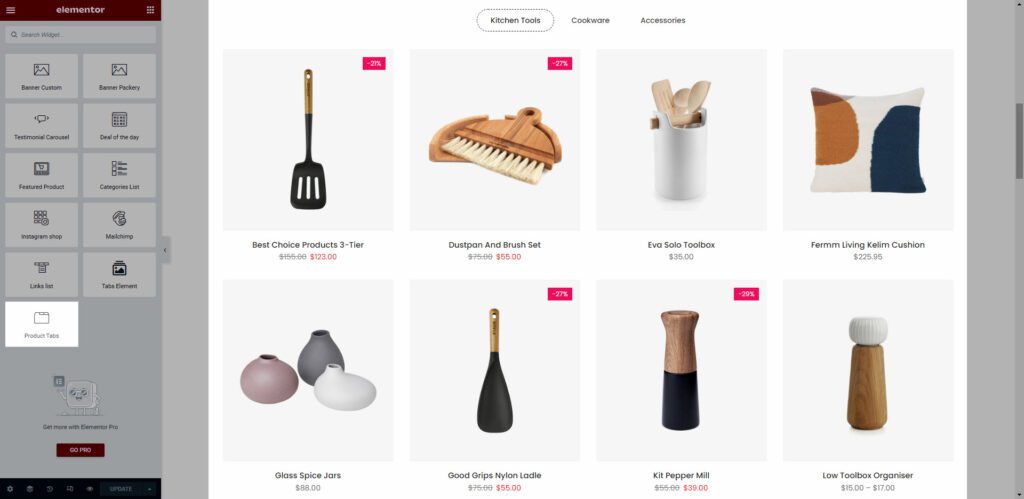
Product tabs allows you to display categories as tabs. For example, you may have three tabs, each tab for one collection. You can build any tab to show whatever collection you want.
1. Add Product Tabs
From Dashboard > Pages > All pages > select the home page you want to add Product Tabs > Edit with elementor.
Scroll down to Kalles Theme > drag and drop the Product Tabs into the page.
2. Configure Product Tabs’ Content
2.1. Tabs
Title: Enter title for the product tab.
Display: This option allows to display product by some conditions. They are All products, Recent products, Featured products, Sale products, Best selling products, Top Rated Products.
Category: If you don’t want to add product manual, you can select product categories that you want to show on the product list.
Order By: This option allows to display product by some conditions. They are Title, Date, ID, Author, Modified, Random, Comment count, Menu order.
Order: This option allows to display product by 2 conditions. They are Ascending or Descending.
You can watch this video below to get more detail.
2.2. Settings
Tabs style: There are 3 styles.
Tabs Color: Select for color for the tab.
Product style: There are 3 styles. They are Grid, Masonry, Carousel.
Columns: There are 5 types. You can choose 2 columns, 3 columns, 4 columns, 5 columns or 6 columns.
Items per page: Enter the number of products that you want to display on one page.
Enable Flip Product Thumbnail: When you hover over the product, the second image will appear.
Load more button: Turn on this option to show the Load more button. Please note that if you want to show Load More button so the number of product must more than product Per Page from Content option block.

CSS Animation: There are 5 style animation. They are Top to bottom, Bottom to top, Left to right, Right to left, Appear from center.
Extra class name: You also can add an extra class name in this option. (Style particular content element differently – add a class name and refer to it in custom CSS).
3. Configure Product Tabs’ Style
From this tab, you will able to config attribute of Hover Product Style, Product Title, Product Title Color, Product Price, Product Price Color.
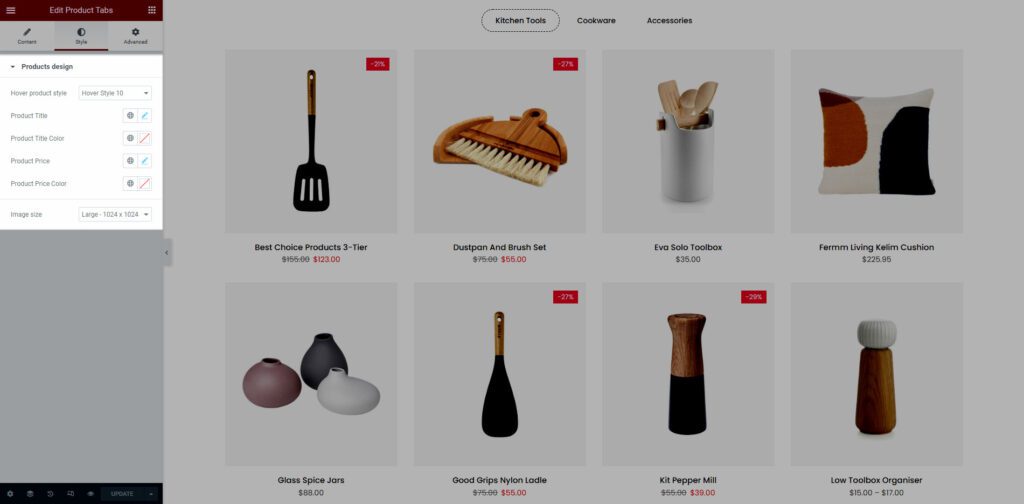
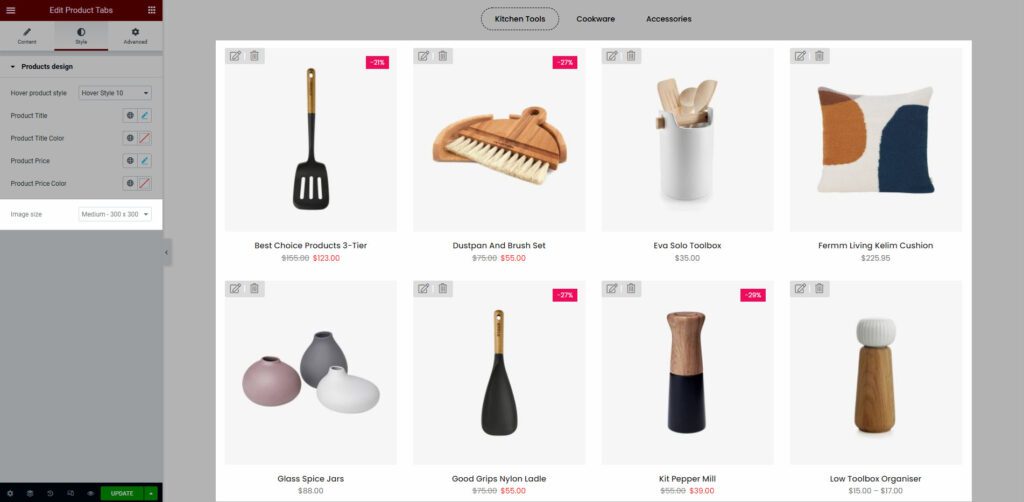
Image size: This is important option and you should understand. Because customers always upload product image with different size so we developed this option to allow make all product images have same size. For example: If I config image size is Medium – 300×300. This is the result:
This video below is an example of how sections work after you’ve made all of the necessary changes.


