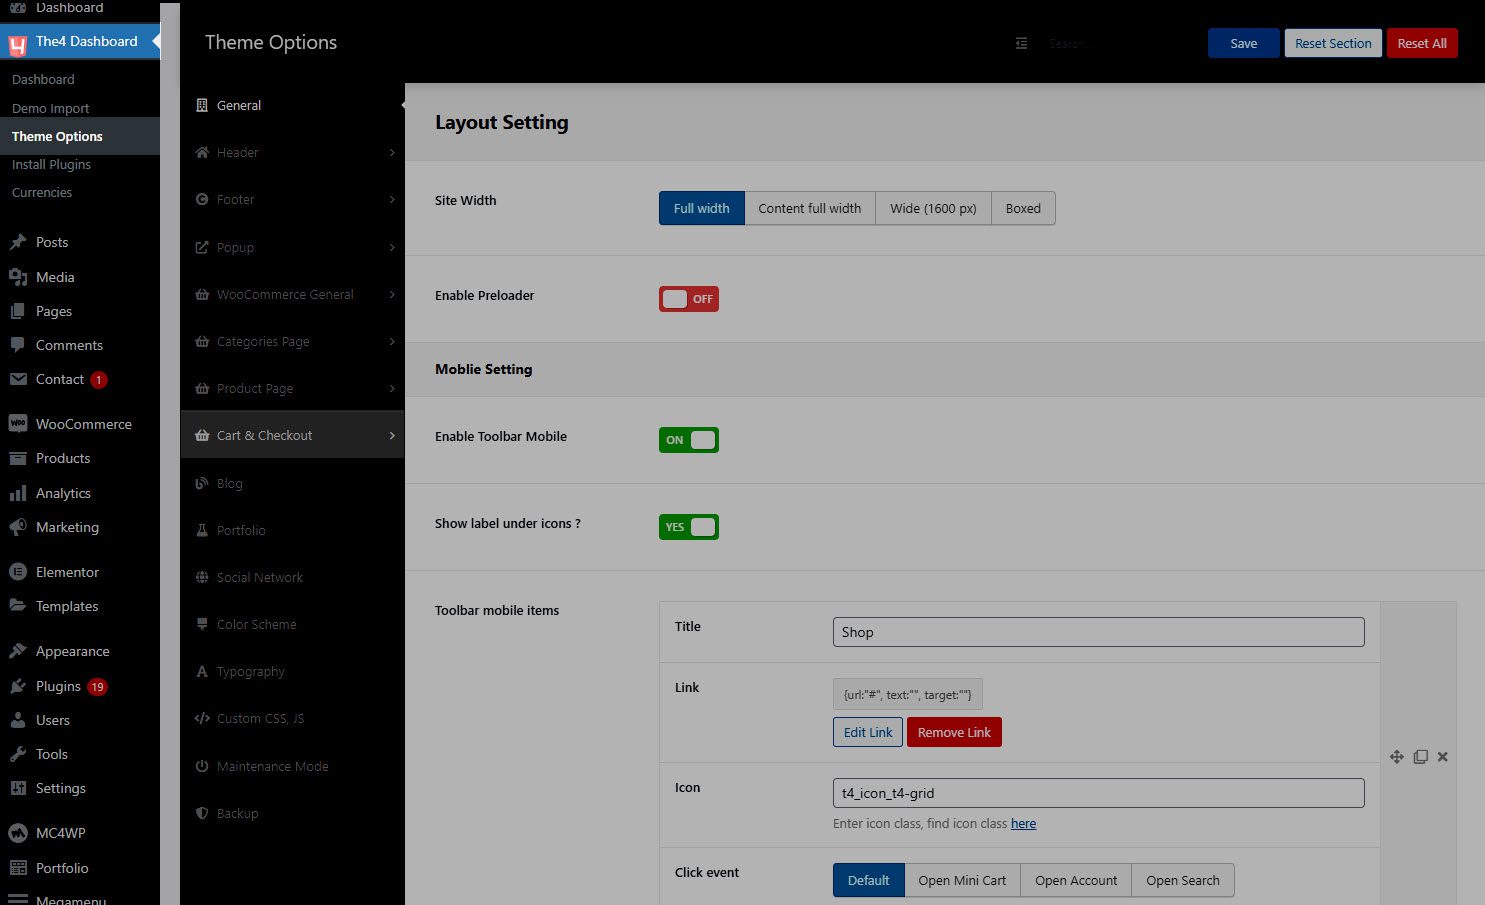
You can go to The4 Dashboard > Theme options > Cart & Checkout. This option allows users to set up the cart & checkout page.
1. Cart Settings
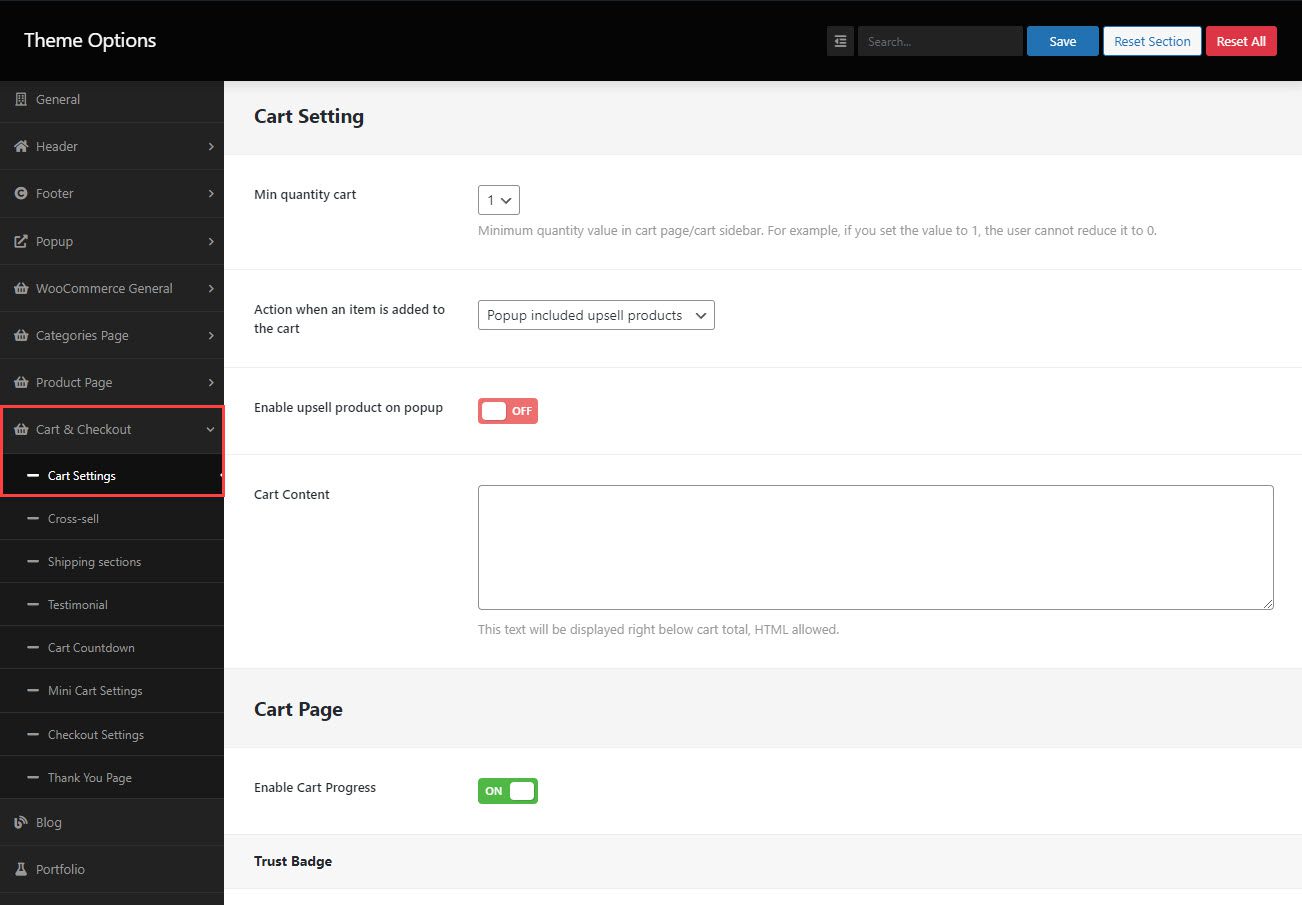
Min quantity cart: This option is used to set the minimum quantity value in the Cart page and Cart sidebar. Has two values, “0” and “1“. If you set it is “0”, you will see a remove icon to remove product from the cart. If you set the value to “1”, the user cannot reduce it to “0”.
Action when an item is added to the cart: You can choose an action after adding a product to the cart. There are many options for you, including Show hidden sidebar/dropdown, Popup included upsell product, No action, stay on the current page.
Enable upsell product on popup: Enable this option to show Upsell product on popup.
Cart Content: Enter the contents of the cart. This text will be displayed right below cart total and HTML allowed.
Enable Cart Progress: Enable this option to show Cart Progress.
Enable Trust Badge: Allows you to enable/disable Trust badge option.
Message: Enter the content of the message.
Source IMG: There are two types of sources: Image and SVG source.
If you select SVG source, you can add an SVG logo to the SVG list box, then set SVG width and SVG height for it. If you select Image source, you can upload an image to the Trust Seal Image option and set the width image for it.
2. Cross-Sell
2.1. How to add Cross-Sell products?
From The4 Dashboard > Products > Select product you want to add Cross-Sell > Go to Linked Products > Cross-sells > Add some products in there.

2.2. Settings
You can go to The4 Dashboard > Theme options > Cart & Checkout > Cross-Sell.
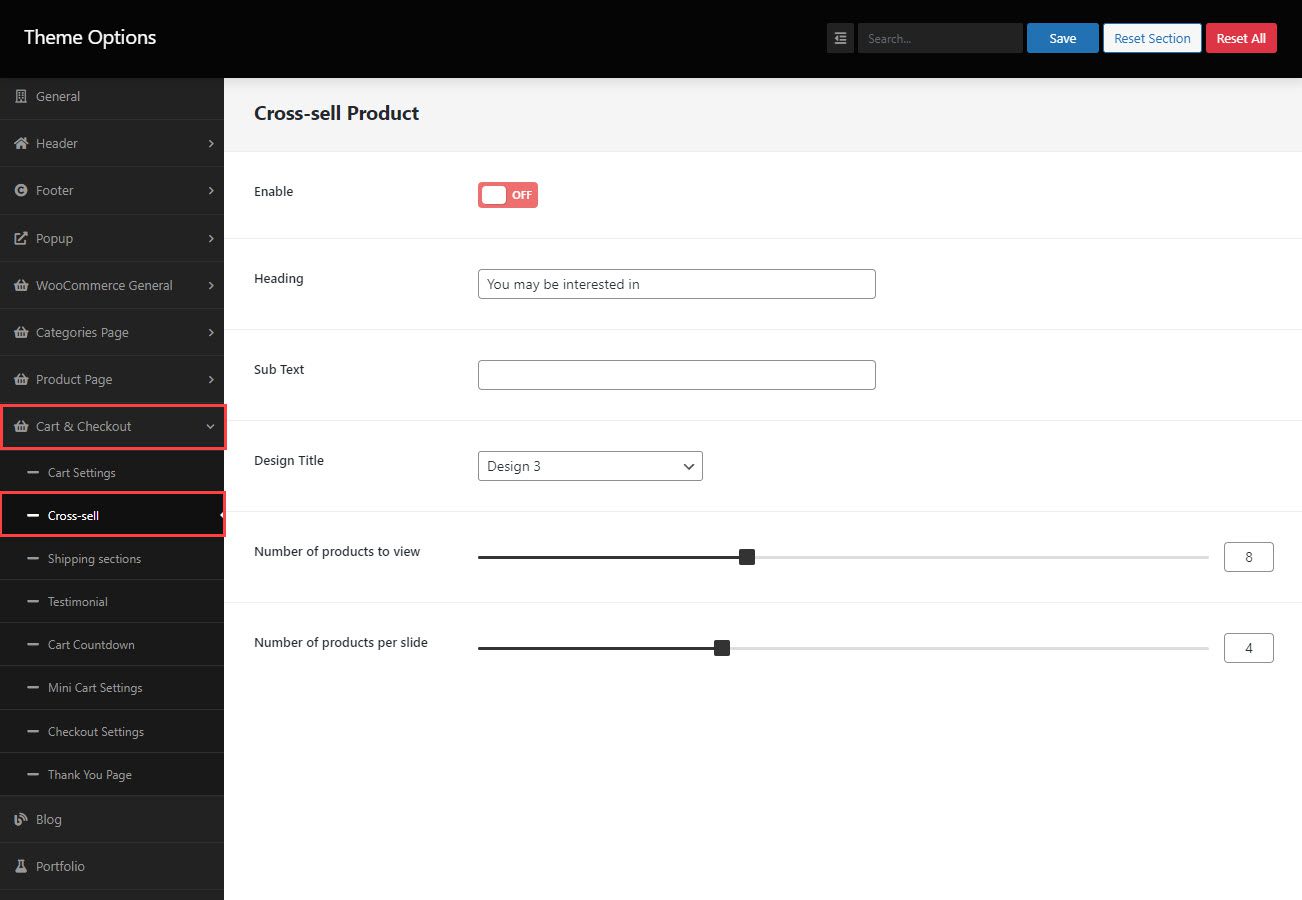
Enable: Turn on this option to show the Cross-sell.
Heading: Enter the heading of Cross-sell.
Sub Text : Enter sub text of Cross-sell.
Design Title: There are 12 designs.
Number of products to view: Enter the total number of products that you want to display.
Number of product per slide: Enter the number of products that you want to display on one slide
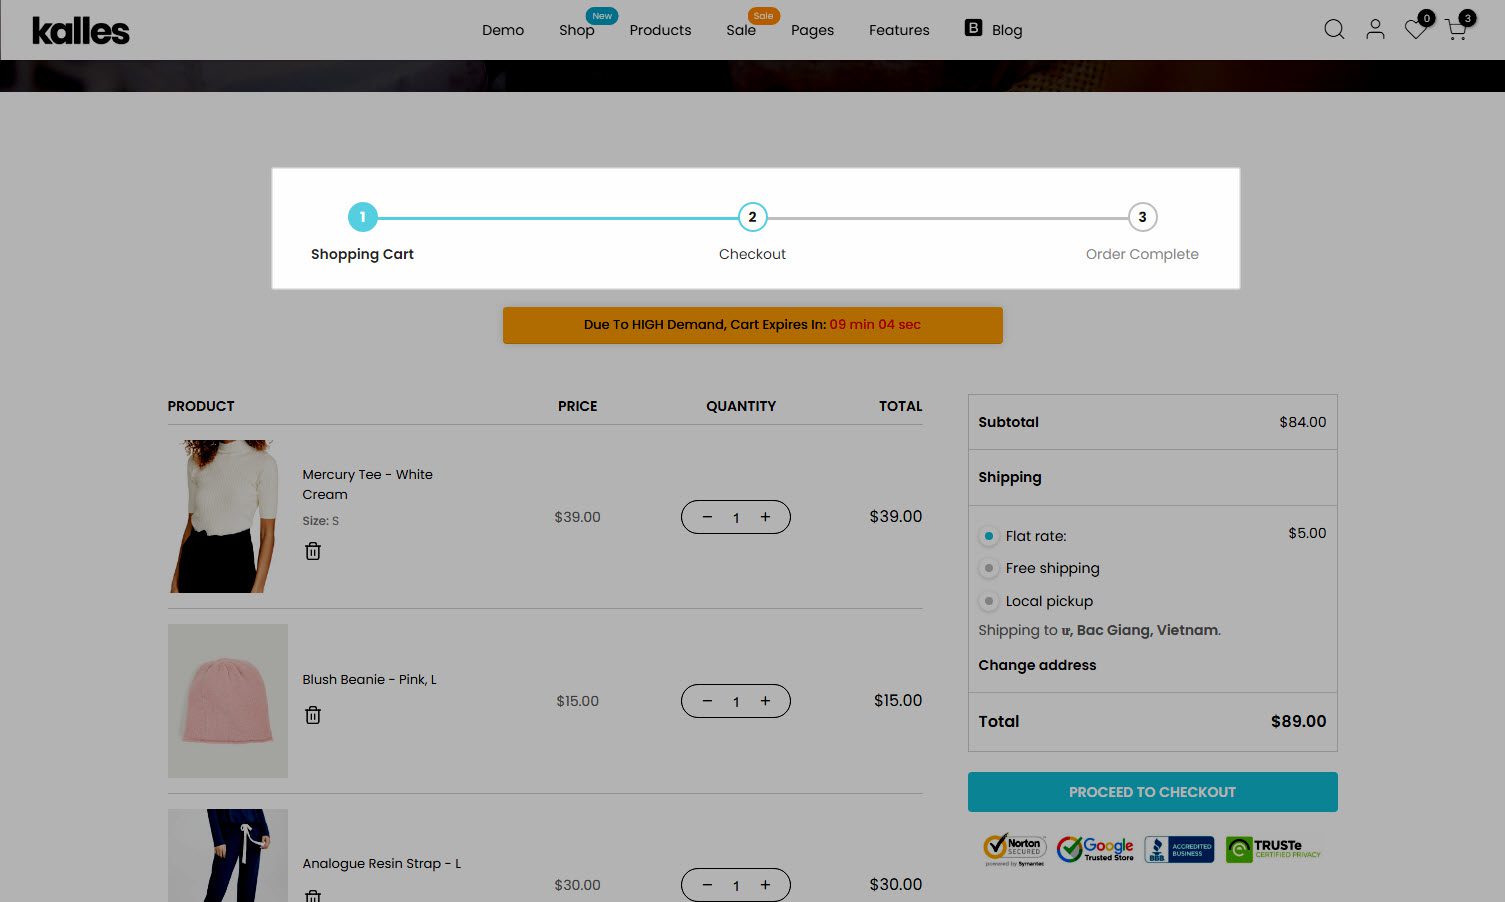
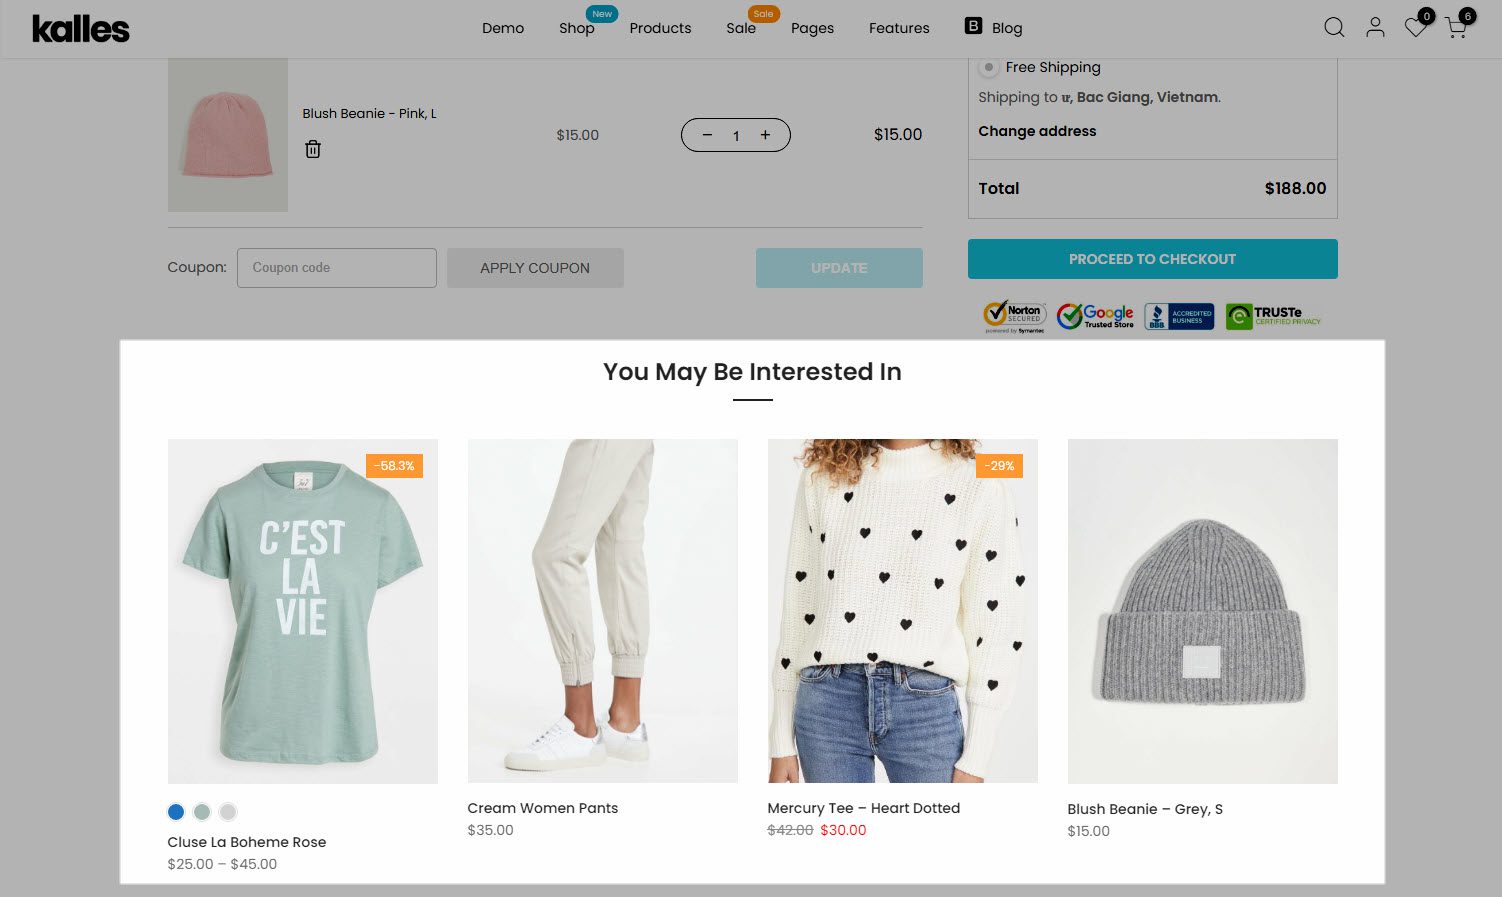
Result: The Cross-Sell product will display on cart page. You can see this image below for details.
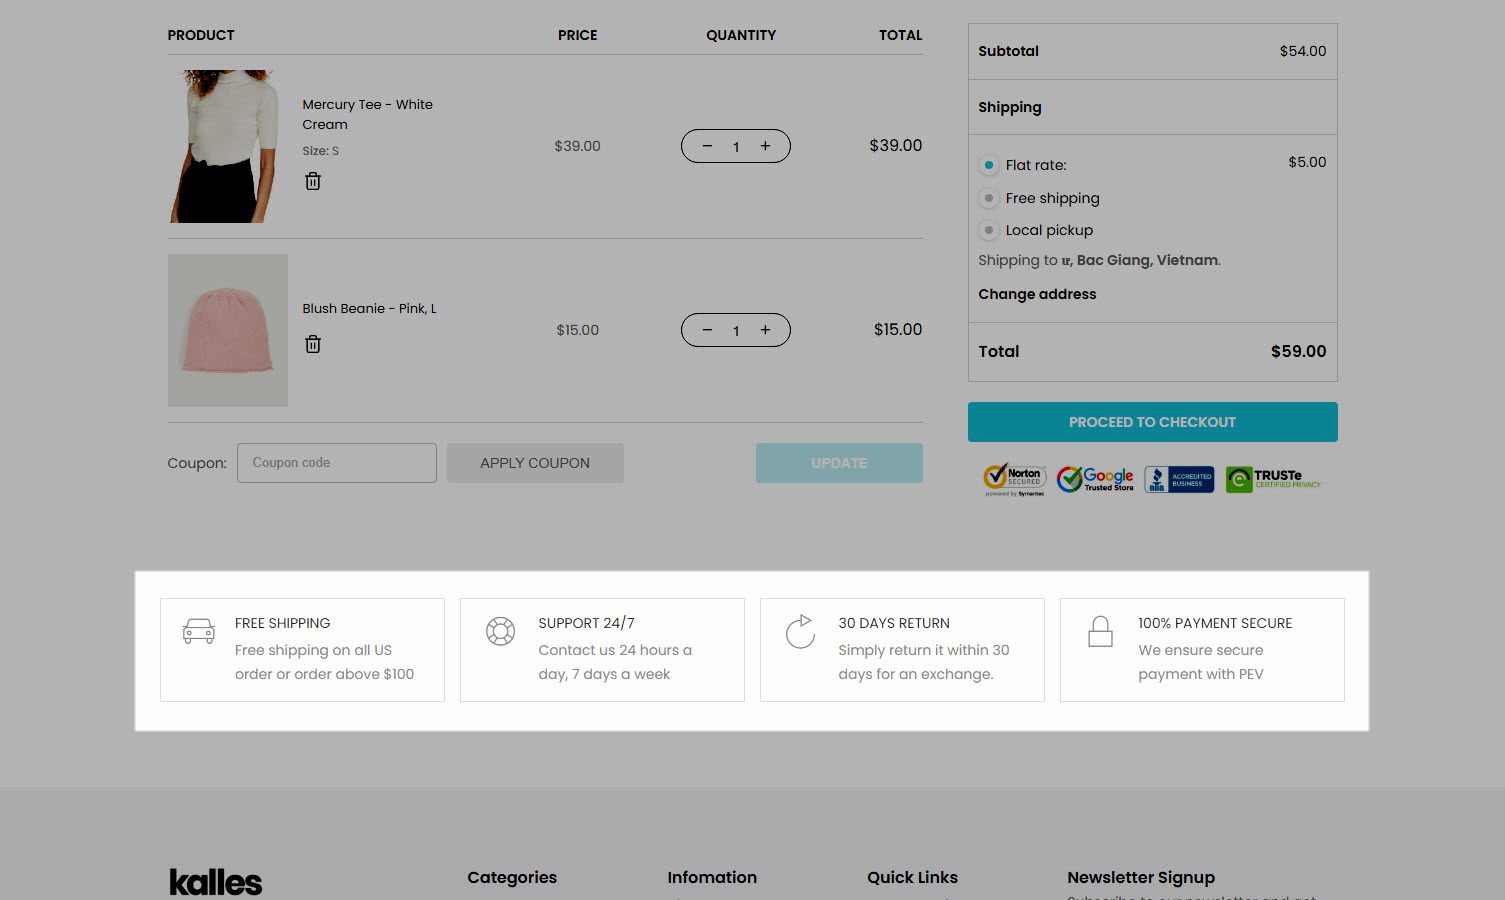
3. Shipping section
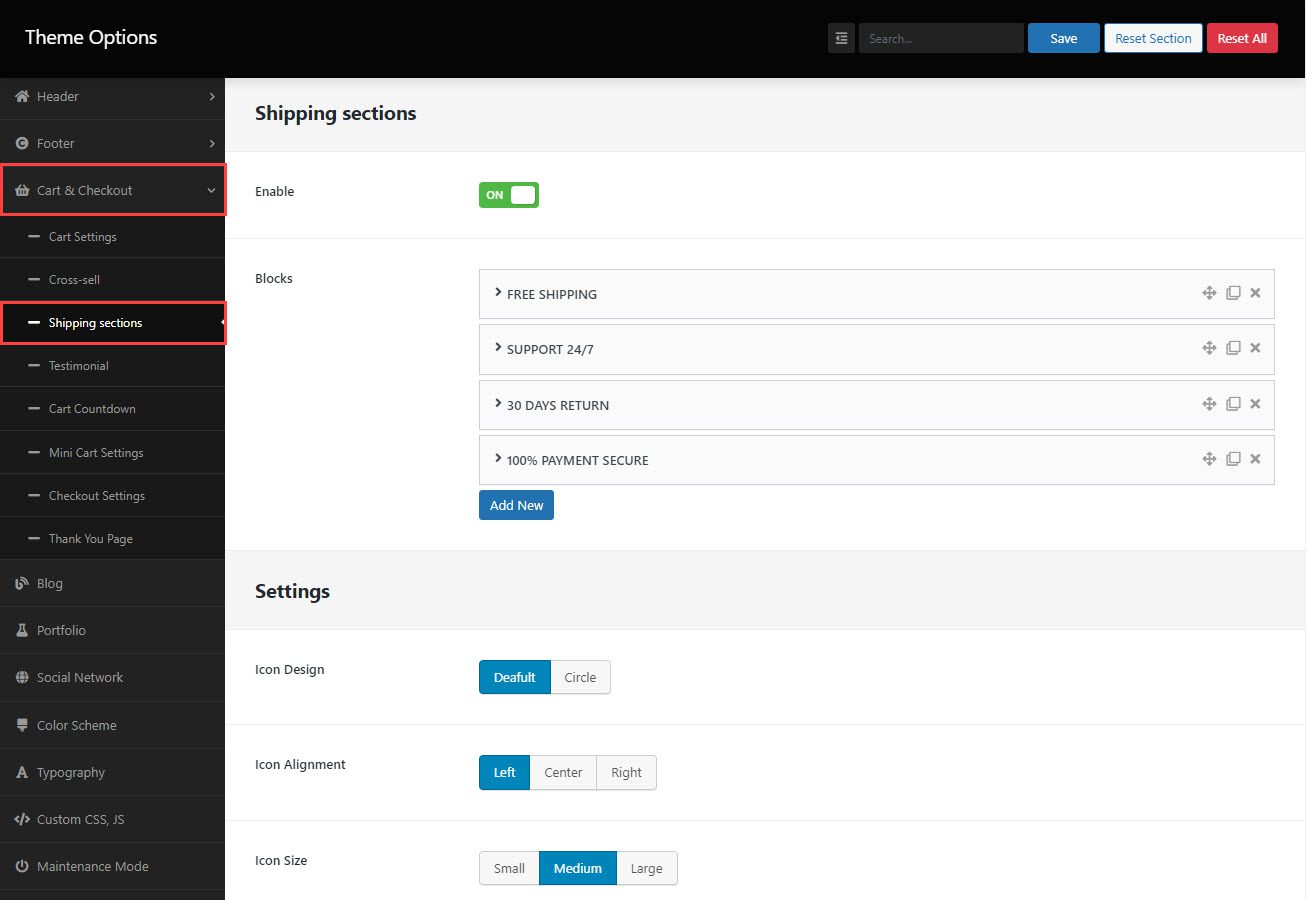
3.1. Shipping items
Enable: Turn on this option to show the shipping section.
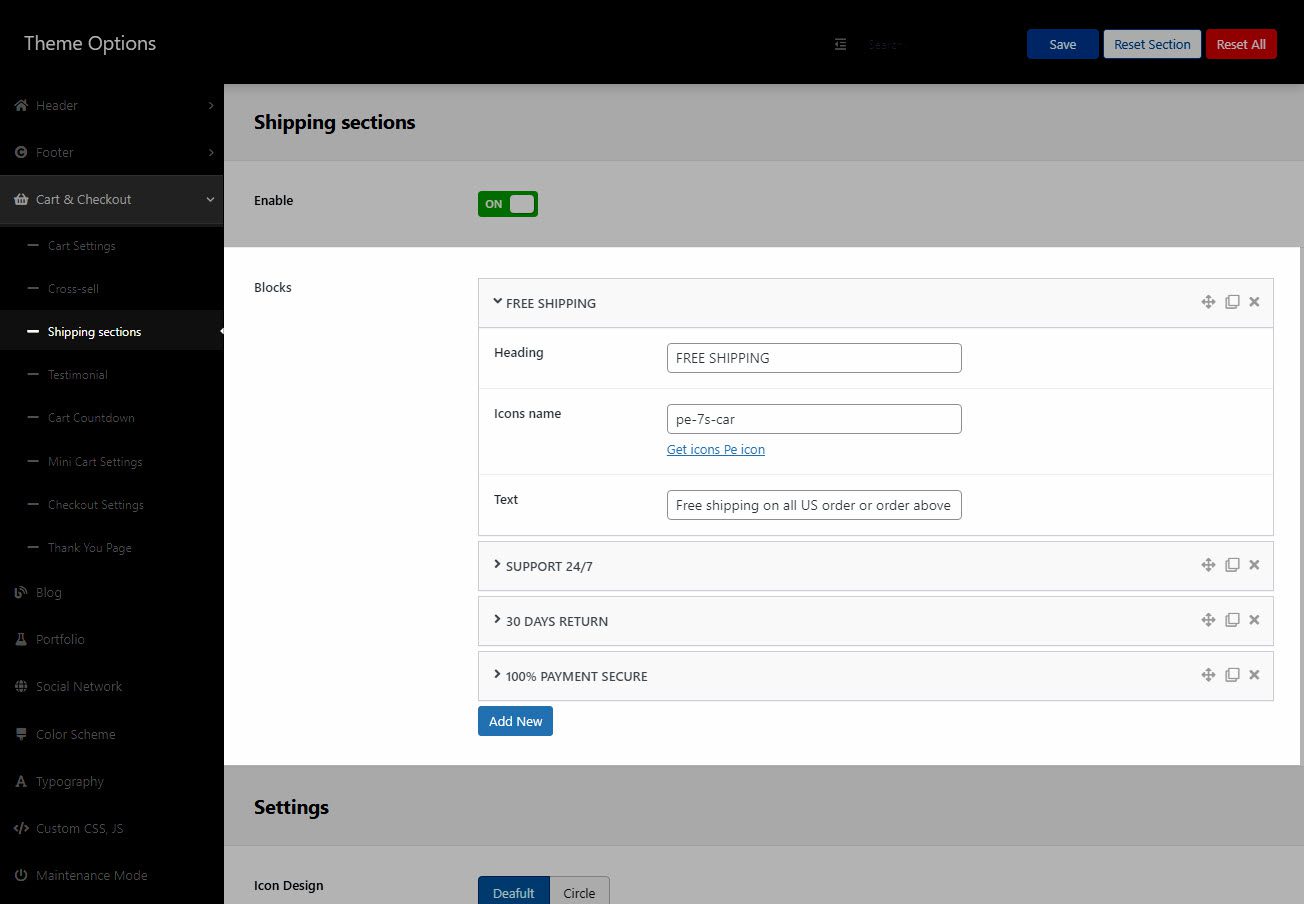
Blocks: With this option, you can add the Heading, Icon Name, Text for the shipping item.
Result:
3.2. Settings
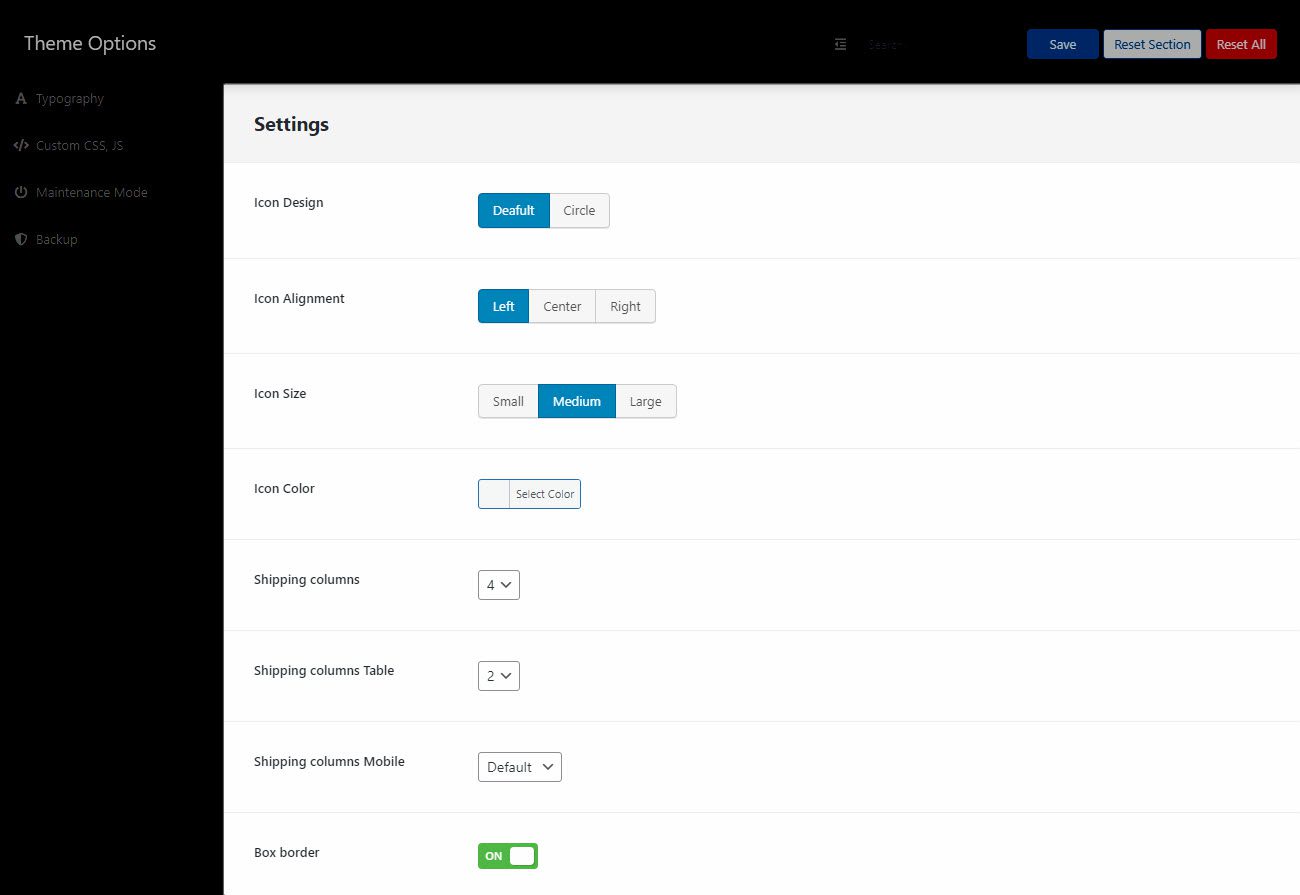
Icon Design: There are 2 design. They are Default and Circle.
Icon Alignment: Align the content to left, center or right.
Icon Size: Set the size of the icon to be small, medium, or large.
Icon Color: Select color for the icon.
Shipping columns: There are 5 types. You can choose 2 columns, 3 columns, 4 columns, 5 columns or 6 columns.
Shipping columns Table: There are 3 types. You can choose 2 columns, 3 columns, 4 columns.
Shipping columns Mobile: There are 2 types. They are Default and Modern.
Box border: Turn on this option to use border for the shipping box.
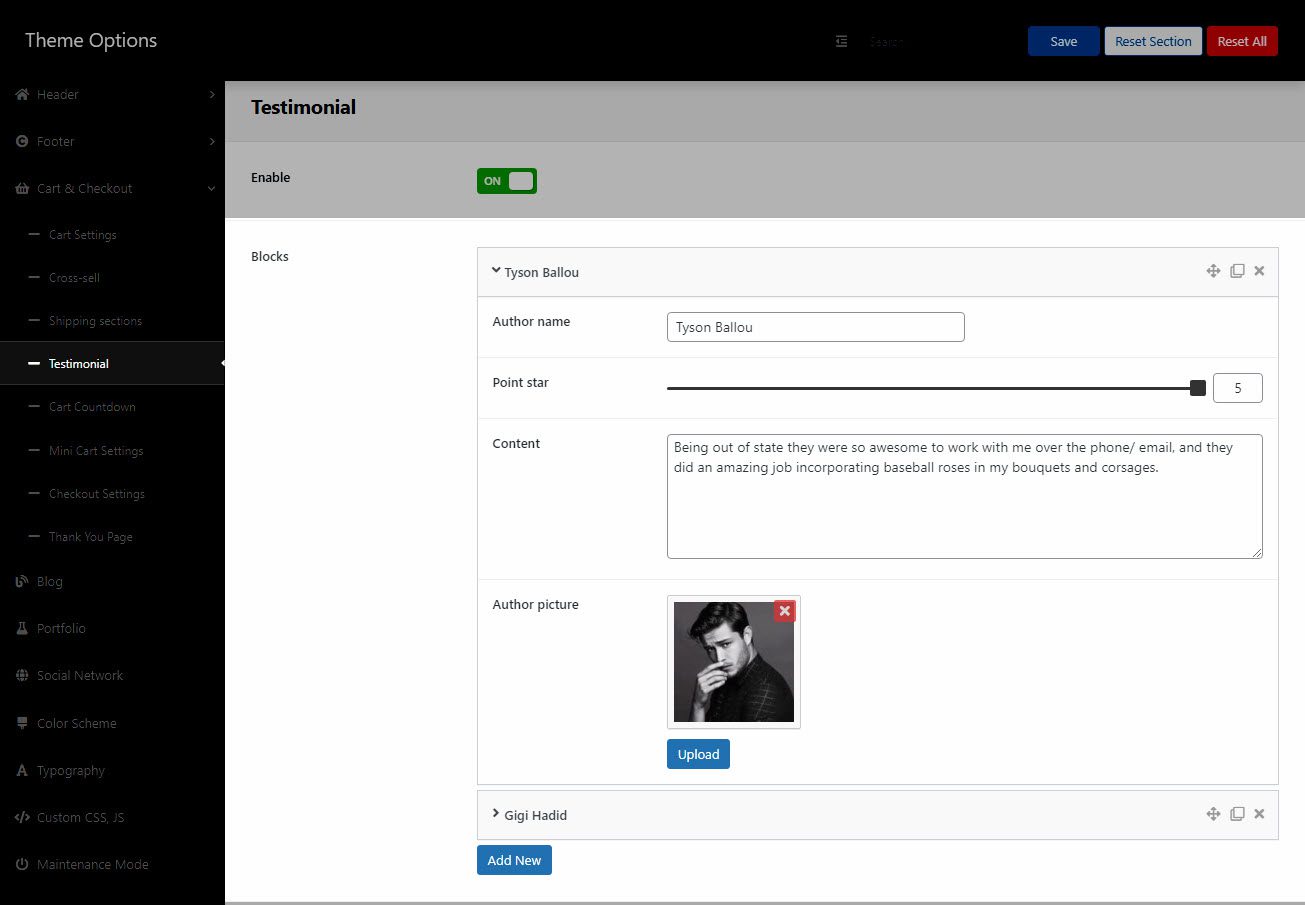
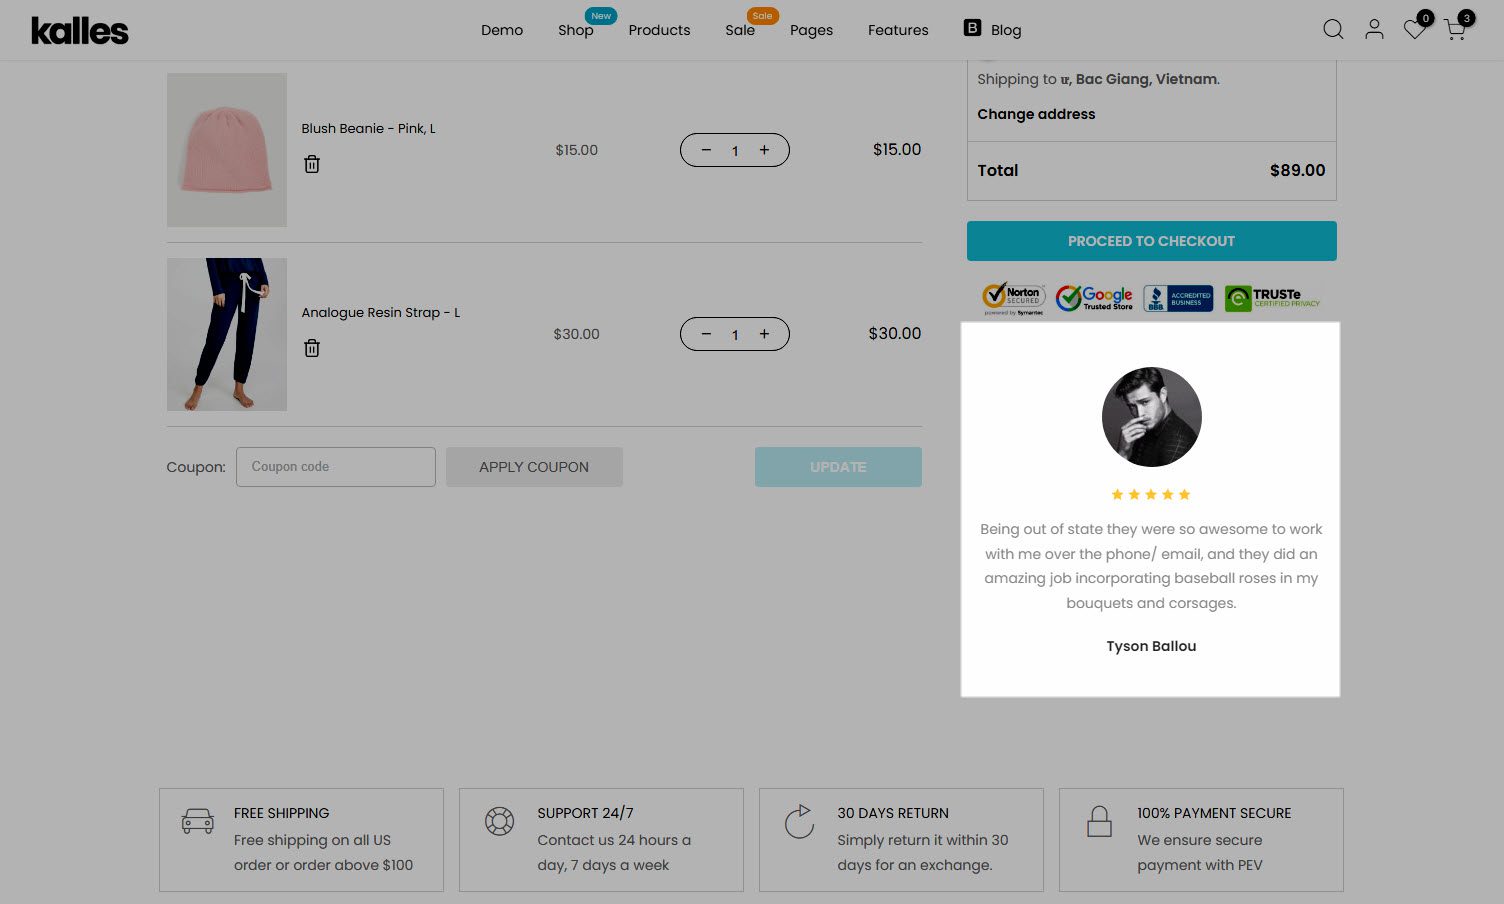
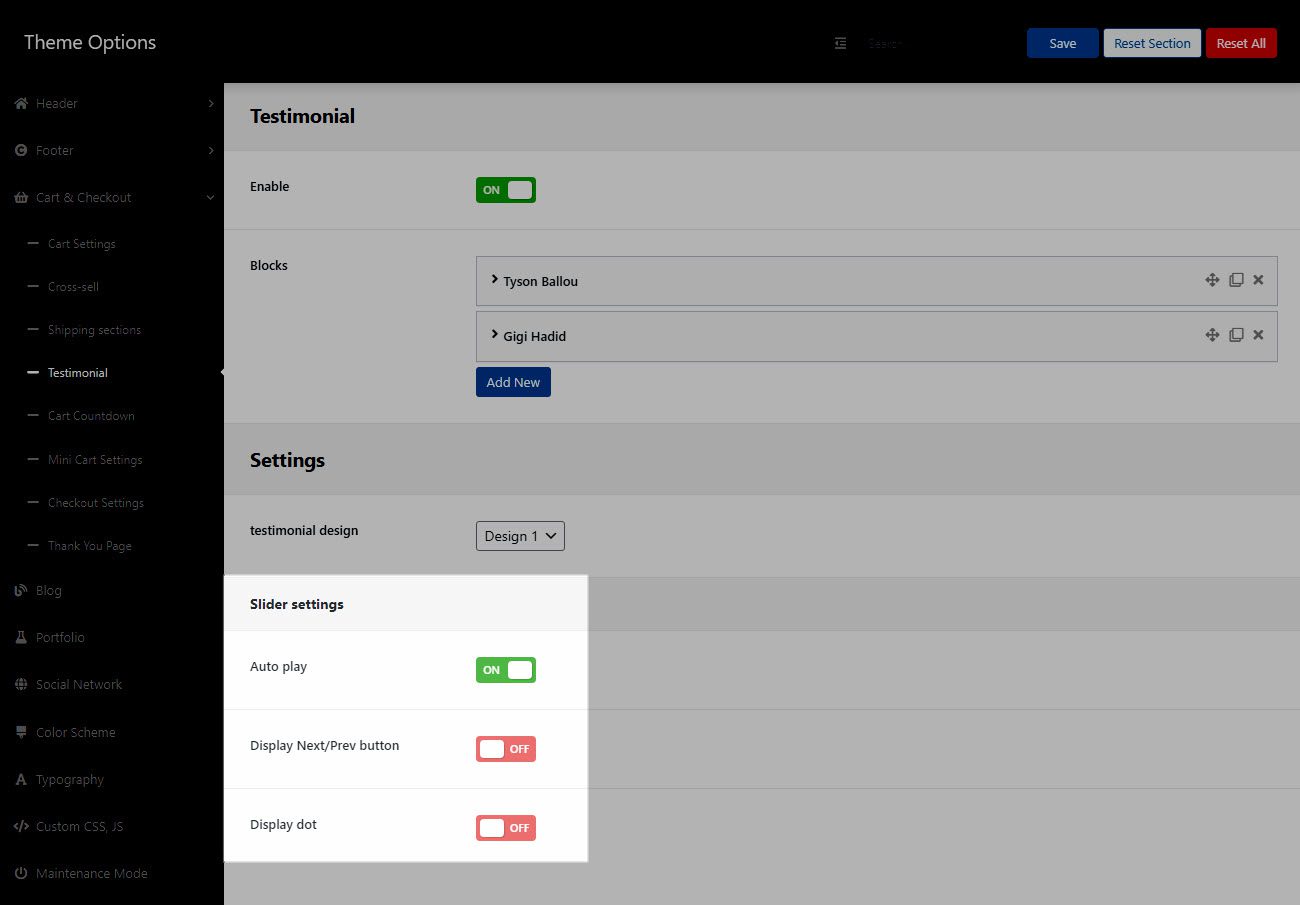
4. Testimonial
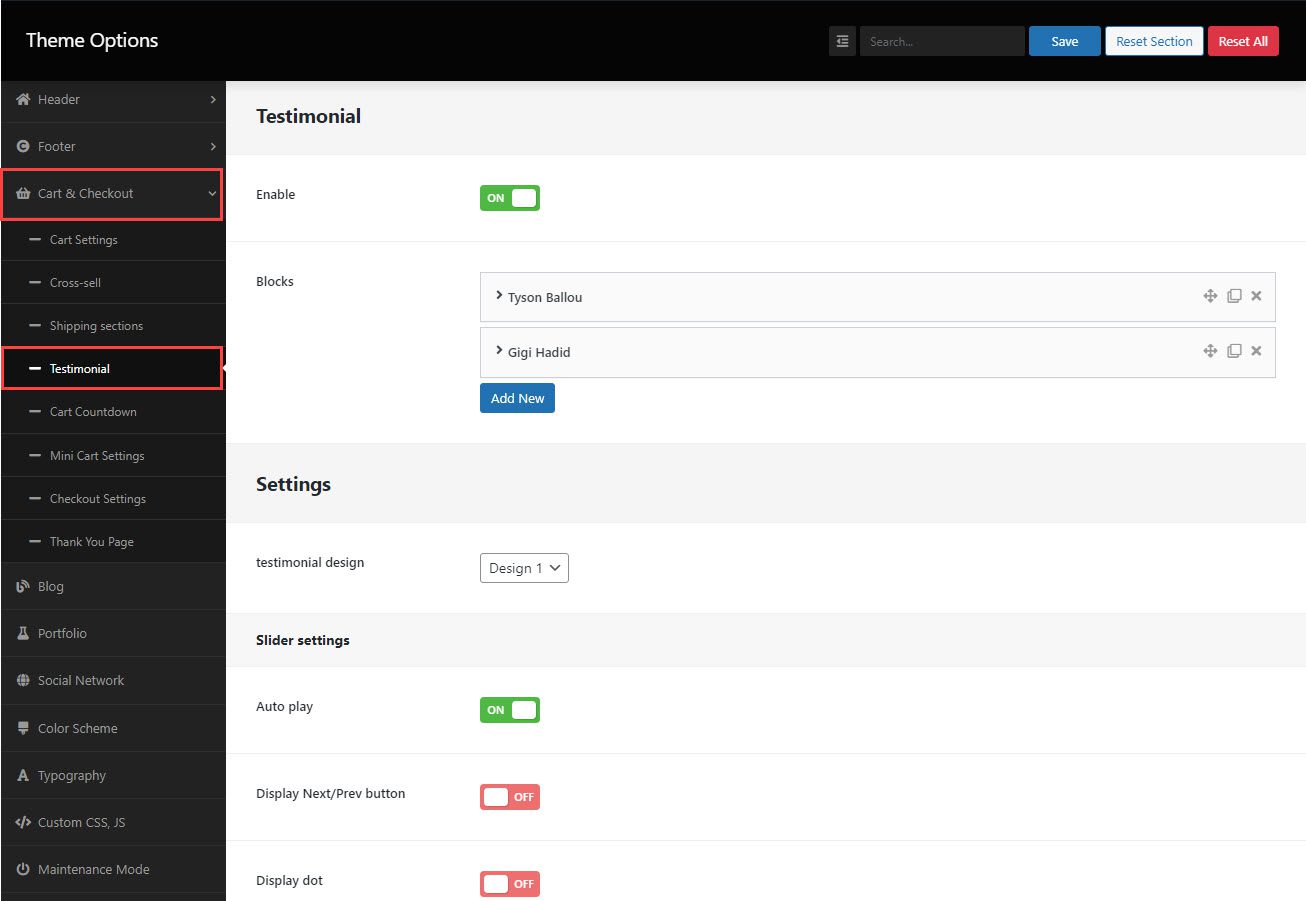
4.1. Testimonial items
Enable: Turn on this option to show the testimonial section.
Blocks: With this option, you can add the author’s name, point star, content, and upload an author picture for the testimonial item.
Result:
4.2. Settings
Testimonial Design: There are 7 designs. You can select one of these designs.
Auto play: Turn on this option to enable autoplay for the Testimonial element.
Display Next/Prev button: Turn on this option to display next/prev button
Display dot: Turn on this option to display dots.
You can see this image below to understand the details about auto play, display next/prev button, and display dot.
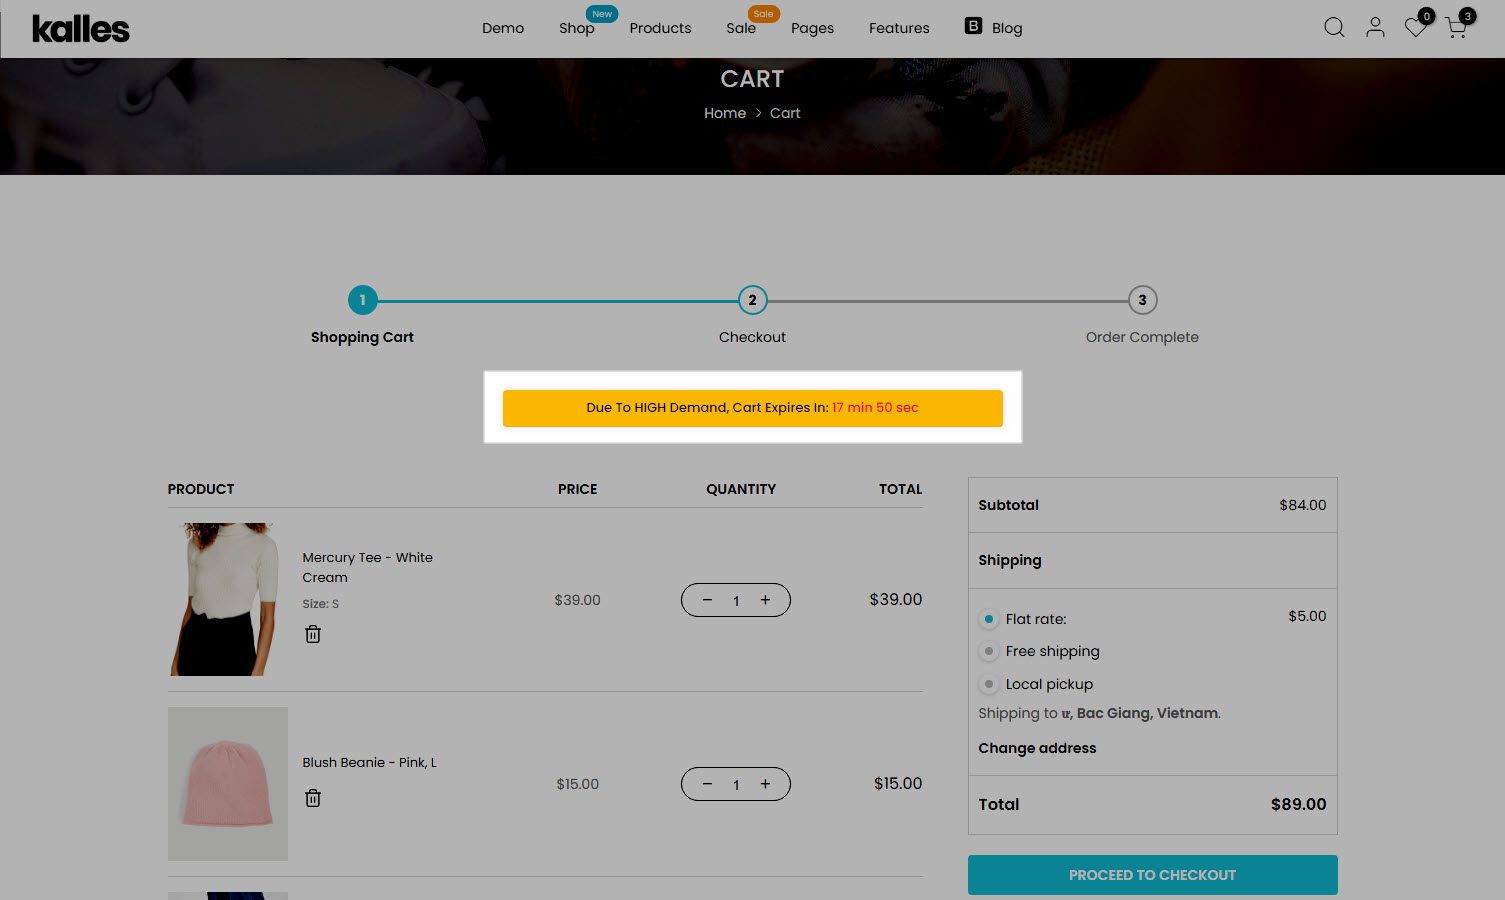
5. Cart countdown
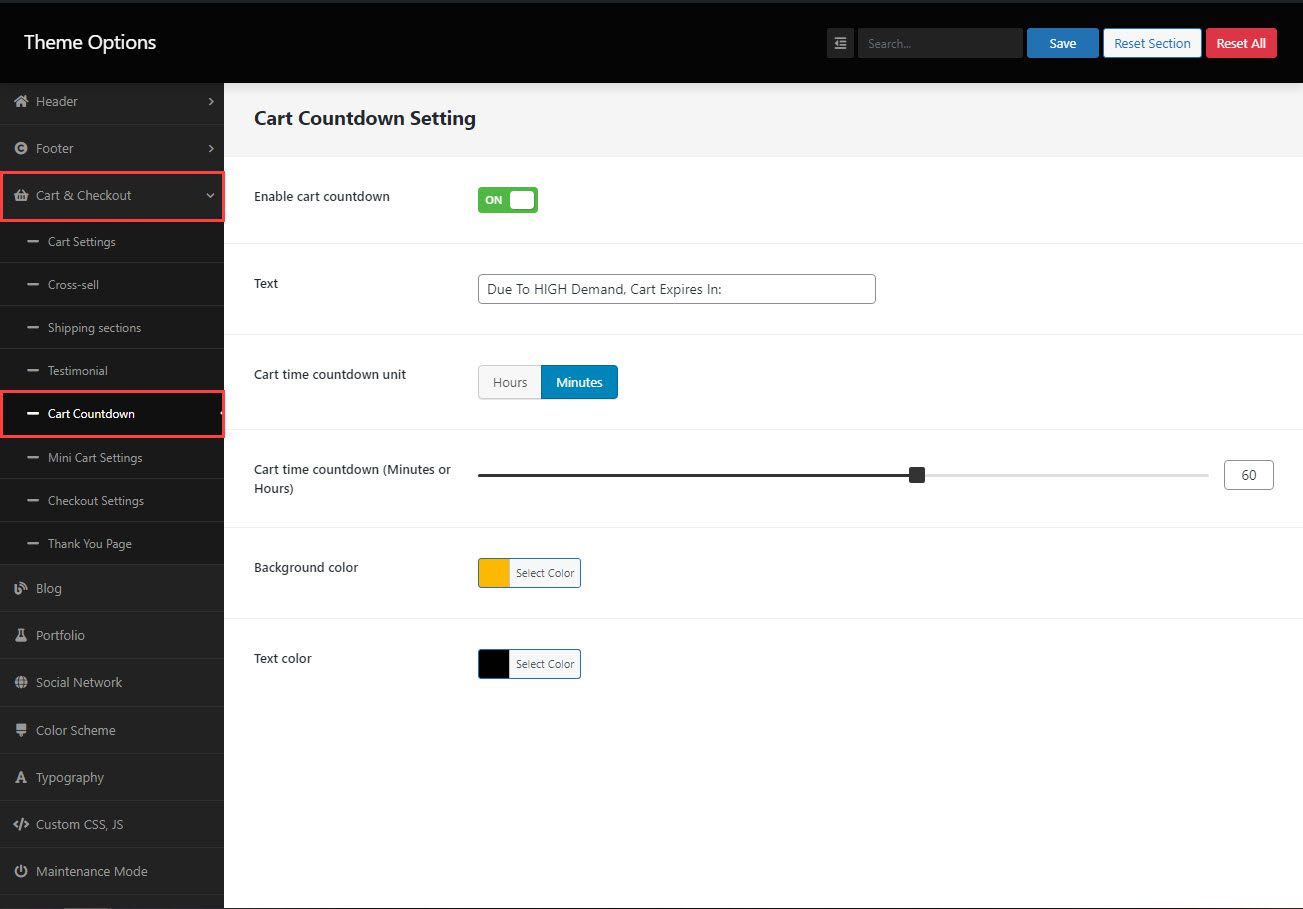
Enable cart countdown: Turn on this option to show the cart countdown.
Text: Enter the content of the cart countdown.
Cart time countdown unit: Select the time whether Minute or Hour to show.
Cart time countdown (Minutes or Hours): Drag a horizontal bar to change the time countdown.
Background color: You can change the background color of cart countdown.
Text color: Select a color for the text of the cart’s caption.
Result:
6. Mini Cart Settings
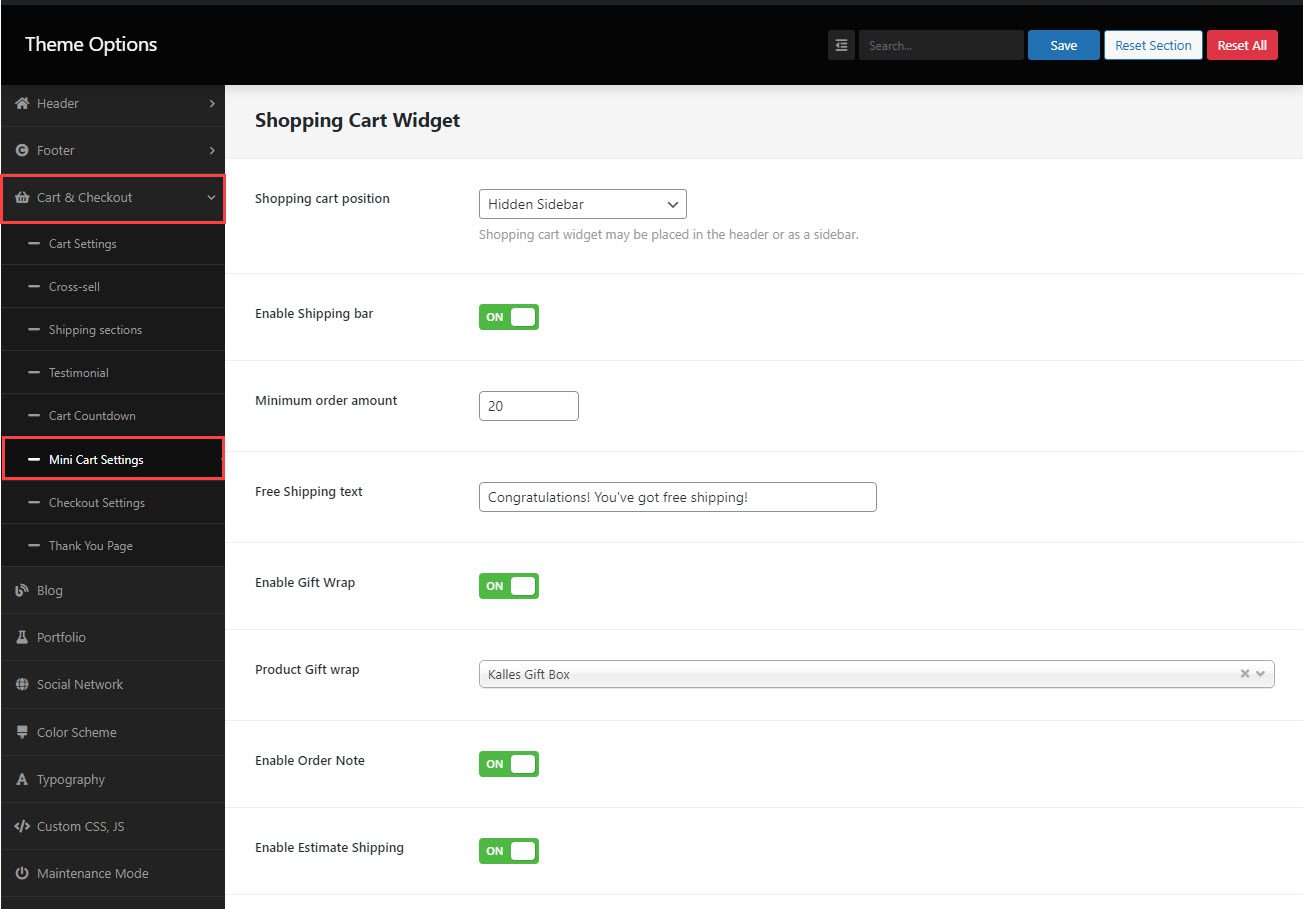
6.1. Shopping cart position:
There are three choices. They are Disable, Hidden sidebar, dropdown widget in header.
Disable: If you select “Disable“, user will be taken directly to the cart when clicking on the cart icon on the header.
Hidden sidebar: The cart sidebar will show when clicking on the cart icon on the header.
Dropdown widget in header: The cart will shows as a dropdown on the header.
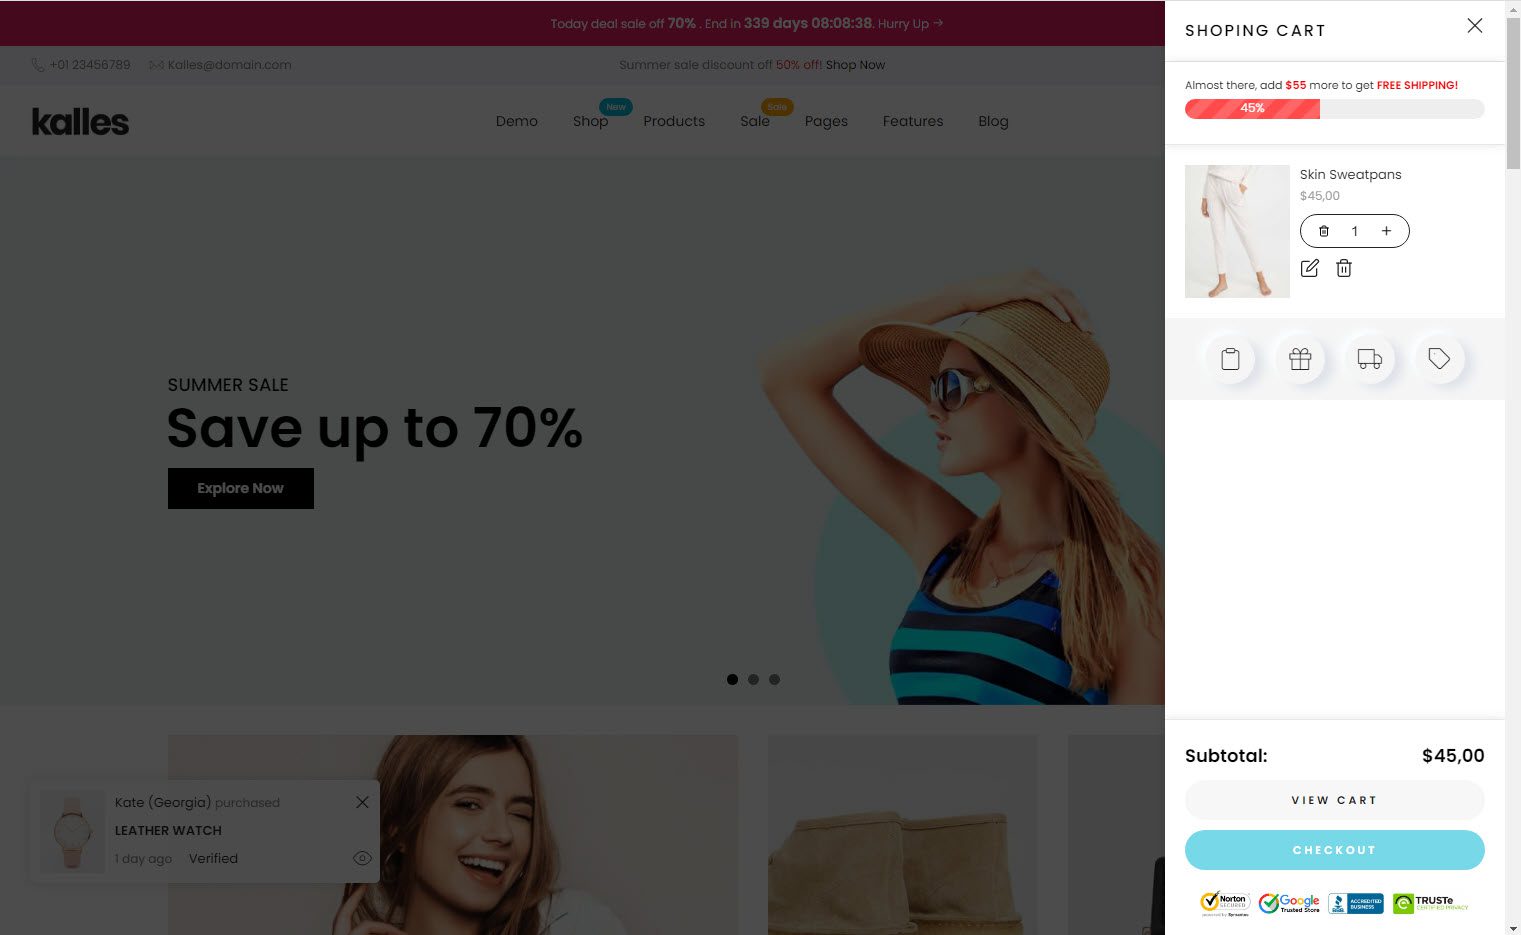
6.2. Shipping bar
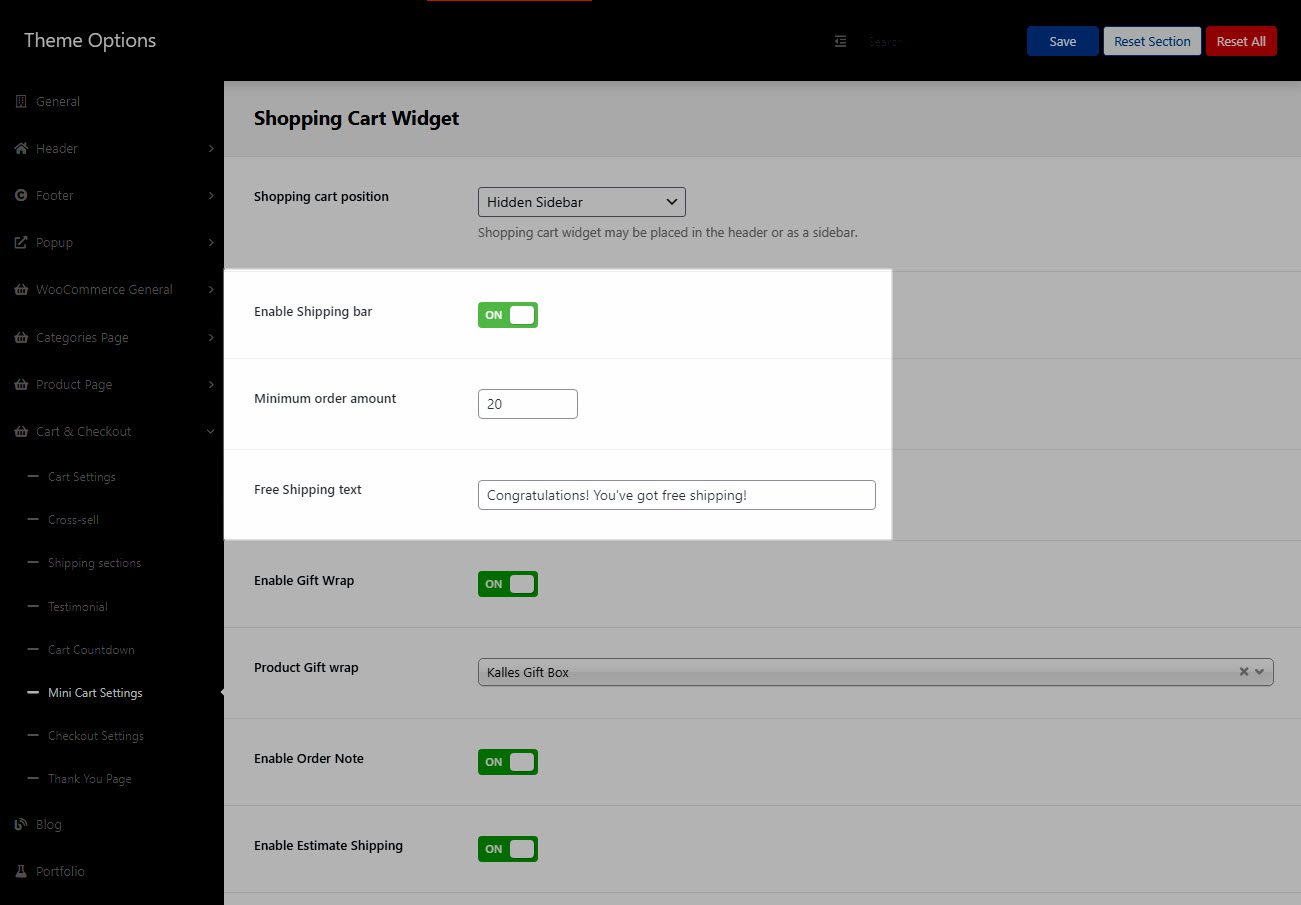
Enable Shipping bar: Turn on this option to show the shipping bar on the mini cart.
Minimum order amount: Enter the minimum item’s price to qualify for free shipping.
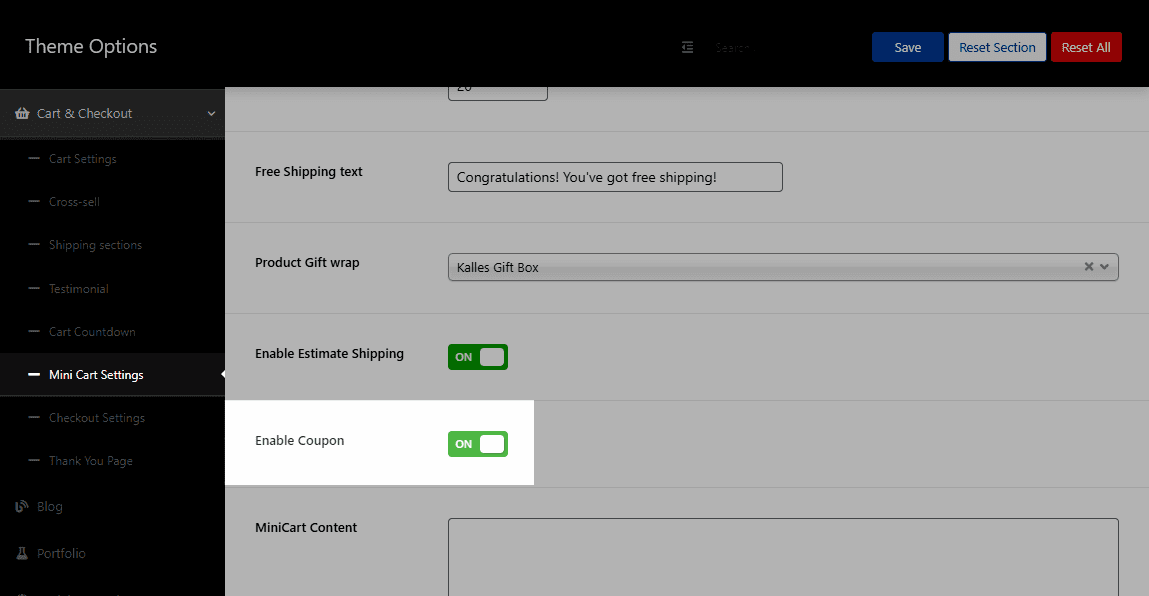
Free Shipping text: Enter content to qualify for free shipping. It’ll display if the total price of the products added to the cart is greater than or equal to the Minimum order amount.
First, the free shipping bar will display the same this image below when total price is greater than or equal to the Minimum order amount.
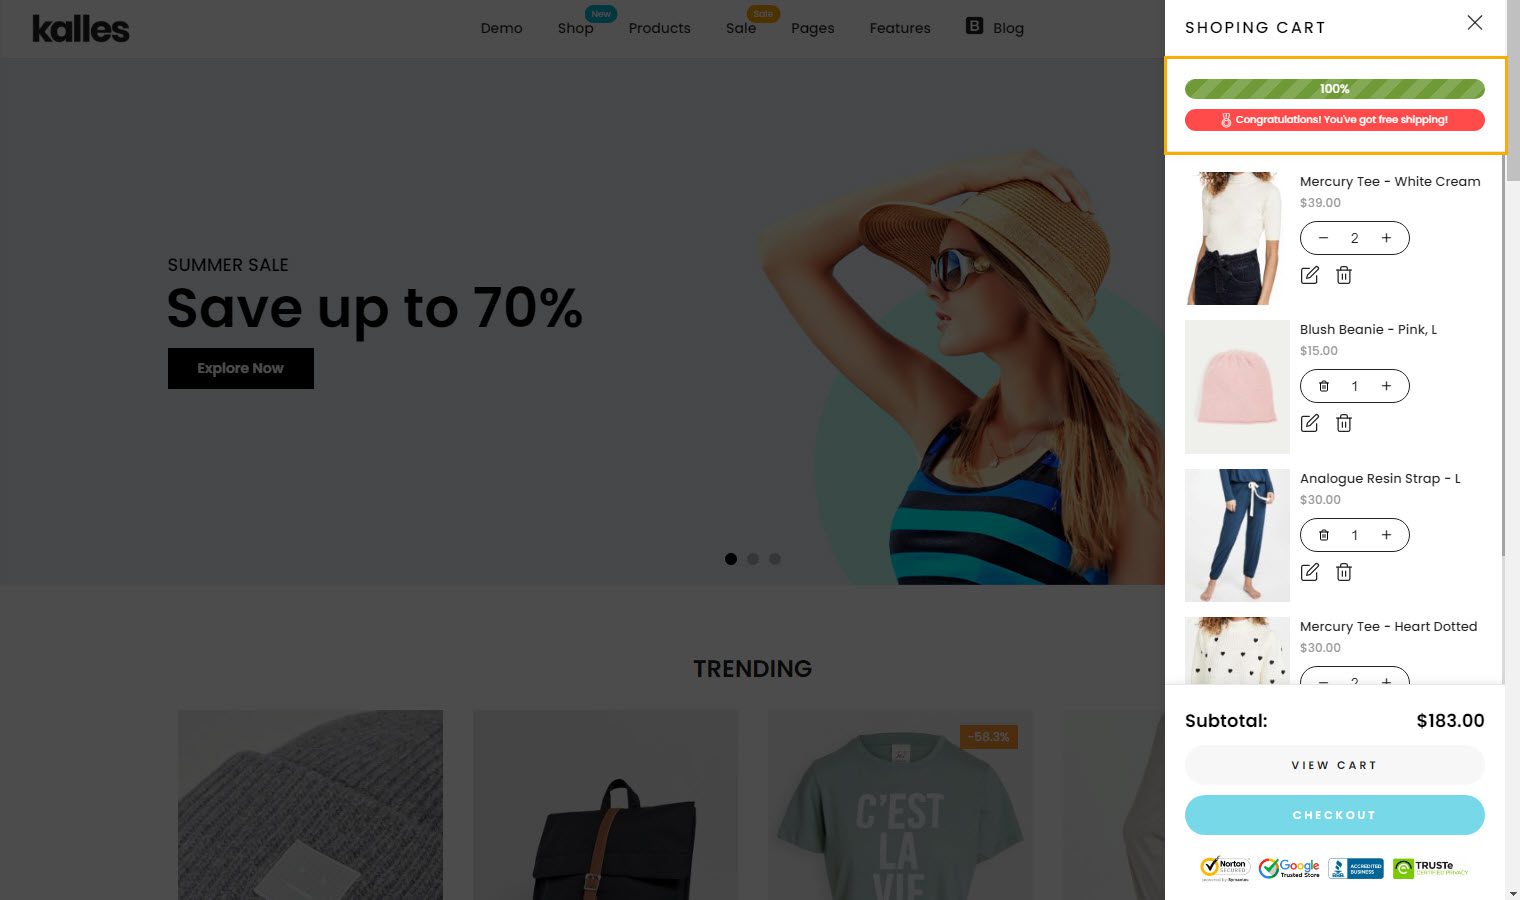
Second, the free shipping bar will display the same image below when the total price is less than Minimum order amount.

6.3. Gift Wrap
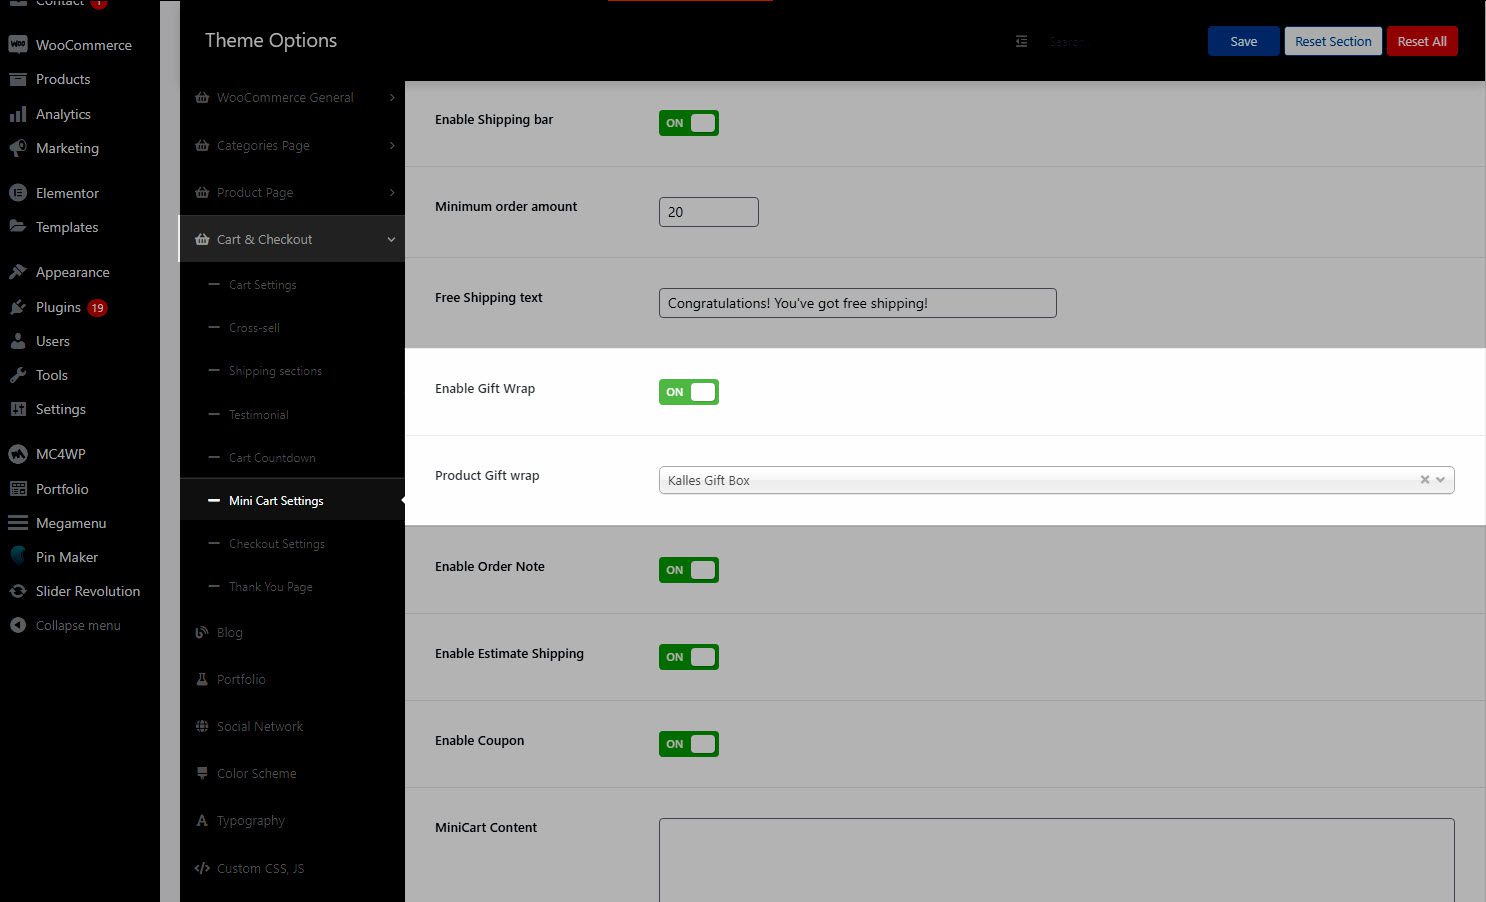
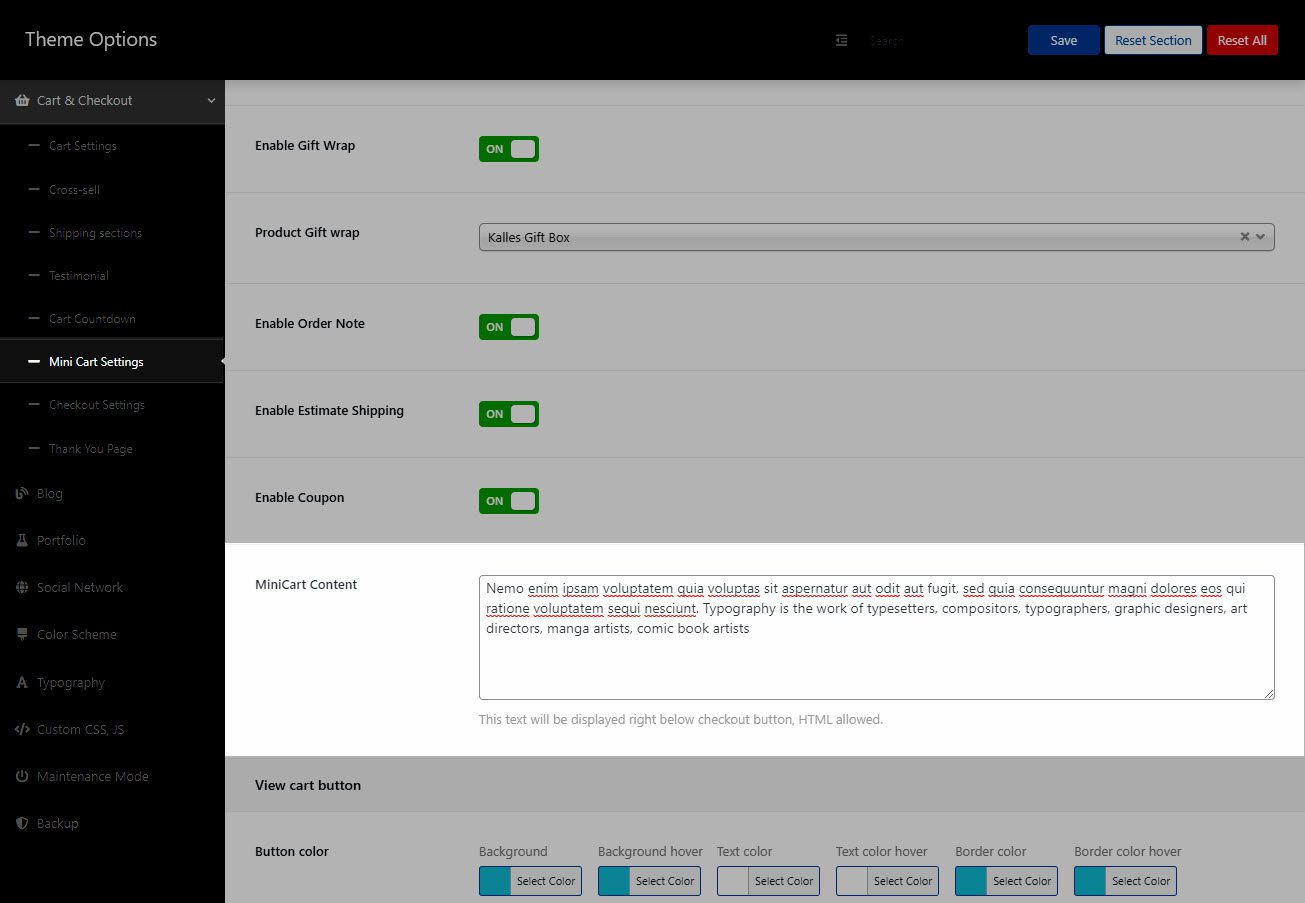
Enable Gift Wrap: Turn on this option to show the gift wrap on the mini cart.
Product Gift wrap: Select product gift wrap.
Gift wrap needs to be set up as a product. From Dashboard > Products > You can create gifts to make customers comfortable and enjoy themselves.
6.4. Enable Order Note:
Turn on this option to display the order note section on the mini cart.
6.5. Enable Estimate Shipping
Turn on this option to display the estimate shipping section on the mini cart.
6.6. Enable Coupon:
Turn on this option to display the coupon section on the mini cart.
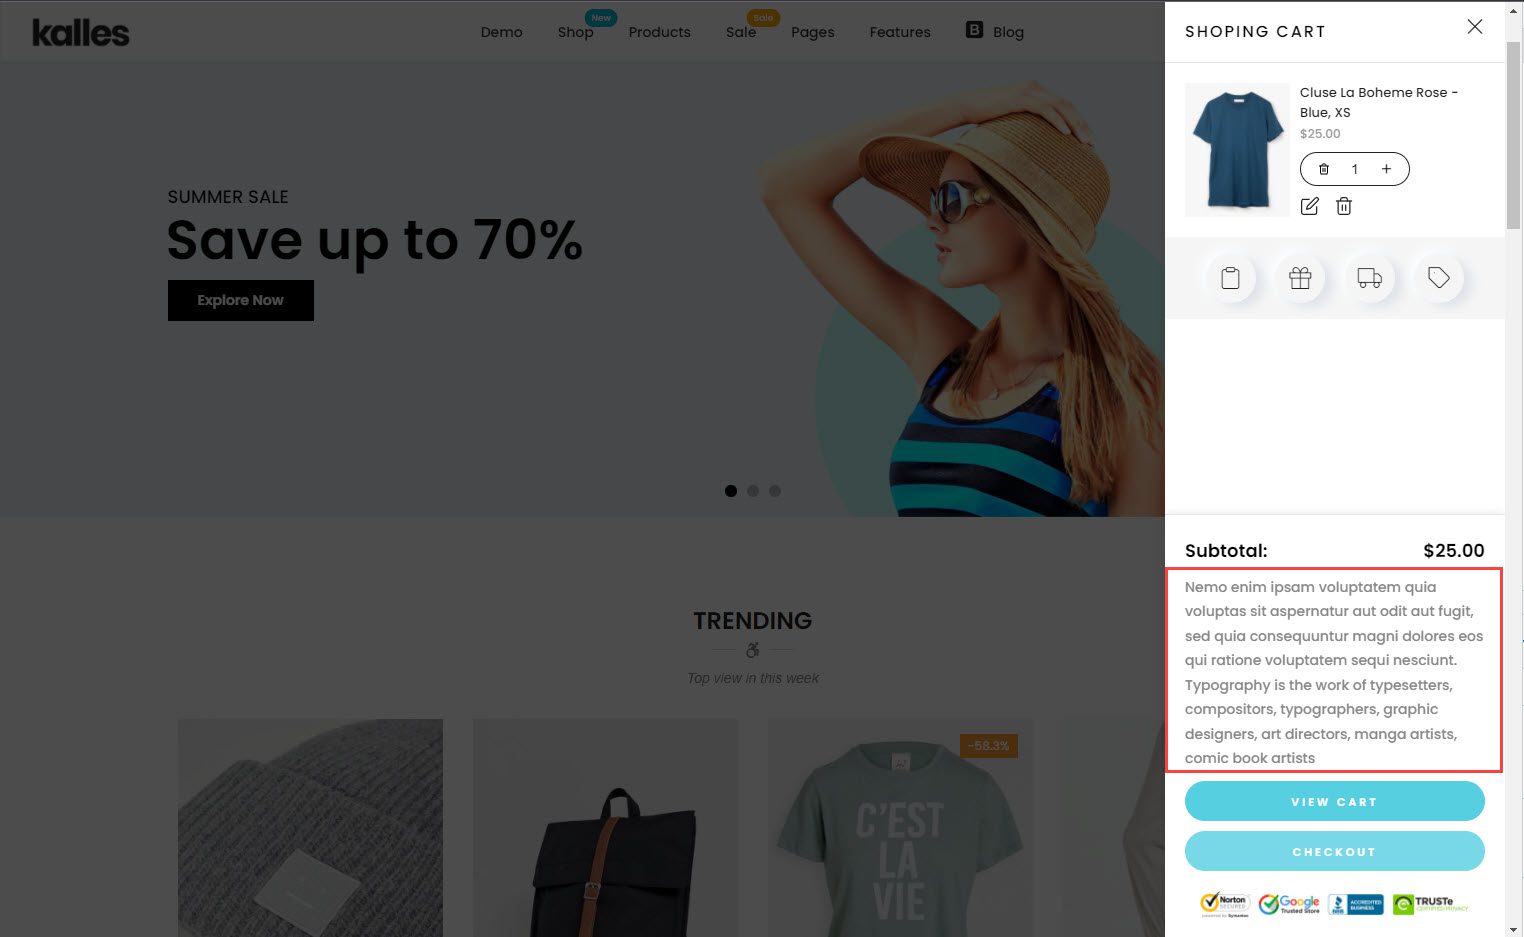
6.7. Minicart Content
You can enter the content of the minicart content here.
Result:
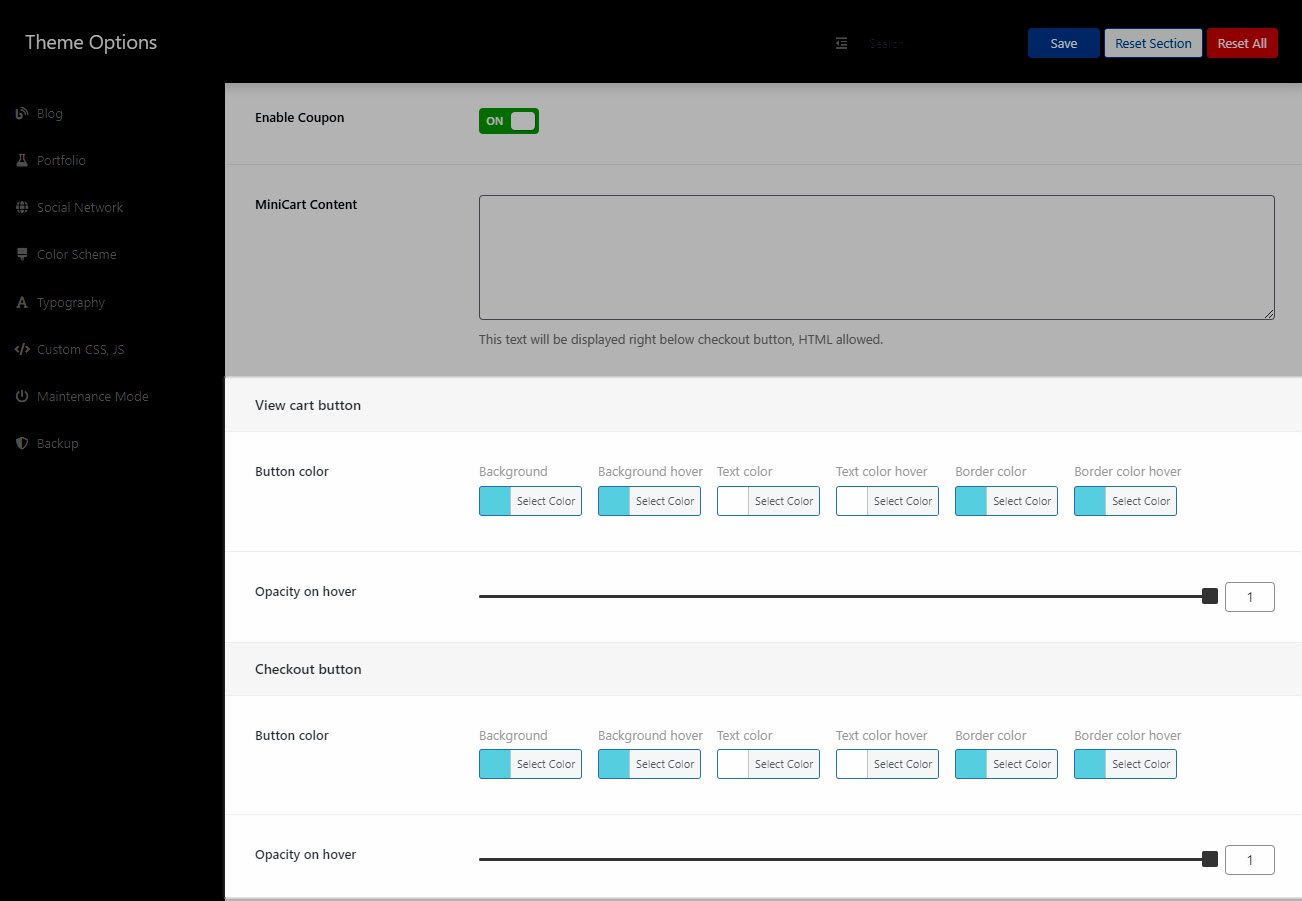
6.8. View Cart Button
With these options, you can change color, background color, and opacity on hover for the View cart & Checkout button
7. Checkout Settings
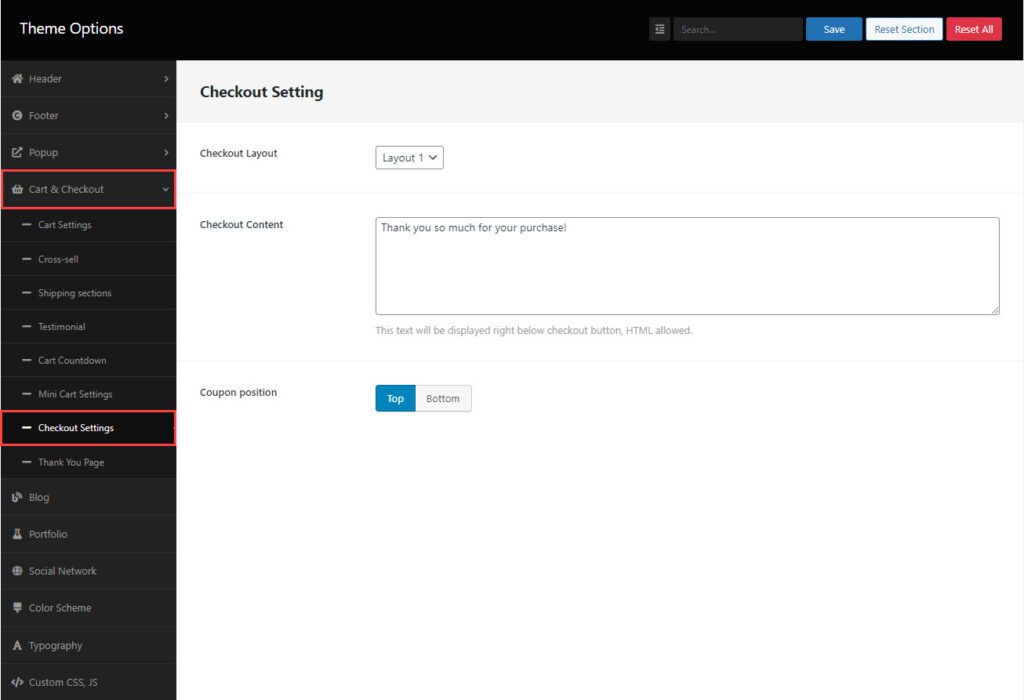
Checkout Layout: There are 2 layouts.
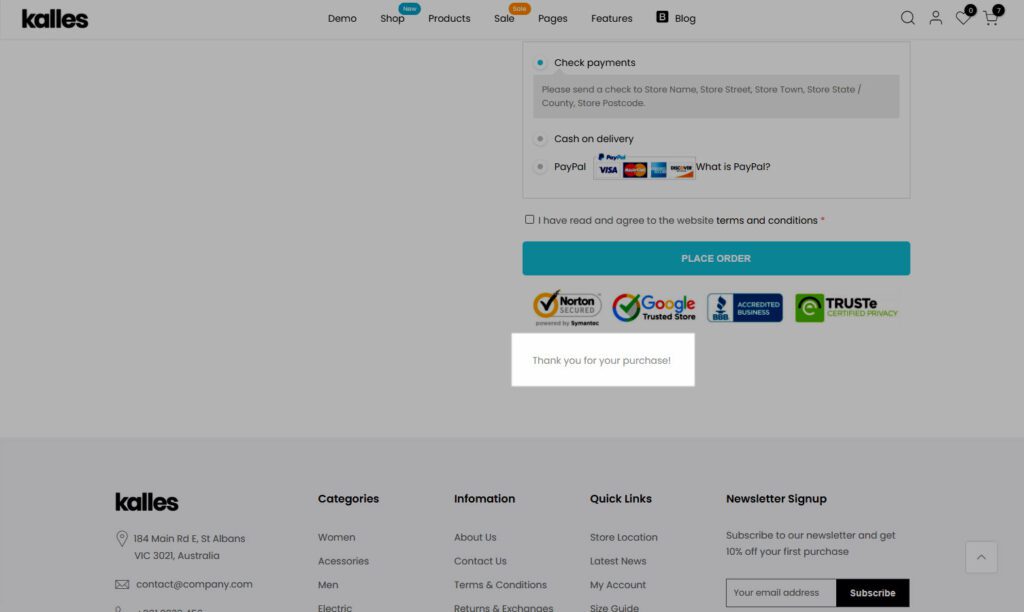
Checkout Content: Enter the content of the checkout. After the content is entered, it’ll show on this position
Coupon position: Set the coupon’s position to the top or bottom.
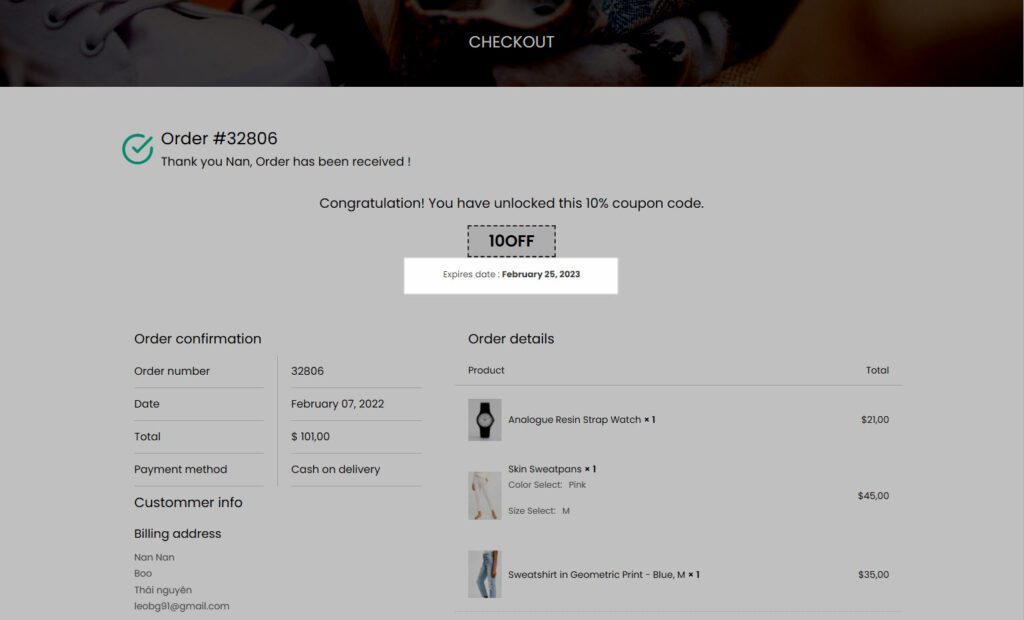
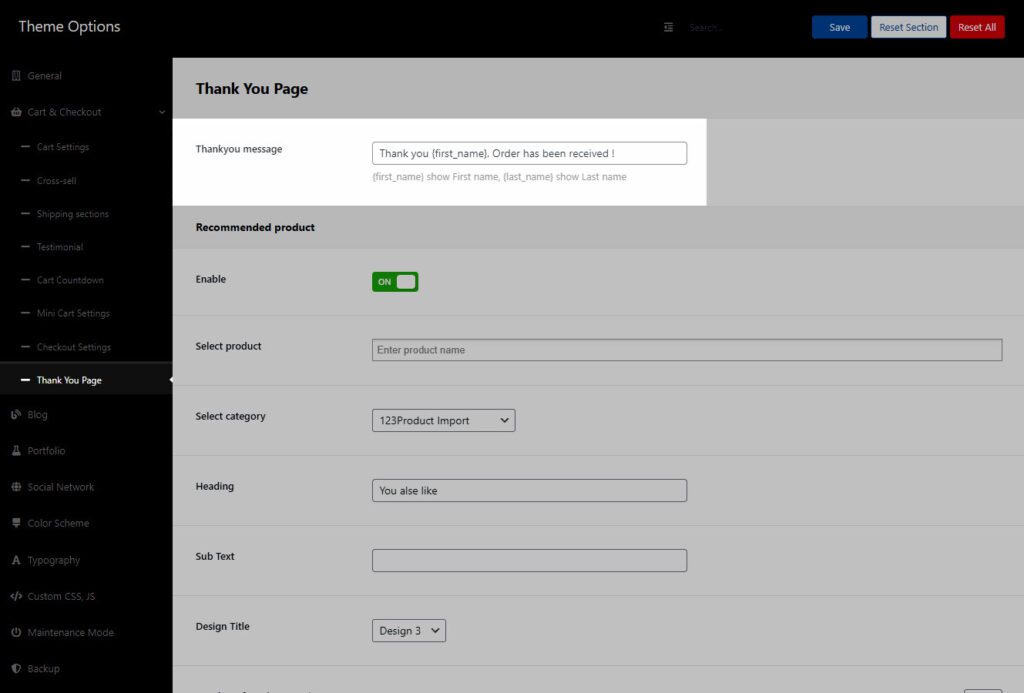
8. Thank You Page
The customer will see this page after ordering.
8.1. Thankyou message
Write the content for the message.
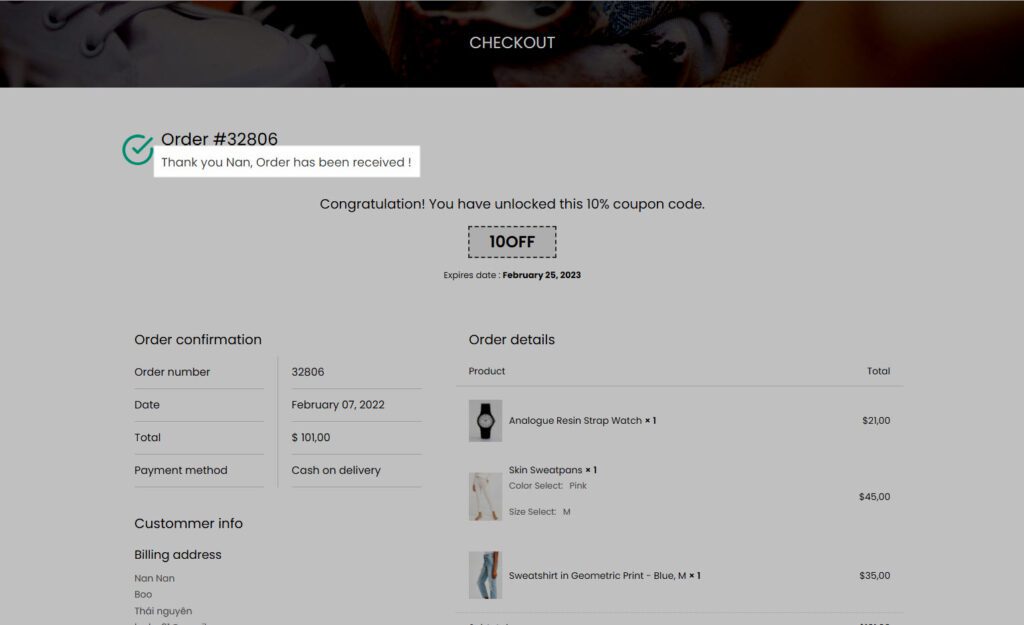
Result:
8.2. Recommended product
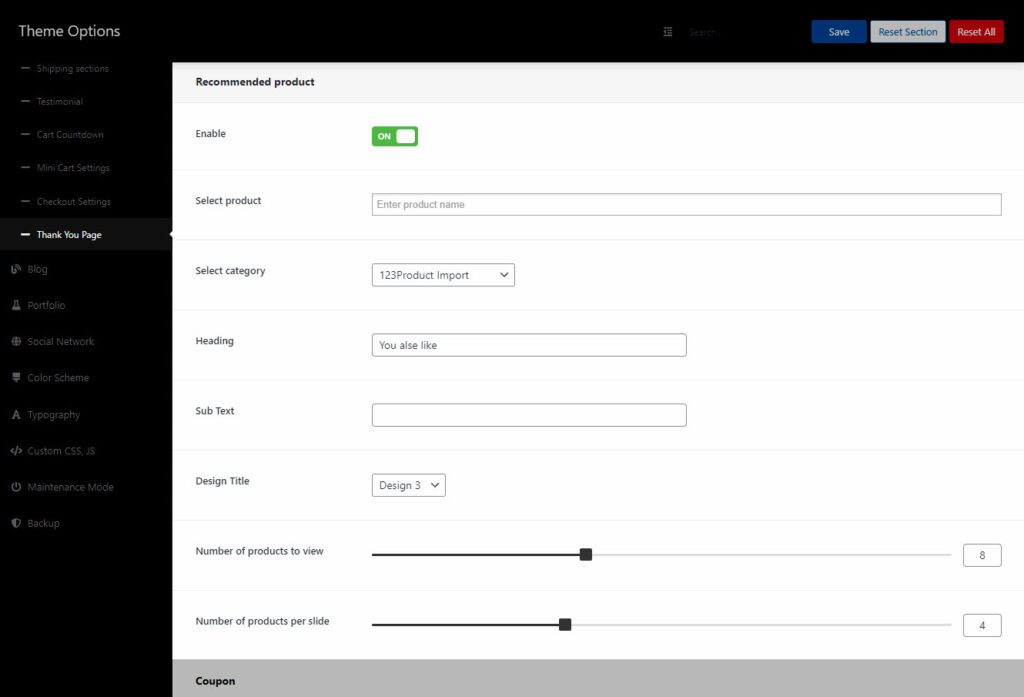
Enable: Enable this option to show Recommended product.
Select product: Enter the name of the products that you want to show in “Recommended Products.”
Select category: Instead of adding a product manual to a specific product, you can choose a category to display products in recommended products.
Heading: Enter the heading of Recommended product.
Sub text: Enter the sub text of Recommended product.
Design Title: There are 11 designs.
Number of products to view: Enter the total number of products that you want to display.
Number of products per slide: Enter the number of products that you want to display on one slide
8.3. Coupon
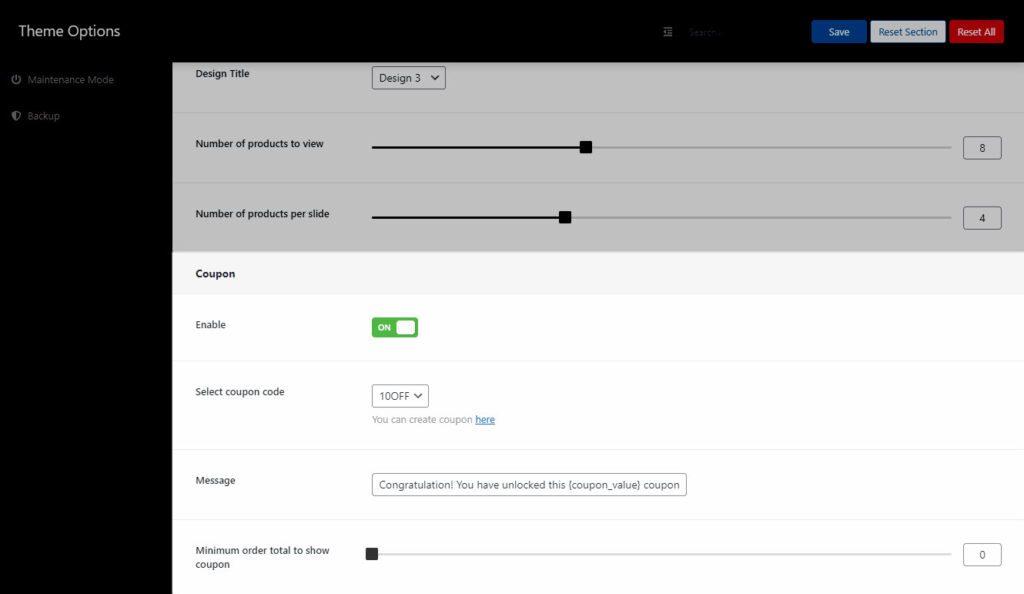
Enable: Enable this option to show Coupon.
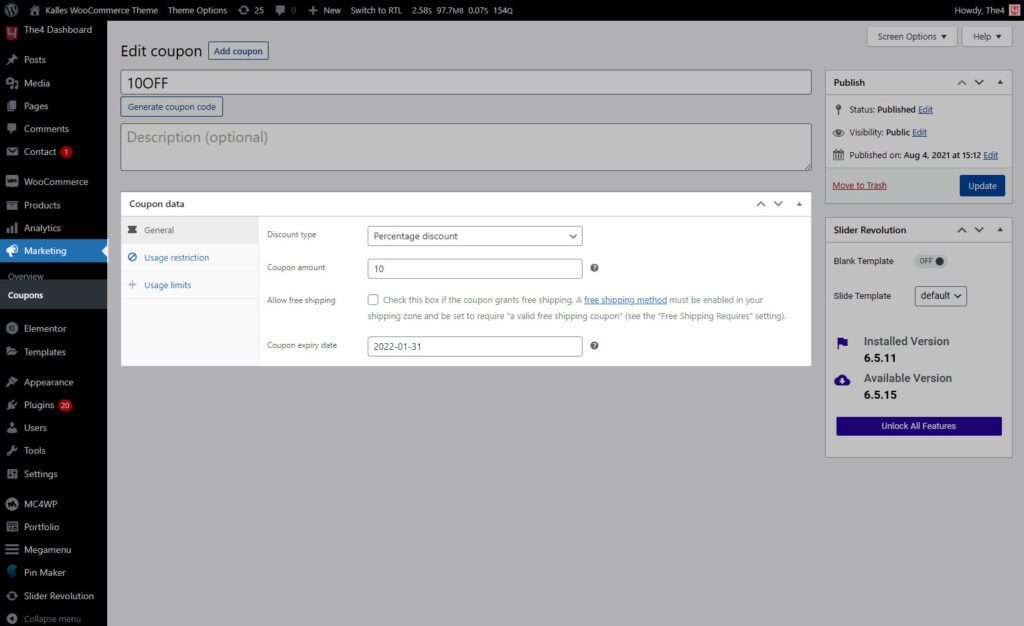
Select coupon code: Select coupon that you created from Dashboard > Marketing > Coupons
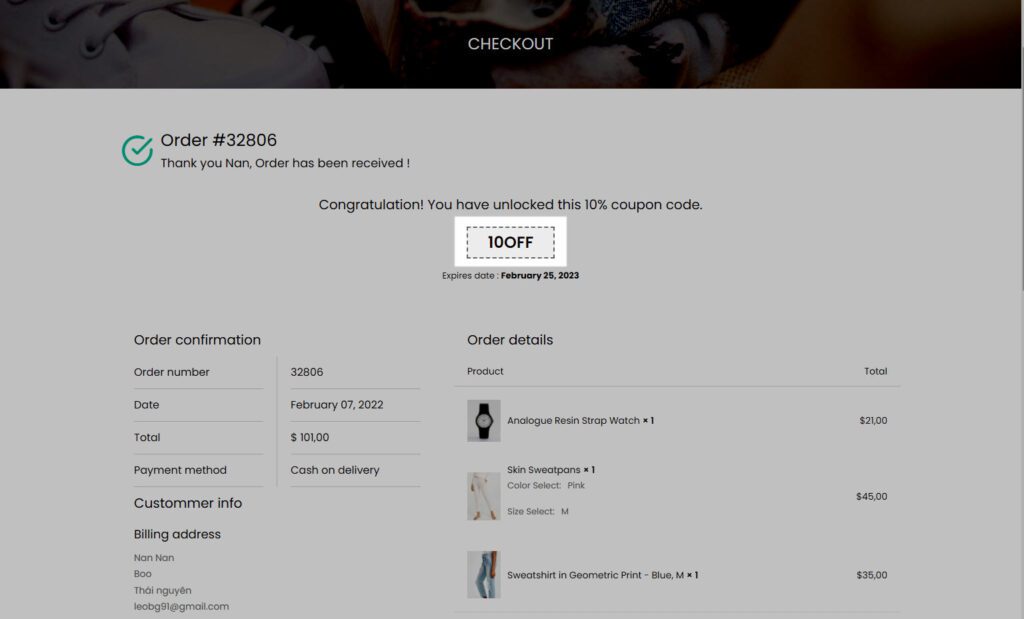
Message: Enter the contents of the message.

Minimum order total to show coupon: Enter the minimum order number to get the coupon.
Expires-date: Set the coupon expiration time by going to Marketing > Coupons > Select the coupon you want to adjust and change the date on the Coupon expiry date.
Result: