1. Upload theme
You can upload theme to WordPress in several ways.
1.1 Upload theme with FTP
Download the theme archive and extract the main theme zip file with the title kalles.zip. Connect to your FTP server and navigate to the folder where your WordPress is installed. Go to wp-content/themes/ and upload Kalles folder (the path should look like this: wp-content/themes/kalles).
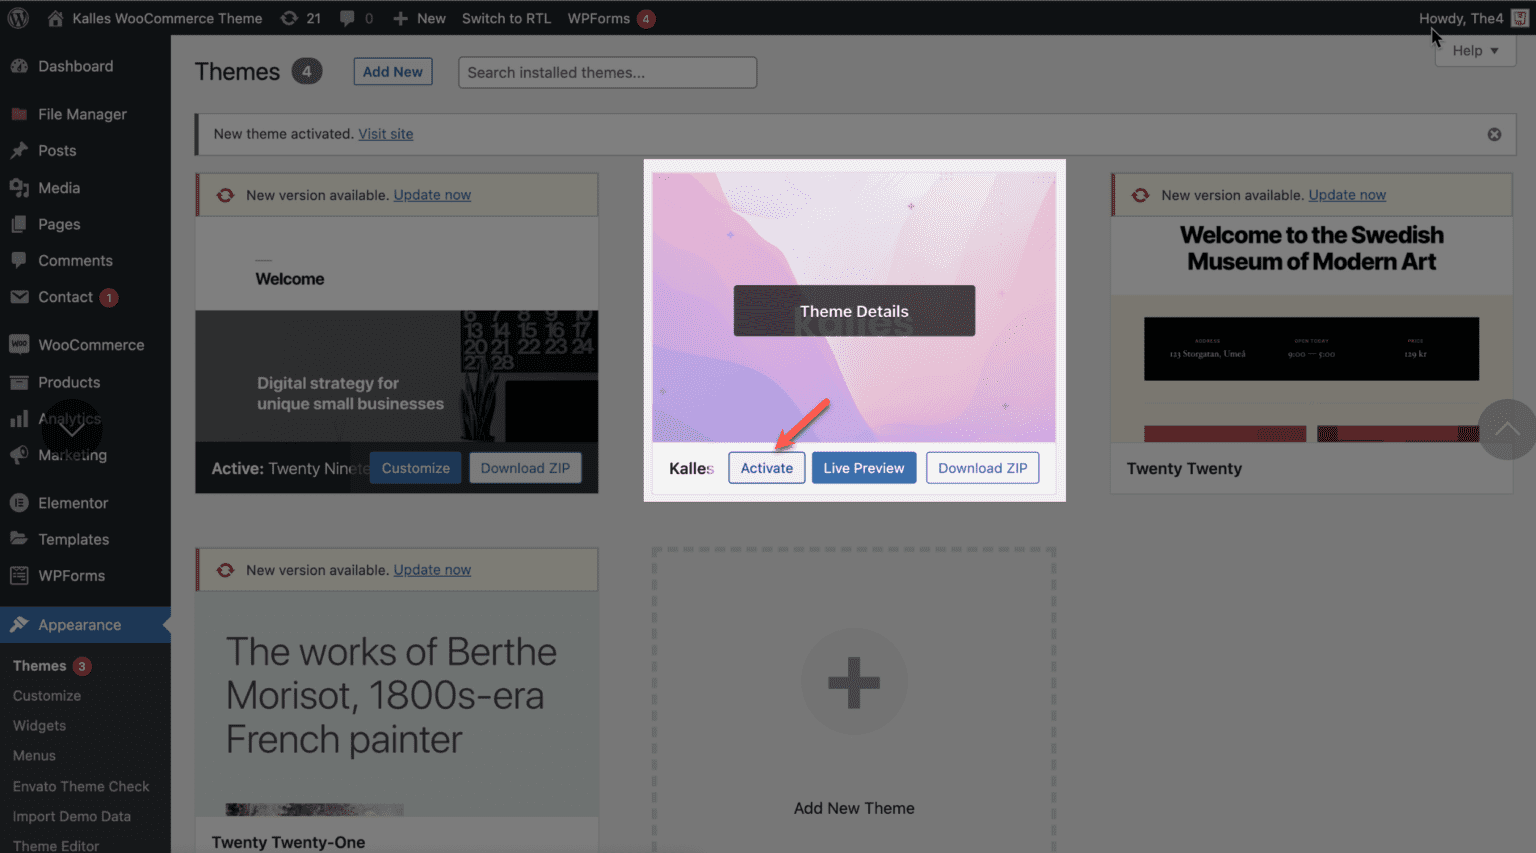
You’ve now successfully uploaded your theme to WordPress. To finalize, login to your control panel, head to Appearance > Themes and hover your mouse over the new theme. Now click Activate.
1.2 Upload theme from dashboard
Please be informed that you should not upload the whole archive you downloaded from Themeforest, as you will get an error reporting “broken stylesheet file”. Instead, locate the kalles.zip file inside the main archive you downloaded.
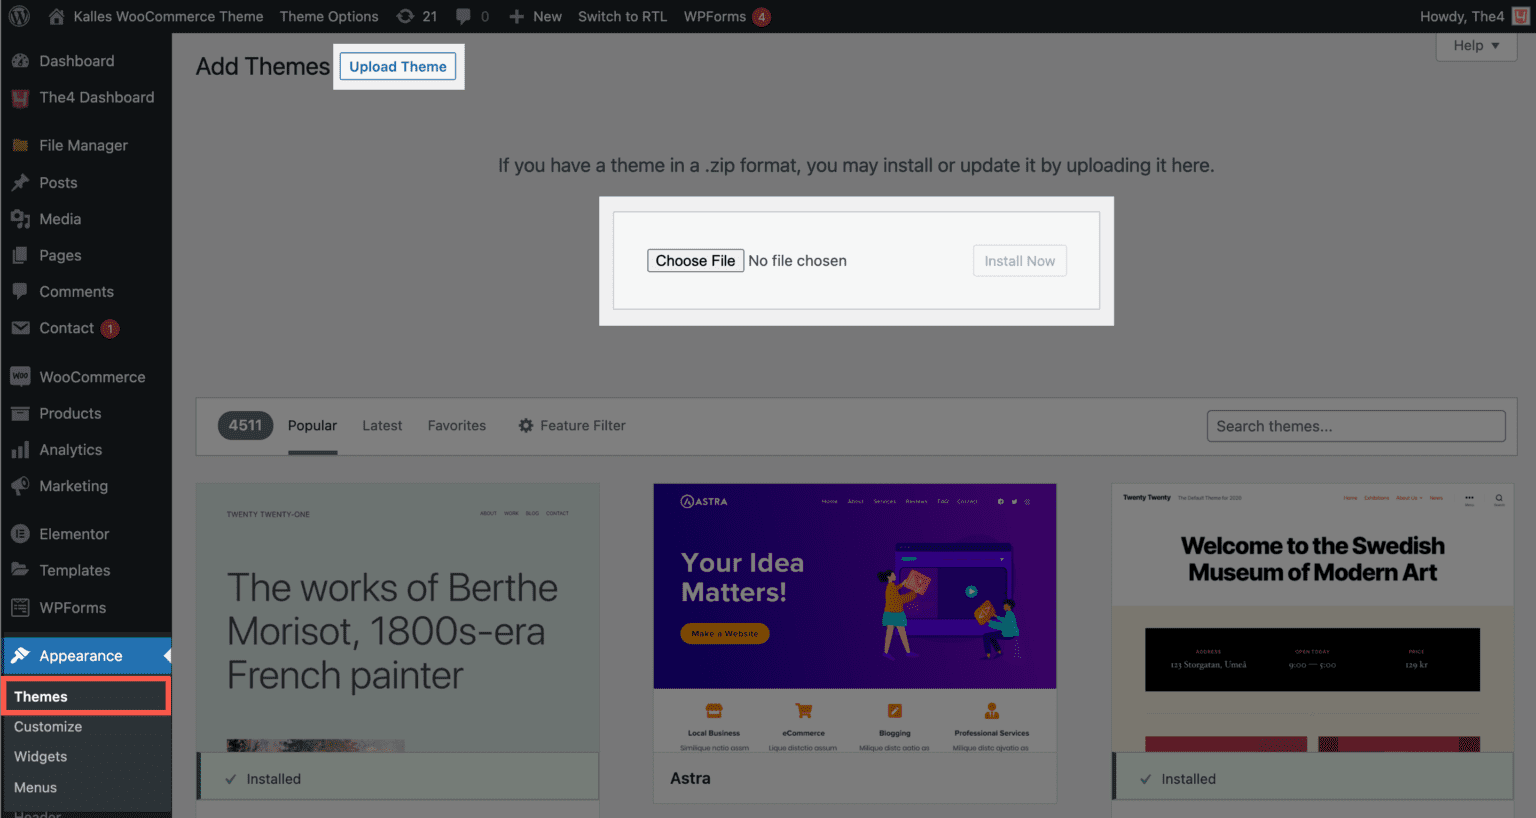
Installing a theme through WordPress is quite a simple process. After you have logged into your WordPress Simply navigate to Appearance > Themes > Add New. The theme upload form is now open, click Choose File, select the theme zip file on your computer, and click Install Now.
2. Active Theme
After Kalles is installed, find the Theme in Appearance > Themes and click the Activate link.
You have your license key. To install this license key to your website, follow these steps:
Go to The4 Dashboard options then paste your license key and click on “START KALLES” button.
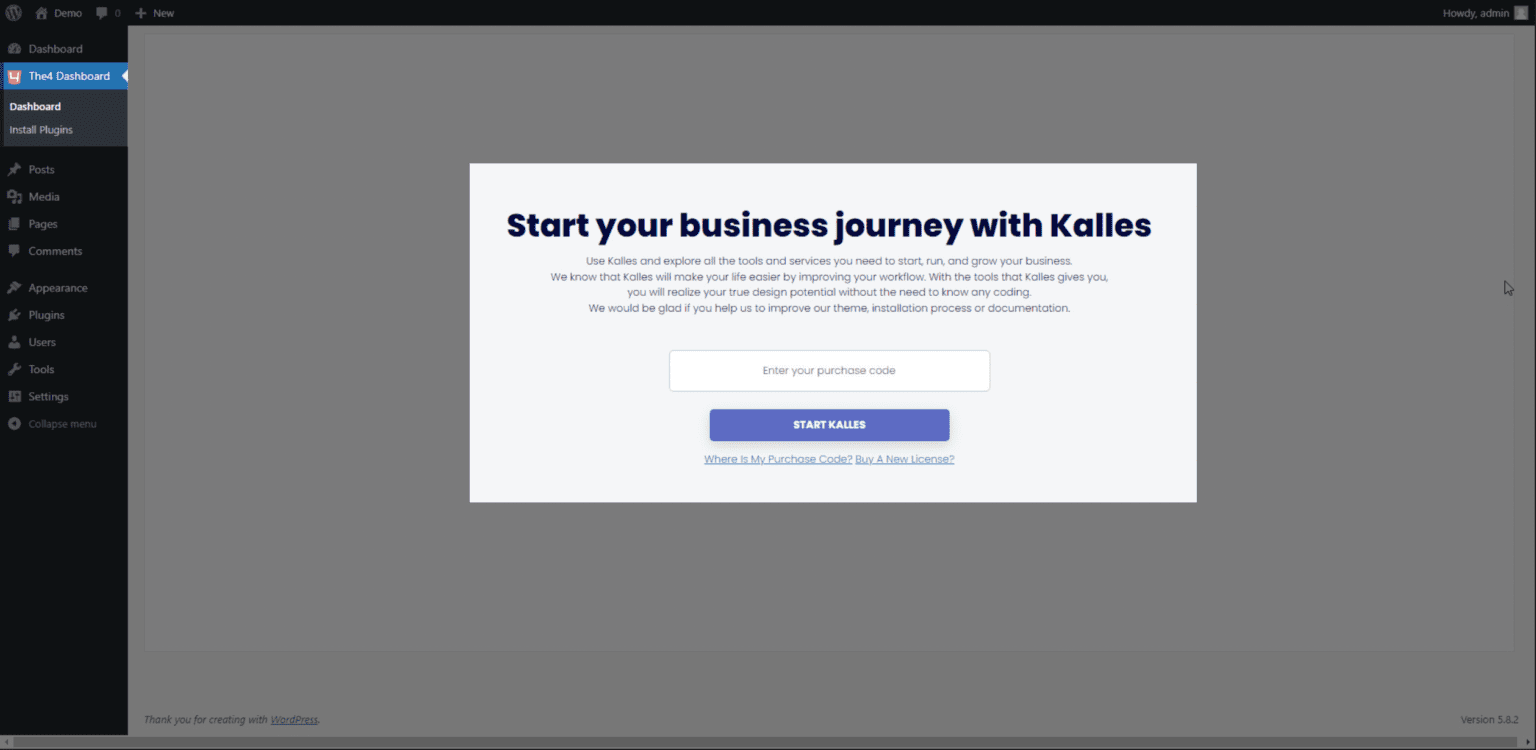
The license key is necessary to validate the theme. When you are a genuine user with a valid license key, you can access to Theme Options to customize theme settings. You can also get an automatic theme update notification. Without the license key, the theme will not work a usual, also you will miss the update notifications. New updates are essential for fixing bugs, and staying up to date with new features and WordPress updates.
Once you have installed and activated theme, installing the plugins is the next step you need to do. Please check next tutorial, we are going to learn how to install plugins.
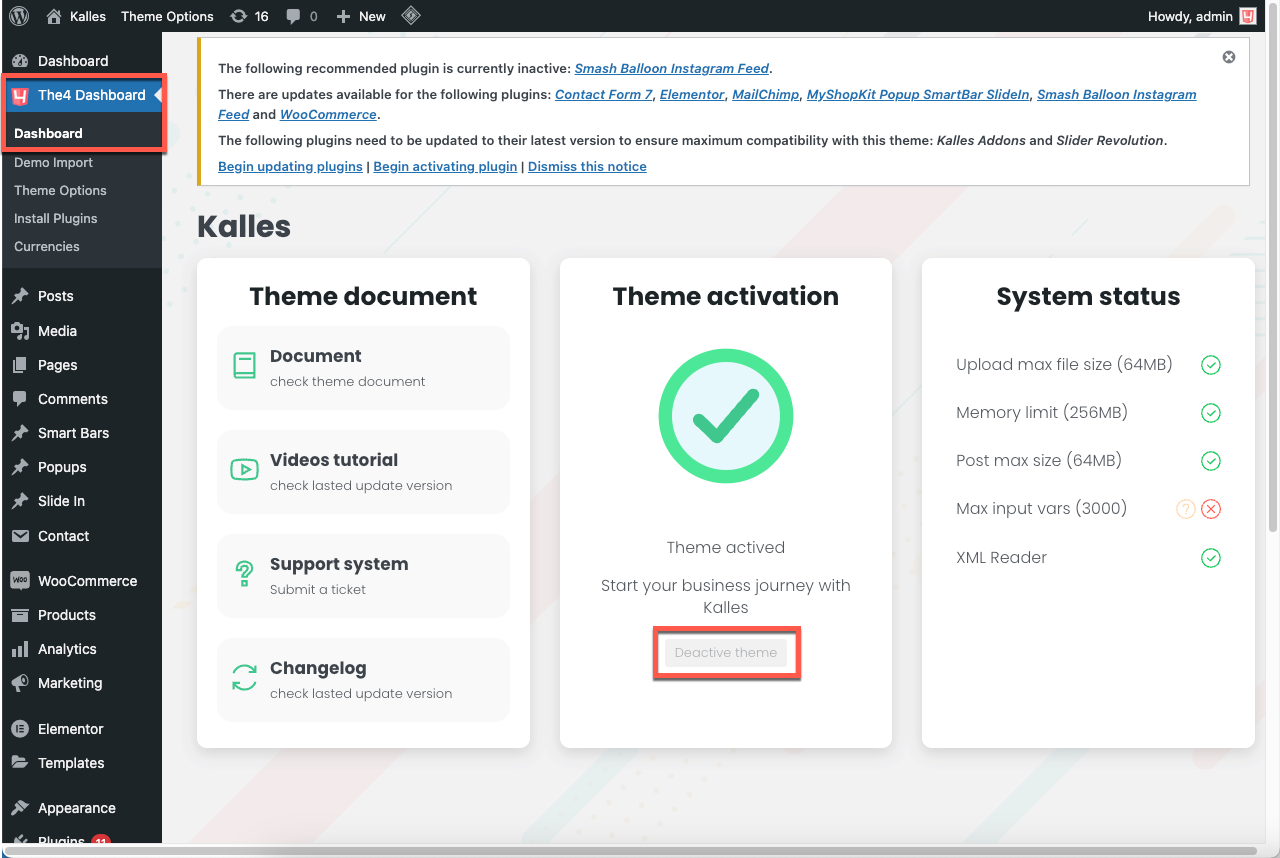
3. Deactive theme
When you want to move the theme to another site, you need to deactivate the theme from the old site. Go to The4 Dashboard > Dashboard > Deactive theme.