To config Popup, please go to Theme Options on your store. There are two ways for you.
The first way, navigate to top bar > click directly on Theme Options.
The second way, from left-side bar, click on The4 Dashboard > Theme Options.
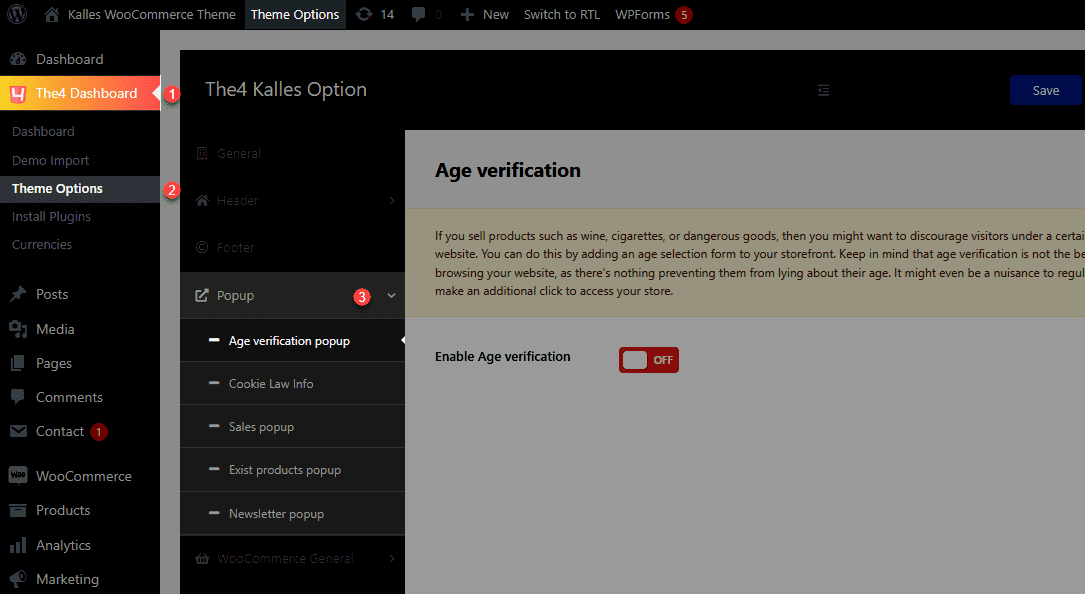
1. Age verification popup
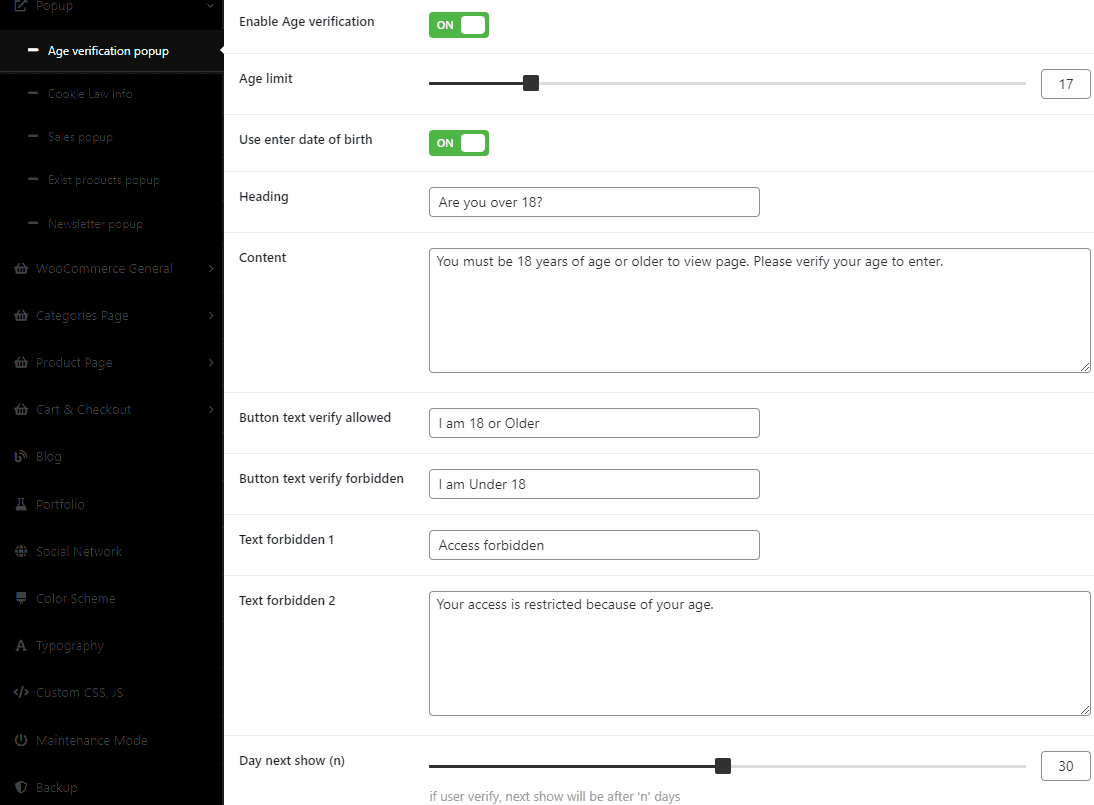
1.1. Enable Age verification popup
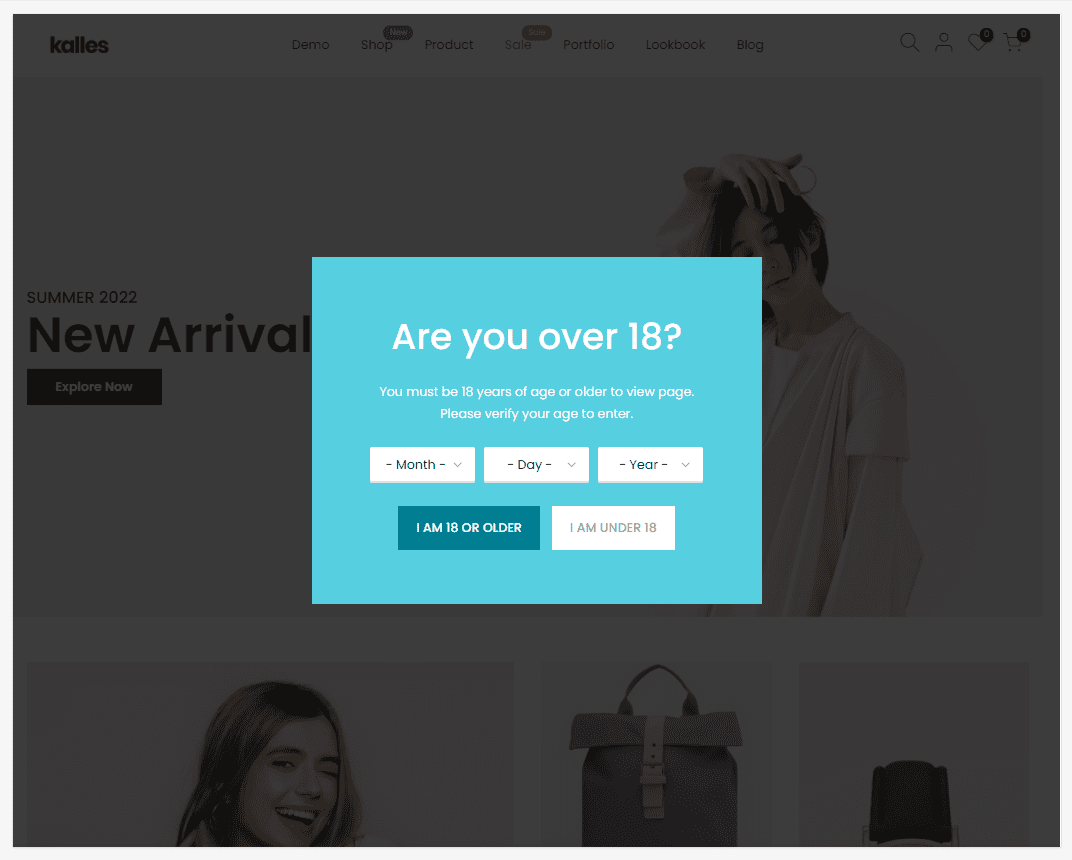
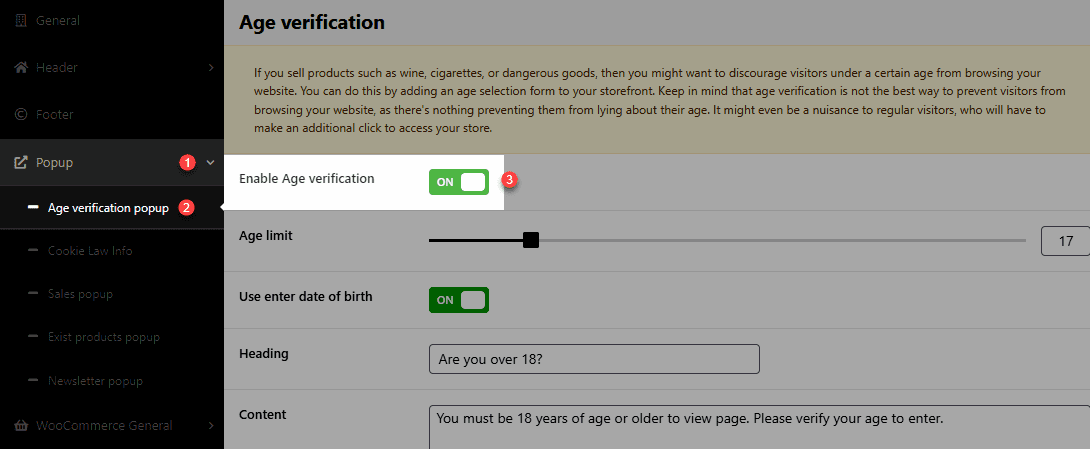
If you sell products such as wine, cigarettes, or dangerous goods, then you might want to discourage visitors under a certain age from browsing your website. This section will be used to verify suitable customers’ age for the store. To enable Age verification Popup, from Theme Options > Popup > Age verification popup > Enable Age verification.
1.2. Content
After you turn on the Age verification, it will appear a list of contents for you to adjust for this option. You can change the text of Heading, Content, Button text verify allowed, Button text verify forbidden, Text forbidden 1, and Text forbidden 2.
Age limit: The default age limit is 18. You can choose to limit customers’ age when visiting your store.
Use enter date of birth: If you want the customer’s specific information about the date of birth, you can turn on this option.
Day next show (n): If the user verifies, the next show will be after ‘n’ days. By setting n days (e.g. 30 days), the popup will appear again 30 days after it is turned off.
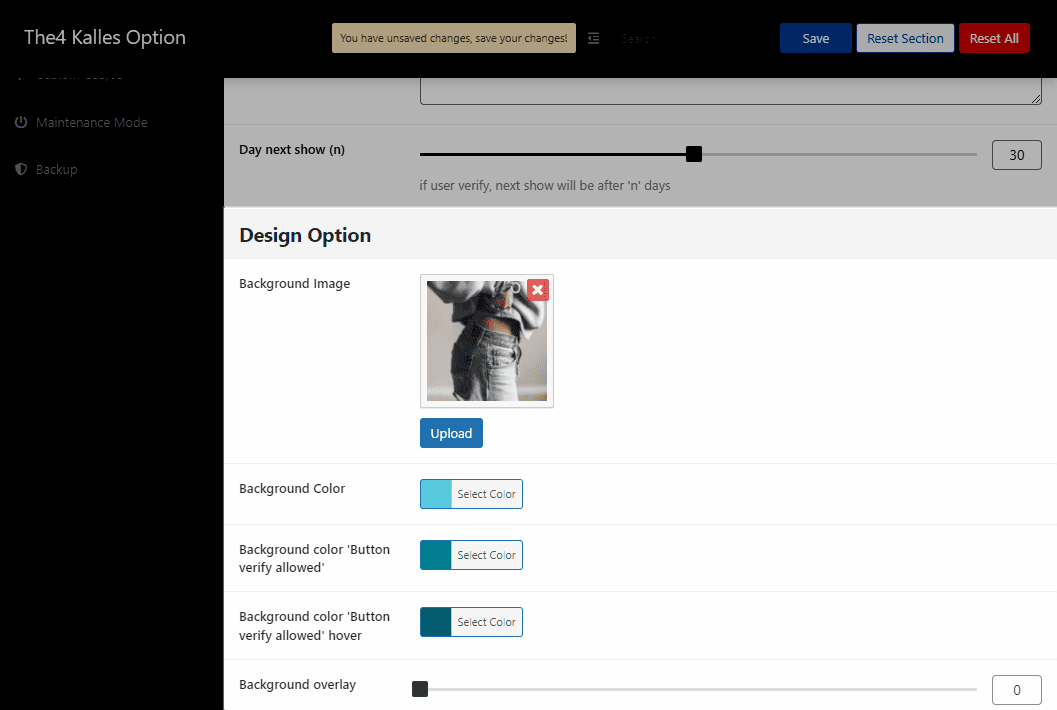
1.3. Design option
Background image: If you don’t want to use the basic color, you can add your background image here.
Background color, Background color “Button verify allowed”, Background color “Button verify allowed hover”: The color can be adjusted to look good in your store.
Background overlay: This option allows you to adjust the background overlay to your preferred appearance.
2. Cookie Law Info
2.1. Enable Cookie Laws Infor
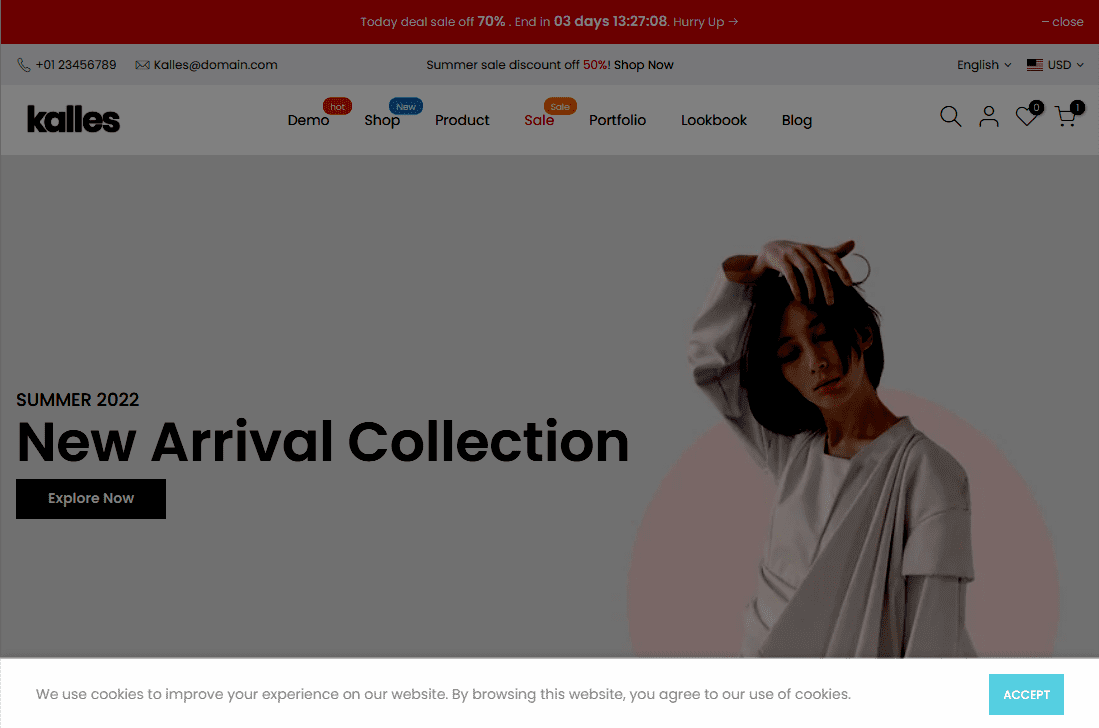
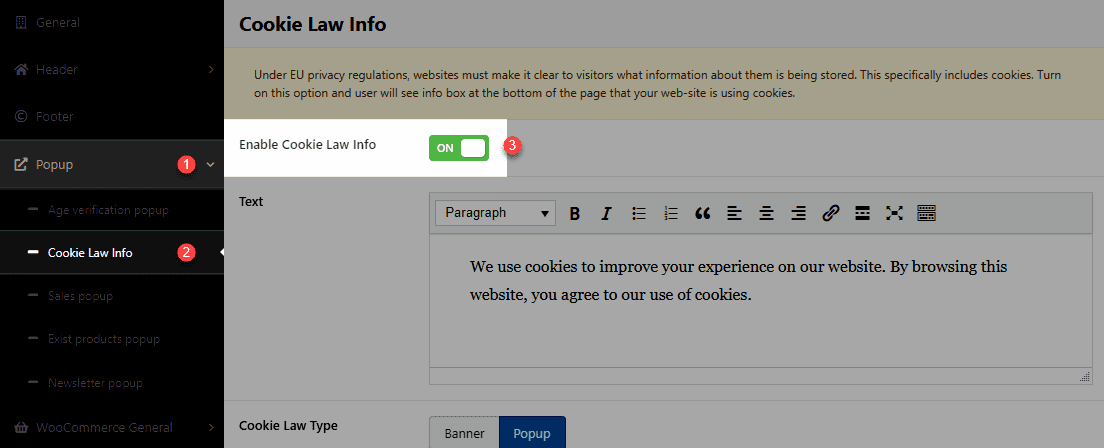
Under EU privacy regulations, websites must make it clear to visitors what information about them is being stored. This specifically includes cookies. Turn on this option and the user will see an infobox at the bottom of the page that your website is using cookies. To enable Cookie Law Info, from Theme Options > Popup > Cookie Law Info > Enable Cookie Law Info.
2.2. Settings for cookie laws info
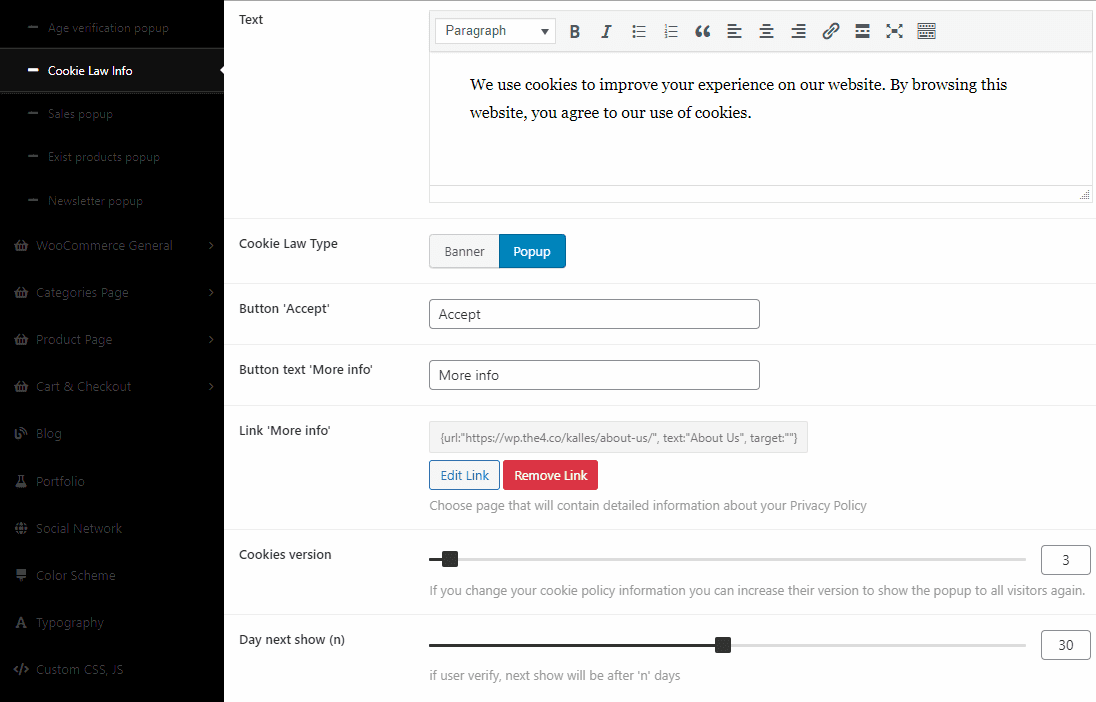
Text: Enter text for the cookie law infor here.
Cookie Law Type: You are allowed to choose between Banner and Popup.
Button text “Accept” and “More info”: You can change the text inside the button instead of “Accept” and “More infor“. If you don’t want to turn on “Accept” and “More infor” buttons, delete all the buttons’ text.
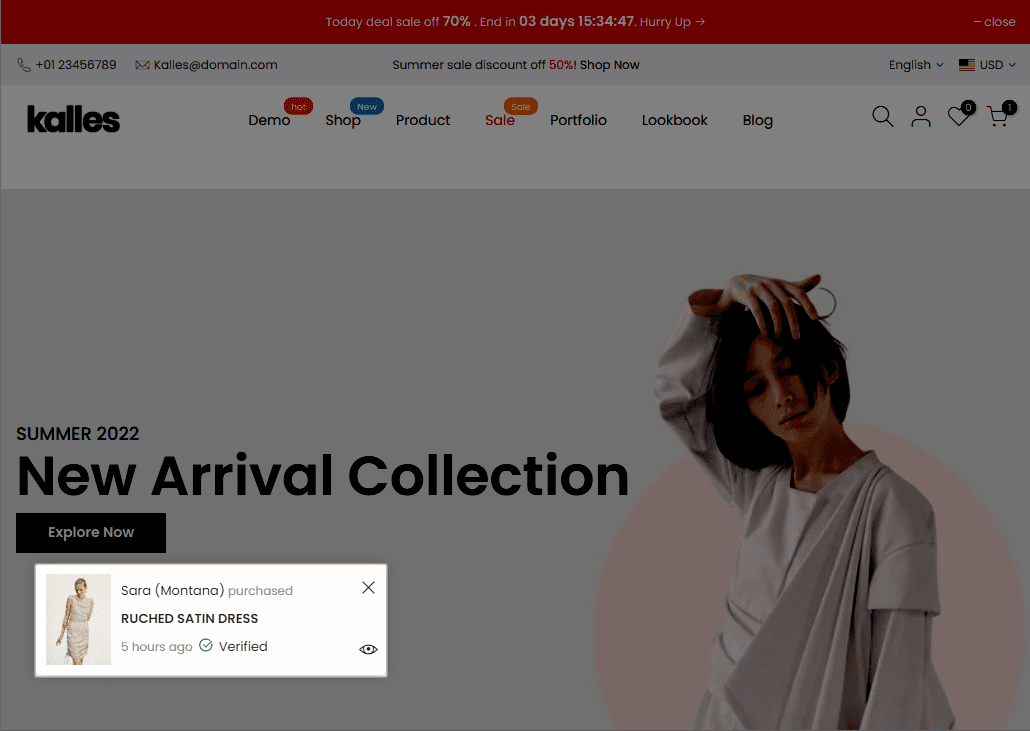
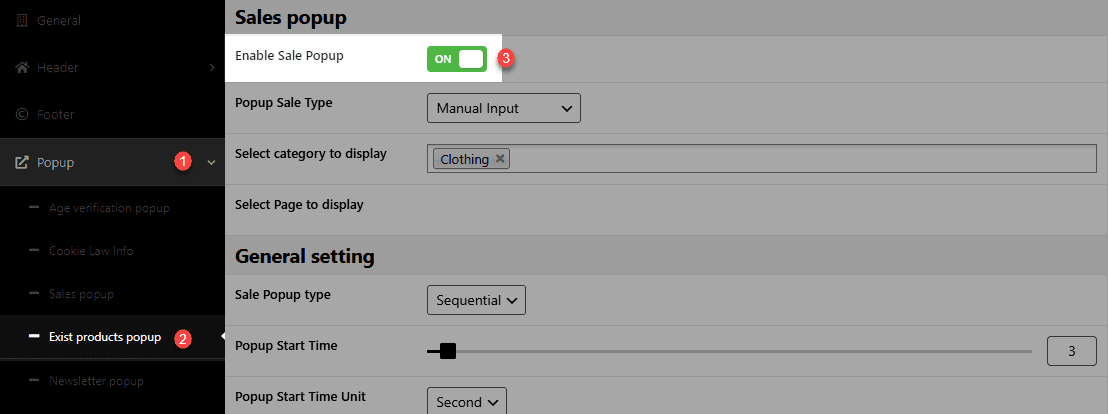
3. Sales popup
3.1. Enable Sales popup
This option is a great form of advertising by popping up your products on the customer’s website screen. To enable Sales popup, from The4 Dashboard > Theme Options > Popup > Sales popup > Enable Sales Popup.
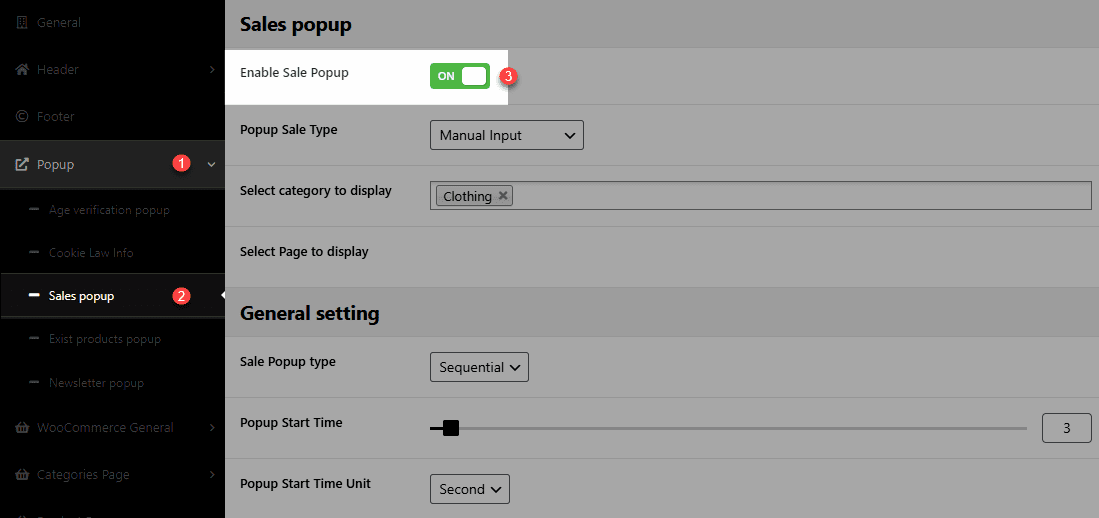
There are two Popup Sale Types: Sale popup will show information of customers that have just bought if you choose Recently purchase. Otherwise, you can choose Manual input to customize yourself.
Select page to display: You can choose pages to show sales popup.
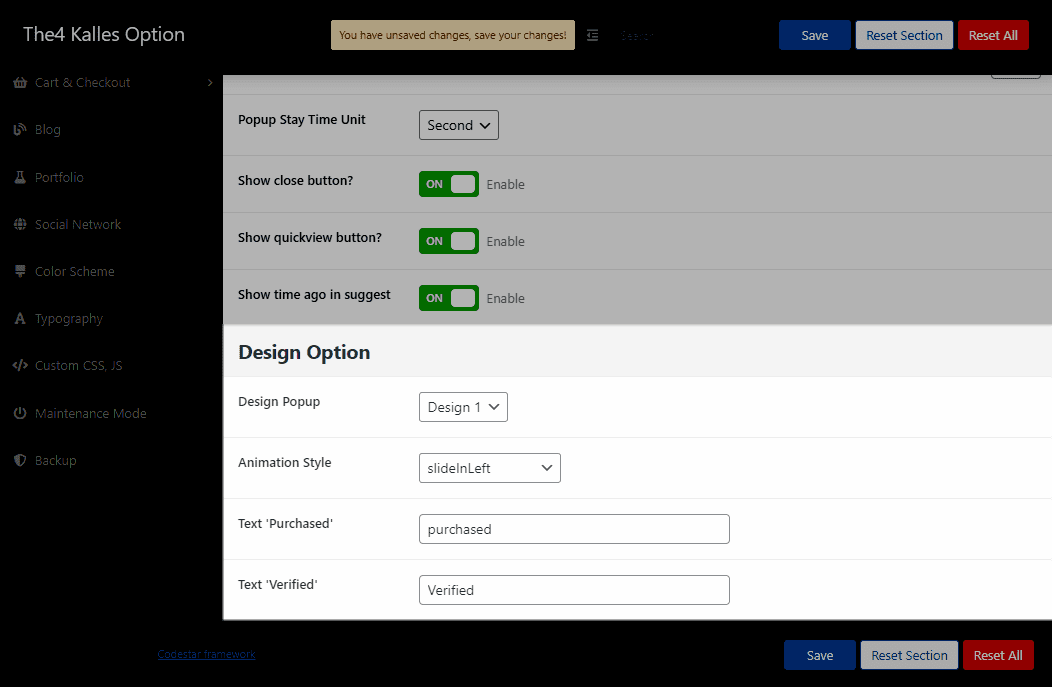
3.2. General settings
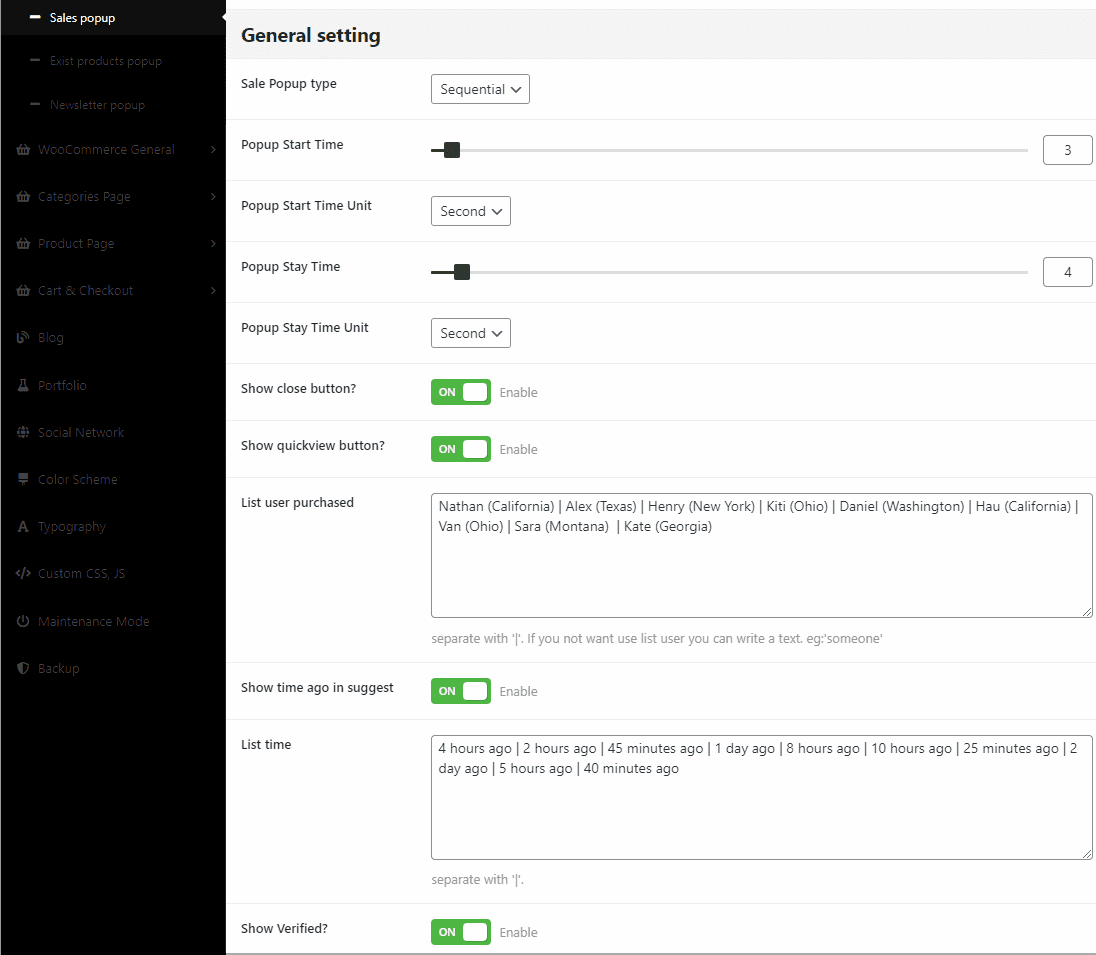
Sales popup type: Choose Sequential if you want you user purchase list is shown sequentially. Choose Random if you want to show user purchase list randomly.
Sale popup allows you to adjust start and stay time by second or minute.
Show close button and quick view button: To show quick view button, you have to enable quick view button first. You can read the instruction here to get more information.
List user purchased: You can customize the user list yourself including name, nation. Adding multiple users is possible by separating them with “|”.
Show time ago in suggest: If you enable this section, you can customize time below, each time will correspond to one customer above.
Show verified: You can enable “Verified” to make products more authentic.
3.3. Design options
Design Popup: Choose Design 1 if you want your popup is on shape of rectangular. Choose Design 2 if you want your popup is on shape of round.
Animation Style: In this section, you will be able to choose between various types of animations, click on each to see how it looks like and pick the one you prefer.
Text ‘Purchased’ and Text ‘Verified’: You can change the text for Purchased and Verified here.
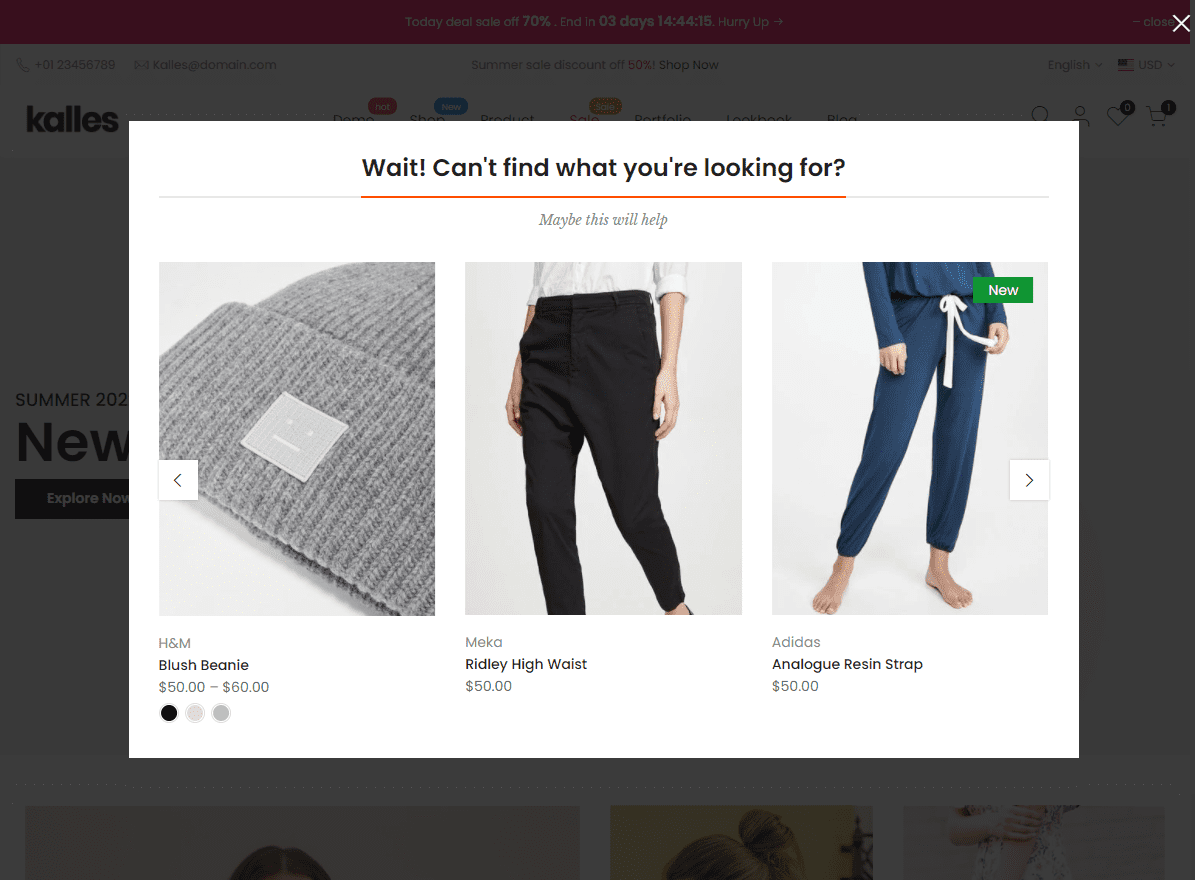
4. Exist product popup
4.1. Enable Exist product popup
To enable Exist product popup, from The4 Dashboard > Theme Options > Popup > Sales popup > Enable Sales Popup.
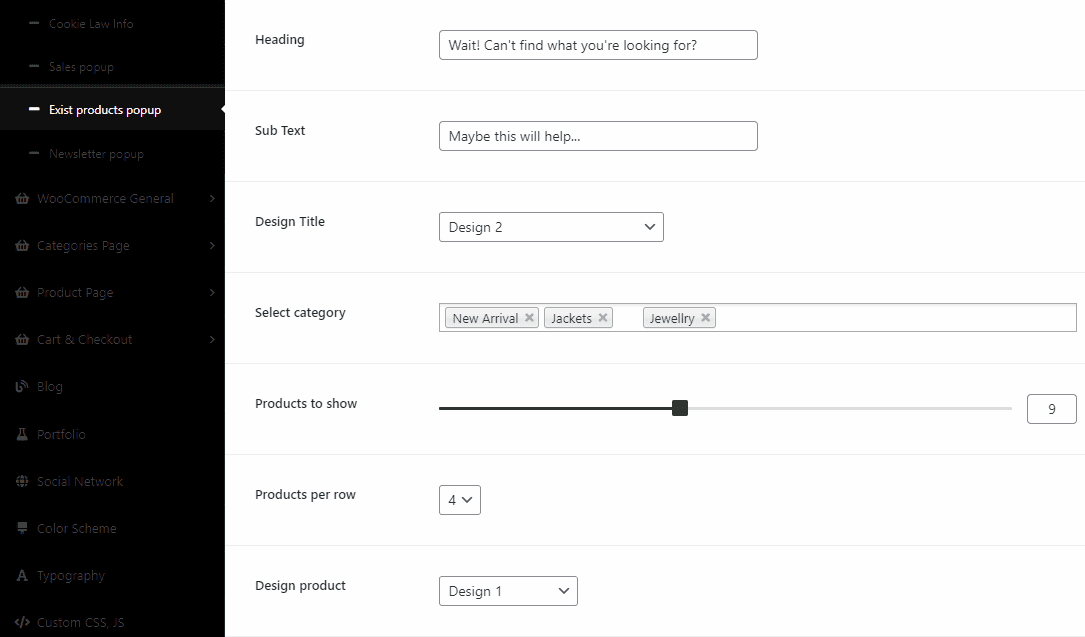
Heading: You can enter an attractive heading for your Exist Product Popup here.
Sub text: You can choose between two choices are body font (normal) and subtitle font (italic)
Design title: There are 13 different designs.
Select category: Choose categories for your Exist popup here.
Use icon color primary: If you have already set the primary color, the icon will change color by it.
You can not only be allowed to choose a Collection, but also change Product to show, Product per row, product designs
4.2. Slider settings
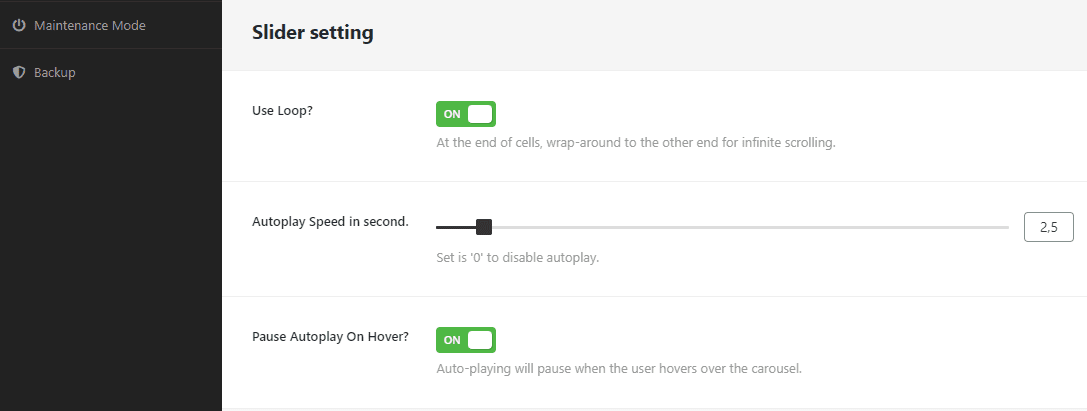
Use loop: At the end of cells, wrap-around to the other end for infinite scrolling.
Auto play Speed in second: You can adjust how many seconds to show, set ‘0’ to disable auto play.
If you want to stop auto play when you are hovering on, enable Pause Autoplay On Hover.
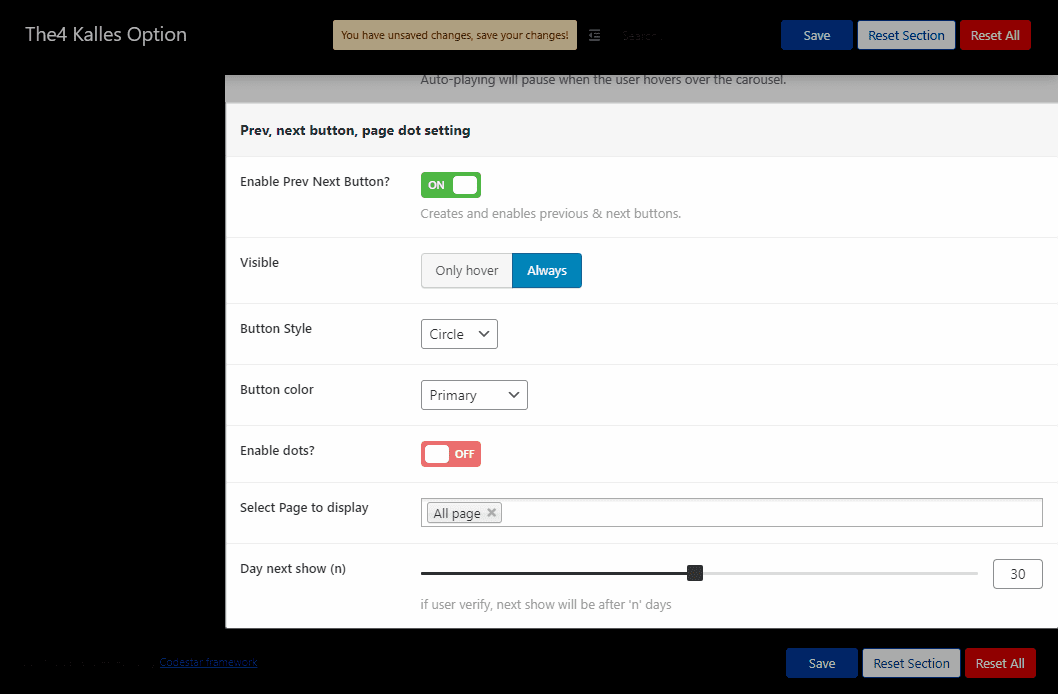
4.3. Prev, next button, page dot settings
In this section, you you enable or not perv and next button. If you enable them, you can customize yourself.
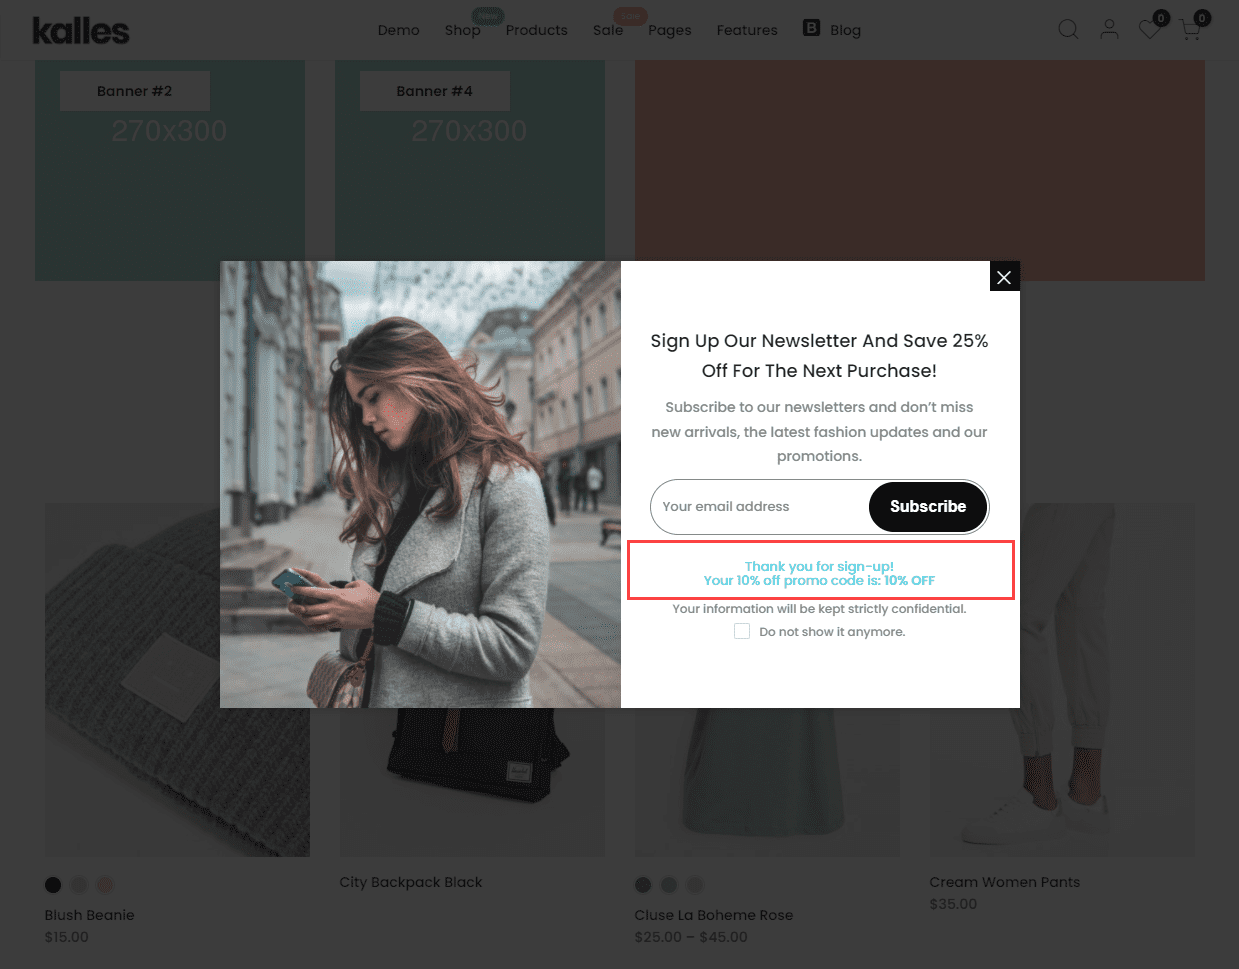
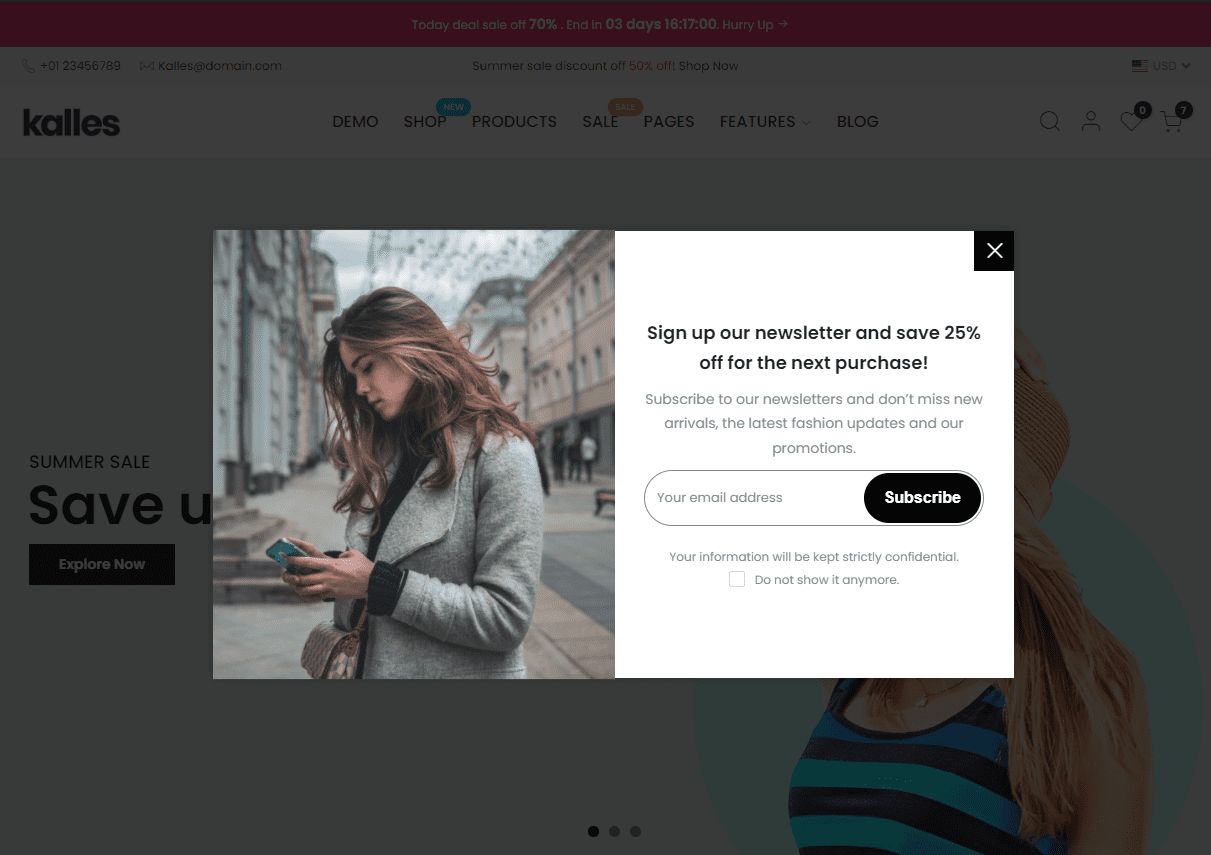
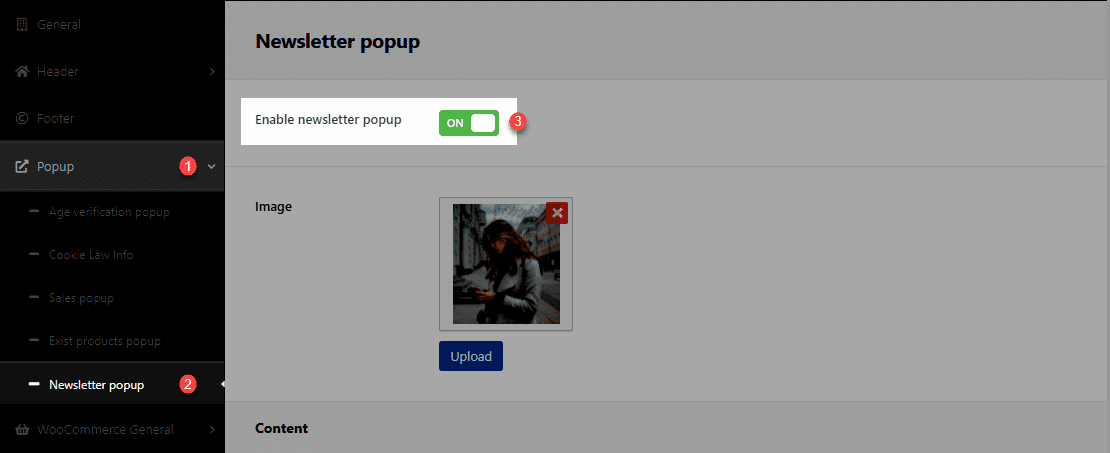
5. Newsletter popup
5.1. Enable Newsletter popup
This section will show when your customers visit pages, scroll down, etc. (you can customize) on your stores. Customers are able to leave their email to get more information about campaigns or products. To enable Newsletter popup, from The4 Dashboard > Theme Options > Popup > Newsletter popup > Enable Newsletter popup.
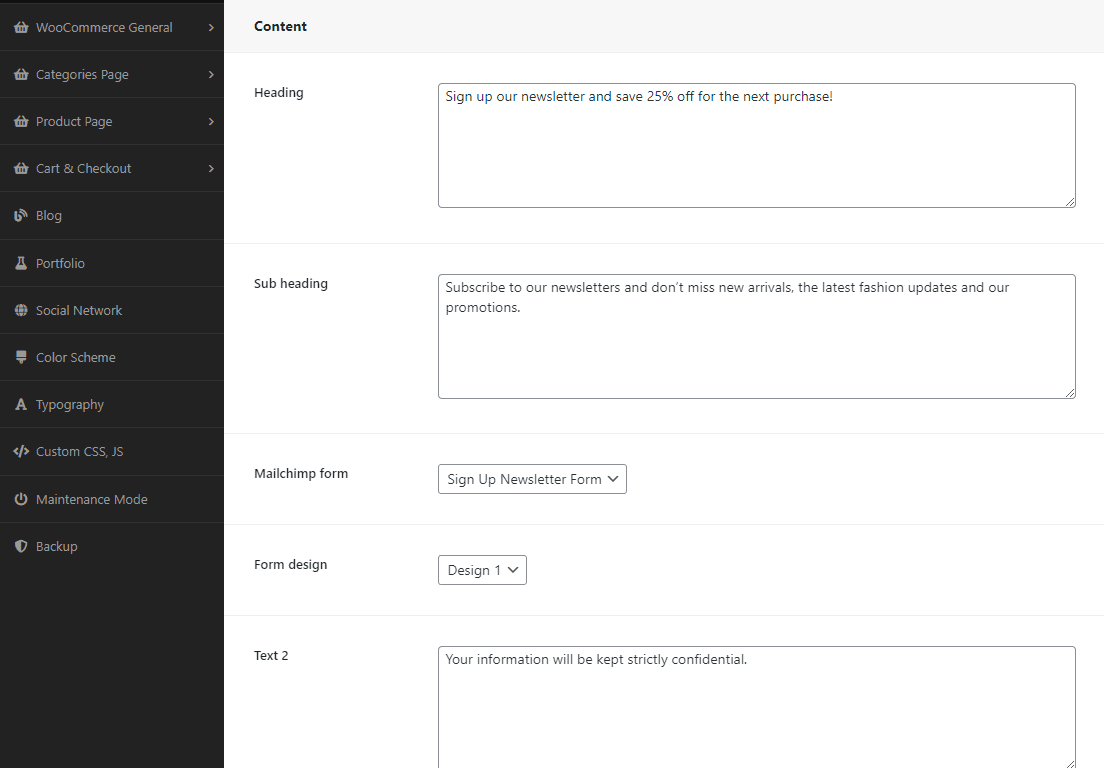
5.2. Content
You can change the Heading, Subheading, Text, Form design for heading.
5.3. Settings for Newsletter popup
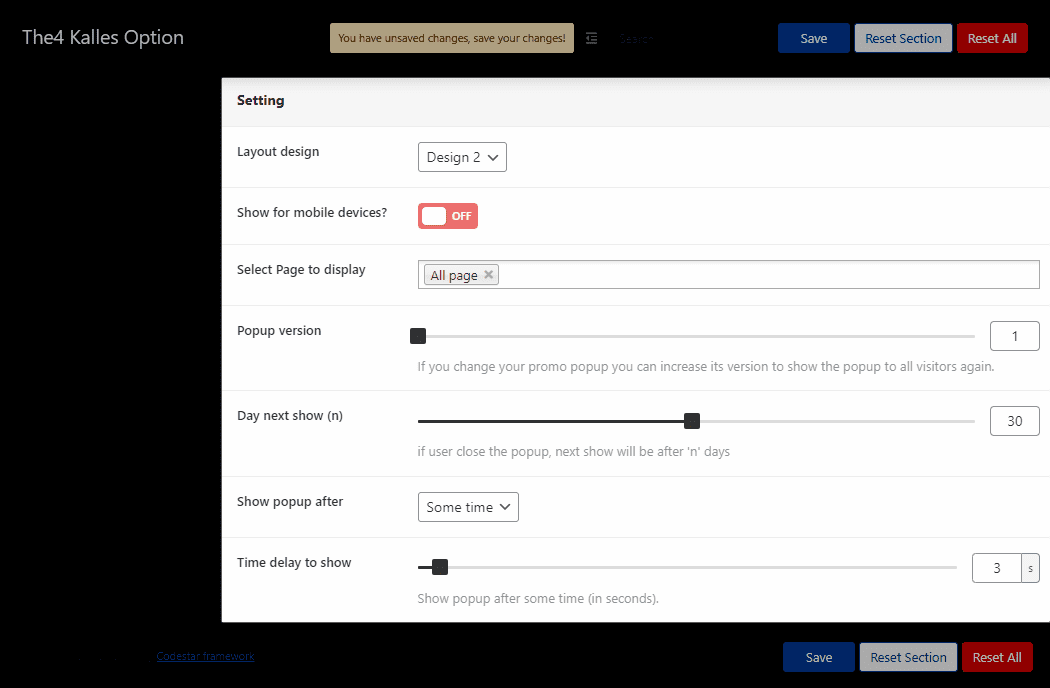
Layout designs: There are two styles for you.
Show for mobile device: You can choose to show or not.
Select page to display: Allows you to choose freely page to display Newsletter popup.
Popup version: If you change your promo popup, you can increase its version to show the popup to all visitors again.
Day next show (n): Allows you to drag horizontally a bar to enable the function “if users close the popup, the next show will be after ‘n’ days”.
Show popup after: There are 2 choices for you. If you choose “Scroll“, you can choose the number of pixels users have to scroll down before the popup opens by dragging a bar. Otherwise, you can choose “sometimes“. You can also adjust the show popup after how many seconds.
Time delay to show: Your are allowed to adjust duration for newsletter popup.
5.4. Configure Newsletter popup
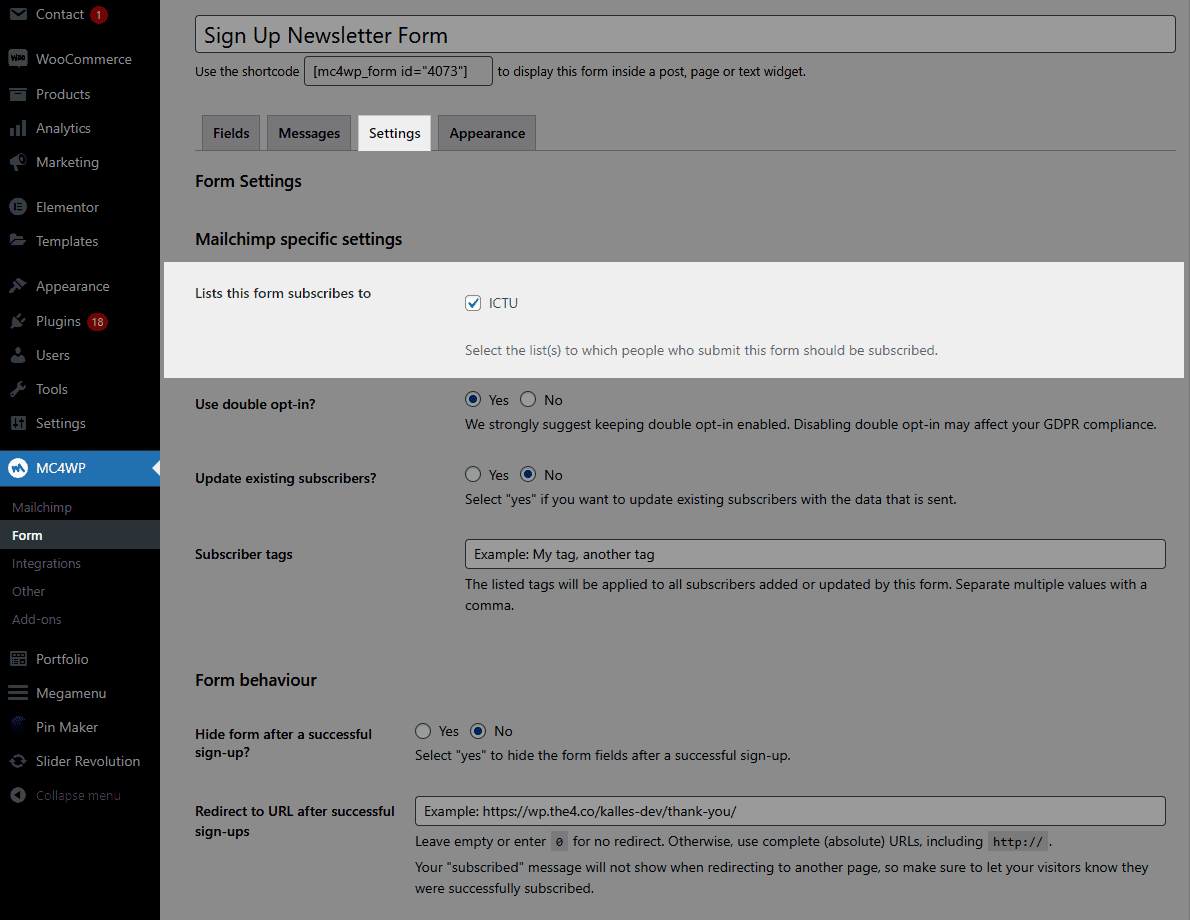
From dashboard > MC4WP > Mailchimp.

Step 1: Get API Key. You have to get the API key to connect with your Mailchimp account. Please watch the video below to get your API key:
Step 2: Setting Form. After you get your Mailchimp API key, from MC4WP > Form > Settings >Lists this form subscribes to. Select the list (s) to which people who submit this form should be subscribed.
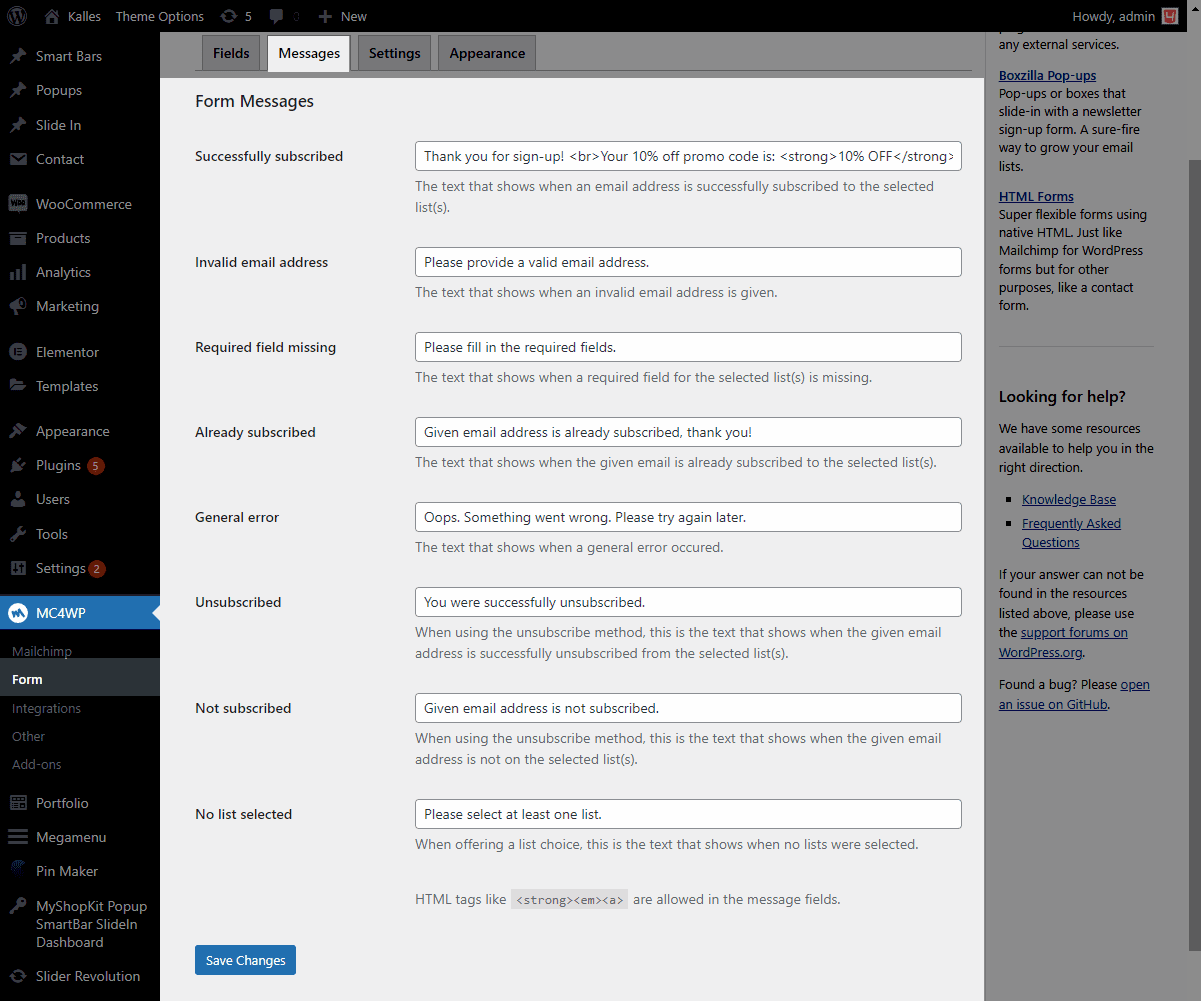
Step 3: Setting Message. From MC4WP > Form > Messages. You’ll see several messages to your customers. You can change the messages’ content such as Successfully subscribed, Invalid email address, Required field missing, etc.
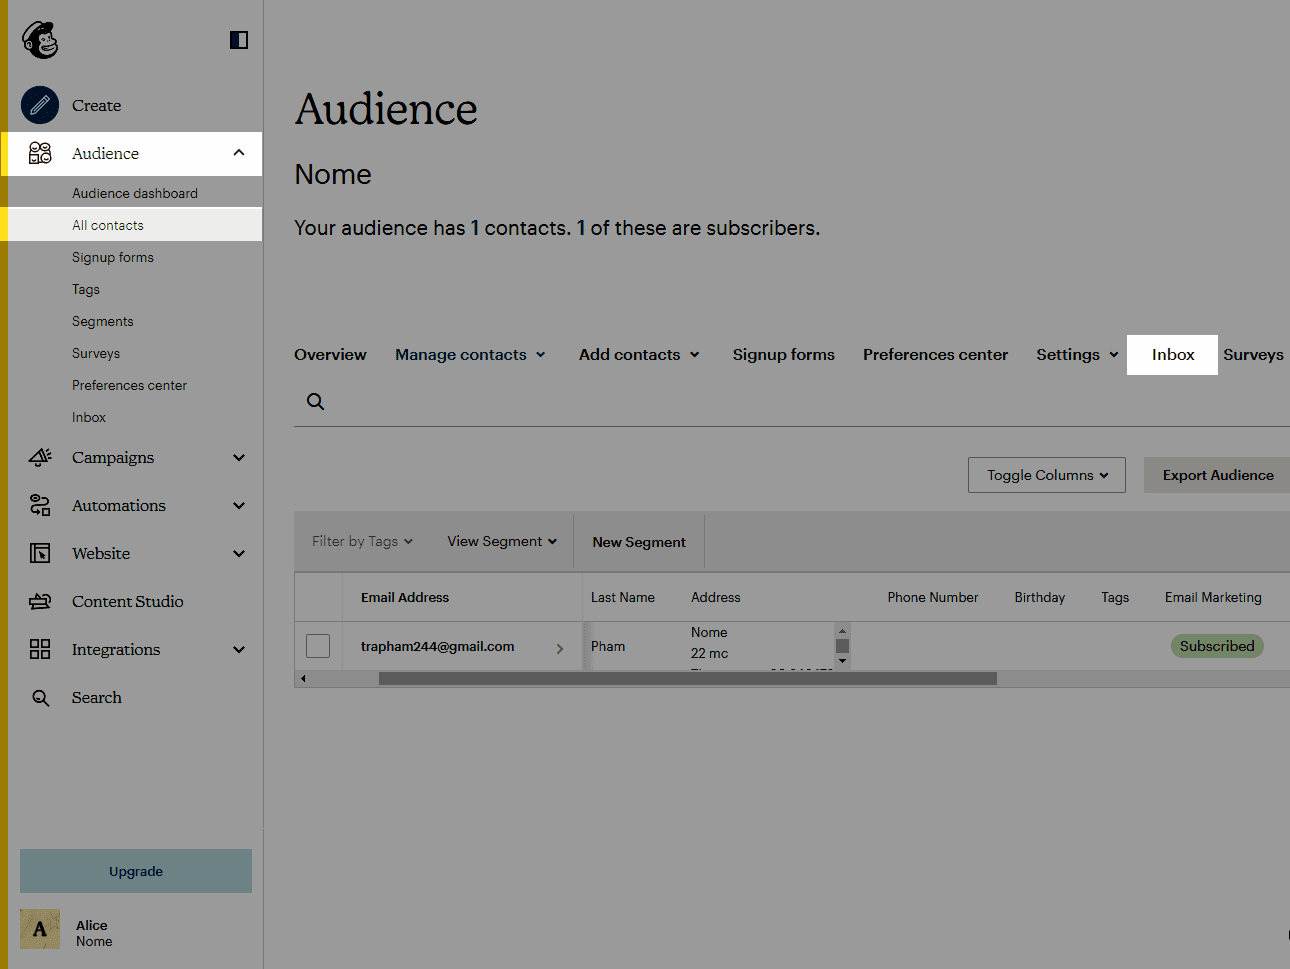
Note: After customers input their emails into the MailChimp element, you can get the customers emails into the MailChimp section, and contact them through these emails by signing up for MailChimp > Audience > All contacts > Inbox. You can contact MailChimp support to understand for details.
Result: