In order to configure Product Page, from WordPress backend > The4 Dashboard > Theme Options > Product Page.
1. General
PRODUCT LAYOUT
Full Width: You can enable or not.
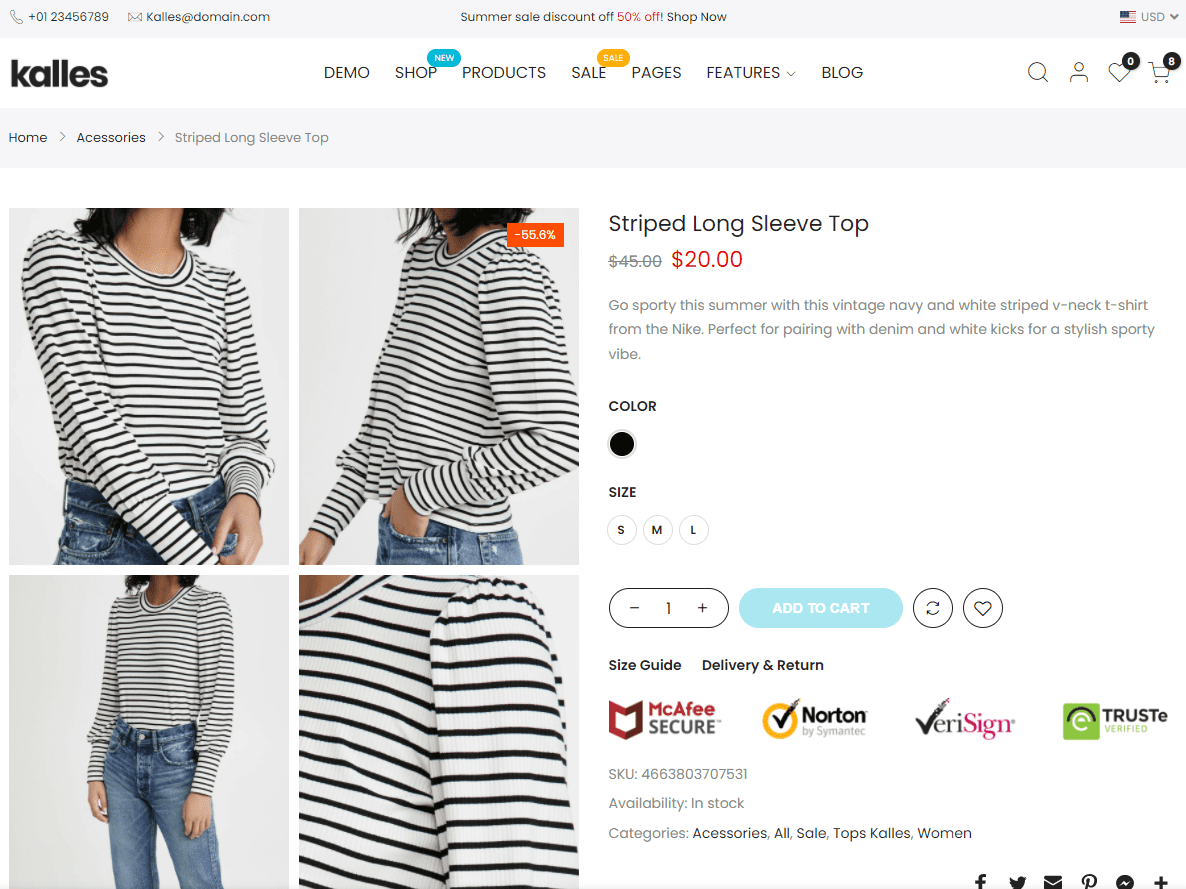
Product detail style: There are 4 styles for you to choose.
Extra information layout: You can choose between among three different styles.
Product Detail Sidebar Layout: There are three layouts for you to choose.
MISCELLANEOUS
You are allowed to enable or disable these options: Display Prev/Next navigation in breadcrumb, Sticky add to cart, Mobile sticky add to cart, Album Gallery, Buy now button.
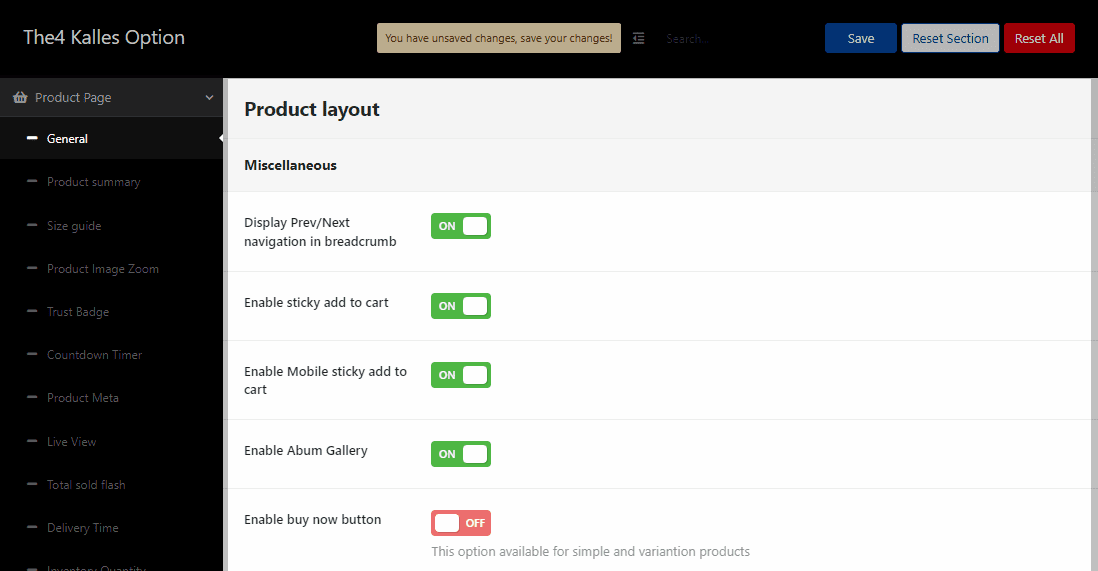
Next/Preview navigation in breadcrumb:
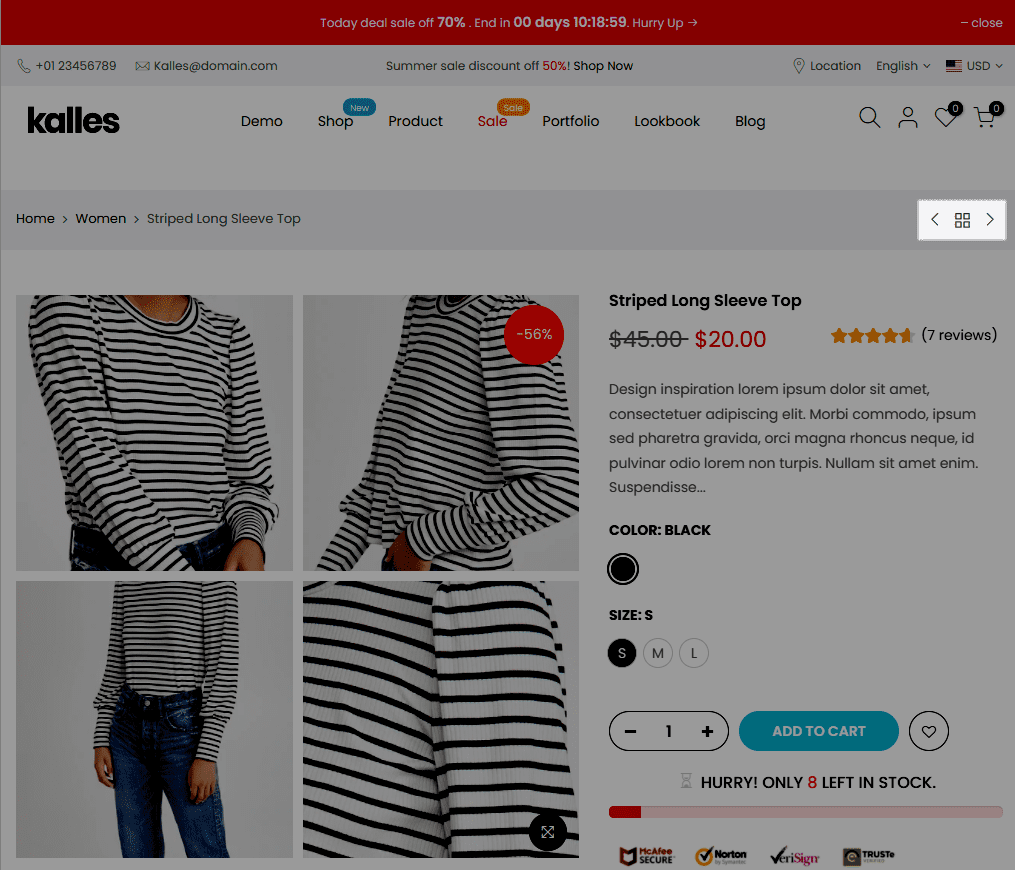
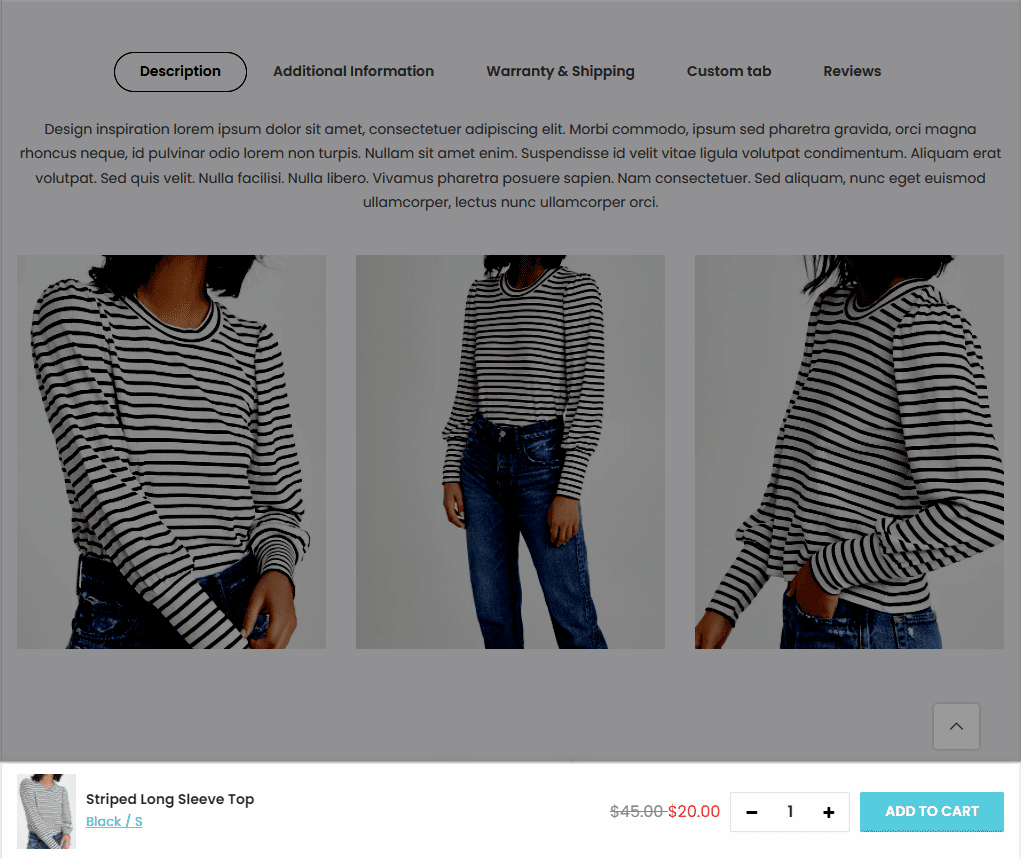
Sticky add to cart:
2. Product Summary
ADD TO CART BUTTON
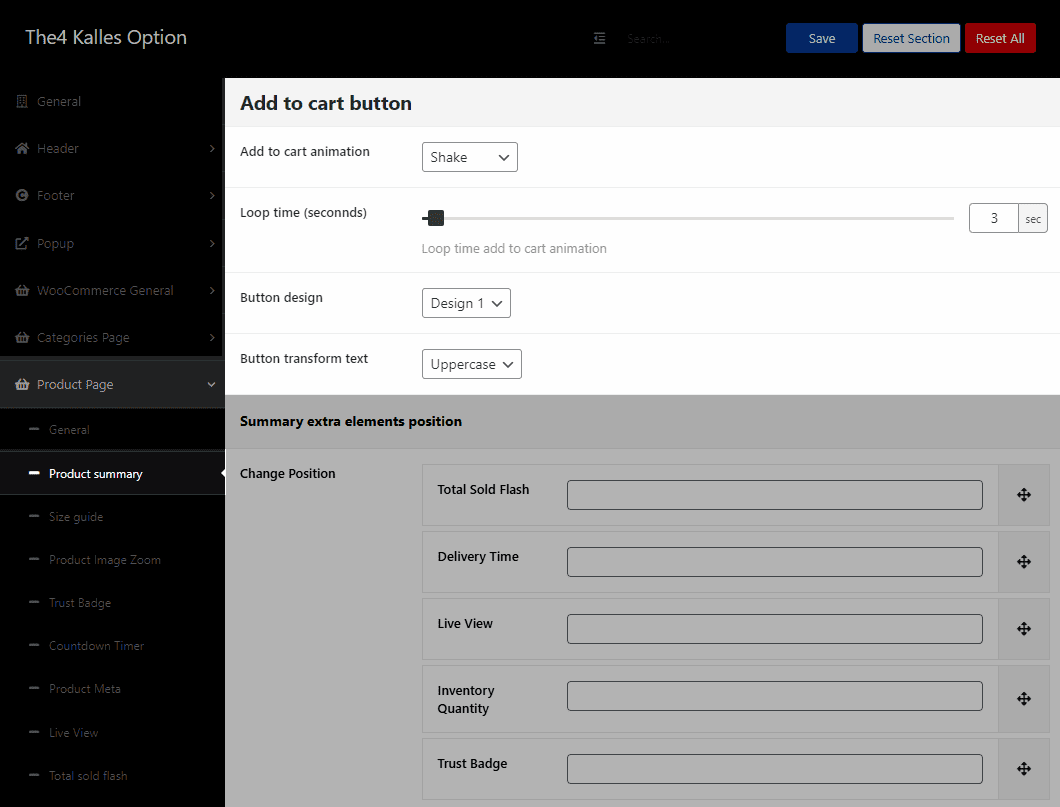
Add to cart animation: There are many animations for you to choose, such as Shake, Tada, None, etc. You can also adjust loop time (by second) for Add to cart animation by dragging a horizontal bar.
Besides, you can change Button designs, Button transform text by many available types.
SUMMARY EXTRA ELEMENTS POSITION
This option allow you to change the position among Delivery Time, Total Sold Flash, Live View, Inventory Quantity, Trust Badge by dragging and dropping.
3. Size guide & Return
ENABLE/ DISABLE SIZE GUIDE, AND SHIPPING RETURN CONTENT
From WordPress backend > The4 Dashboard > Product Page > Size guide > Enable Size Guide/ Shipping return content.
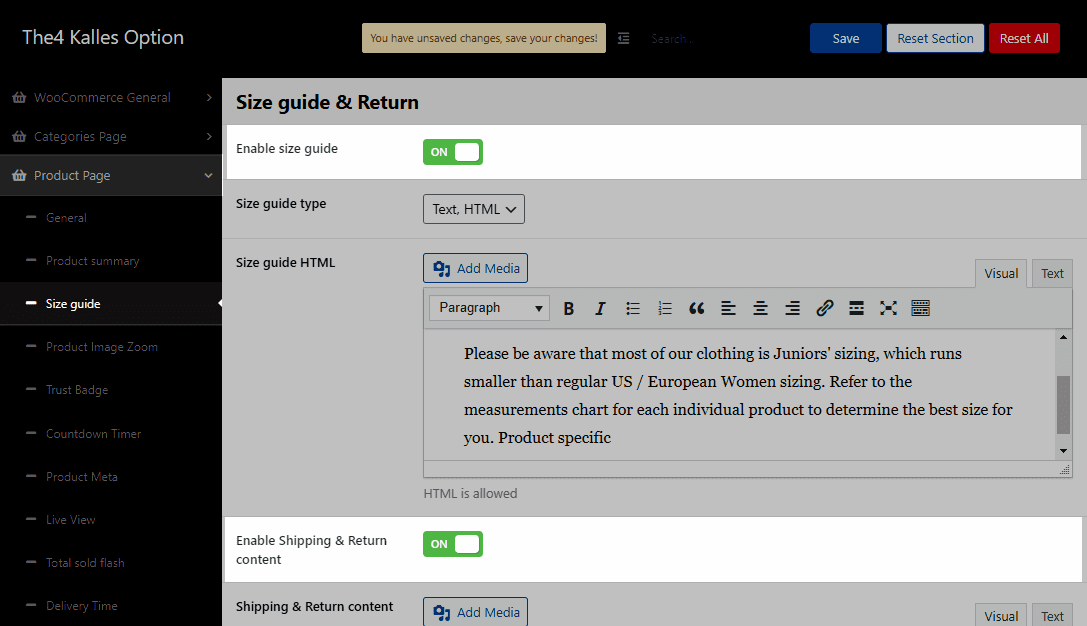
SIZE GIDE & RETURN CONTENT
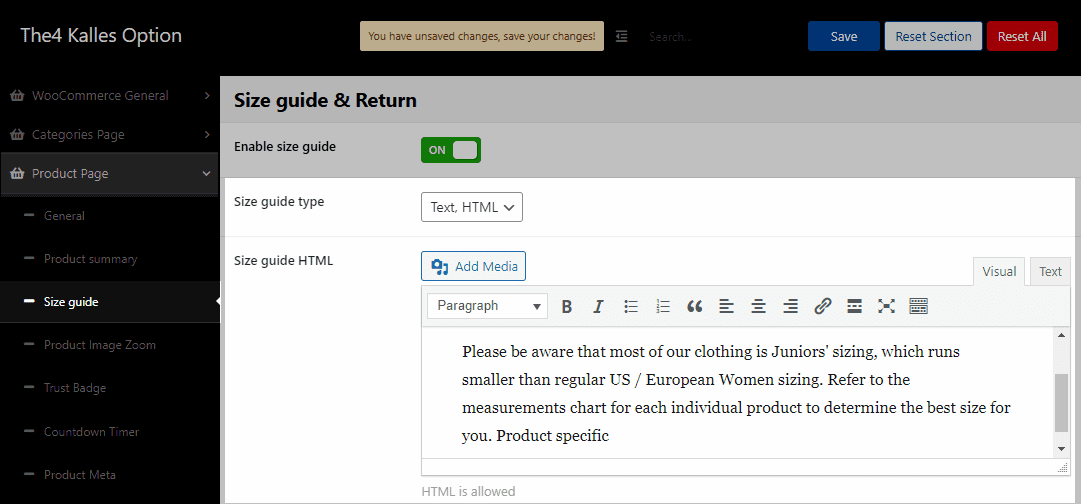
Size guide type: There are 2 types of side guide, you can choose between Text, HTML and Image. Regarding to Text, HTML type; you can freely enter text, HTML, tables, images, or event videos, etc. Regarding to Image, you are allowed to upload an image from your device.
You can change size guide for each product by uploading an image. Let follow these steps: From WordPress backend > Products > Choose a product that you want to add image size guide > Scroll down to Product Layout Options > Click on the right-side-down arrow > Size Guide Image > Upload an image.
SHIPPING AND RETURN CONTENT
As Size Guide above, Shipping and Return Content also allows you to freely enter text, HTML, tables, images, or event videos, etc.
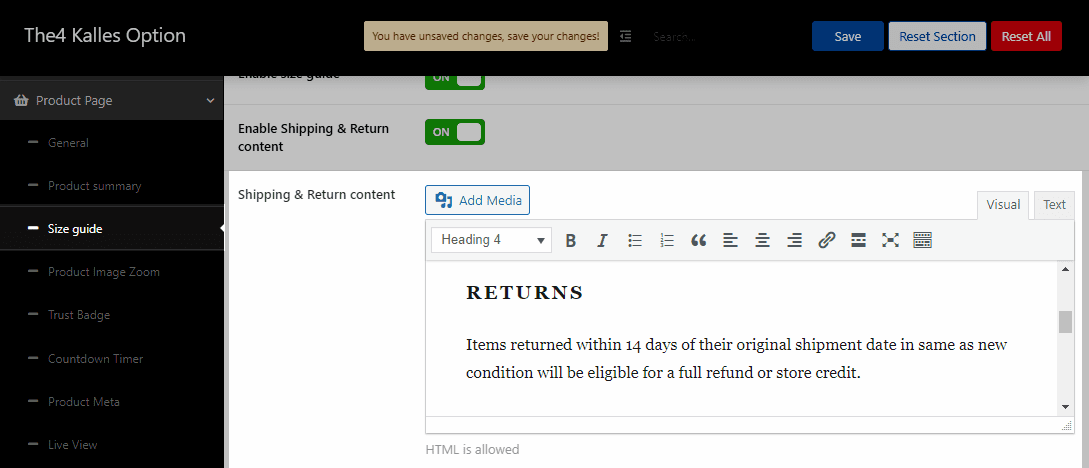
This is an example:
4. Product Image Zoom
ENABLE/DISABLE PRODUCT IMAGE ZOOM
From WordPress backend > The4 Dashboard > Product Page > Product Image Zoom > Enable Product Image Zoom.
INNER TYPE ZOOM
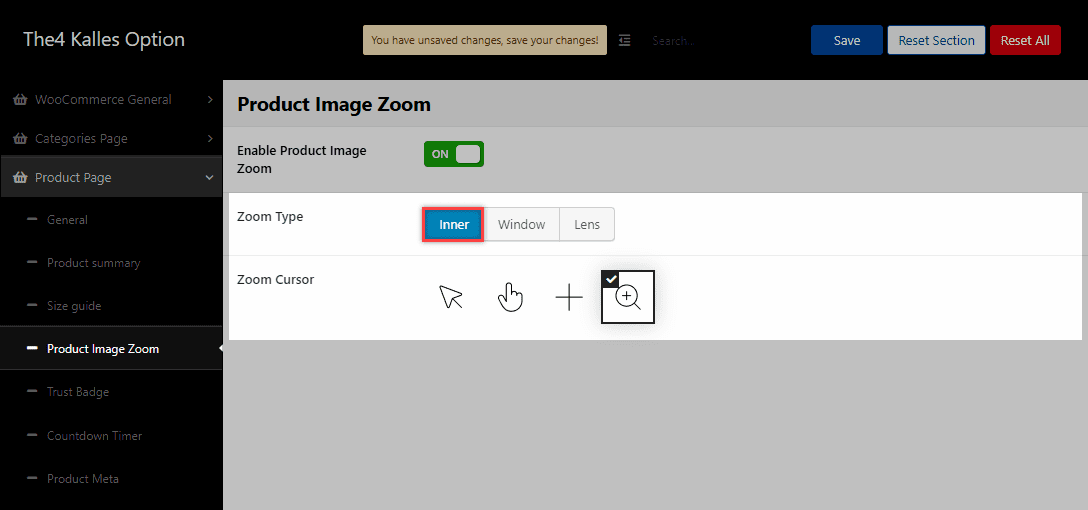
Right after enable Product Image Zoom, you can change Zoom Cursor for all zoom types.

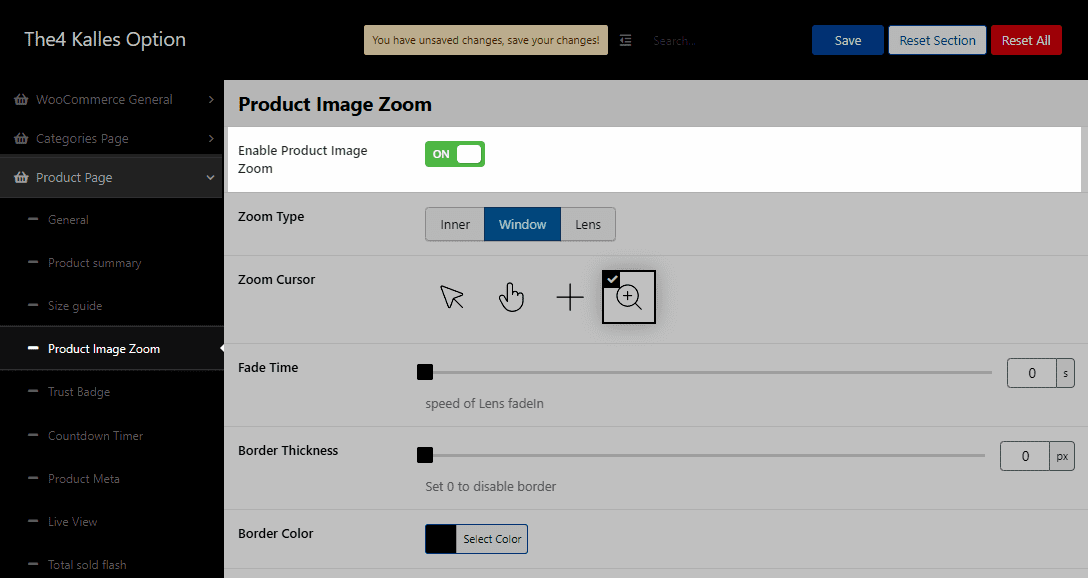
WINDOW TYPE ZOOM
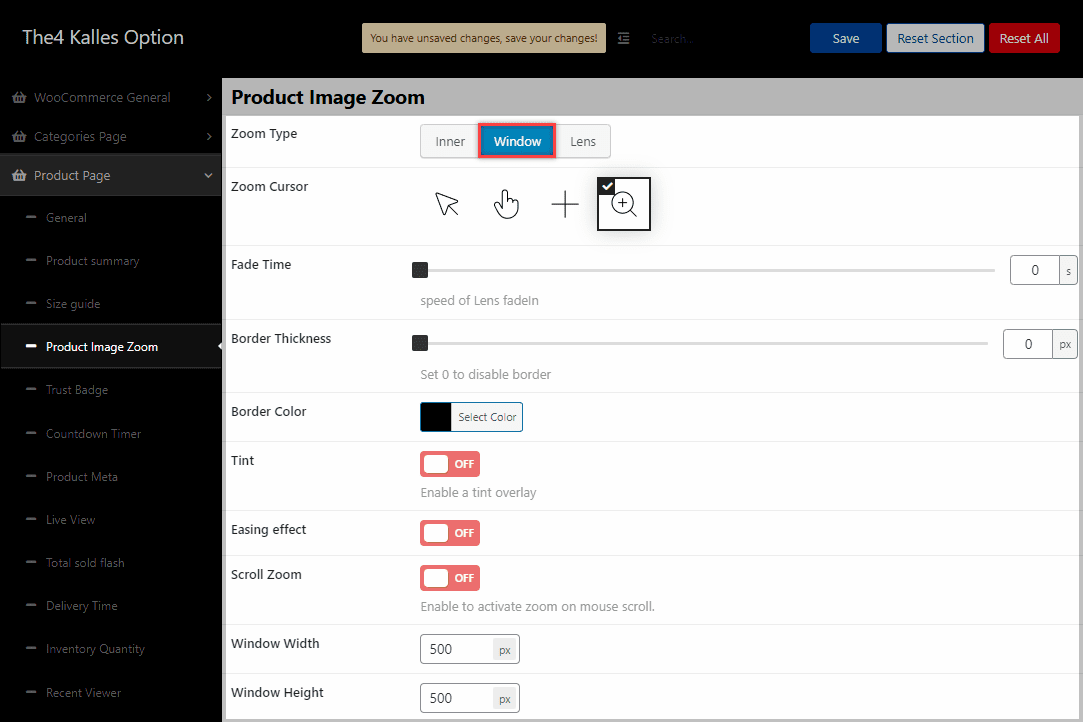
Right after enable Product Image Zoom, you can change Zoom Cursor for all zoom types.
Fade time, border thickness: You can adjust both of them by dragging a horizontal bar.
Border color: Allows you to choose freely color for border.
Tint: You can enable Tint overlay and configure the Tint color.
Easing effect: Turn On/ Off the buttons to Enable/ Disable the Easing effect and Scroll Zoom on the Product Image.
Scroll zoom: Turn On/ Off the buttons to Enable/ Disable the Scroll Zoom on the Product Image.
Window Height and Width: You can configure Width and Height for the Zoom Windows.

LENS TYPE ZOOM
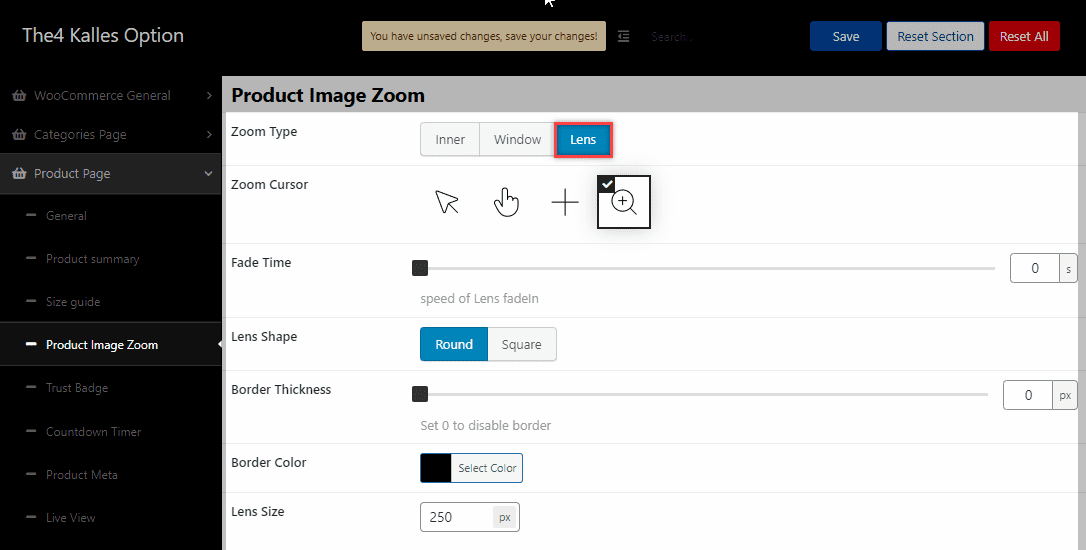
Right after enable Product Image Zoom, you can change Zoom Cursor for all zoom types.
Lens Shape: You can choose between Round and Square style for Lens Zoom.
Fade time, Border thickness: You can adjust both of them by dragging a horizontal bar.
Border color: Allows you to choose freely color for border.
Lens size: You can configure size for the Zoom Lens.
5. Trust Badge
ENABLE/DISBLE TRUST BADGE
From WordPress backend > The4 Dashboard > Product Page > Trust Badge > Enable Trust badge.
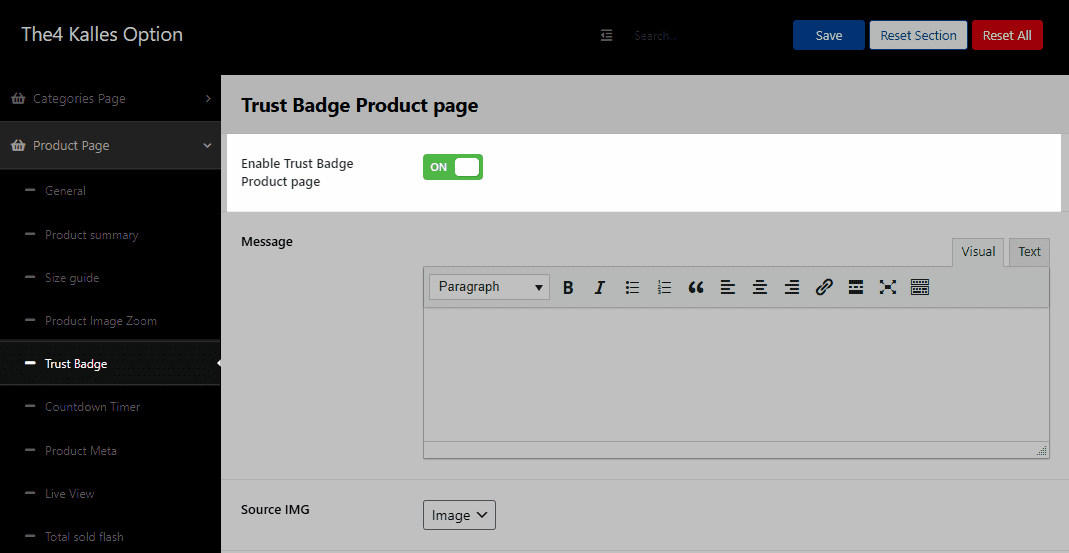
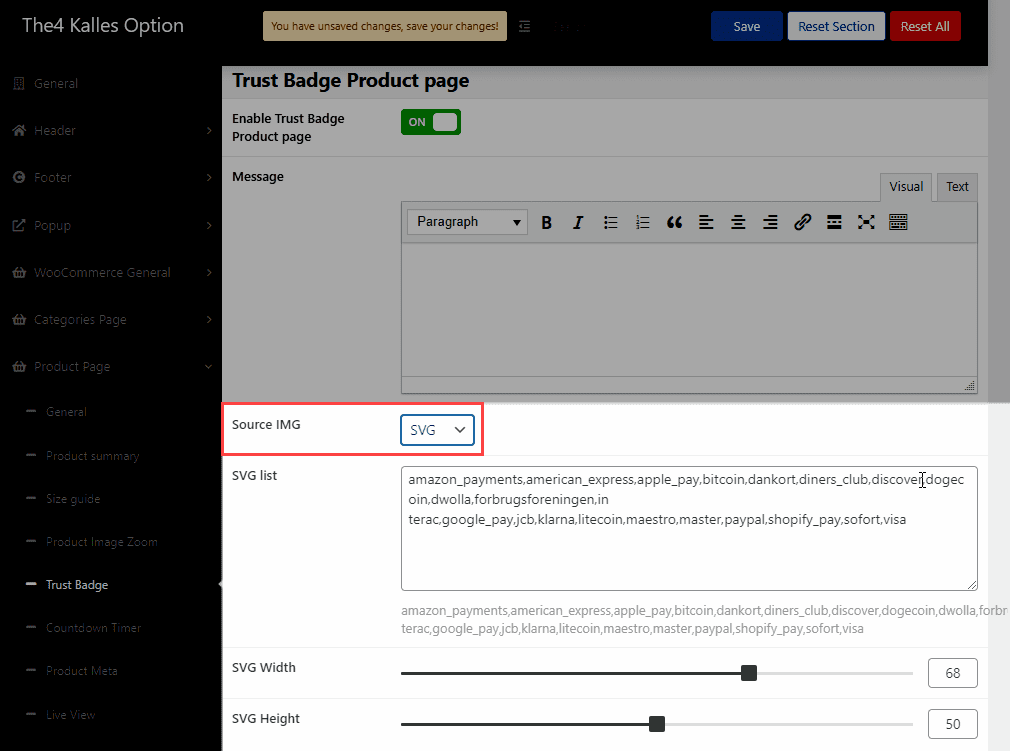
TRUST BADGE SETTINGS
Message: You can add some text for the Trust Badge in this option.
Source IMG: You can choose the source for Trust Badge between Image and SVG icons. If you choose Source of Trust Badge is SVG, you can configure the SVG icons in the option below.
If you choose Image, you can configure these options below.
6. Countdown timer
SETUP SCHEDULE
If you want to show countdown timer, you must setup sale schedule in product page first. Let follow these steps: From WordPress backend > Products > Choose a product that you want to show countdown timer > Scroll down to Product Data > Click on the right-side-down arrow > Below Sale Price, click on Schedule > Set Sale Price Dates.
ENABLE/DISABLE COUNTDOWN TIMER
From WordPress backend > The4 Dashboard > Product Page > Countdown timer > Enable Countdown timer.
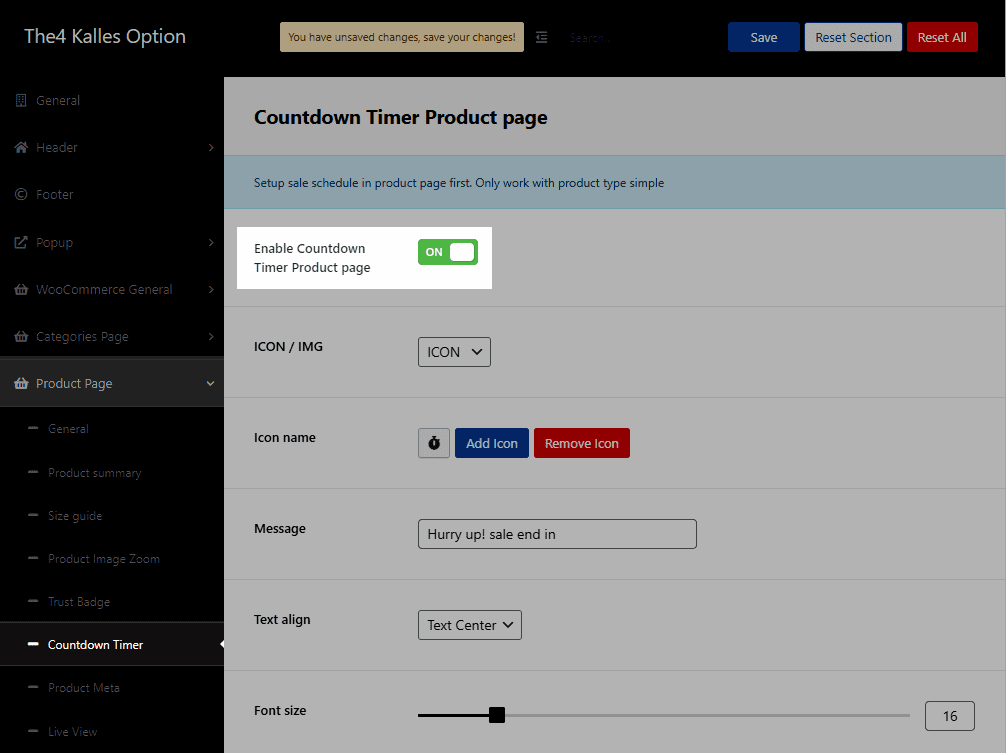
COUNTDOWN TIMER SETTINGS
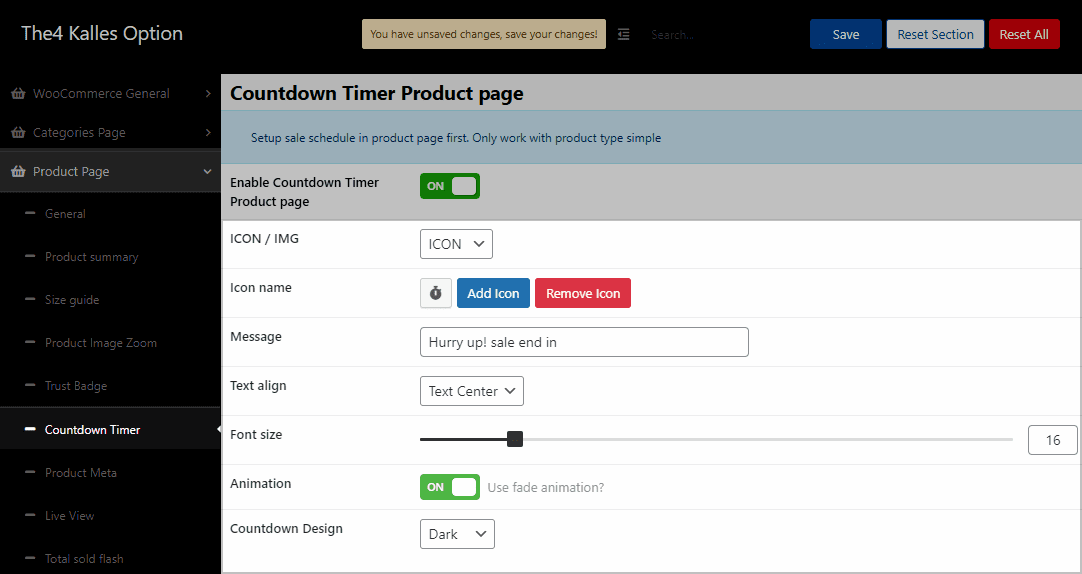
You can choose the source for the Countdown icon between ICON and Image.
Message: You can enter content for countdown here.
You are allowed to change Font size and Alignment for the message above.
Animation: You can turn on the button to enable the Fade animation for the Countdown Timer icon. By default, this button is off.
Countdown design: You can choose between dark or light color.
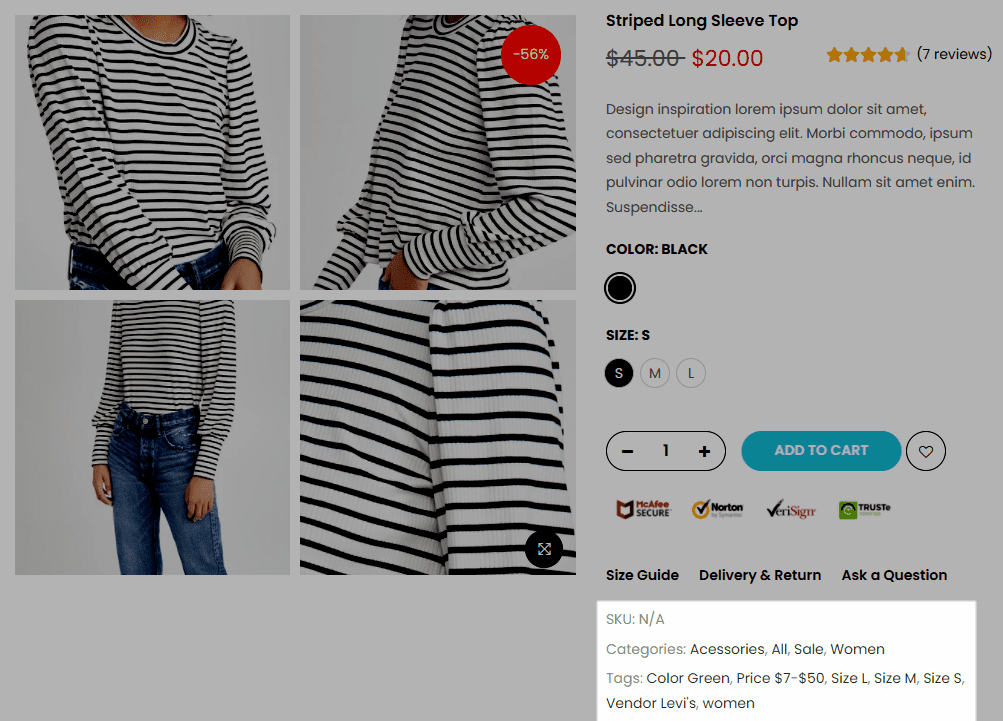
7. Product Meta
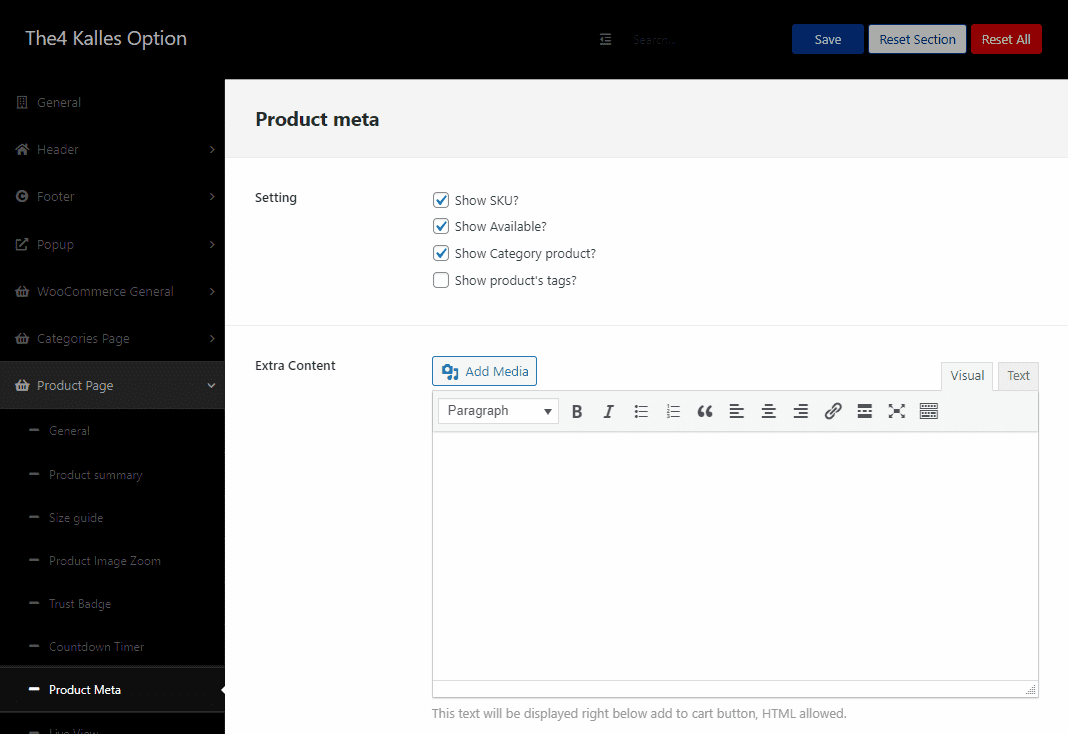
Product Meta Settings: You can tick on these checkboxes to enable SKU, Product’s Categories/ Tags, etc.
Extra content: You can add more content, image, Snappt Embed, etc. for the Product meta in this option.
8. Live view
ENABLE/DISABLE PRODUCT LIVE VIEW
From WordPress backend > The4 Dashboard > Product Page > Live View > Enable Live View.
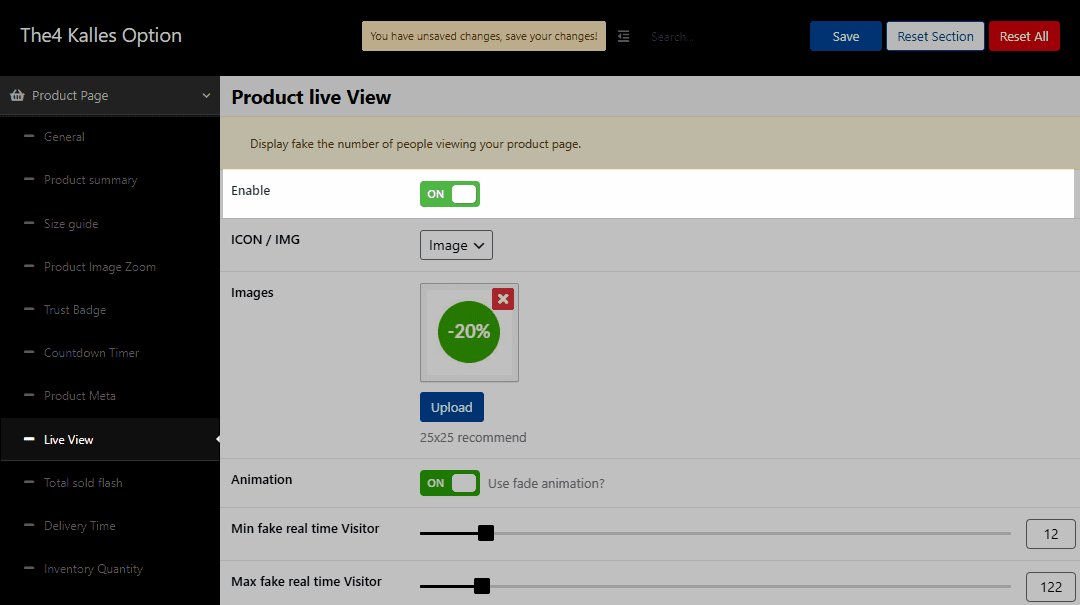
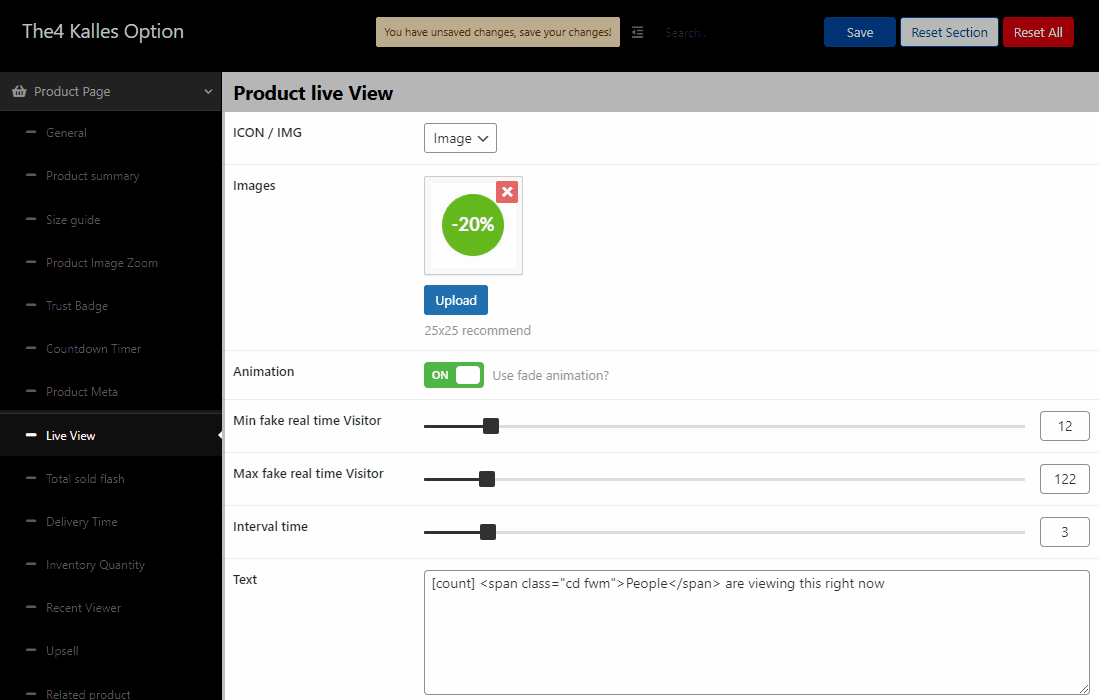
LIVE VIEW SETTINGS
Source of the Live View icon: You can choose between Image or Icon. You are also allowed to upload image from your devices or choose different icons, enable or disable animation.
Min/ Max fake real time visitor: You can configure the number of Visitors show on the Live View in these options. The number of Visitors will show randomly but the minimum/ maximum number of Visitors will follow your settings.
Interval time: You can change interval time (second unit) by dragging a horizontal bar.
Text: You can enter freely text for Live View. For example: 100 people are viewing this right now.
Let see an example:
9. Total sold flash
ENABLE/DISABLE TATAL SOLD FLASH
From WordPress backend > The4 Dashboard > Product Page > Total sold flash > Enable Total sold flash.
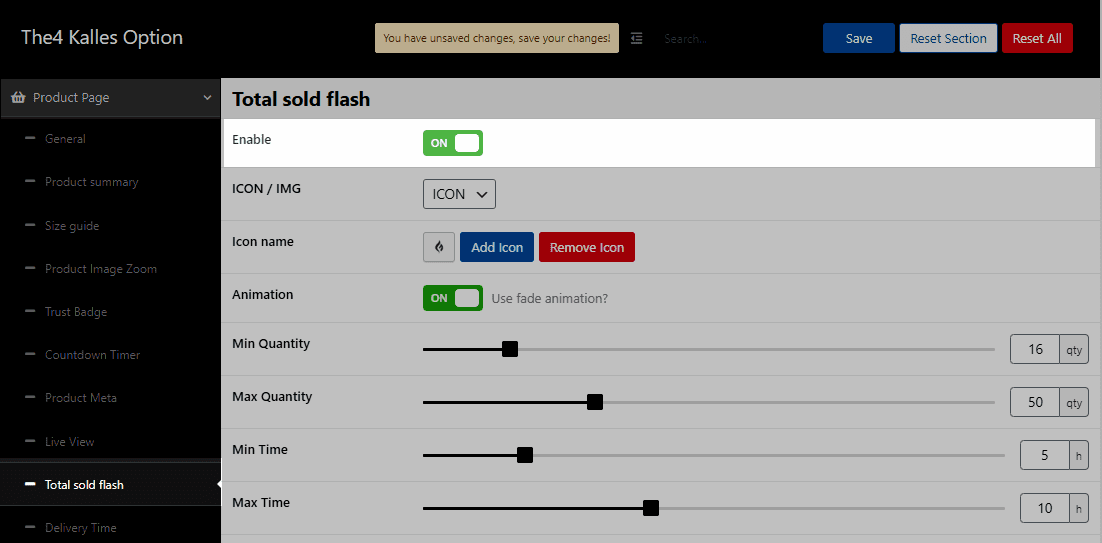
TOTAL SOLD FLASH SETTINGS
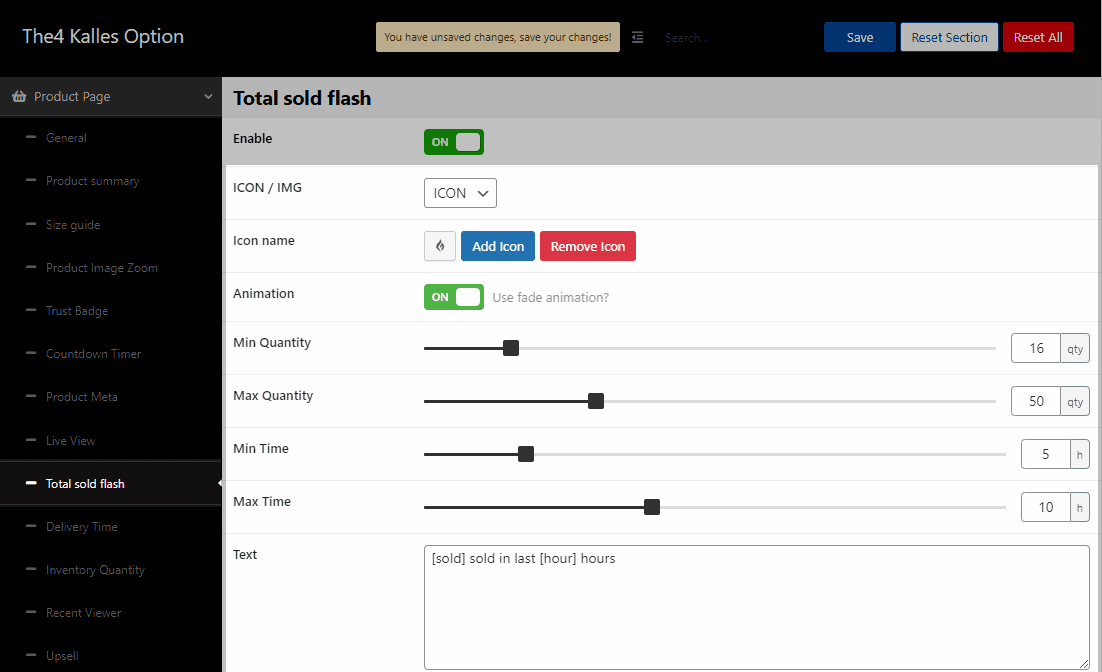
You can choose source for the Total sold flash. There are three options for you, including None, Icon, Image. You are also allowed to upload image from your devices or choose different icons, enable or disable animation.
Min/Max Quantity: You can configure the number of products show randomly on the Total Sold Flash in these options. The number of products will show randomly but the minimum/ maximum number of products will follow your settings.
Min/Max Time: You can configure the minimum and maximum time that show randomly on the Total Sold Flash in these options.
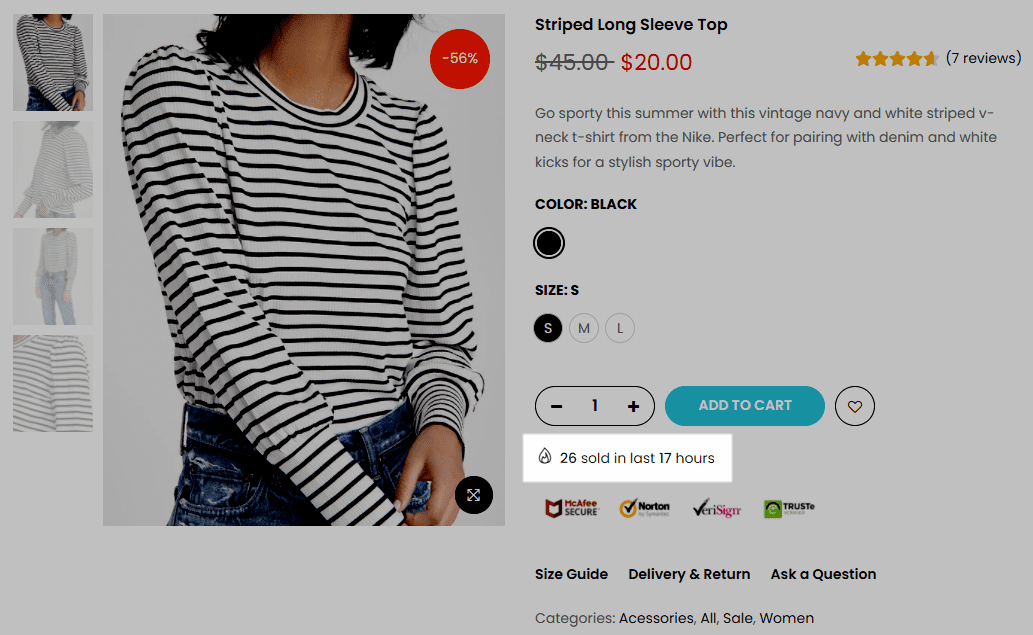
Text: You can enter freely text for Total Sold Flash. For example: 26 sold in last 17 hours.
10. Delivery Time
ENABLE/DISABLE DELIVERY TIME
From WordPress backend > The4 Dashboard > Product Page > Delivery Time > Enable Delivery Time.
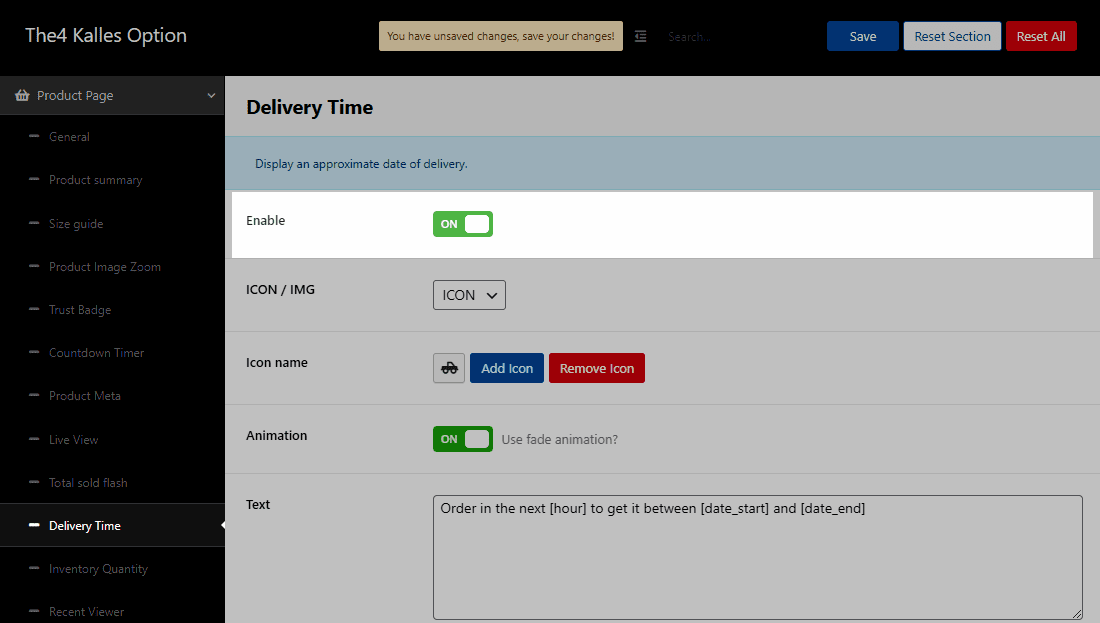
DELIVERY TIME SETTINGS
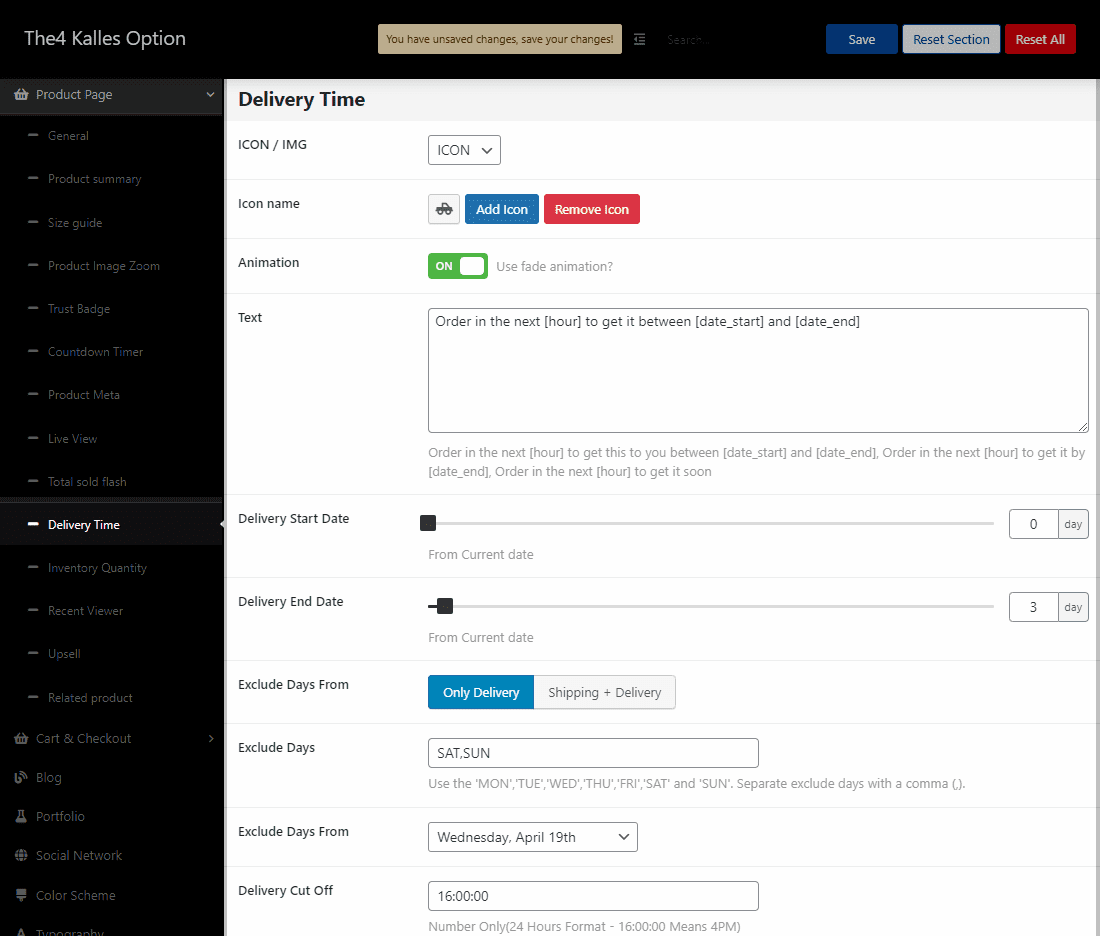
You can choose source for the Delivery Time. There are three options for you, including None, Icon, Image. You are also allowed to upload image from your devices or choose different icons, enable or disable animation.
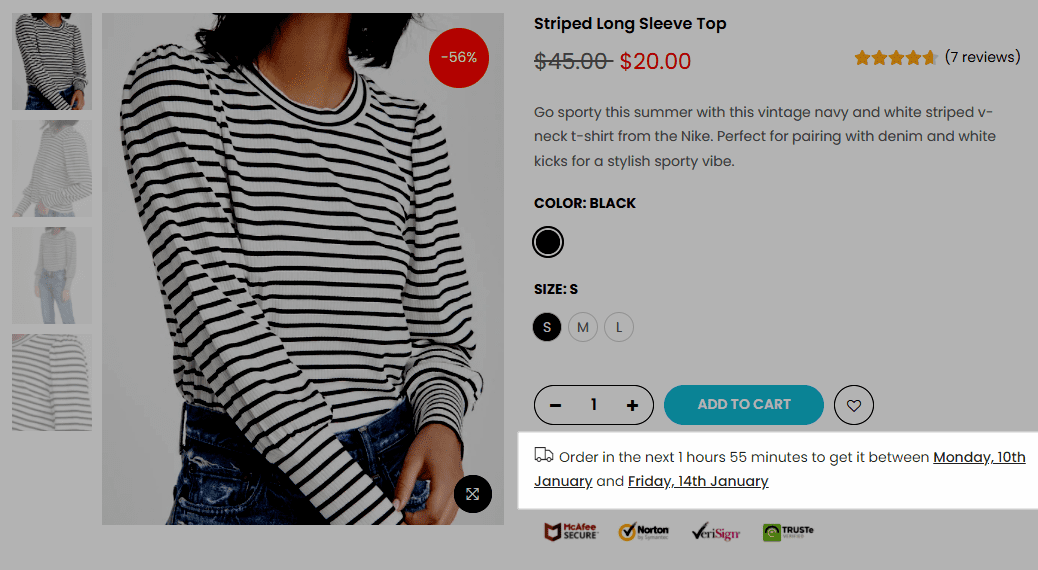
Text: You can enter freely text for Delivery Time. For example: Order in the next 24 hours to get it between Monday, 10th January and Friday, 8th February.
Delivery start/end date: You can configure the number of Start days/ End days of Delivery Time in this option. The time will show randomly but the minimum/ maximum days will follow your settings.
Exclude Days From: Allows you to choose the Shipping/ Delivery method.
Exclude Days, Exclude Days from, Delivery Cut Off: You can adjust all these sections freely.
11. Inventory Quantity
ENABLE/DISABLE INVENTORY QUANTITY
From WordPress backend > The4 Dashboard > Product Page > Inventory Quantity > Enable Inventory Quantity.
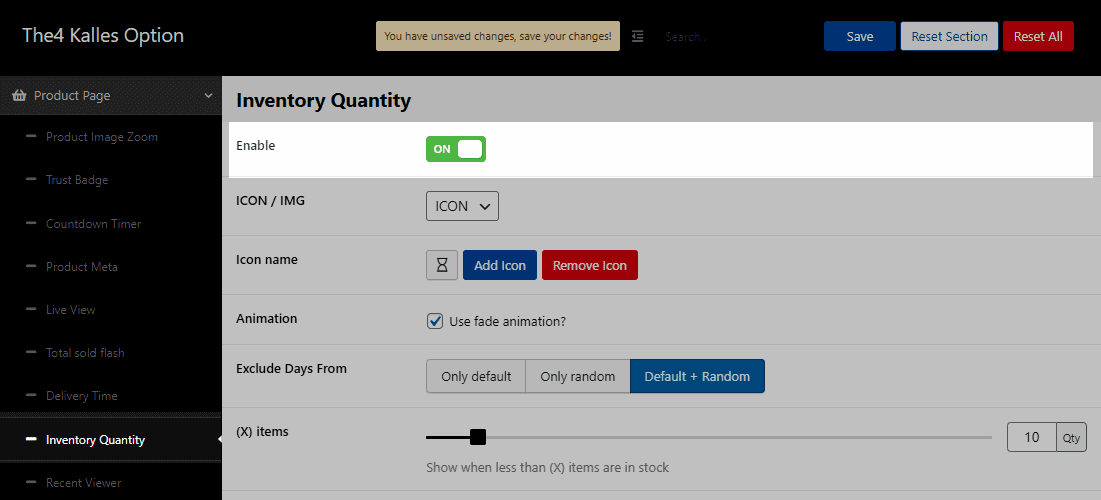
INVENTORY QUANTITY SETTINGS
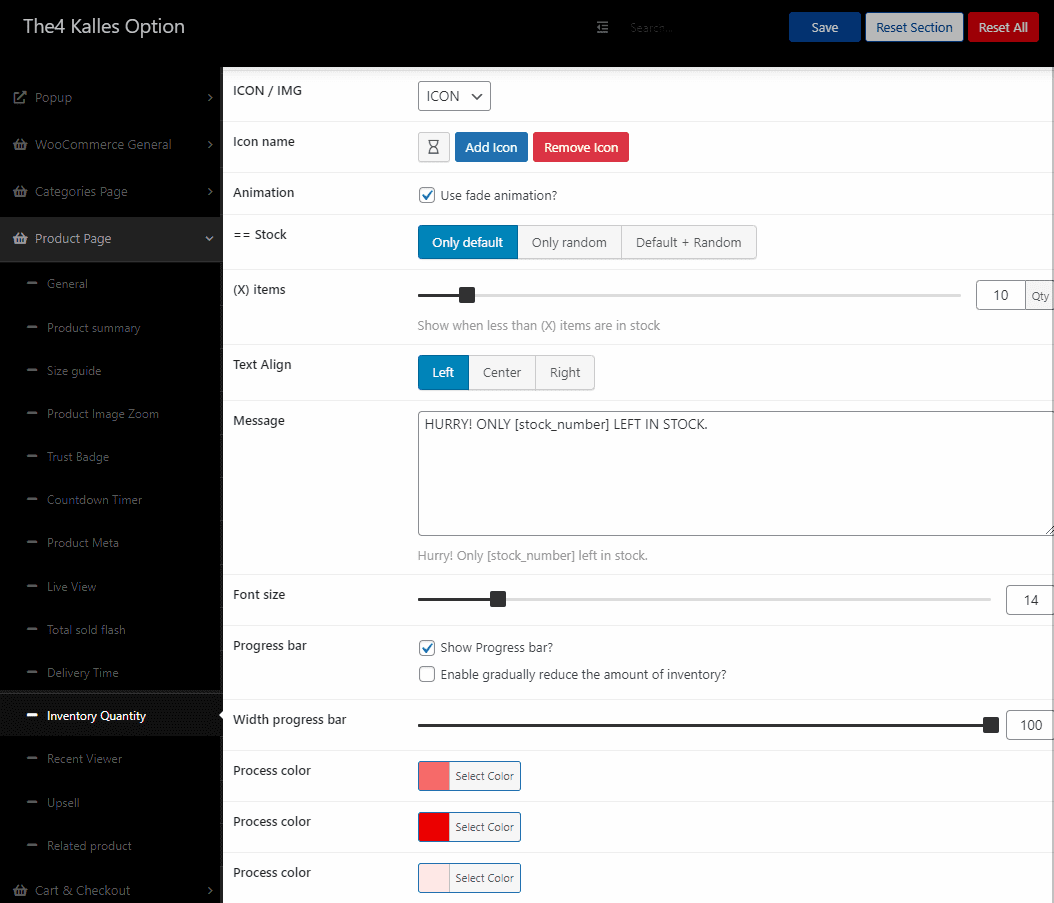
You can choose source for the Total sold flash. There are three options for you, including None, Icon, Image. You are also allowed to upload image from your devices or choose different icons, enable or disable animation.
Stock: There are three options for you to configure: Only default, Only random, and Default + Random. You can Disable availability when using this option.
Only default: Note: Apply for Simple products only. It will appear an (X) items box after you choose Only default. Please remind that the Message is only shown when the real quantity is less than the quantity set in (X) items.
Only random: There are 3 custom boxes corresponding to Only Random: Total Items, Stock From, and Stock to. In particular, Total Items will be the total amount of your item (no need to match the number of real goods), then on the front-end page will display randomly the amount of inventory in the range from Stock from to the Stock to. Note: The number in the Stock to must be smaller than Total Items; Only random can apply for all kinds of Product data.
Default + Random: Note: Apply for Simple products only. A combination of Default and Random, there will be displayed in 2 cases: 1) If the real inventory quantity is less than (X) items, the message will show the real inventory quantity; 2) If the real quantity is more than (X) items, the message will run as the random option ( show quantity randomly from Stock from to Stock to).
Text Align: You can configure the position of the Inventory Quantity message in this option.
Message: You can enter the Message of the Inventory Quantity in this option.
Font size: Configure the font-size of the Inventory Quantity message.
Besides, you can enable/disable progress bar, adjust width, color for progress bar.
12. Recent Viewer
ENABLE/DISABLE RECENT VIEWER
From WordPress backend > The4 Dashboard > Product Page > Recent Viewer > Enable Recent Viewer.
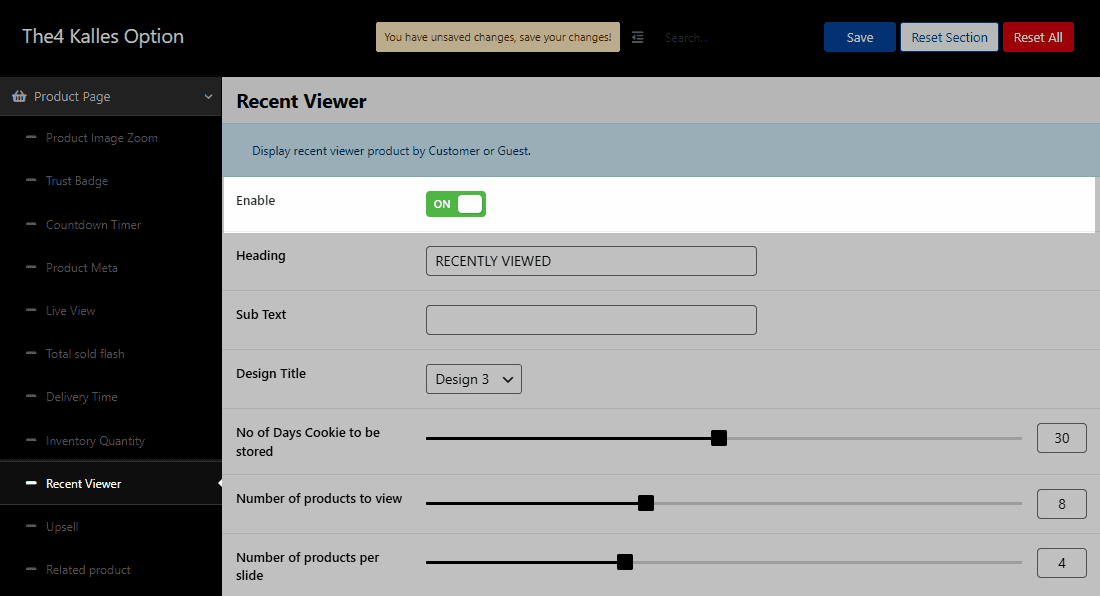
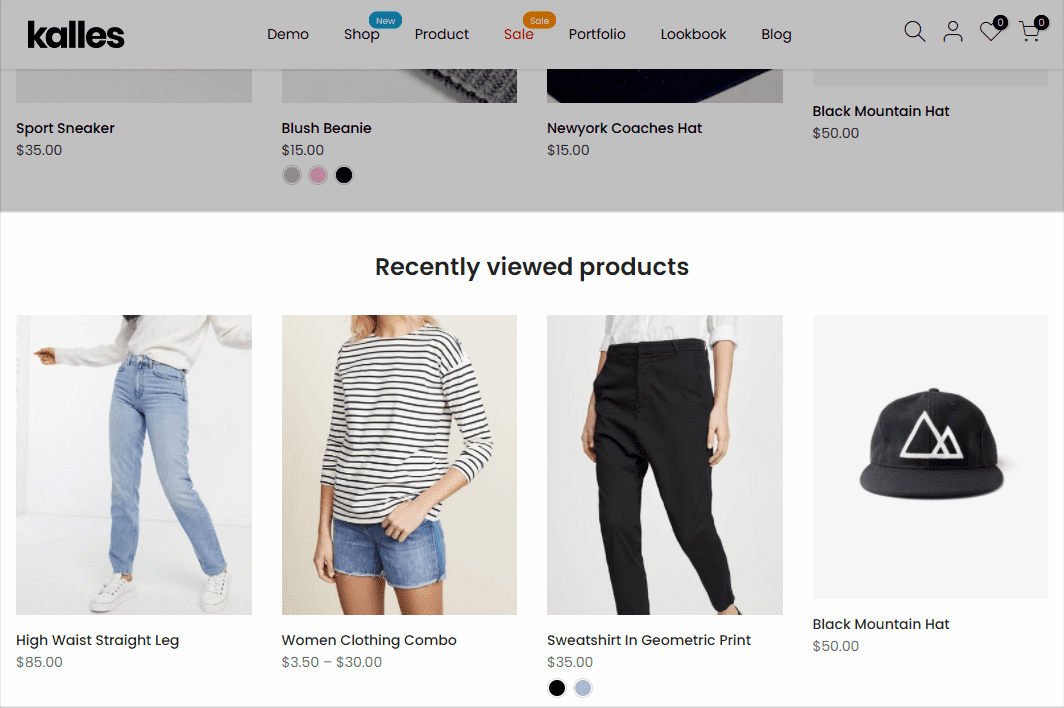
RECENT VIEWER SETTINGS
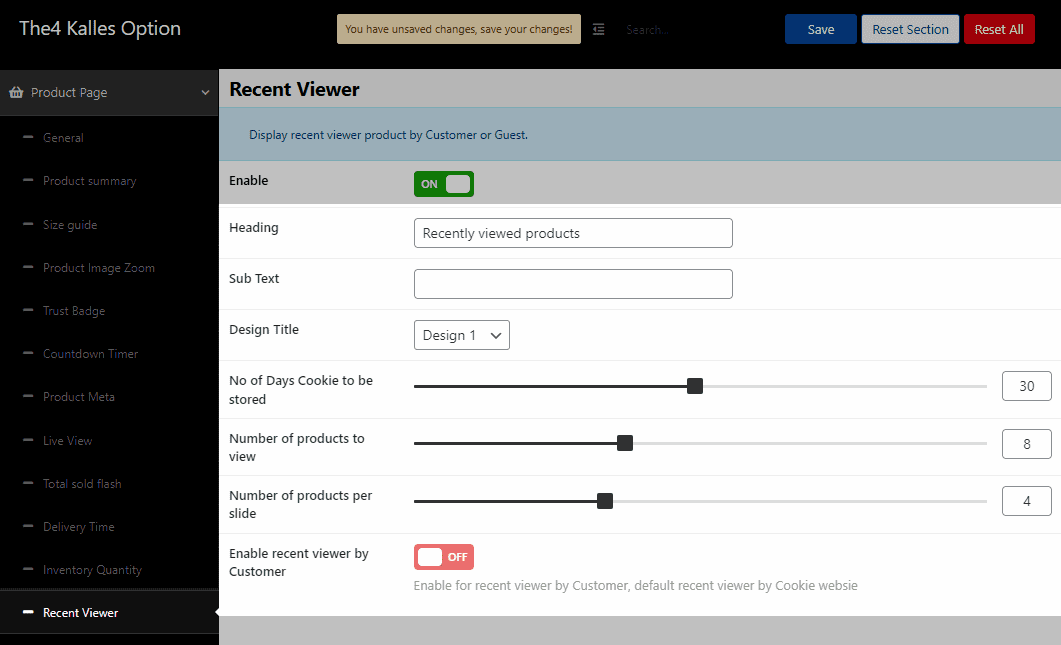
You are allowed to enter Heading, Sub Text, and choose Design Title for Recent Viewer.
You also can adjust Days Cookie to be stored, Number of Products to view, Number of product per slide by dragging a horizontal bar.
Enable recent viewer by customer: Default recent viewer by Cookie website.
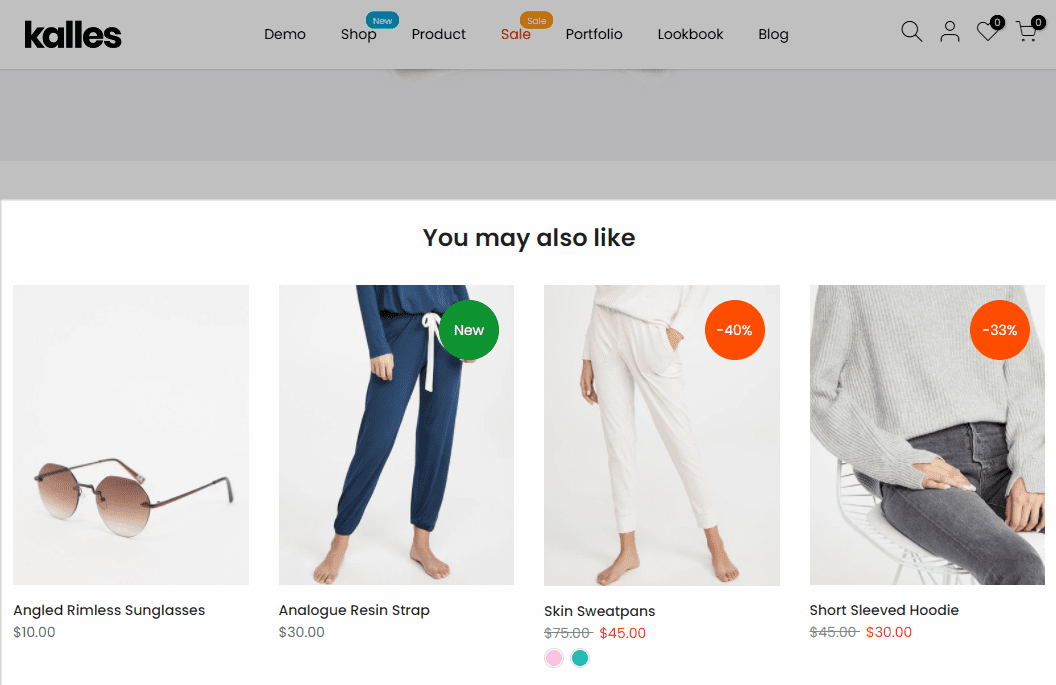
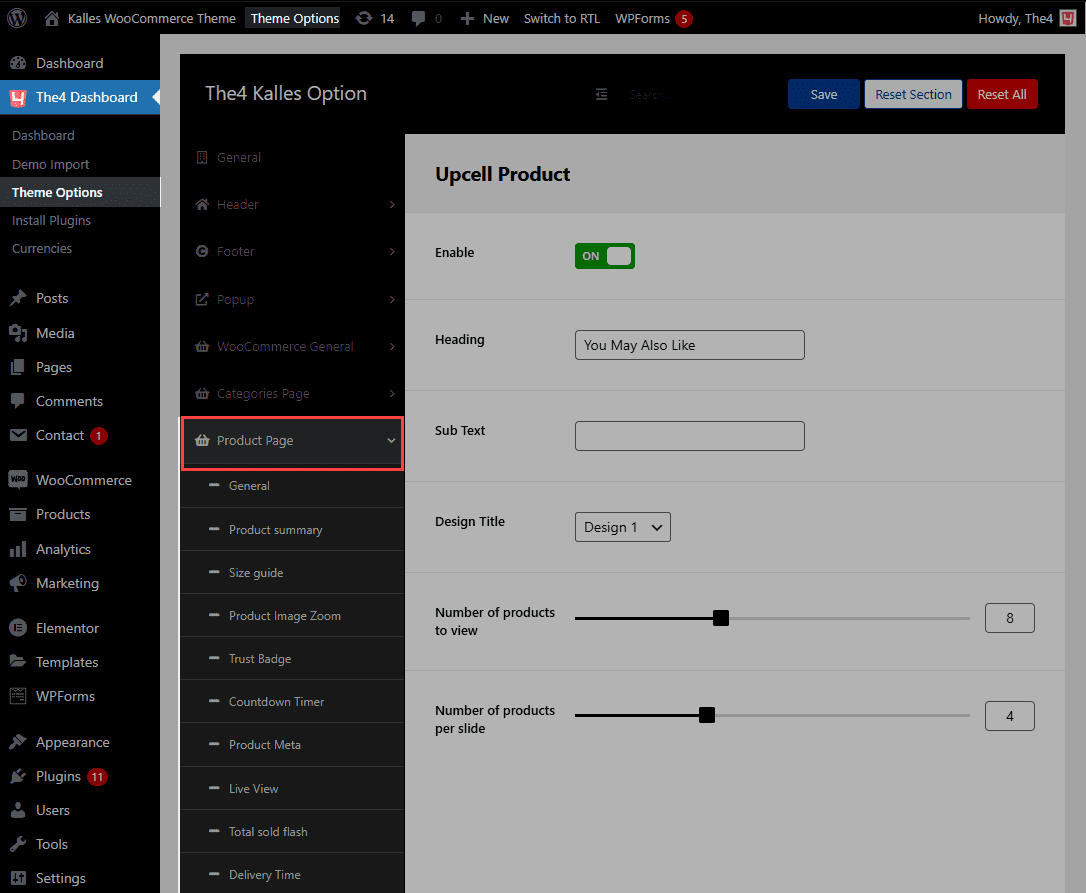
13. Upsell & Related Product
ENABLE/DISABLE UPSELL & RELATED PRODUCT
From WordPress backend > The4 Dashboard > Product Page > Upsell or Related Product > Enable Upsell or Related Product.
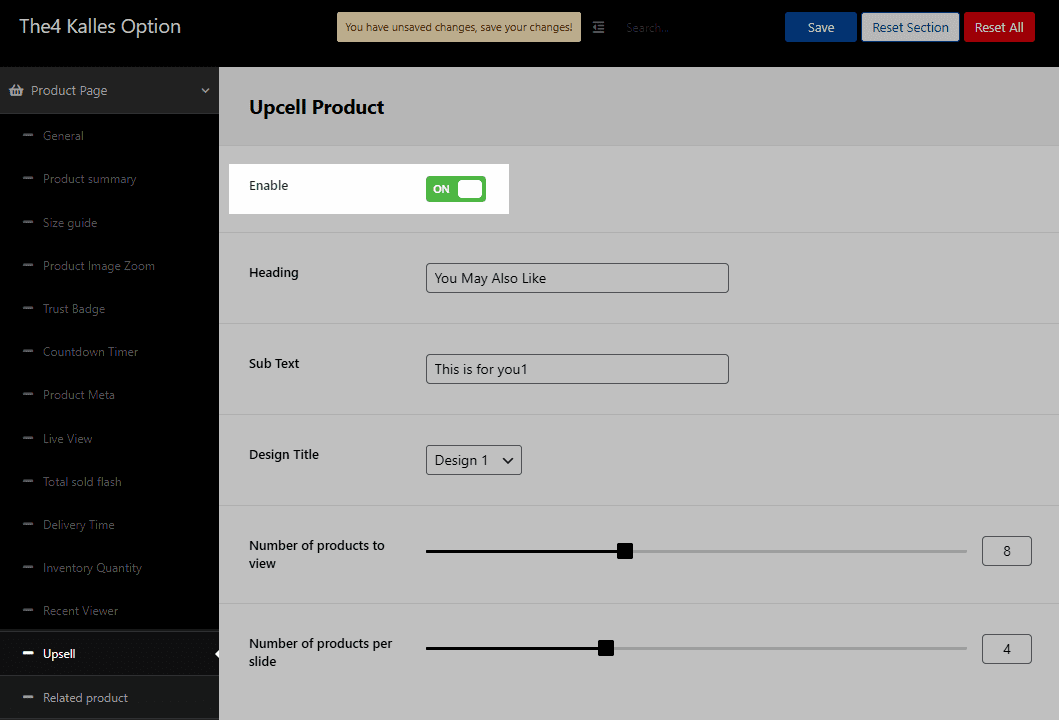
UP SELL & RELATED PRODUCT SETTINGS
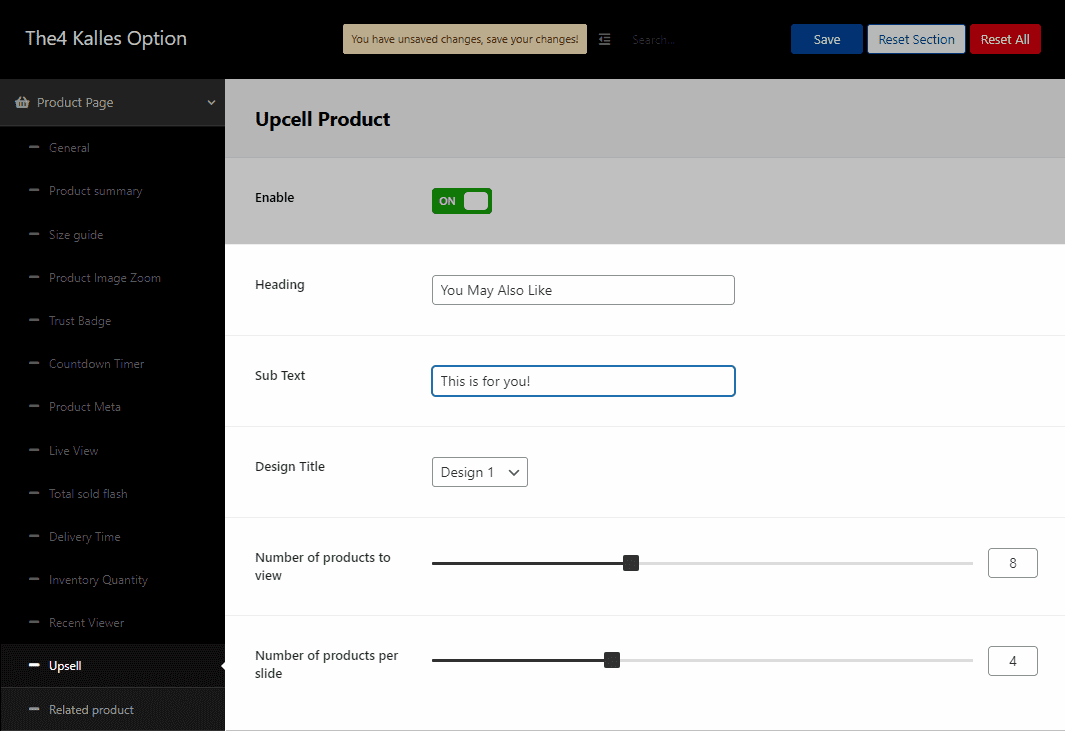
Heading and Sub text: You can freely enter text for them.
Design title: You can choose among 11 different designs.
Besides, you can also adjust Number of products to view and Number of products per slide.